Going large - building large layouts
Posted

Full Member
You make some very good points.
My philosophy is that I have more track than most and regard clean track as a must-have. If that costs me a a sum of money that could be spent on a decent loco, then so be it. I know that such an approach does not suit all.
Barry
Shed dweller, Softie Southerner and Meglomaniac

Posted
Full Member

Older readers ( :shock:) may recall the saga of this O4 which suffered a broken axle and required some major work to mend it with a piece of plastic sleeving. She has just had a service and put to work at Trinity Square where she is seen standing on Platform 4 road. Unfortunately, she has acquired a "waddle", probably owing to the plastic tubing have warped, so she will be back for a bit more corrective surgery sometime soon.
Recently, I ventured to the fine town of Bolton where I came upon the new model shop run by James, son of the proprietor of the model shop on the platform at Carnforth station. James had been open 3 weeks and to promote trade was running a raffle.
Huzzah! I won the raffle and now have a voucher for £250 to spend in James' establishment!! I shall have a very enjoyable post-Xmas lunchtime sit down thinking about what I am going to get.
Messrs Hattons (remember them) have also informed me that the start of the year should yield my Oxford Rail Pilchard ballast wagons and my pair of J26 0-6-0's that have been on pre-order since before Granby had a railway!!!

I think it's going to be very "Railway" Xmas and a Steaming New Year.
Bashing on…….
Shed dweller, Softie Southerner and Meglomaniac
Posted
Full Member
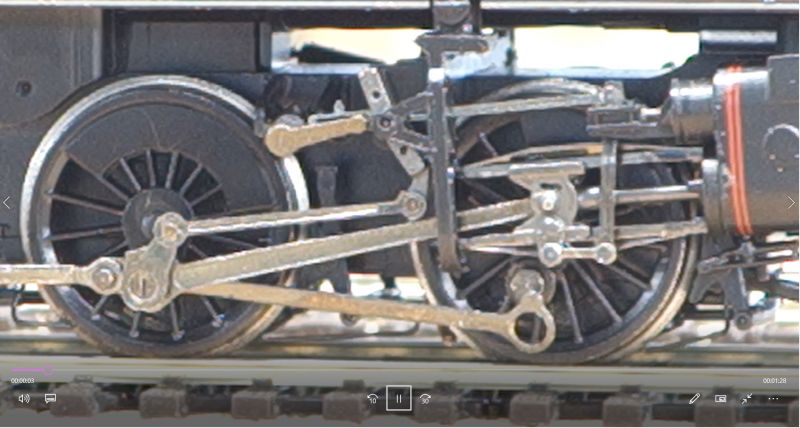
During a recent running session that I filmed to upload onto the Yarslow Model Railway YouTube channel, one of my Standard Class 4 2-6-0 engines came to a rather unceremonious halt. Investigation revealed the above - the coupling rod has worked over the crank pin. At this stage, I am not sure whether the coupling rod hole has worn too large or the crankpin has become too rounded to hold the rod in position.
Bad news got worse when I investigated further and found that my other Class 4 is suffering the same fate on a rear wheel.
I like these engines but they have been worked no more or less than any other class in the fleet so it is rather disappointing that I am facing either some major surgery or the prospect of replacing 2 chassis. The former is the cheaper option but I am not sure how easy taking all this motion to bits is going to be
 .
.If anyone else has had experience of this type of problem with these Bachmann chassis, please do let me know - all help gratefully received.
Barry
Shed dweller, Softie Southerner and Meglomaniac
Posted
Full Member
Roger OO DC Steam
Posted
Full Member
Barry
Shed dweller, Softie Southerner and Meglomaniac
Posted
Full Member

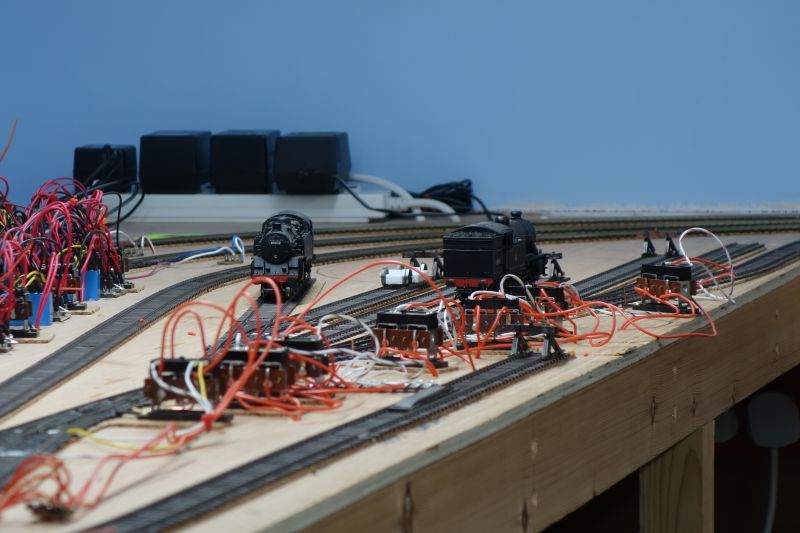
So the year draws to a close and the track laying likewise. The last bit of track to lay has been the loco storage area for the Trinity Square storage sidings. "Rotation" locos are stored here for the TSQ "suburban" trains, the "Coastal" and the various other trains held in the sidings. Surface point motors again for ease. The one on the foreground was laid and wired as the "pair" of the one that splits the storage sidings road from the exit road (see on the left of the picture). Wires will be much shorter and neater when done properly. The centre road to the right of the loco will lead to a loco cartridge, disguised as a turntable. This will allow me to store other engines off-site and to turn tender engines of required.
Apparently, many things in life are like riding a bike. Wiring up a live frog 3-way point is, alas, not one of them. I have done a few over the years but could not, for the life of me, remember how to wire the 3 frog polarity wires into the 2 point motor switches. Luckily, t'Internet came to the rescue and I found a diagram!
About an hour after this picture was taken, the frog polarity wires were done and the loco tested around the yard. Everything was fine until I dropped a screwdriver onto the track. That induced a permanent dead short across the section, even when the main feed wires had been disconnected from the Master Cab Control Panel :shock: :shock: :shock:
Wires were removed one by one unitl nothing was connected - still a dead short.
An hour later, I discovered that one of the feed wires passing under the 3-way point was the problem - the insulation was probably 0.5mm too short, exposing the bare conductors. Somehow, dropping the screwdriver had moved the wire and it was now causing a short with the return rail under the unit. A quick tweak fixed it!! For future protection, I slid a small plastic sliver under the track to cover the wire.
So the basics of the layout are now complete and I will use whatever time I get over the next couple of weeks to tidy up, make a support frame for the Master Cab Control Panel and add a few more buffer stops etc where required.
In the new year, I start on scenery with the planning and installation of point rodding for Yarslow
Bashing on…………
Shed dweller, Softie Southerner and Meglomaniac
Posted

Full Member
Staying on the thread Kevin.
Posted
Full Member

More loco woes!
As this picture was taken on a very old layout, it shows that Bachmann V2 class 2-6-2 60834 has been with me for some years. She is a good engine and better than the very old version of this engine made by Bachmann (Mainline?).
On Boxing Day, in preparation for the demonstration being staged for the visit of the family over New Year, she was heading a Down express through Middle Junction when "bang!" - she came to a dead stop with the motor desperately trying to turn and making that awful humming noise.
Quick investigation showed that she has split her from axle. Bachmann used (still use?) wheels on stub axles with square ends and a nylon/plastic centre for insulation. The front axle plastic centre has burst open!
Hopefully, the motion is not bent as a result of the front wheels heading in different directions. I have ordered a new set of axle centres from Peter's Spares. This will allow me to repair the V2 and, perhaps, the O4 shunter as well - you will recall she has gained a waddle. If these repairs are successful, I will order another set and keep them safe.
At least this all happened before anyone was looking!!!
Bashing on……..
Shed dweller, Softie Southerner and Meglomaniac
Posted

Full Member
I've found that many of these older locos are simply not worth all the effort and cost of spares when changing to DCC, particularly in the case of split chassis locos when invariably, the plastic pins holding it all together become brittle.
Chipping them is not an easy task for me so I no longer bother unless I really want a particular loco. I've tried on a few but generally, without too much success.
Good luck with yours. :thumbs
'Petermac
Posted
Full Member
Ps: I've just remembered that I fitted new insulators.
Cheers Pete.
Posted
Full Member
Hi Barry, Bachmann sell those too, £16 for two sets including postage and touch wood they have been fine. Hope the Peters Spares ones are good too :)More loco woes!
I have ordered a new set of axle centres from Peter's Spares.
Roger OO DC Steam
Posted
Full Member

The S&T department have renewed the switchgear at Middle Junction with levers which are much easier to see from all viewing points around the shed. The chart on the right helps the signalman remember which levers he needs to pull to direct traffic as required. The levers need fixing down now that they have been tested.
The PW department report that the track laying is complete at TSQ Storage Loco (probably going to be renamed George Street Shed after my late father-in-law) and that the electrics powering the point motors has also been completed. The TSQ storage sidings and loco shed have been tested and approved by the local Inspector.
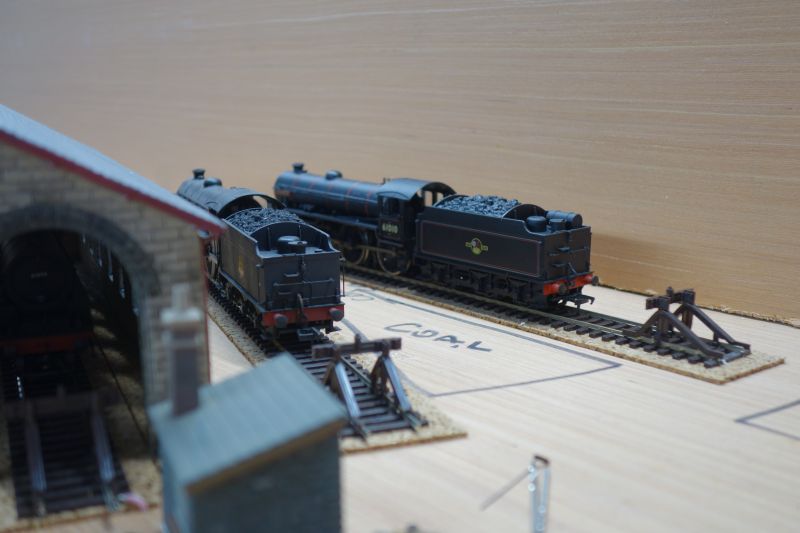
The Operating Department has reported that the Locomotive Superintendant has checked all main line locomotives and failed 2 - both B1 class 4-6-0's for having wonky wheel inserts. Other members of the class have suffered a similar problem but careful attention fixes the problem. Both engines are expected to return to traffic shortly and are currently in store on the coaling roads behind TSQ shed. Replacement axles for the V2 have been fitted and she has returned to duty and new crankpins for the Standard 4 2-6-0's arrived through the letterbox today. The well-known wagon suppliers, E Bay & Co, have confirmed an order for a further 9 wagons due for delivery in the next few days.
The civil engineers have erected a temporary backscene between the branch and TSQ to see how it might work. Initial reactions are favourable although drivers of trains out of TSQ cannot see their trains if they are operating from controller G at TSQ Storage!! Either I need to grow by a foot or get a box to stand on. The latter is the current solution pending my next growth spurt……..
The S&T department have also approved plans for the installation of point rodding at Yarslow and have authorised the release of funds to purchase the rods and cranks from Messrs Wills. If time permits, the first MSE signal kit will be started to see how well my soldering has improved.
So lots happening as the scenification gets under way
Scenifying on……………….
[is that even a word???]
Shed dweller, Softie Southerner and Meglomaniac
Posted
Full Member
As a result I started to muck about with silly little things - building some gound signal kits, organising the dummy point motors for Trinity Square etc.
Eventually, I spent a couple of evenings just running trains, changing consists to better reflect the type of trains being depicted, adding coal loads etc. Last weekend, I got the urge to do some scenery and hit on the idea to "eat my elephant, one bite at a time" - I would start the scenery on the branch.

I widened the board by 2 inches to allow a better platfrom width and painted the backscene. The front edge is fitted but not cut to profile yet - I will wait until the platform and fence are in. There is an end board with a hole in it for the train to emerge and I will add a suitable "view-blocker" beside the level crossing that will go between the entrance and the platform.

I did go 3 parts mad fitting the point rodding and, after this photo was taken, cut a deflection ramp from 5 thou plastic card to cover up the facing point lock mechanism. I also added another rod going off to the right to operate the trap point. It wasn't until I reviewed this picture that I realised that I had fitted the front rod end backwards - the stool should be at the end of the angle supporting the joint rather than (too) close to the pair of stools carrying the rodding. Note that I have not fitted the actual facing point lock - once the ramp is on, the Peco gubbins containing the spring for the tie bar stands in for it.

Before calling it a day, I glued some lumps of polystyrene down and shaped a second front board. When its all dry, I will start carving a gentle hill and a sudden fall into the river which will be set onto the ply surface.
My "mojo" seems to have returned and I am now capturing some footage for the next Yarslow Model Railway YouTube update - something I was fearing was going to lapse a week or so ago :sad:.
Bashing on……….
Shed dweller, Softie Southerner and Meglomaniac
Posted
Full Member
Staying on the thread Kevin.
Posted
Full Member
Stay safe
Shed dweller, Softie Southerner and Meglomaniac
Posted
Full Member
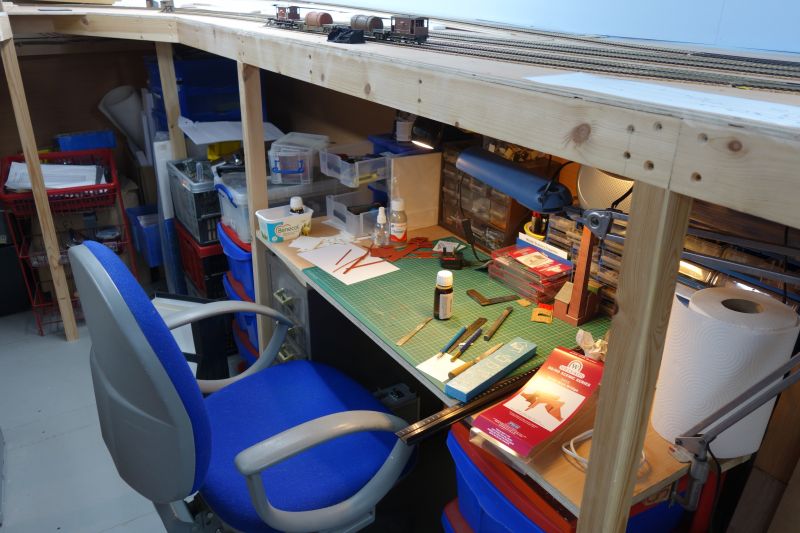
Well, if in doubt, make changes!!
I have made a desk under the layout at Yarslow, near to the controllers. Now I can start to make things and run trains at the same time - Huzzah!
This sounds a bit trivial but it spurred me onto starting back, working on the layout. I have made a couple of brick piers for the branch underbridge and a Wills overbridge kit. I made the platform at Butterbump and a couple of sets of ground signals. I painted some resin wagon loads and added some wagon sheets to "loaded" wagons before adding coal to wagons in the coal train that were previously empty.
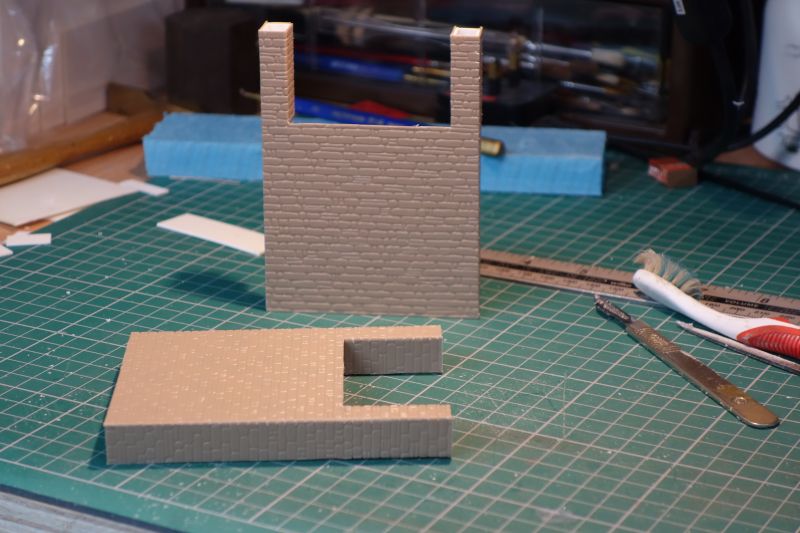
Here are the piers - simple 30 thou shapes with random stone faces. Take care to line up the stones and then run a file through the edges to make it look solid.
The painted versions can be seen in the latest YouTube video update
[yt]7KbtSjSYbPo[/yt]
Enjoy!!
Bashing on………
Shed dweller, Softie Southerner and Meglomaniac
Posted
Full Member
You must shop at Waitrose though, I had a look but there is no Elephant in Tesco…

Posted

Full Member
It's good to see all the progress you've made, very efficient use of the video to cover so much about all your settings. It must be very satisfying to have some decent operations to run after the effort you've put in.
Posted

Full Member
Graham
Graham Long
Engineers do it by design.
Engineers do it by design.
Posted
Full Member
Staying on the thread Kevin.
1 guest and 0 members have just viewed this.