Modifying a Breakdown Crane
Posted
#193938
(In Topic #10791)

Inactive Member
From Tyco American to GWR Lookalike
G`day Folks,I am allowing myself to be distracted from my railway building and I`m playing about with other projects at the moment…….not to worry….all will be good in the end.!!
Well this is one of the distractions…..a TYCO Crane that was given to me by a family friend.
Going by the name ( The Rock ), I`m assuming it`s from the Rock Island Line.??
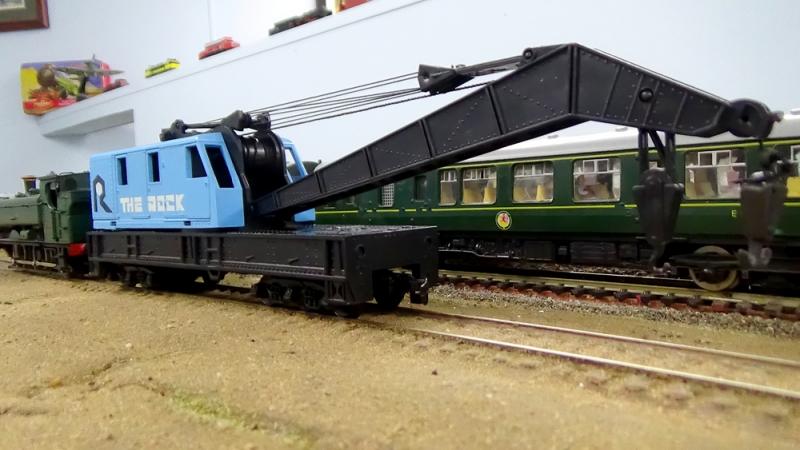
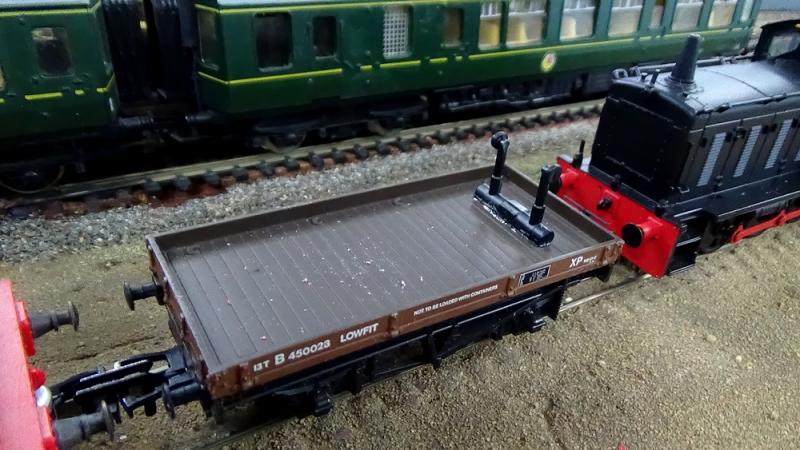
There is also an accompanying flat car with a caboose type fitted cabin on the end. To achieve something that looks remotely British, I`m not going to use the flat car, but rather two Mainline short, flat wagons.
The first issue is with the overall height. It won`t fit through my exit holes in the wall of my railway room. I can either go around and alter the four holes or modify the crane. So I decided to modify the crane. I took some material off the base of the cabin and I`ve reconfigured the top of the jib where the cables enter the cabin.
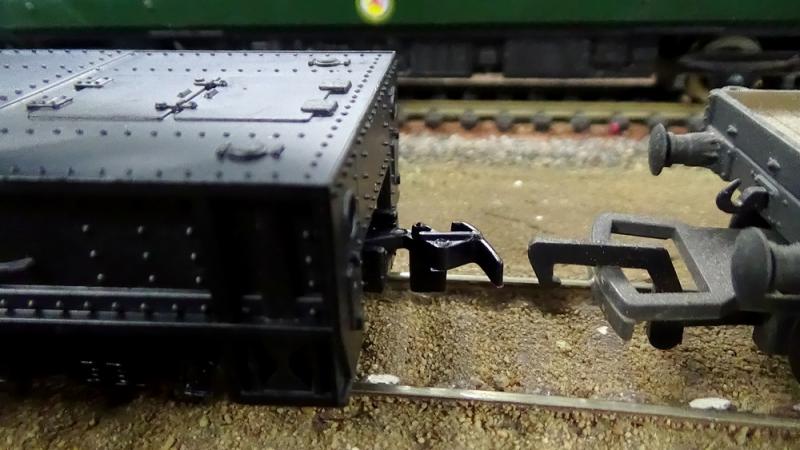
The other issue is the couplings. I am changing over all my stock to small Bachmann tension locks so to be able to run the crane, I need to remove the standard TYCO fitted version.
Basically, it`s out with the cutting tools and a bit of fudging and fiddling is required.
The overall height was fairly easily done and once that issue was sorted I was confident enough to proceed with the couplings.
The first one was fitted by using a plastic sleeper slid into the recess left by removing the TYCO coupling. A slightly trimmed Bachmann was screwed under the protruding end of the sleeper.
Once I could couple the crane to a loco, I could do some proper testing. Not knowing much about break down cranes, I`m learning as I go. One thing that was obvious during testing was that the end of the jib would over hang the the edge of the rails as it went around a curve. A bit of research revealed that the jib should rest on a trailing flat wagon with a device fitted to hold the end of the jib in place. That would mean then that the cabin would rotate slightly on a curve instead of the jib and the overhang problem would be fixed.
The solution presented itself in the form of some drop down plastic legs as used on a semi trailer. I have some TYCO plastic semi trailers that came with the crane and one has sacrificed it`s legs.
Please bear in mind that everything is going to be repainted and slightly weathered so any glaring abnormalities should blend in.
The flat wagons will need some scratch built metal boxes fitted as well to make the whole thing look authentic.
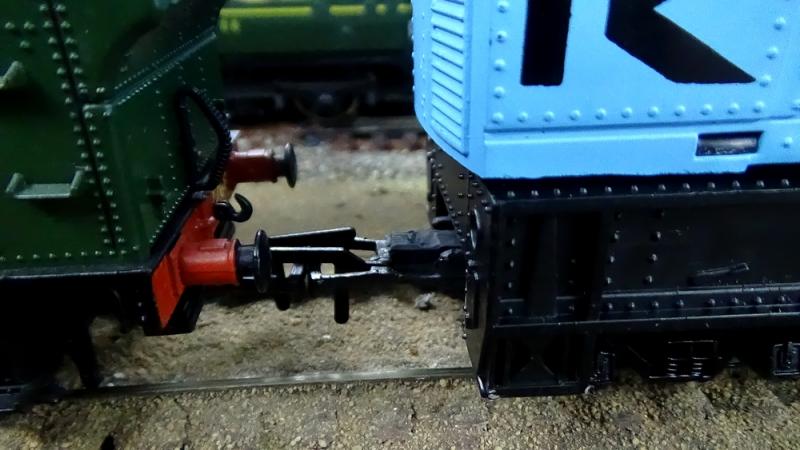
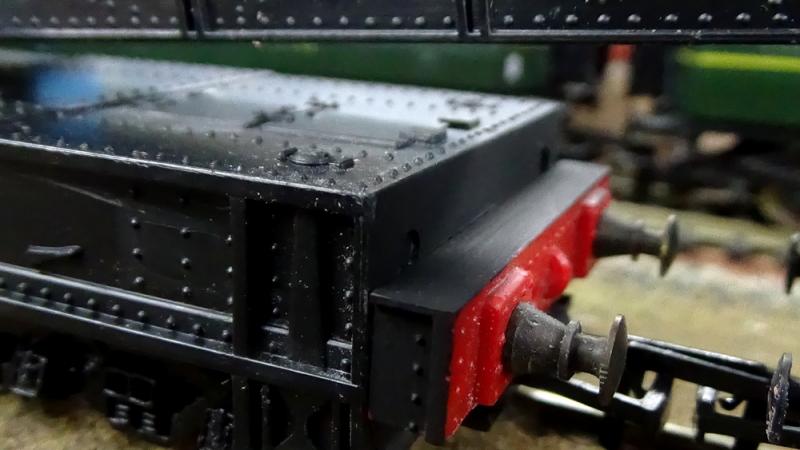
The other thing to be considered was buffers. Fortunately I have a damaged Dock Shunter body which has offered up it`s buffer beams and buffers to further modify the crane and give it a more English, although rather hybrid look. A coat of paint can hide a multitude of sins, so I certainly hope that is true in this case.
Here`s the first buffer beam fitted. I`ve also used it to fit the second tension lock.

And here`s the second buffer beam, over the top of the coupling attached by a sleeper, and incorporating some steps. I did say it`s a hybrid!!

Card has been fitted to the top to hide a gap in the plastic. In this pic you can also see the ring on top of the wagon that holds the cabin in place and allows it to rotate. That has been shaved down to a minimum to achieve clearances as well.
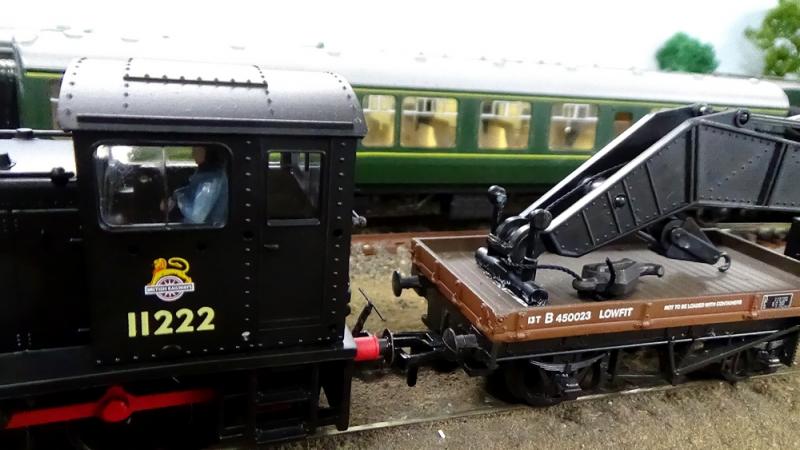
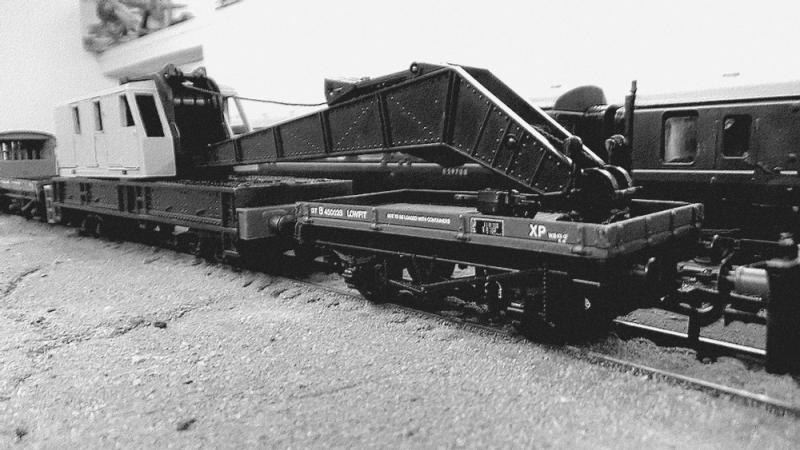
Below ….ready for a test run around the curves to make sure everything stays connected and doesn`t derail.

And with the crane fitted. Note the lettering has been removed. I intend to add glazing to the windows and further details to bring it to life hopefully.
I think there is certainly potential here to achieve a reasonable result…so stay tuned for further updates.
:cheers Gormo
"Anyone who claims to have never made a mistake, never made anything!!"
https://sites.google.com/site/greatchesterfordmodelrailway/home
https://sites.google.com/site/greatchesterfordmodelrailway/home

Posted

Site staff
So far so, good :thumbs
Ed
Posted

Site staff
Regards
Alan
Born beside the mighty GWR.
Alan
Born beside the mighty GWR.
Posted

Full Member
Bob
Posted

Full Member
Bill
At 6'4'', Bill is a tall chap, then again, when horizontal he is rather long and people often used to trip over him! . . . and so a nickname was born :)
Posted
Inactive Member
Easter will slow me down a little with family commitments on Saturday and Sunday but I`ll keep plodding along.
I`ve been looking at a lot of pics of British break down cranes, both real and model, and it seems to me that the version I`m putting together, won`t really look out of place.
This one takes my fancy
http://www.eastsomersetrailway.com/media/images/medium/0/0135_Image-15.jpg
and also this apparently restored version
http://www.eastsomersetrailway.com/media/images/medium/1/1023_crane_chambers_3_swindon.jpg
So I will attempt to produce something similar, given the restraints of the existing model.
:cheers Gormo
 Last edit: by gormo
"Anyone who claims to have never made a mistake, never made anything!!"
https://sites.google.com/site/greatchesterfordmodelrailway/home
https://sites.google.com/site/greatchesterfordmodelrailway/home
Posted
Guest user
Great stuff. mind the progress piccies so we can see exactly what you are doing as this is very interesting. a cut and shut on a crane. how much are you lowering the roof by ?
toto
Posted

Banned
Have you considered shaving 3mm or so off the bootom of the chassis ??
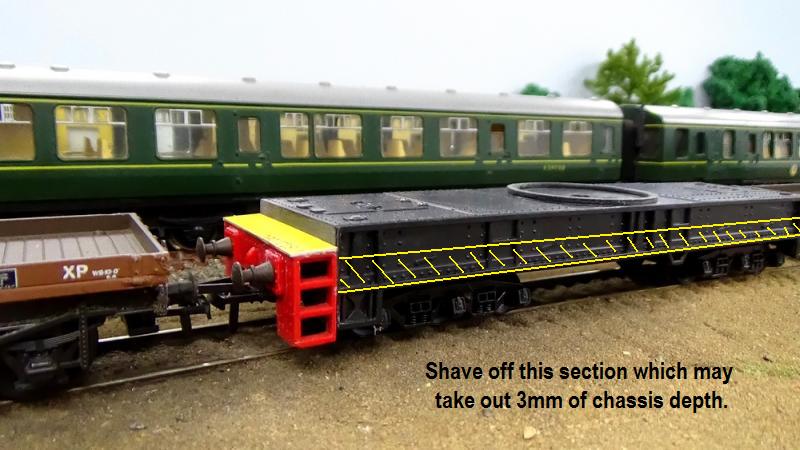
Shave off the lower chassis then add a new strip of styrene along the bottom.
Cheers, Gary.
Posted

Full Member
Doug
'You may share the labours of the great, but you will not share the spoil…' Aesop's Fables
"Beer is proof that God loves us and wants us to be happy" - Benjamin Franklin
In the land of the slap-dash and implausible, mediocrity is king
"Beer is proof that God loves us and wants us to be happy" - Benjamin Franklin
In the land of the slap-dash and implausible, mediocrity is king
Posted
Inactive Member
Toto…the roof is untouched but the winding gear frame support for the crane was set about 5mm too high above the roof line, so that was trimmed down. Then I had to lower the position for a set of pulleys and also the main drum that raises and lowers the jib by winding the cables, was set down inside the cabin. Everything still functions and there is no dramatic change to the appearance of the crane.
Gary… the chassis will have to stay as is. There is a lower floor pan on these TYCO wagons, underneath,which takes the pivot pin from the bogies. Shaving anything off would serve no purpose because the floor pan would be exposed. The floor pan fits onto four locating posts, one at each corner of the wagon and really there is no room there to play with. I have gained my clearances from the work on top of the crane so any changes below would be for cosmetic reasons and at this stage I don`t want to push my luck.
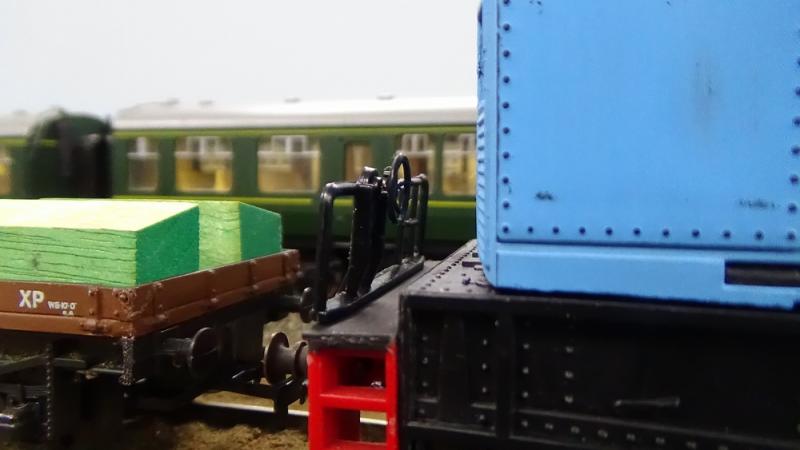
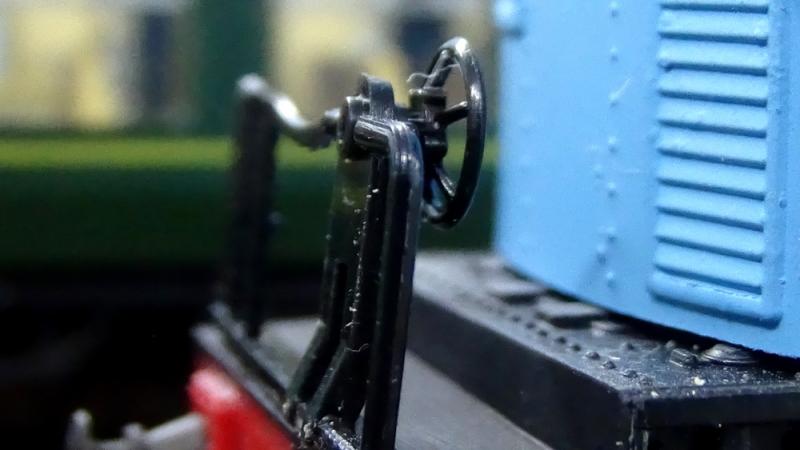
I have robbed some more parts this afternoon. A safety railing that will sit atop the buffer beam behind the cabin, some small hand braking / type control wheels, and a warning lamp for the rear of the brake van. I have also found some small bits of timber that will form the body of the tool boxes that will go onto the flat wagons.
So really we are onto the cosmetics now and the process of creating something that resembles a British crane.
I will put some more pics up tomorrow and try and give some more detail I guess.?
:cheers Gormo
Last edit: by gormo
"Anyone who claims to have never made a mistake, never made anything!!"
https://sites.google.com/site/greatchesterfordmodelrailway/home
https://sites.google.com/site/greatchesterfordmodelrailway/home
Posted
Inactive Member
Don`t you go hurting your neck …..try sitting in front of the computer screen

:cheers Gormo
"Anyone who claims to have never made a mistake, never made anything!!"
https://sites.google.com/site/greatchesterfordmodelrailway/home
https://sites.google.com/site/greatchesterfordmodelrailway/home
Posted
Inactive Member
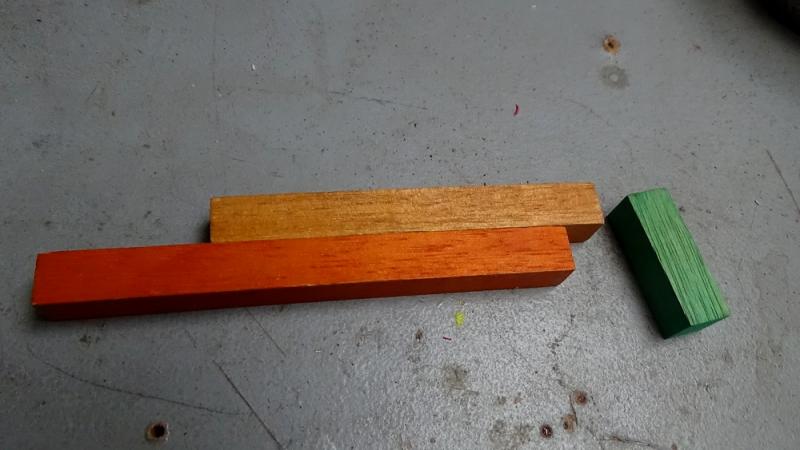
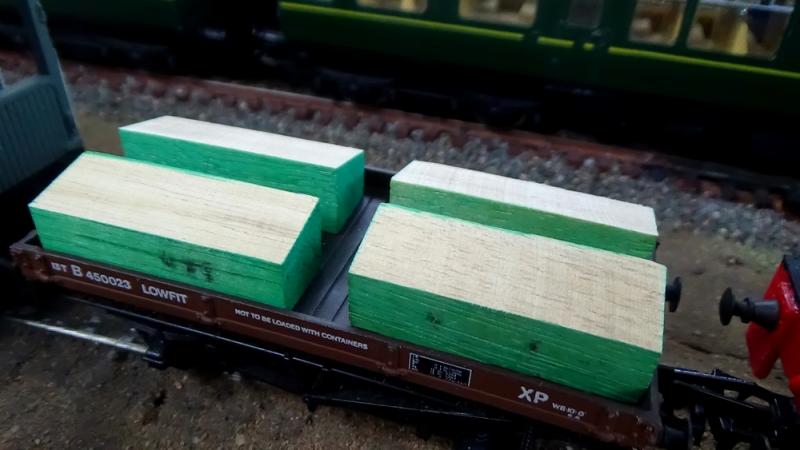
A bit of inspiration happened last night. I remembered I had some wooden blocks about the right size for tool boxes to go onto the flat wagons. This morning I pulled them out and thought I would have a go at shaping them to see if it will work. The idea is to create the basic shape of the box with the block and then cover the block with card or paper or whatever?
This a typical block…..they vary in length but otherwise the other dimensions are identical.

I want to have an angled lid on top of the boxes so the next problem was how to shape each block and have them near identical. Because they are small and difficult to hold, I made a jig from two of the longer blocks. The two pieces are simply nailed together.
Using the jig, I can now hold the piece securely and sand one face at an angle on the face plate sander.

The jig allows me to achieve consistent results and here they are sitting on one of the wagons.

The next task was to make some for the wagon that supports the jib. These ones have to be shorter in length because the wagon also contains a jib support and retainer. I made the grey jib support yesterday. It`s cut out of an old Hornby sprung buffer stop which is rather over scale to be of any great use to me otherwise. It still needs a bit of a clean up.
So here we are with two of the shorter blocks awaiting shaping.
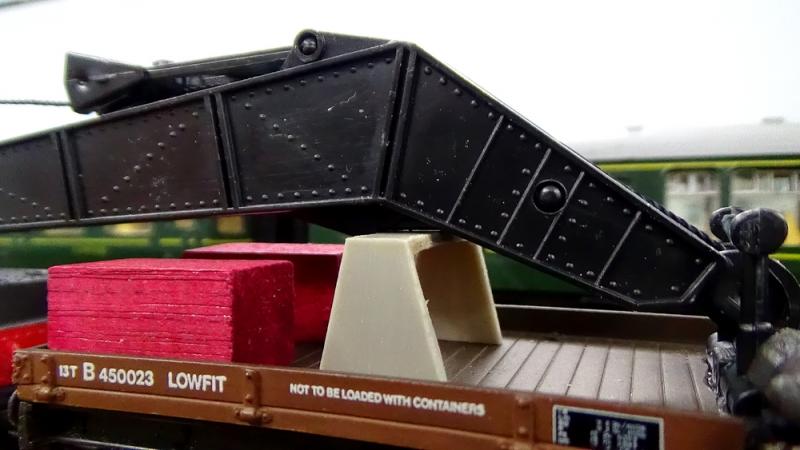
Shaped again at the same angle.

I`ve also put some black onto the new buffer beams as a base coat. Note the safety railing which has yet to be fitted. That will be added once the crane has been sprayed.
The other end
So all is good…..coming along nicely, but still a way to go yet.!!
:cheers Gormo
Last edit: by gormo
"Anyone who claims to have never made a mistake, never made anything!!"
https://sites.google.com/site/greatchesterfordmodelrailway/home
https://sites.google.com/site/greatchesterfordmodelrailway/home
Posted
Full Member
It's great having members posting from Australia, as there's always something new to read when I get up in the morning :)
Great idea with the wood blocks and they remind me of the toolboxes on Great Western shunting trucks and when painted, will retain some prototypical wood grain.
Looking forward to the next instalment and you're really making me want to build something!
Happy modelling,
Bill
At 6'4'', Bill is a tall chap, then again, when horizontal he is rather long and people often used to trip over him! . . . and so a nickname was born :)
Posted
Inactive Member
Yes the timing works for us here in Oz too. I check every morning what you guys have been up to whilst I was asleep.
I think I will go for a metal look on the tool boxes, however I have seen pics where some have timber boxes.
As far as building something goes Bill……go for it. I would suggest something old that can be modified or a kit……there are lots of options.
:cheers Gormo
"Anyone who claims to have never made a mistake, never made anything!!"
https://sites.google.com/site/greatchesterfordmodelrailway/home
https://sites.google.com/site/greatchesterfordmodelrailway/home
Posted
Guest user
Cheers
Matt
Posted
Inactive Member
What will B&W pics show……I`m not quite with your reasoning there????
:cheers Gormo
Last edit: by gormo
"Anyone who claims to have never made a mistake, never made anything!!"
https://sites.google.com/site/greatchesterfordmodelrailway/home
https://sites.google.com/site/greatchesterfordmodelrailway/home
Posted
Guest user
Cheers
Matt
Posted
Inactive Member
Here`s a couple I`ve quickly adjusted, but I`ll set it up today and take some proper pics.
:cheers Gormo
"Anyone who claims to have never made a mistake, never made anything!!"
https://sites.google.com/site/greatchesterfordmodelrailway/home
https://sites.google.com/site/greatchesterfordmodelrailway/home
Posted
Banned
Cheers, Gary.
Posted
Inactive Member
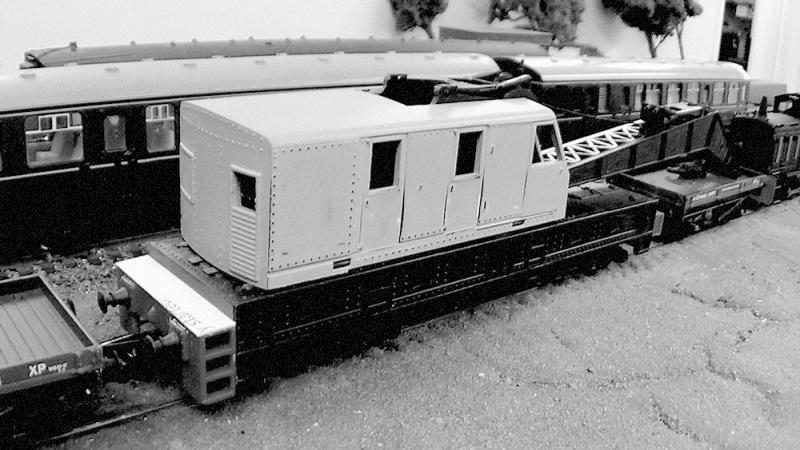
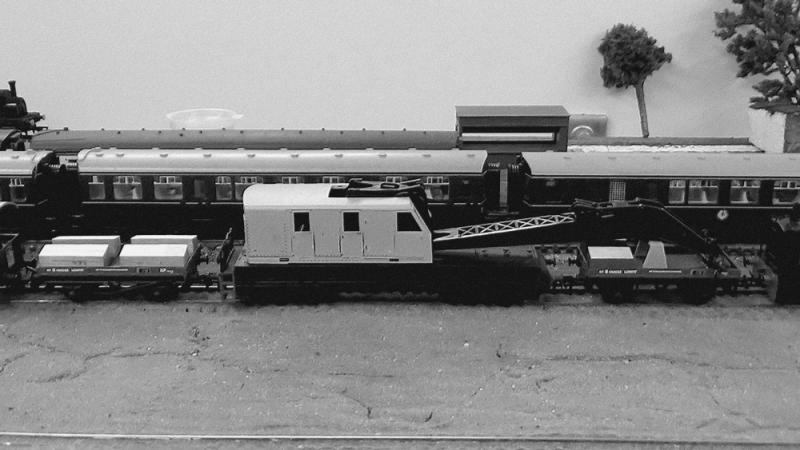
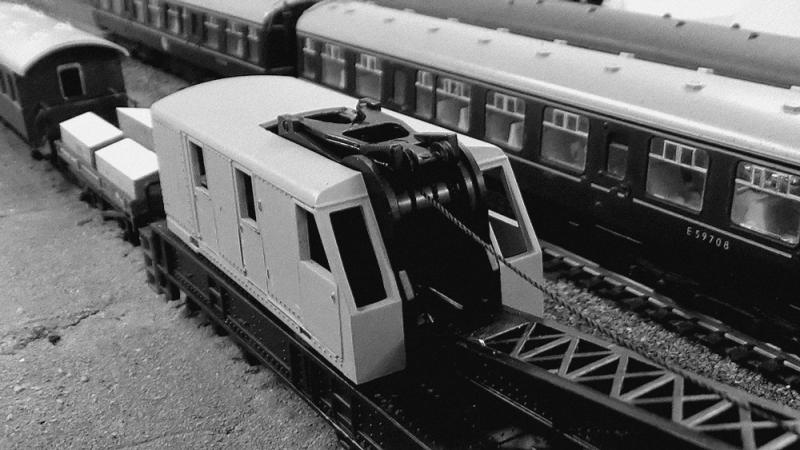
Well Matt…..here`s some B & W pics.
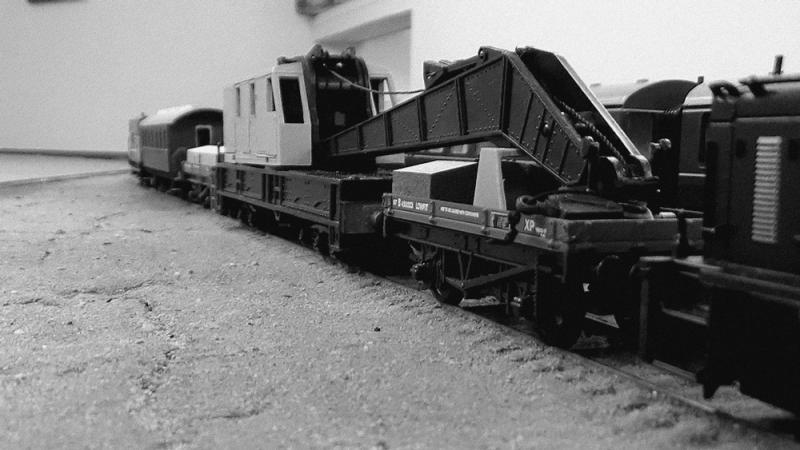
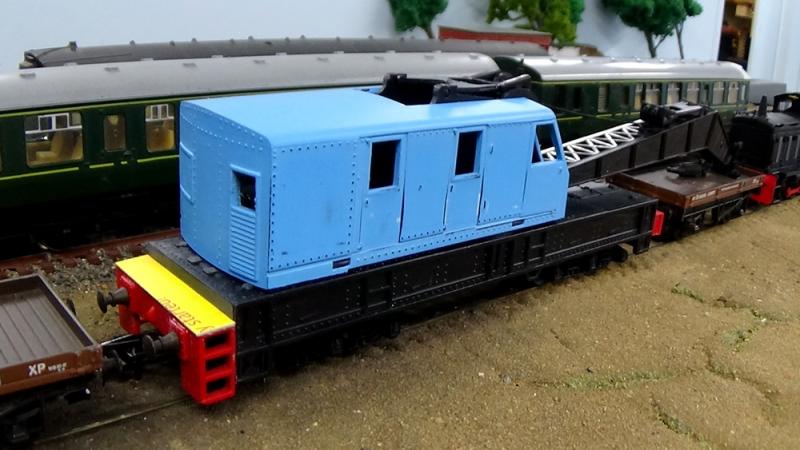
You will notice I`ve added an old PIKO carriage which is going to be converted to a Mess van.

Nothing has been painted yet
And finally some experiments with brass and creating rivet heads etc.

I think the brass is going to work out OK. I`ve found the thickest sheet I have in my stocks, worked the best. It`s .0005 thick.
Well folks, I think Matt was right. The B & W pics give a better feel for how the final product will shape up. It`s turning into a Maintenance / Work train rather than just a Crane. As my branch line has been designated a heritage railway by me, the maintenance train will be busy carrying rail and sleepers or possibly picking up old wagons due for restoration.
Easter and family functions require my attendance, so not much more until next week.
:cheers Gormo
"Anyone who claims to have never made a mistake, never made anything!!"
https://sites.google.com/site/greatchesterfordmodelrailway/home
https://sites.google.com/site/greatchesterfordmodelrailway/home
1 guest and 0 members have just viewed this.