Johns' 7mm Workbench
Posted

Inactive Member
Alan from ModelU got straight back to me.
He doesn't have the capability to model in 1/4 scale, but he's hoping to have a bigger machine next year.
Still, it was nice to hear from him.
Max
Port Elderley
Port Elderley

Posted

Full Member
John
John
Posted
Full Member
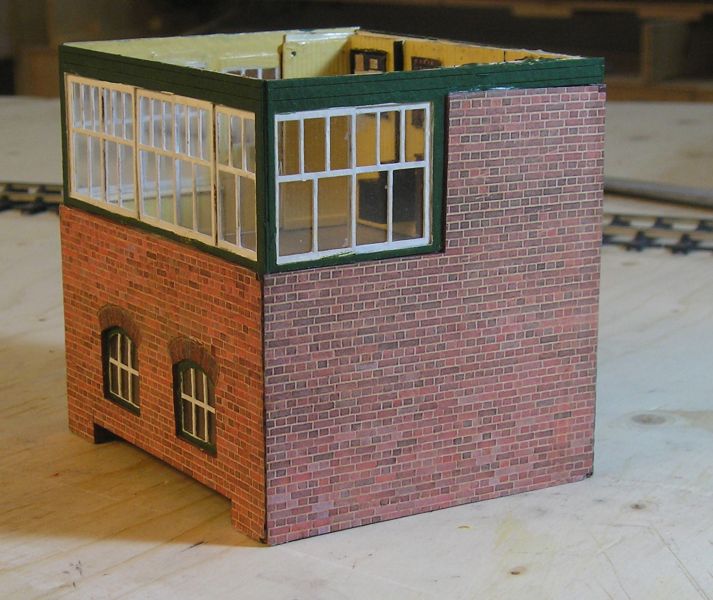
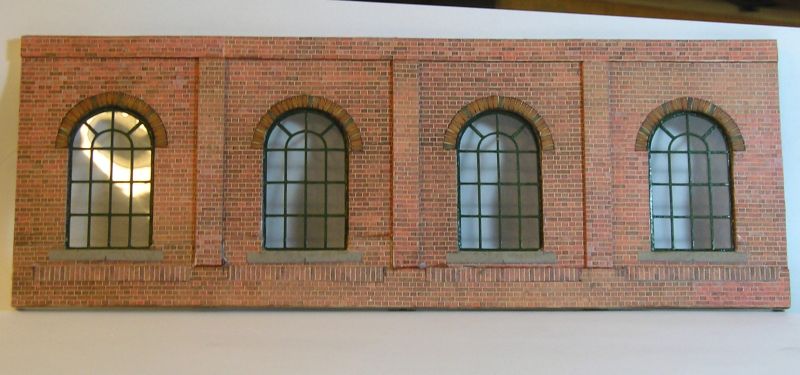
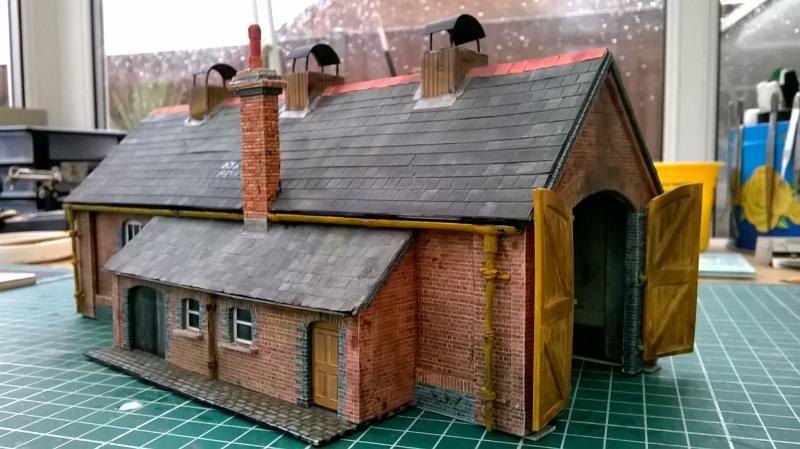
First impressions: what a lot of parts! Beautifully cut :thumbs
The doors caught my eye and I followed the instruction to fold and glue them. However, something didn't seem right - the bracing was etched on both sides - uh oh. I checked pictures just to confirm and found that I was right.
So, I made my own doors:

LCut doors to the right, mine are on the left. The outside of the doors should be plain as you can see at top left.
I scribed 0.060" Evergreen sheet then used suitable strip to create the bracing and hinges.
John
John
Posted
Full Member
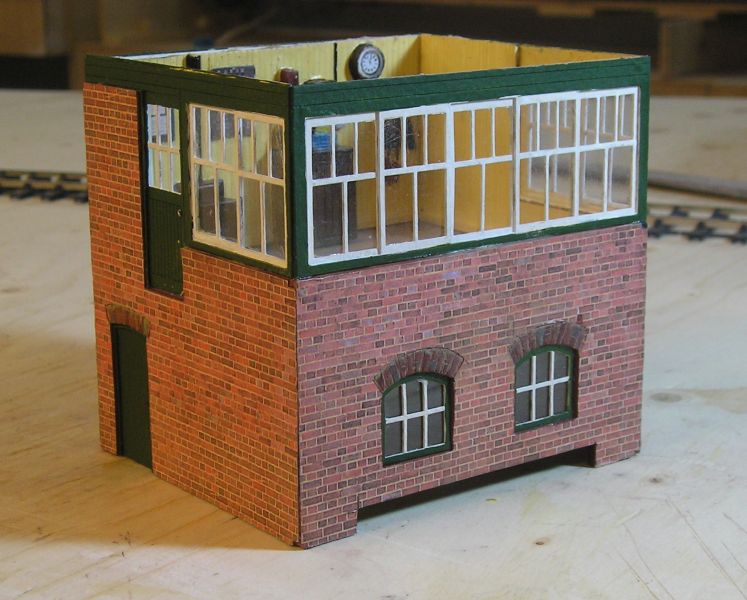
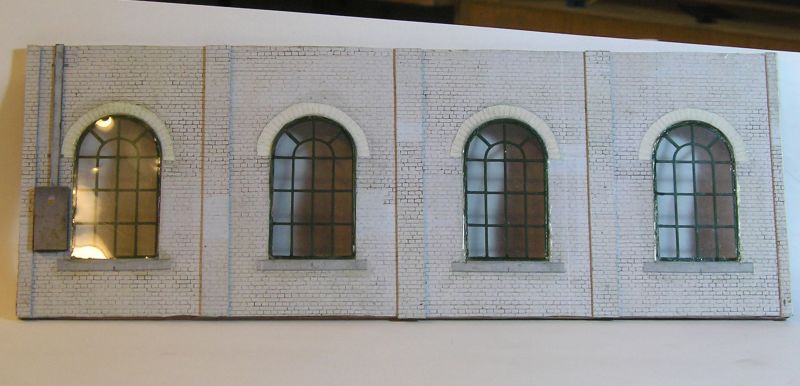
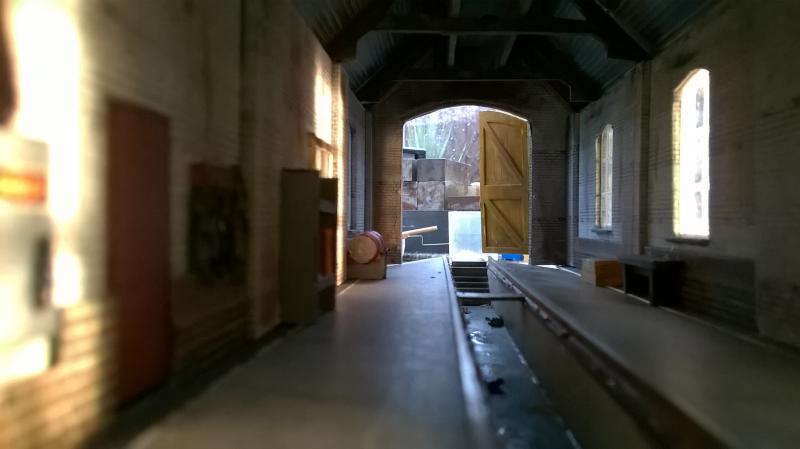
Apart from the rear wall, interior panels are V groove Evergreen sheet. I used some Scalescenes details. Otherwise I had to paint the moulding which I hate. Better to have been separate components I think. Ah well lesson learned.
Not sure how much farther I can take this. I don't know how many levers I need and I need a signalman.
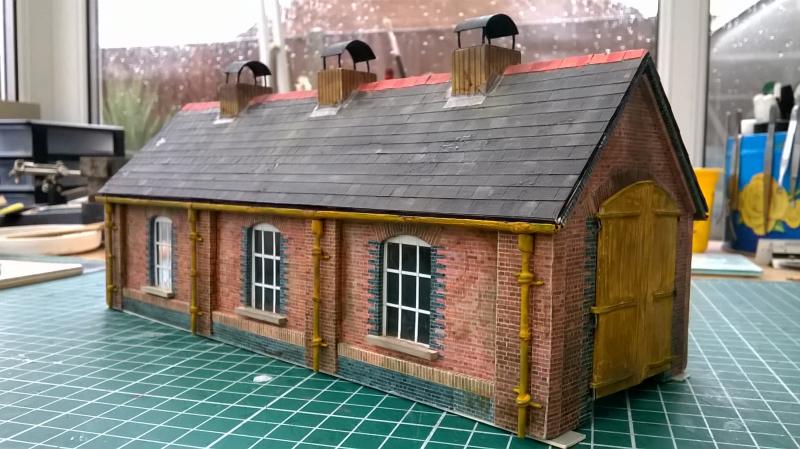
Made some slow progress on the shed too. I've done the ends:

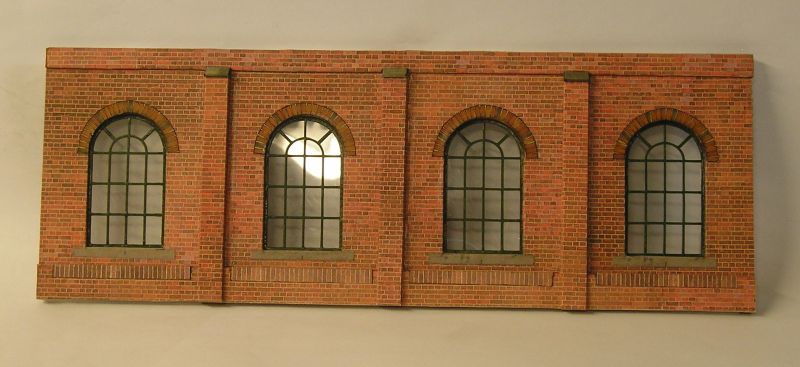
These are wrapped in Scalescenes brick paper. I had a ton of trouble with the arch and circle. Cutting a long story short, I had the foresight to scan the arches so I have a PDF of these to work with (lesson learned from the signal box). I finally hit upon using Letraset artists pens to colour these element. I think they look quite good. Scalescenes brick paper pack has a number of arch shapes but, typically, none will suit.
Finally the side walls are assembled:
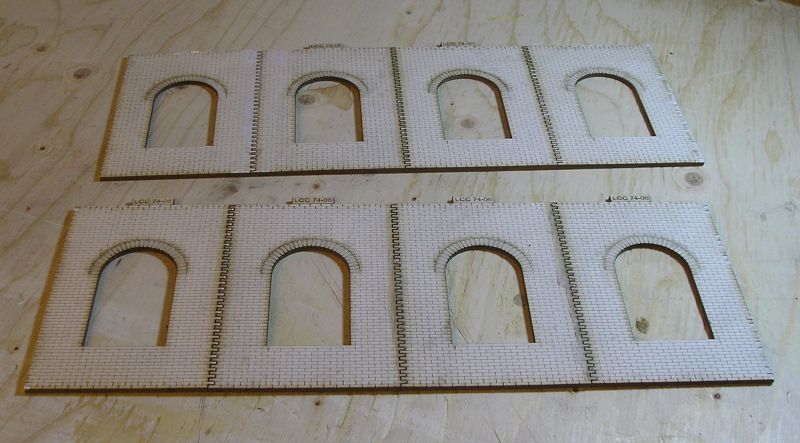
A lot of work yet to do with buttresses and plinths. Happily I did find a Scalescenes arch that works.
John
John
Posted
Full Member
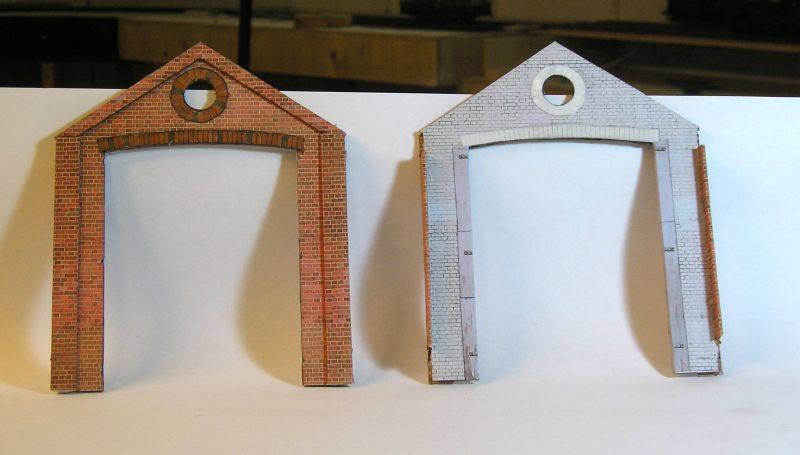
I used Scalescenes painted brick (TX05) for the inside and regular brick (TX01) for the outside. The outside circle and arch were both scanned from theh kit and copied. I cut them out and used letraset markers (which I've had for probably 20 years) to render the bricks. Not a bad effect if I say so myself. The inside circle and arch were sprayed matte white which leaves the lines showing through.
I made the plinth slightly higher than the kit and used regular card wrapped with brickpaper. Window arches used the same method as the ends. The sill is taken from the Scalescenes engine shed kit. Because the window openings are wrapped, their dimensions are reduced slightly so some sanding on the window frames was needed. These were secured with canopy glue.
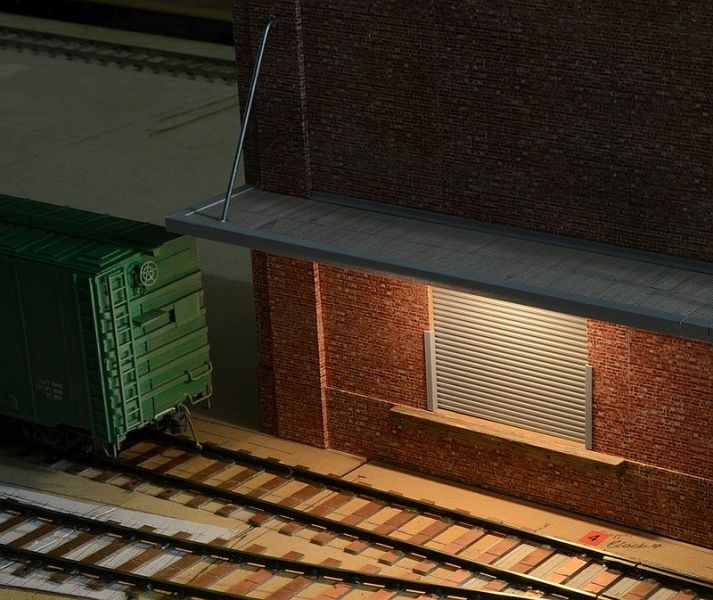
…and the inside. Glazing secured with canopy glue - great stuff and dries pretty much invisible. Notice the electrical distribution box.
The LCut kit doesn't have anything for the interior so I made buttresses from card.
You may wonder why I didn't just build the Scalescenes kit - it comes with provision for single and two road sheds. The answer is the windows. If I was building in 4mm, I'd get these from Brassmasters but no-one does ready made windows of the right shape in 7mm (I don't think). LCut kits are great because of the really good windows which would be a royal pain to scratch make.
John
 Last edit: by Brossard
John
Posted
Inactive Member
Why do the buttresses stop short of the ground on the unpainted side?
I would have thought that a buttress should stand firmly on Mother Earth.

Max
Port Elderley
Port Elderley
Posted
Full Member
John
John
Posted
Inactive Member
Sorry for doubting you.
Max
Port Elderley
Port Elderley
Posted
Full Member
John
John
Posted
Inactive Member
Max
Port Elderley
Port Elderley
Posted
Full Member
John
John
Posted
Inactive Member
Max
Port Elderley
Port Elderley
Posted

Full Member
My scratch built effort below
Cheers
Andy
Andy
Posted
Full Member
John
John
Posted
Full Member
These make more sense now I think.
John
John
Posted

Full Member
Regards Rob
Posted
Full Member
John
Posted
Inactive Member
Nice building, Andy. :cool:
Max
Port Elderley
Port Elderley
Posted

Full Member
Posted

Full Member
I actually think you got it right first time. Although buttresses go to the ground and support a wall (and counteract spreading forces), in the case of engine sheds (and goods sheds) they are actually pillars which directly support the roof beams (often metal I beams plus the rafters), and can either go to the ground or more often rest on a plinth. They often protrude inside as well. The plinth and pillars form the main structural unit, not the walls.The infill with recessed brick usually only has to support the windows (with an arch if there is a lot of brick above). Check Tetbury engine shed or goods shed (you have built the engine shed in OO). The buttresses/pillars rest on the plinth, which protrudes about half a brick. The infill brick panels sit half a brick or a brick in from the buttresses. Something to do with spreading the weight of the roof over as wide an area as possible, rather than concentrating it on a small foundational area through the pillars. It makes no sense to break the integrity of the plinth by dividing it with buttresses/pillars. Engineering brick was usually used for the plinth.
Many brick and wood engine sheds had the buttresses/pillars on the inside to support the roof beams (thus being pillars), and displayed a clean face to the world.
Technical stuff, of no great importance. Read it all up for a project a few years ago. Great model though.
Nigel
©Nigel C. Phillips
1 guest and 0 members have just viewed this.