Johns 7mm Wagon Workbench
Posted

Full Member
John
John

Posted

Inactive Member

Max
Port Elderley
Port Elderley
Posted
Full Member
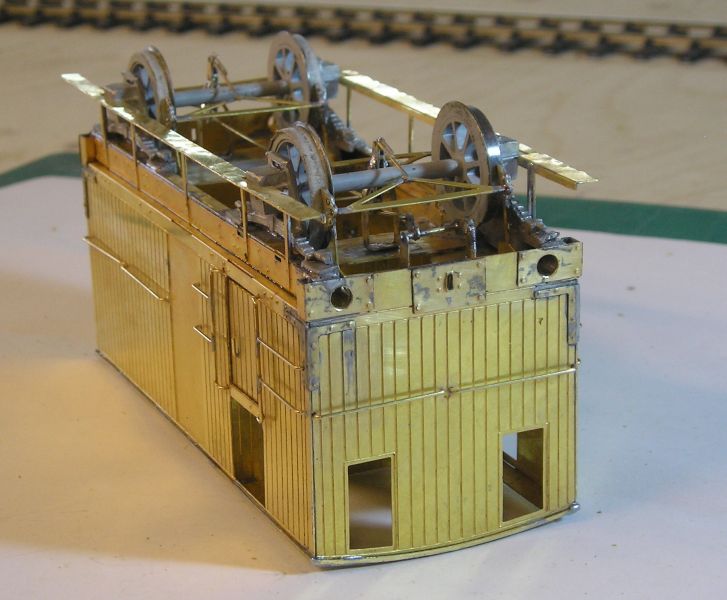
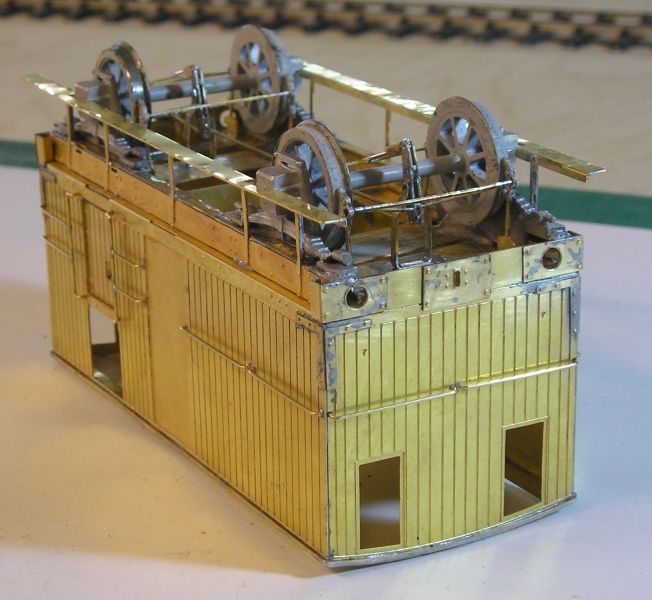
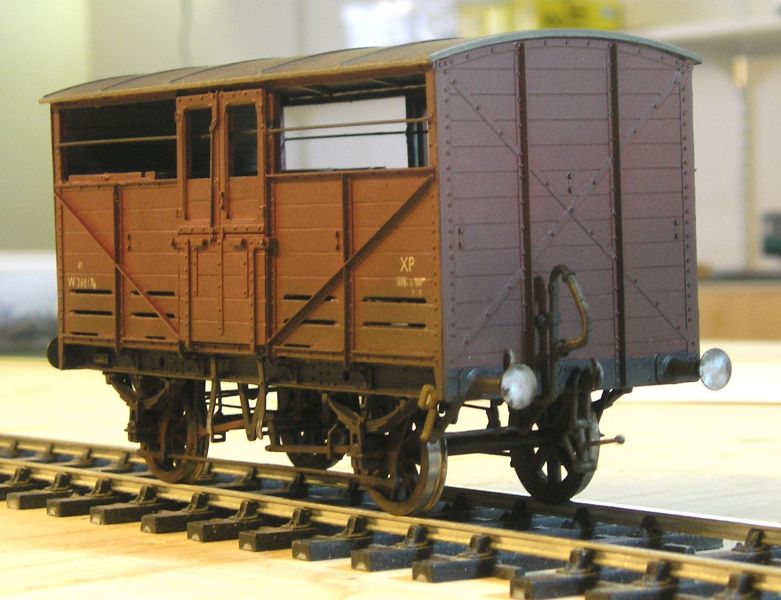
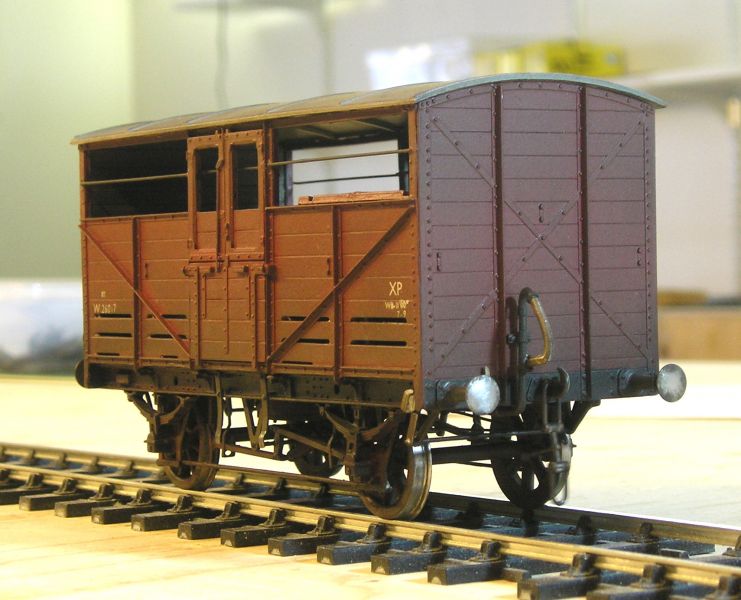
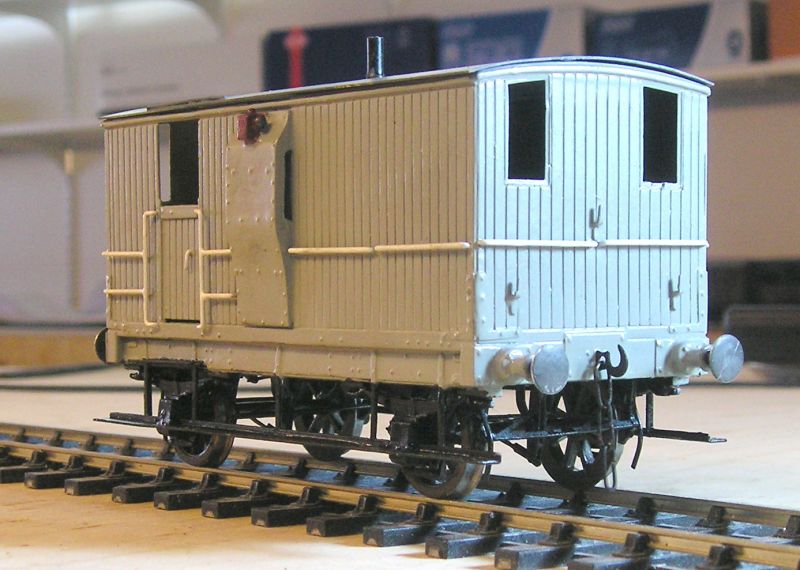
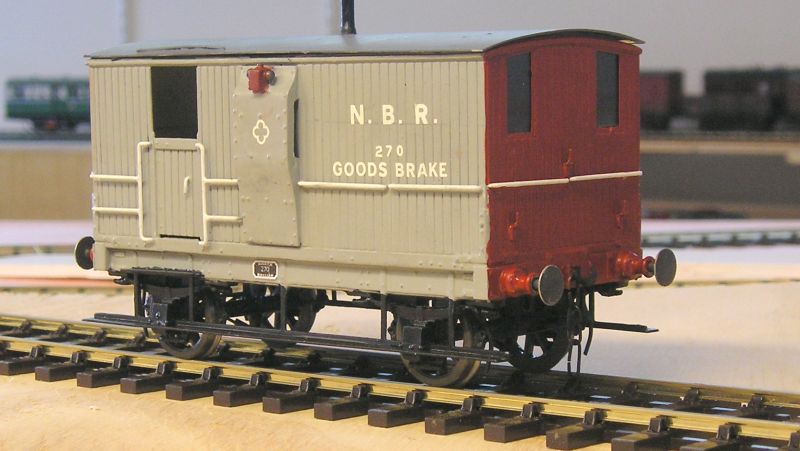
Added the lamp brackets which are a bit of a pain as they are so small.
Also the duckets. I made a template from plastic card and drilled holes. I used the template to drill holes in the sides and castings so that these lined up. I soldered wire through the holes and cut it off to about 2mm. I then used CA and secured the castings.
Buffer guides are also CAed in.
Roof is on loosely, I still need to finagle it.
To those who say you can't see the brake gear, I disagree.
John
 Last edit: by Brossard
John
Posted
Full Member
In the meantime, I completed a couple of commissions:
GWR Dia V5 Cattle Wagon
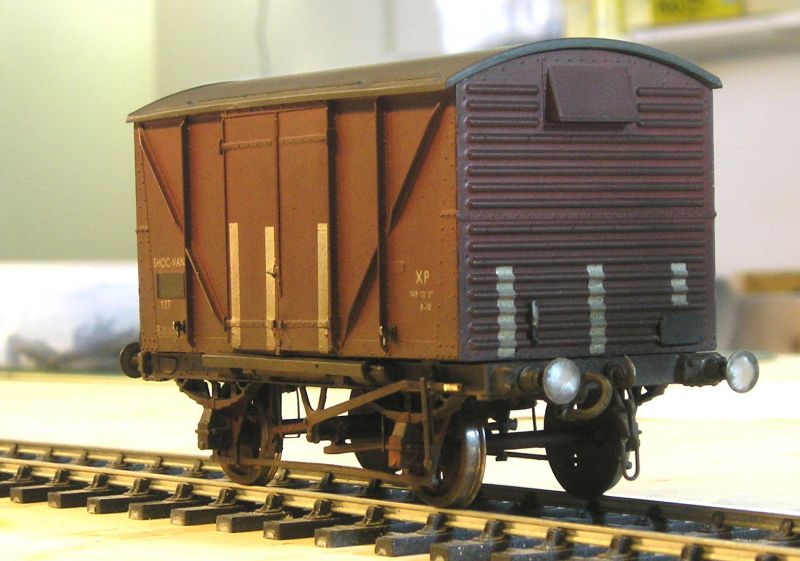
BR Shoc Van

I can deliver these today. :doublethumb :cheers
John
John
Posted
Full Member
Very nice John. :thumbs
Terry
Posted
Full Member

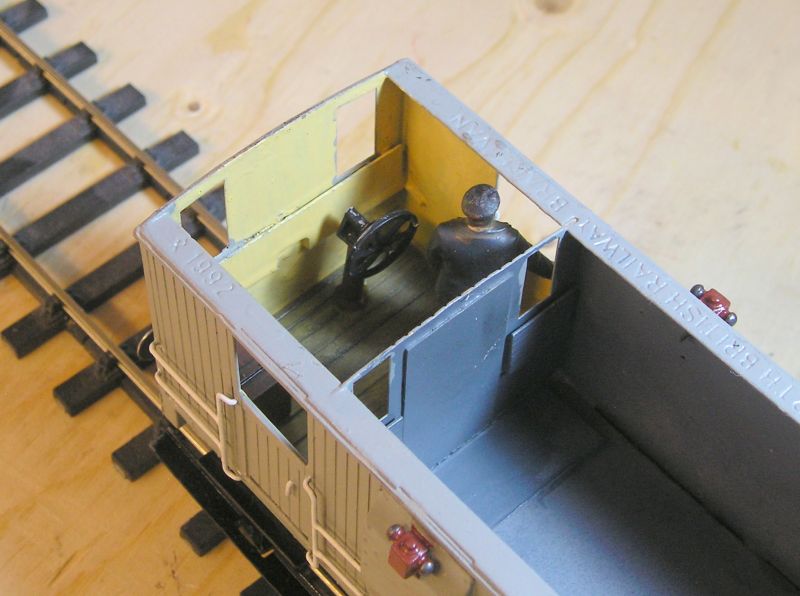
Guard is from ModelU.
John
John
Posted

Full Member
I liked the pins to attach the duckets.
Nigel
©Nigel C. Phillips
Posted
Full Member

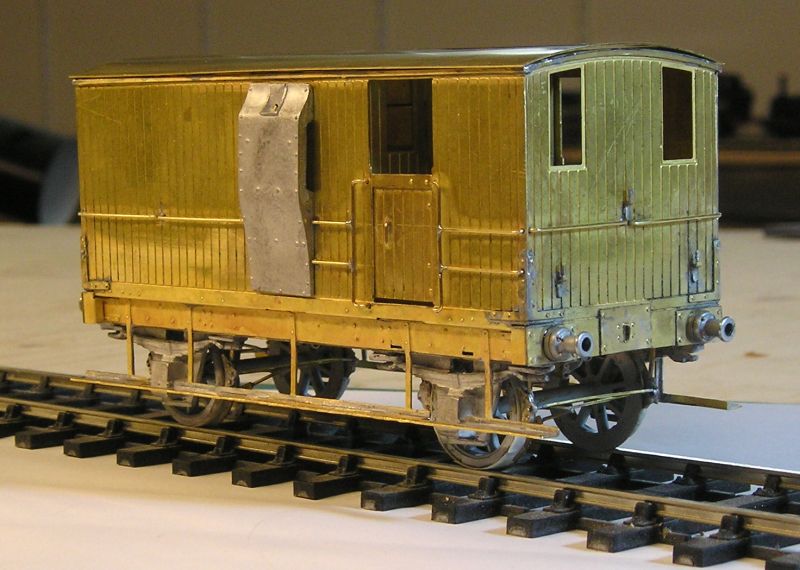
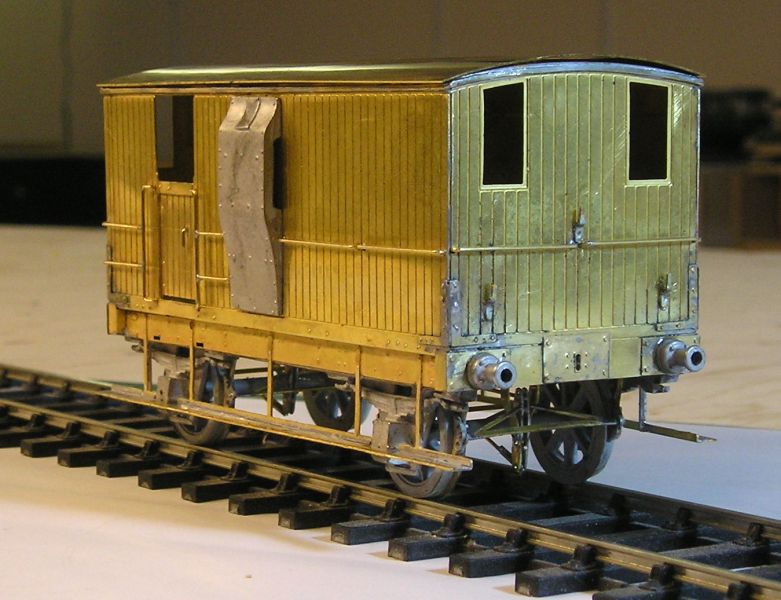
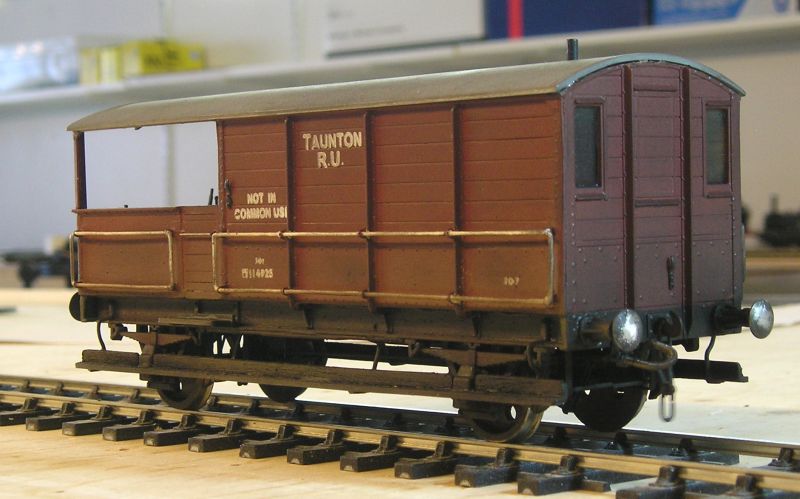
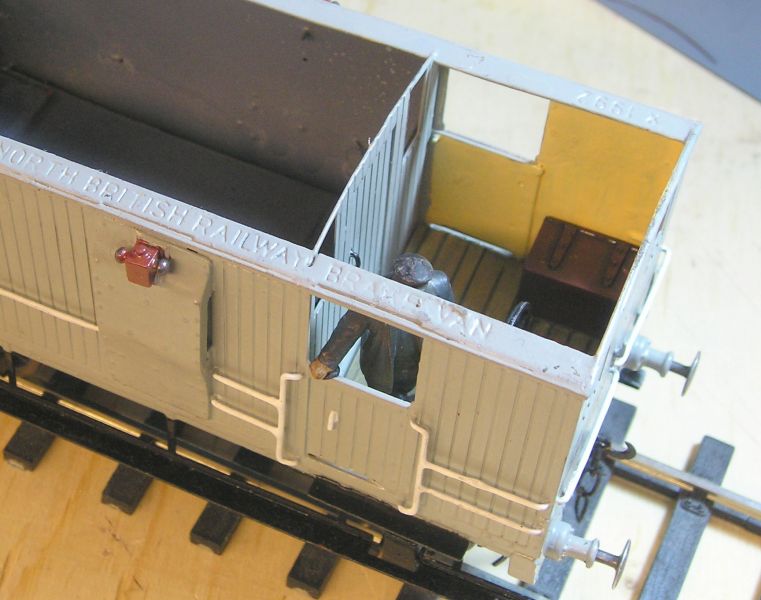
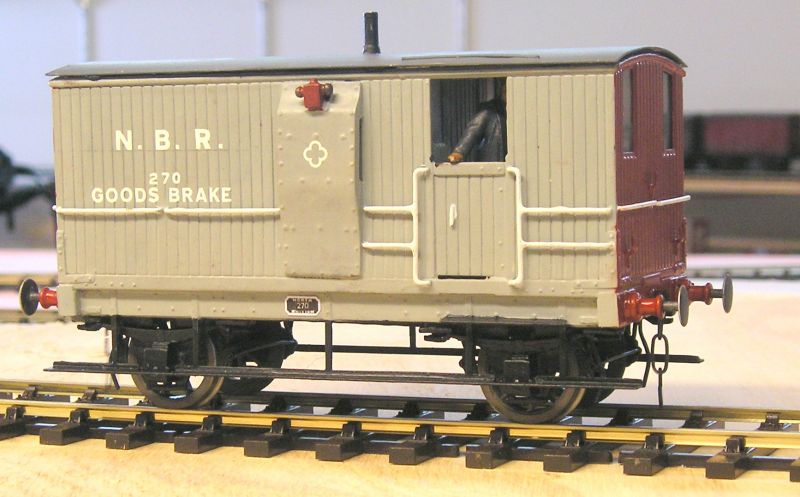
Guard is a ModelU figure. I used blacktack to fix him in place.
Note the sand pipes.
Roof is on loosely. When the time comes I think I'll use blacktack on this too.

Buffers were a pain because I should have assembled them first. :It's a no no
Floor is 0.020" plastic card, scribed and painted.
Note the sand box in the corner.
The van has a couple of coats of Testors gloss spray. Next up is transfers. After that some matte varnish and then glazing, which I was working on today.
John
John
Posted
Inactive Member
Black tack is a new one on me. Interesting Google results.
Max
Port Elderley
Port Elderley
Posted
Full Member
John
Happy New Year Max, you're already in 2018.
Last edit: by Brossard
John
Posted
Full Member
Rail Album - Military Wagons - World War Two - 50-ton 'Warwell' Wagons
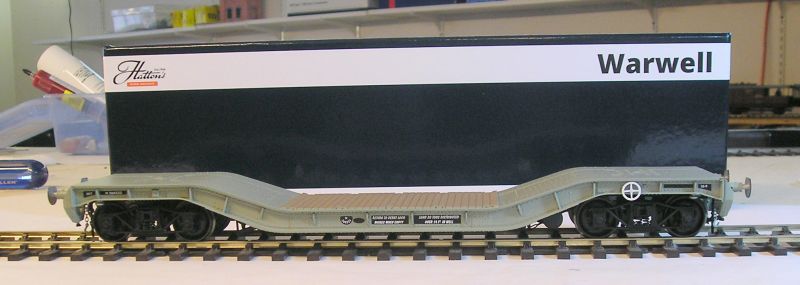
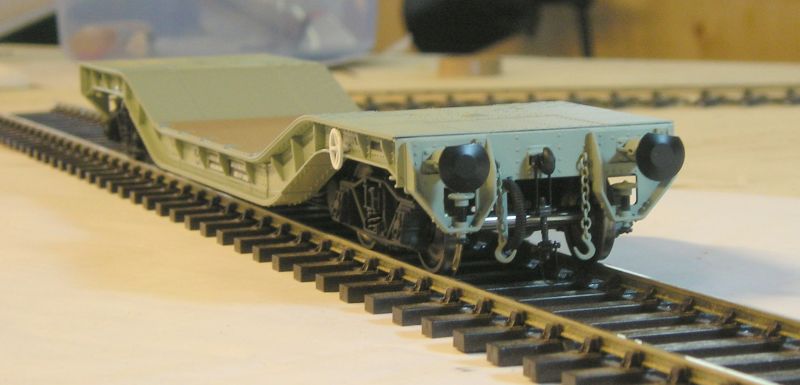
I’m very pleased. The chassis feels diecast so lots of weight. The vacuum brake gear is well done. The screwlink coupling works – maybe too well since I had to screw one of the ends back in. I applied Threadlock Loctite to stop that happening. Note the safety chains. Must look into the buffers, the clipped top should be straight.
My guess/speculation is that the manufacturer is actually Dapol/Lionheart.
John
John
Posted
Inactive Member
You're right about the buffers. Can you turn them?
It looks like they had holes in their centres, as well.
Max
Port Elderley
Port Elderley
Posted
Full Member
John
John
Posted

Full Member
Last edit: by Passed Driver
Staying on the thread Kevin.
Posted
Full Member
Let me know if you have questions.
John
John
Posted
Full Member
Staying on the thread Kevin.
Posted
Legacy Member
Keep it a coming, mate. Always look out for your posts.
Allan
Posted
Full Member
Another Parkside kit on its way from Antics. :doublethumb
John
John
Posted
Full Member
The roof is held on temporarily with black tack. My customer will weather it himself.
I have to say the red ends are striking.
John
John
Posted
Full Member
http://www.crtkits.gbr.cc/product.php/394833/
Today, I received two Dapol tanks and a Corgi road tanker:
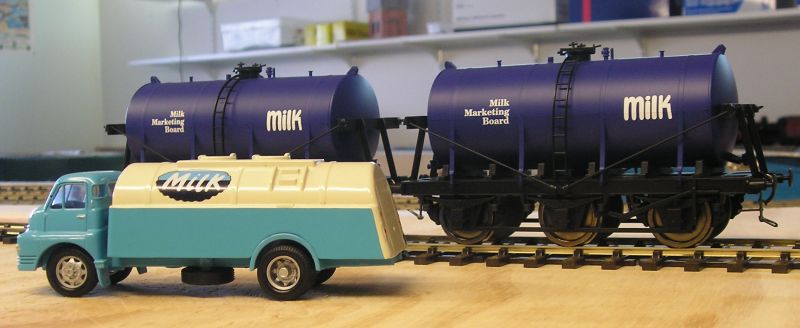
The milk tanks are OK. I had thought about getting a Slaters kit but the transfer choices didn't include MMB which I felt was appropriate for early 60s.
There is no brake detail underneath but I can add that readily enough once I figure out what it looked like. I also need to see how far these are from the LNER tank and perhaps do some nurdling.
The road tanker is second hand and missing mirrors. I can reinstate these from wire I reckon.
John
John
1 guest and 0 members have just viewed this.