Johns 7mm Wagon Workbench
Posted

Full Member
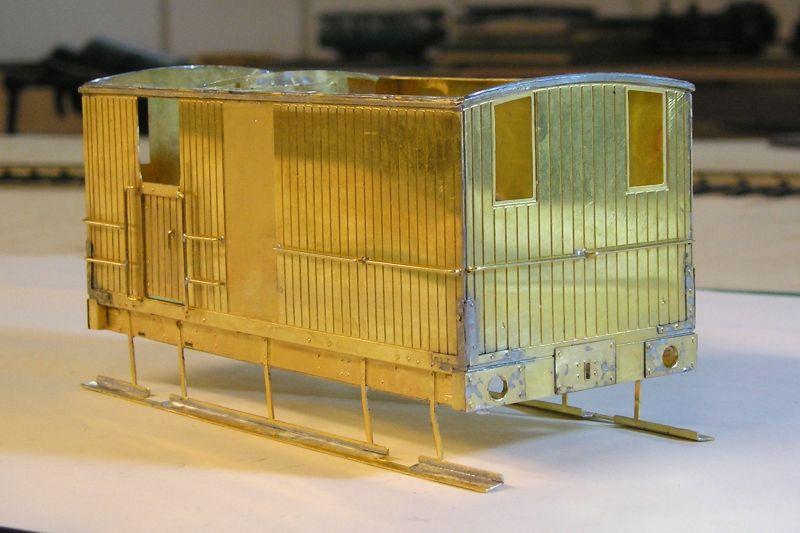
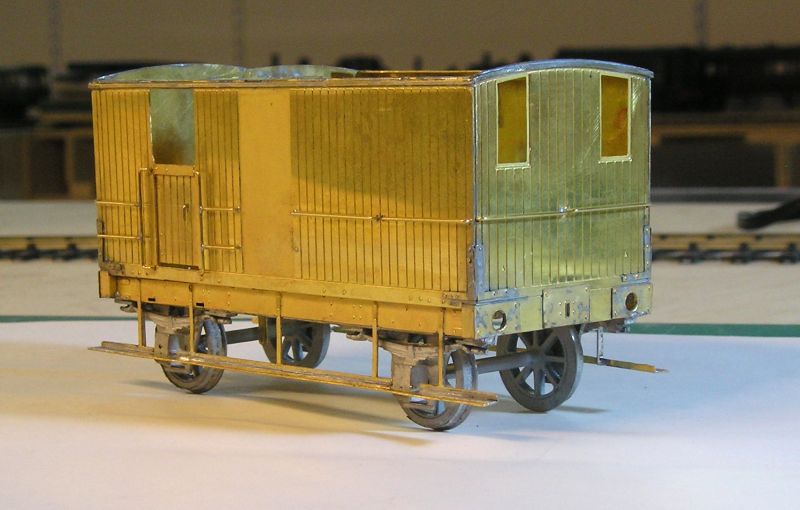
This is a BR Dia 209B Shock Absorbing Van. These were built in 3 lots between 1955 and 1958. The design was based on Shock Absorbing Vans built by LMS/LNER/GWR.
I've almost finished the construction:

Three major subassemblies as you can see. In life the van body would have "floated" constrained by the springs.
The roof has had rainstrips and end strips added from supplied plastic strip.
I'll take the opportunity to paint these separately before joining up.
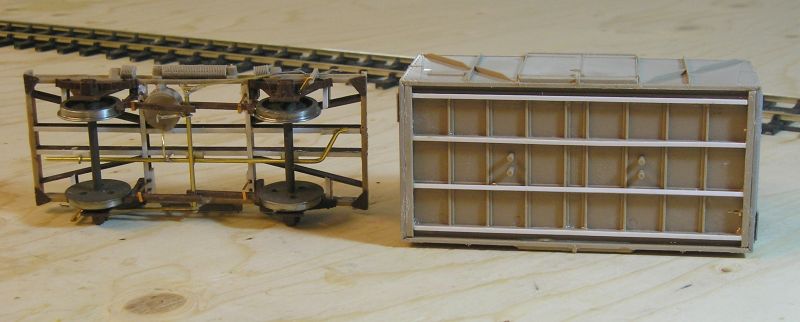
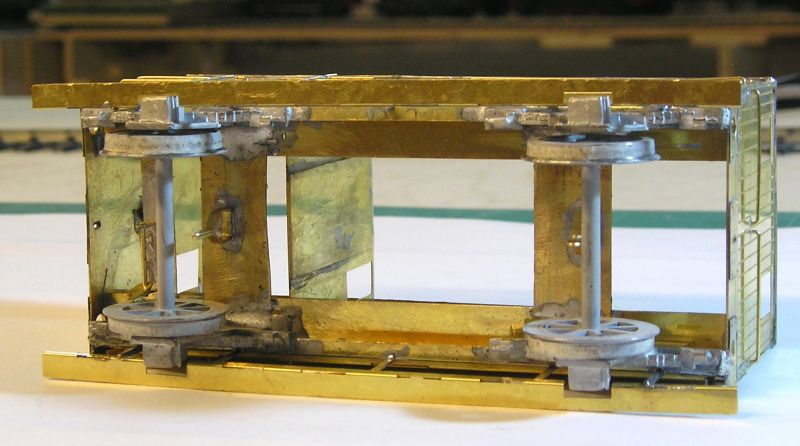
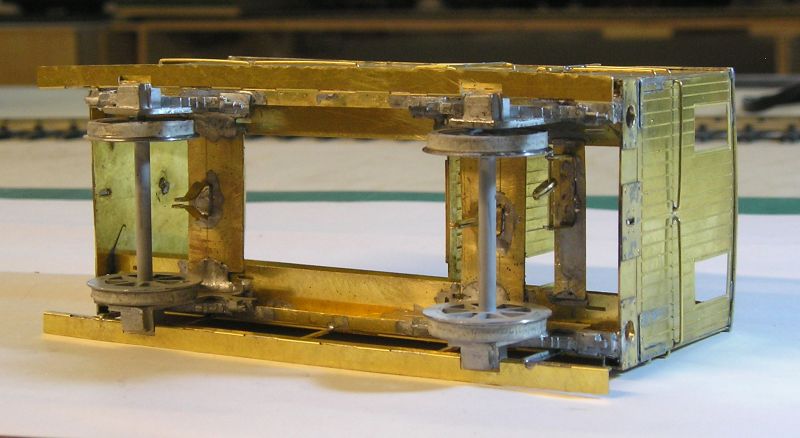
Note the floor of the van body. Safety loops are 1mm phosphor bronze strip - the plastic ones supplied are impossible to clean up without breaking.
Note the vacuum pipe from brass tube, secured on strips of plastic strip and brass wire clips.
There's a strut that supports the brake lever guide which is ignored in the kit, I made these from scap brass strip.
I must do the tie bar between axle guards. The kit recommends plastic strip but that is way too fragile. I'll dig up some brass strip.
John
 Last edit: by Brossard
John

Posted

Full Member
Regards Rob
Posted
Full Member
John
John
Posted
Full Member
Regards Rob
Posted
Full Member

Anyway, the subassemblies are now painted and drying.
John
Last edit: by Brossard
John
Posted
Full Member
I hear you, it's not the greatest website in the world despite them stocking loads of useful goodiesYes and annoyingly the website doesn't tell you if transfers are in the kit or no.
Anyway, the subassemblies are now painted and drying.
John
Regards Rob
Posted
Full Member

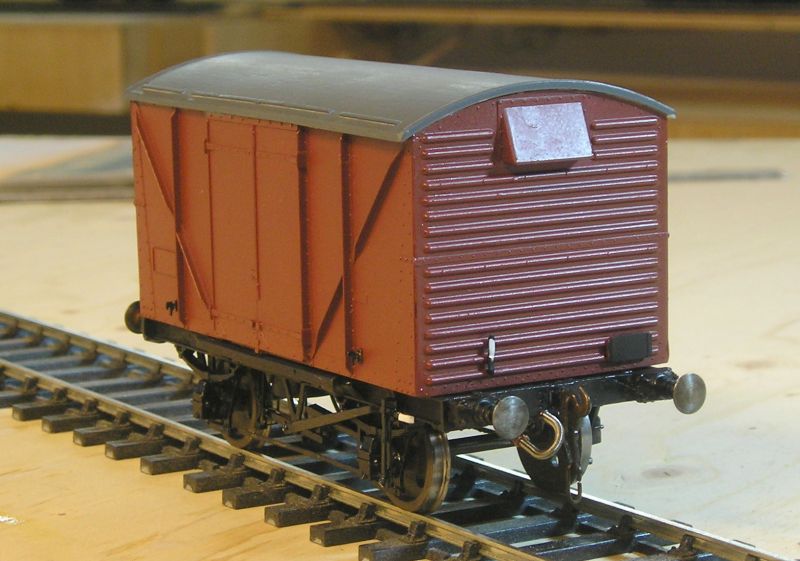
IAW my usual practice, the van has been sprayed all over with GlossCote. Not only does this provide a smooth surface for the transfers but also tends to blend out minor blemishes.
Happily the transfers arrived yesterday - serendipity rules.
John
John
Posted

Inactive Member
Max
Port Elderley
Port Elderley
Posted
Full Member
Can I offer the suggestion that you put a spot of solder on the links of the coupling chain, it improves the look no end.
Regards Rob
Posted
Full Member
The other thing I noticed is that the tie bars are very thin and should be flush with the outside of the axle guards. I'll glue some plastic strip over the brass.
John
John
Posted
Full Member
The ubiquitous Dia 1/108.

Rivetted dia 1/109.
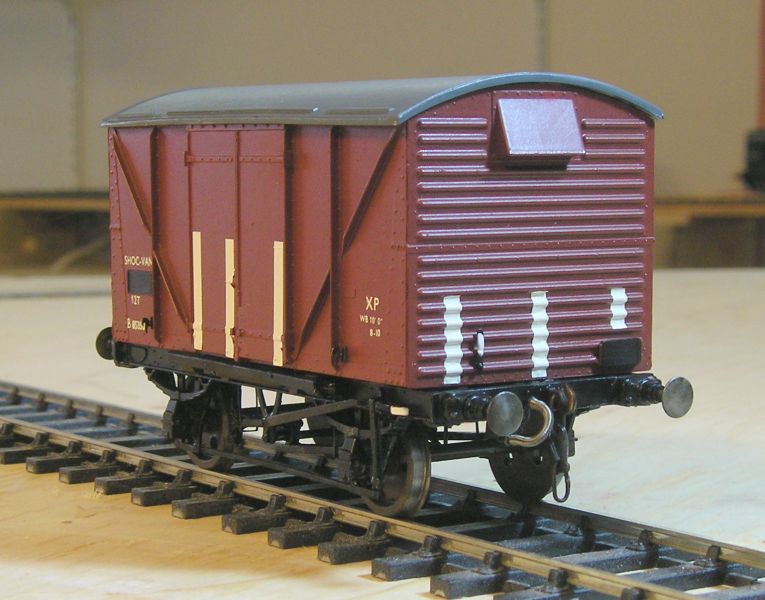
Next step is to do the final weathering.
John
John
Posted
Full Member

The stripes were actually quite difficult because they had to lie over moulded detail. I did use MicroSol. I think I should trim their length but weathering will distress them anyway.
John
John
Posted
Full Member

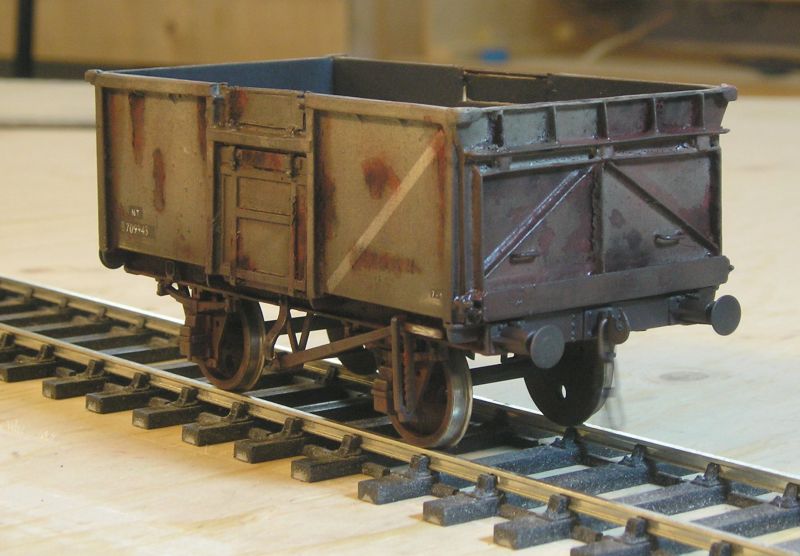
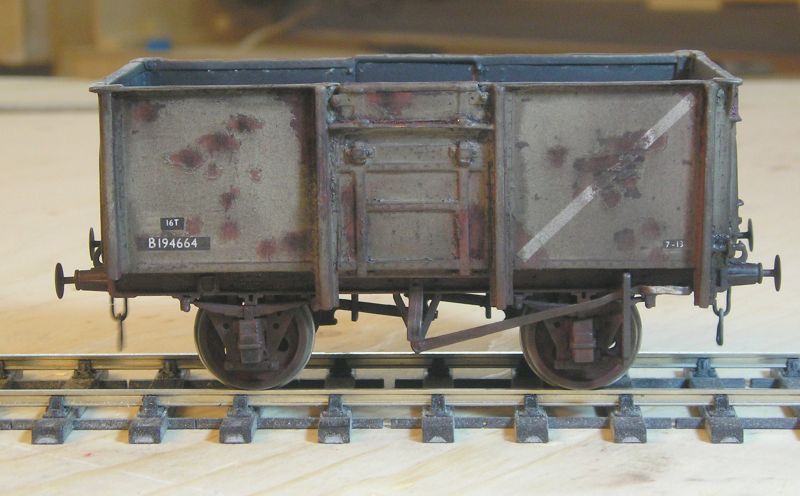
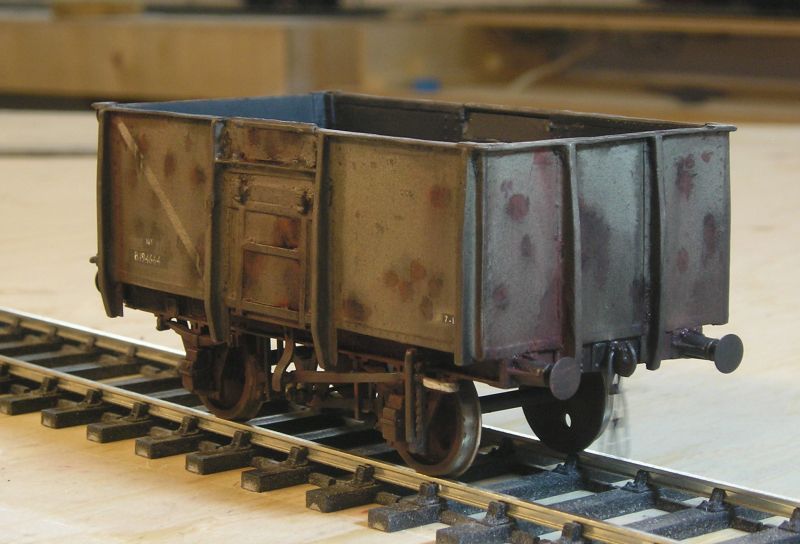
I used weathering powders - started with rust on the underframe and wheels, followed by black. I then touched the rust spots on the body with rust and blended that. I followed up with black to tone things down.
John
John
Posted

Site staff

PS… very nice indeed
Ron
NCE DCC ; 00 scale UK outline.
NCE DCC ; 00 scale UK outline.
Posted
Full Member
Rob has showcased the model he built in his thread so I hope this won't be too repetitive. Rob did kindly provide some drawings and photos which should help greatly.
Early days yet with the build and I've only been tinkering today. I drilled the axle guards and instlled bearings. I also drilled out the buffer housings which was a very painful exercise.
The kit:

Still taped to the backing :roll:
Castings:

Top L to R: Chimney, brake wheel standards (don't know why there are two), duckets, buffers and lamps
Bottom: Axle guards.
John
John
Posted
Full Member
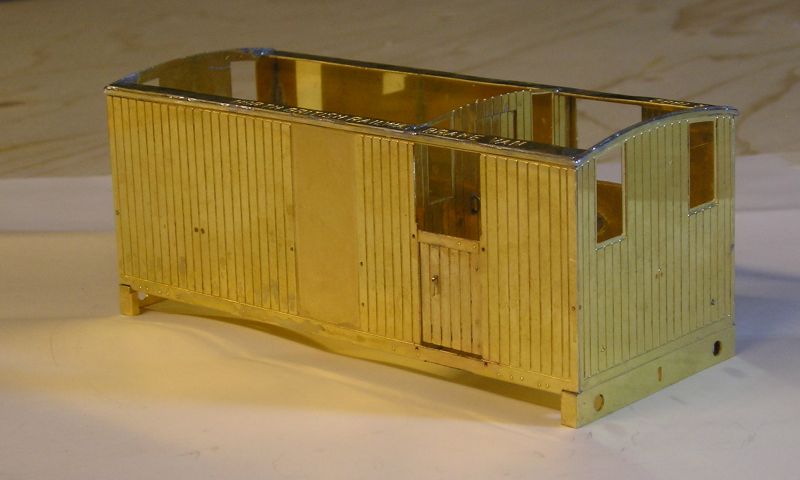
Slot and tab construction, no drama. There's still a lot to do.
John
John
Posted
Full Member
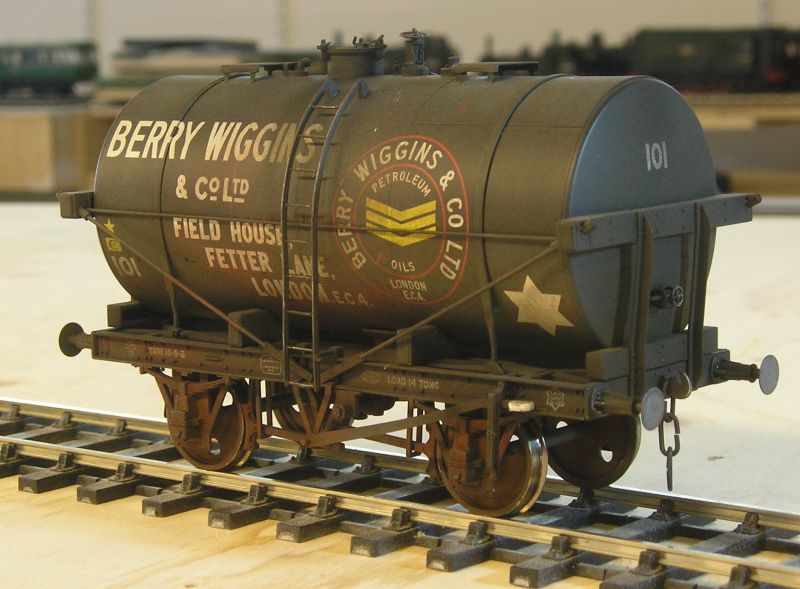
Class B Oil Tank (for heavy oil like Kerosene and Diesel), Dapol
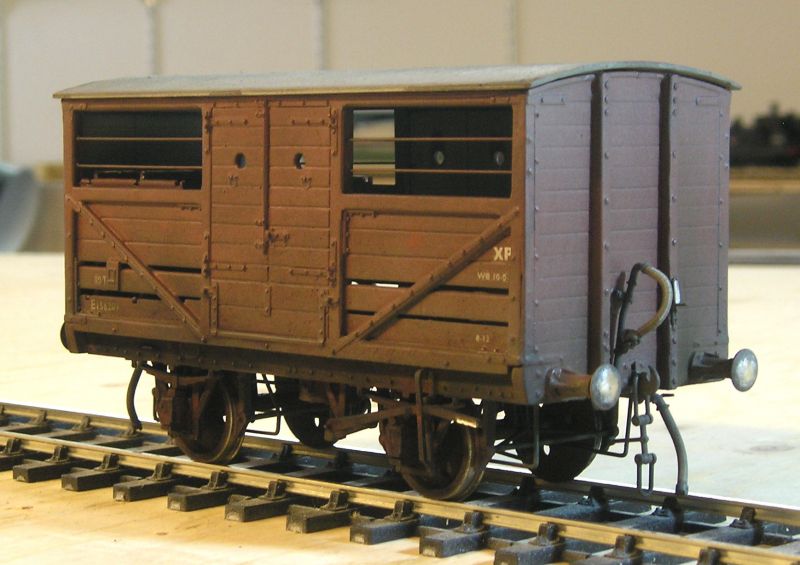
BR Standard Planked Van, clasp brake variant, Slaters

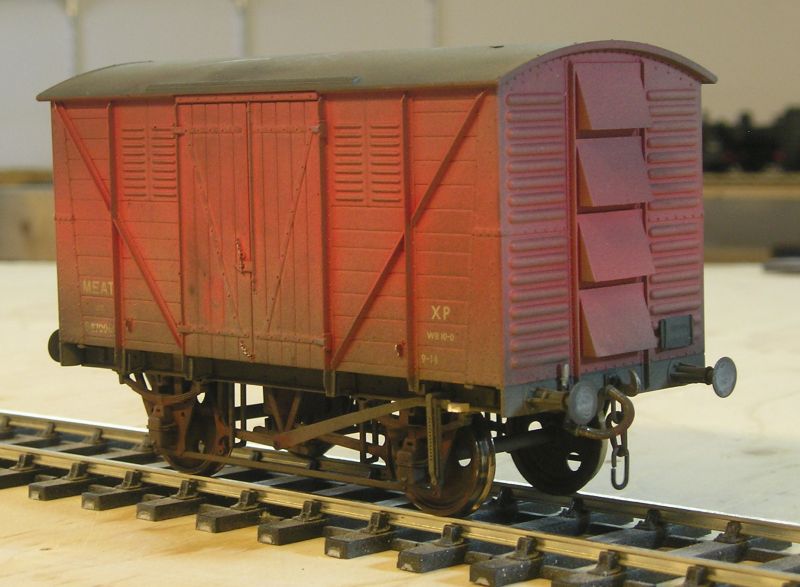
BR Meat Van, Dapol
I replaced the rigid plastic vac hose with a flexible vac pipe/hose set from Slaters. The set includes lamp brackets and a buffer beam receptacle for the vac hose QR connector. I also added the chalk plate. Notice the lamp bracket is white.
John
Last edit: by Brossard
John
Posted
Full Member

The handrails were painstaking but not especially difficult. Holes were pre etched so that helped hugely.
I used bending bars (ie a large straight file and C clamps) for the solebar and steps.
The fun and games will begin when I try to build the correct brake gear. The kit is a tad sparse in that area. Happily I've done these before on Parkside kits.
John
John
Posted
Full Member
John
John
Posted
Full Member
Now with wheels installed. I preprimed these and wrapped tape around the tyres.
I've installed sub floors and soldered the hangers.
At right side you can see the gubbins I made for actuating the brakes from the hand wheel. It should get clearer as I proceed.
Yes, I soldered the axle guards using 70C solder, ordinary non acid flux and my regular iron. I don't hold with anemic 25W irons for this job, lots of heat and in and out quick sharp.
John
John
1 guest and 0 members have just viewed this.