Johns 7mm Wagon Workbench
Posted

Full Member
Any ideas on making the roof removable? I would thing crossed 0.5mm NS wire at the front and rear. I have two concerns:
1) In an absent moment someone could pick up the van by the roof and it may fall and
2) The veranda end wouldn't be secured. The end framing is pretty fragile by itself which is why I left the sprue for now.
John
John

Posted

Full Member
I have seen small rare earth magnet and tinplate angle used to good effect to hold van roofs on but I can't say that I have done it myself yet - it's on the list to try at some point.
 Last edit: by Rob Pulham
Regards Rob
Posted
Full Member
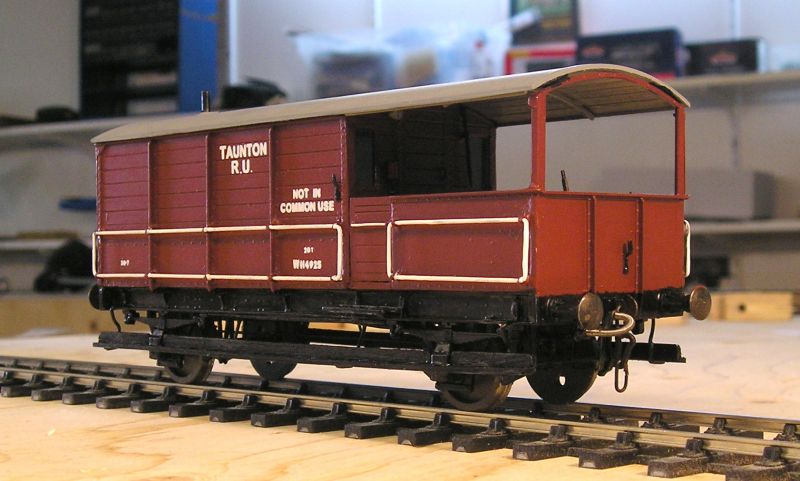
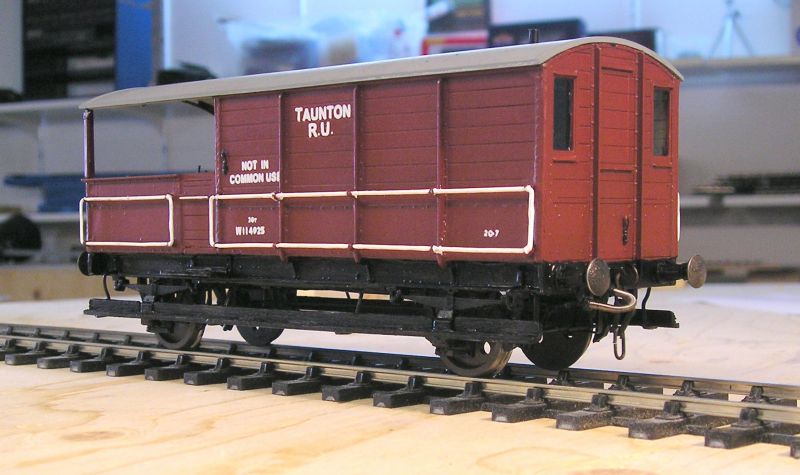
In other news, I applied transfers to the cattle wagon today.

After giving the transfers some time to dry, I sprayed on Dullcote.
Slaters provide a sheet of transfers but only for the grouping era. I had to cobble together what I needed from my Fox collection.
John
John
Posted

Site staff
Ron
NCE DCC ; 00 scale UK outline.
NCE DCC ; 00 scale UK outline.
Posted

Full Member
Now that really does look the part.
Nigel
©Nigel C. Phillips
Posted
Full Member
John
John
Posted
Full Member
Looking around a thread on the Hornby AA15 model, I found several pictures that seemed to depict the thing I was after.
Here's what I've done:
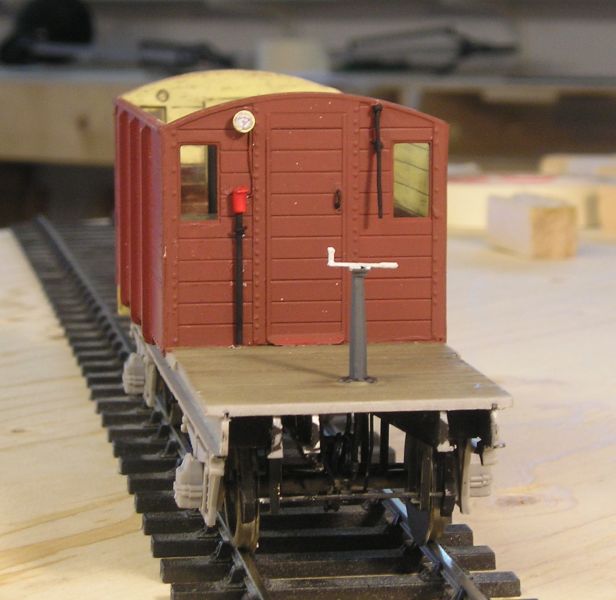
The pipe is teed into the vacuum pipe under the van. I don't know exactly what the red thing does, I assume it's a valve, possibly called a "setter".
I also added a vacuum gauge made from a slice of brass tube and plastic rod. I have Roche's book of locomotive drawings and in it, there are drawings of gauges. I scaled down a pressure gauge and used that. Note the fine wire from the gauge to the valve.
I also added the sandbox lever and brake standard.
John
John
Posted
Full Member
The real thing had 3/4" dia rails which scales to 0.44 mm. I used 0.5mm NS because it is harder than brass and stays straight.
I found the template on the instruction sheet to be too short - after wasting a load of wire I made a gauge from plastic card for the length.
The verticals were still problematic since they need to be identical. I offered up the long handrail to the short one to get these the same length in the end.
Of course, the brackets have to be threaded on before adding a touch of solder to the open ends. I ended up using 188C solder because it's stronger than 145C.
The corner brackets are intended to fit into slots in the body. Trial fitting with a gauge that spaces the wire 1.5mm from the body I found these to be too short to comfortably secure everything. I made new corner brackets from brass that are 2mm longer. I also had to fettle the slots in the body so that the brackets went in easily.
The guards door handle is spaced 1mm.
I finally got things fitted but it was still a fiddle. I find that CA is a better glue for jobs like this than solvent. It seems to set harder.
Handrails were primed and the painted bauxite. This is still pretty rough. I need to paint the rails white yet, I'll leave that for later when I no longer have to handle it so much.
I added lamp brackets today. These are Slaters lost wax. One went "ping" to Lord knows where so I made one from brass strip. Plastic brackets are supplied but are intended to be butt joined to the body. This is inadequate to me and they must be pinned for strength (as Slaters are). I tried to drill the plastic bracket but they're too narrow.
I've also started the steps. You can see hangers for the guards door. Also the end hangers. These are attached with CA.
I still need to add hangers in the center (where the white tabs are). The plastic hangers supplied are supposed to fit in holes in the sub floor but were too large. When I tried modifying one, it broke. I bent some brass angle to shape. In order for these to fit snugly I blanked off the holes and will re drill.
John
John
Posted
Full Member
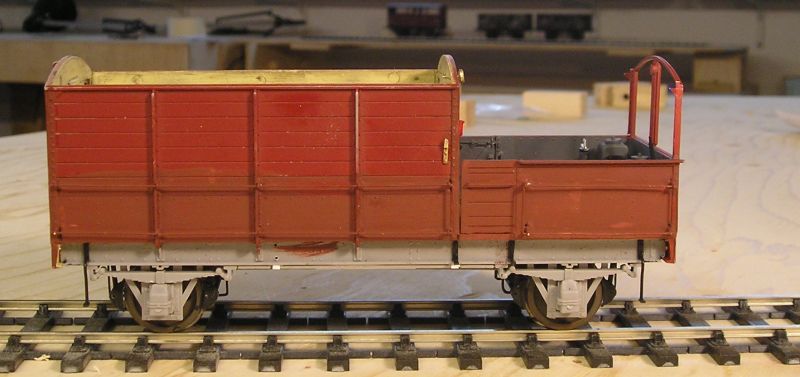
Soooo…I did it again. I used nominally 0.032" (0.8mm) wire which, oddly enough, measure to be 0.6mm. This is pretty much exactly what I was after.

The bodywork has taken a beating but paint covers a multitude of sins.
I've completed the build now. The plastic step hangers were, as I feared, useless, but I wanted to give them a chance. One of them snapped off when I lightly touched it during handling. I made the outer hangers from wire, shaped to replicate the plastic hangers. They're not perfect but I think they look the part and they won't break.
The central hangers are made from brass angle bent to shape.
The guards step hangers are brass strip, drilled and 0.5mm NS wire soldered in. This looks a bit like bolts.
I also replaced the wimbly 0.5mm (which is actually 0.25mm) guards door handle with 0.020" wire (actually 0.43mm).
You can see I installed the buffers and instanter couplings. I also added the vacuum pipe.
The roof is only on loosely, I'm wondering what to do with it - glue it on or leave it removable somehow.
John
John
Posted
Full Member
While that is going on I decided to make a start on my MMP Dia 1/109 Steel Mineral Wagon.
Immediately after nationalization BR realized that there was a serious requirement for a massive investment in mineral wagons. These would replace the aging and decrepit ex PO wagons and expand the fleet to cater for increased demand for coal (seems strange to be talking about demand for coal in 2017).
Anyway, about 250,000 steel wagons were built through the 1950s. Most were welded (Dia 1/108 which I have yet to build) but around 10% were riveted, Dia. 1/109.
I made good progress with assembly today (I pressed out what seemed like a million rivets a while ago):
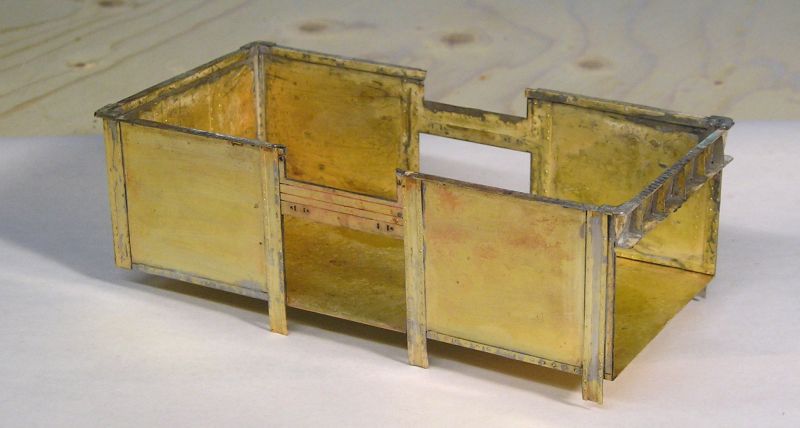
There are lots of overlays with rivet detail on the interior. These are very thin sheets of brass sweated to the body, as are the stanchion back plates.
Lots of cleanup to do.
I killed my variable temp. soldering iron bit today. I bought a cheap iron from my LHS on the recommendation of the owner who is an avid builder of brass kits. However, as I feared, it lasted about 10 minutes before the bit turned black with oxidization. Plan C was to break out my Weller stand alone iron with a new bit - much much better. Moral is to spend a few bucks on a good iron, buying a cheapie will result in disappointment and could be why so many people complain about being unable to solder.
John
John
Posted
Full Member
Hi John,
The roof is only on loosely, I'm wondering what to do with it - glue it on or leave it removable somehow.
John
Neodymium magnets on each end of the roof, bits of steel on the body shell. All inside of course.
Nigel
©Nigel C. Phillips
Posted
Full Member
John
John
Posted
Full Member

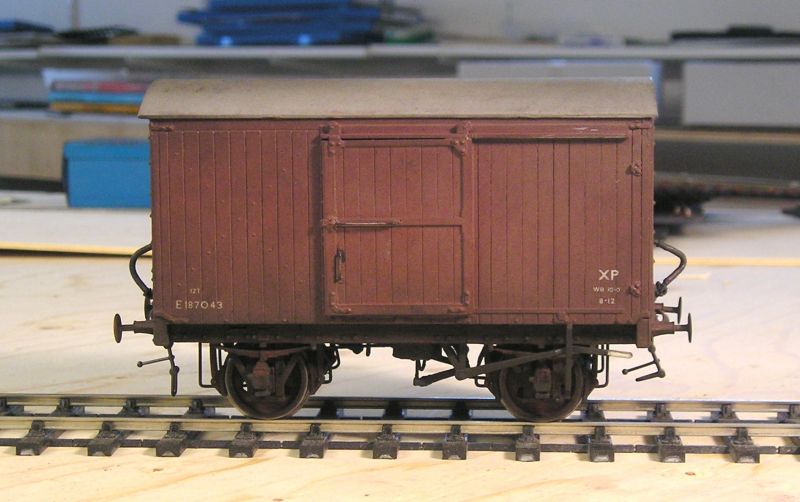
It took me all day yesterday to do the side doors. I attached the end door today and stuck on the WM framing with CA. I also removed the floor and fettled to ensure that the Peco floor is a good fit.
These are obviously weel researched and, as far as I can tell (not having a lot of knowledge of the prototype) accurate. Thing is, from my point of view, all this work doesn't add a whole lot more value than the moulded plastic Parkside kit that I built earlier. The only issue is that I don't know of any other kitmaker that does steel mineral wagons, so if you want variety, it's MMP.
John
Edit: well I am quite wrong about steel mineral wagon variety. Peco do a couple of kits of steel wagons. Parkside do the 1/108 kit that I built as LMS dia 2134 and also the ex SNCF cupboard door version. Dapol, ex Lionheart do both 1/108 and 1/109 RTR models. :hmm
Last edit: by Brossard
John
Posted
Full Member
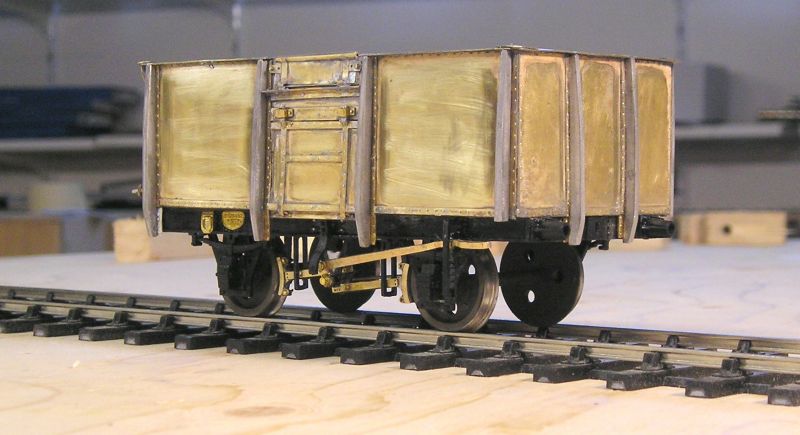
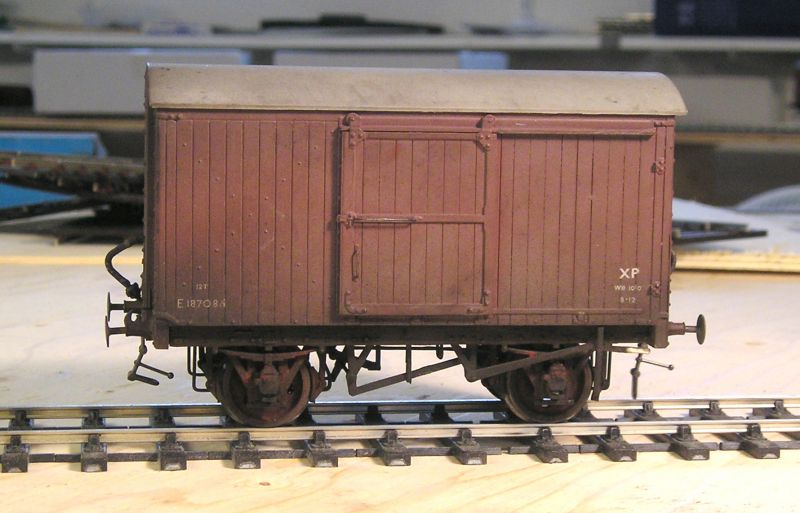
The chassis turned into quite a puzzle as I worked how the brakes are arranged. The Peco chassis assumes independent brake shoes both sides since the 1/108 and others have drop doors in the floor. This wagon doesn't have bottom doors and the brake shoes are only on one side. The brake shoe side is of a Morton type and you can see the clutch in the middle. The brakes supplied were backwards so I had to reverse them. Happily, I was able to use components from the MMP chassis to detail them.

The opposite side showing the lever. These were taken from the MMP kit since the Peco levers were of the wrong type. Note the cross shaft.
This will probably hit the paint shop tomorrow, same process as the previous two.
John
John
Posted

Inactive Member
Max
Port Elderley
Port Elderley
Posted
Full Member
John
John
Posted
Full Member
I've attached the roof temporarily with black tack. It isn't enough to get the roof at the veranda framing seated.

John
John
Posted
Full Member
I know that they take time to put together but I do like the MMP wagon. I am sure that it will be very robust in service too.
Regards Rob
Posted
Full Member
I note that Peco/Lionheart have these in RTR form. There's no obvious interior rivet detail on their 1/109 though. However, MMP sell interiors.
Anyway, I think I have enough minerals, 3 ex PO and 4 steel (all different).
John
John
Posted
Full Member
LNER 12T goods van.
John
John
1 guest and 0 members have just viewed this.