Johns 7mm Wagon Workbench
Posted

Full Member
Regards Rob

Posted

Full Member
John
John
Posted
Full Member
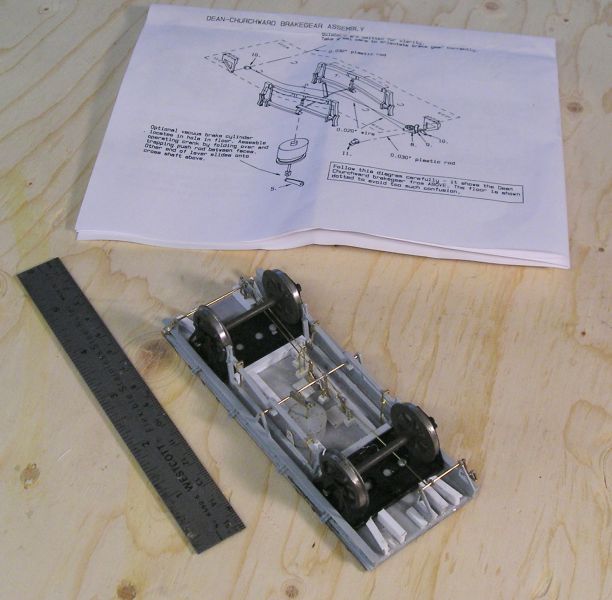
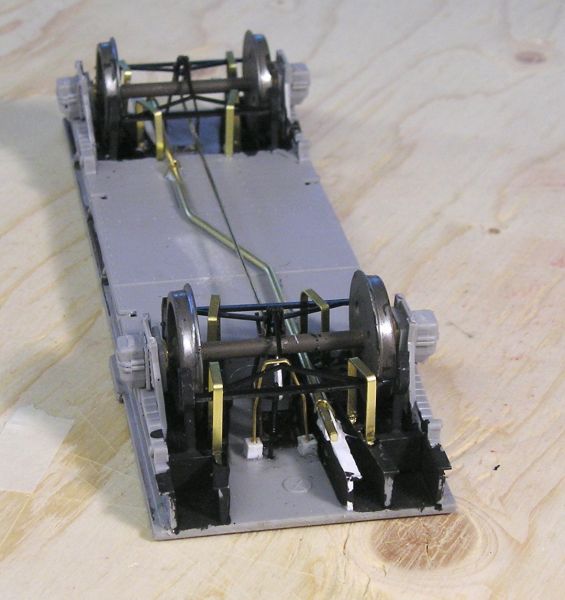
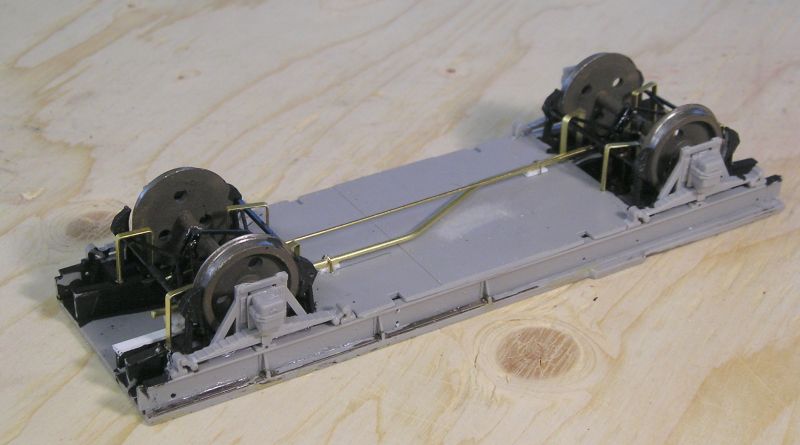
Theh instructions were very frustrating because they are drawn as iff the floor is glass and looking down. No-one (well I sure don't) builds an underframe like that. I made a number of errors as my brain tried to turn the drawing upside down.
In any event, the brake arrangement shown is simplified. I have collected quite a bit of info and discovered that:
a) the W5 cattle wagon had several brake variations. These include:
- non Hayward, vacuum fitted, 4 shoes
- Hayward, vacuum fitted, 4 shoe (this is the version I attempted to make)
- Clasp brake version, vacuum fitted, 8 shoes, DCII
- Clasp brake version, vacuum fitted, 8 shoes, DCIII
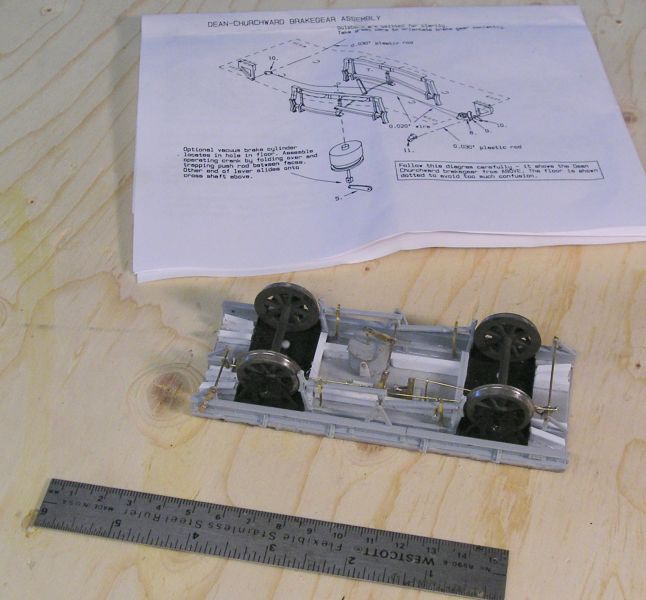
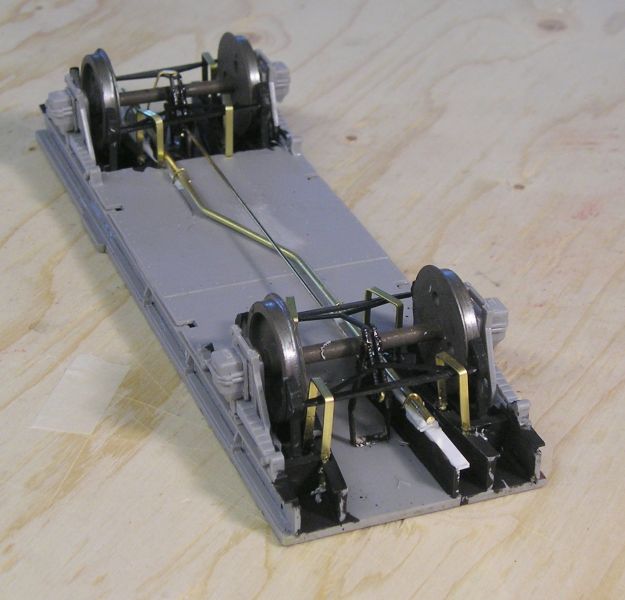
The kit is wrong as follows:
1) the left most vee hangers should be spaced a scale 28", shorter than those on the right.
2) no subframing, I added this but I'm not sure of the accuracy.
3) I added trunnions to the vacuum cylinder as well as a representation of bolts.
4) For manual brake actuation there is an intermediate slotted link between the main lever and the ratchet on the right. This can be seen in the middle of the underframe. It took me about an hour to make the link itself.
5) The link from the leftmost lever to the rightmost has an intermediate support.
Here are a couple of close ups:
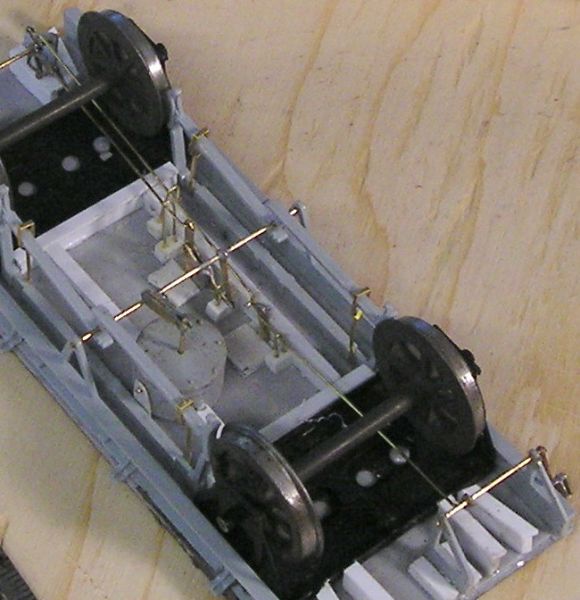
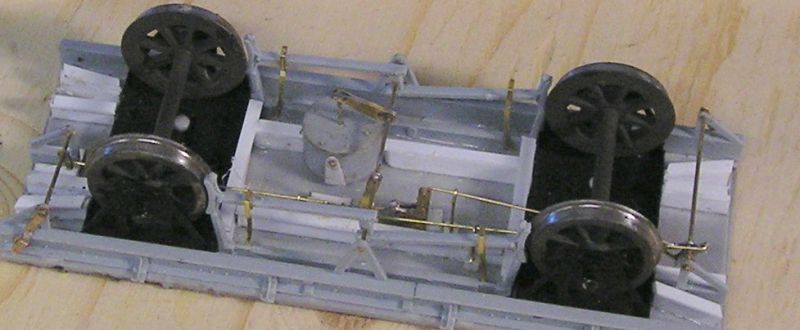
I found this to be very useful:
DC 2 brakegear as fitted to 4w wagons - GWR Rolling Stock: model and prototype - RMweb
There are a lot of underframe shots showing some of the details I mentioned.
John
John
Posted
Full Member
One is mine and the other five I am building for a friend. He wants his to scale 7 with quite a few mods and I need to be in the right frame of mind to tackle them..
Regards Rob
Posted
Full Member
GWR brake rigging seems to me to be a minefield.
I have a very good PDF, given to me by a kind soul on RMWeb, with excellent details of brakes for all manner of GWR wagons. Email?
John
John
Posted
Full Member
So:

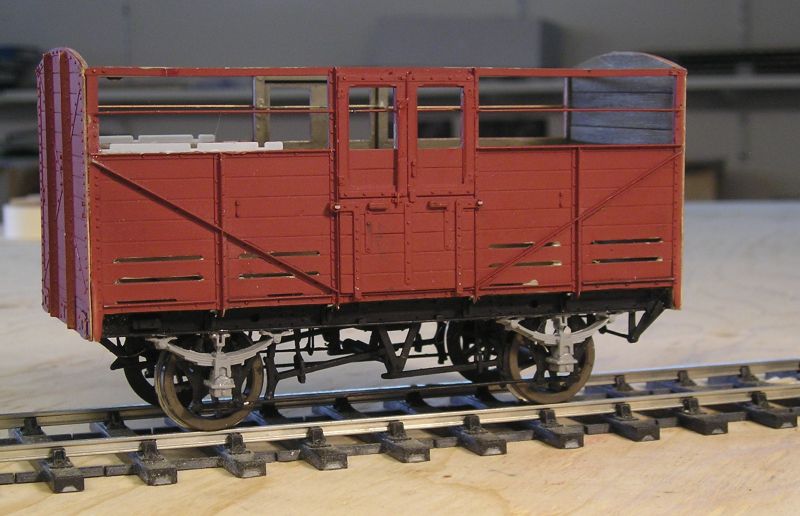
I scribed the interior planks and used coarse sandpaper to give them some grain effect. I started with Tamiya Panel Lining paint (very thin enamel wash). Having let that dry, today I applied umber and black powder to get a grungy effect.
John
John
Posted
Full Member

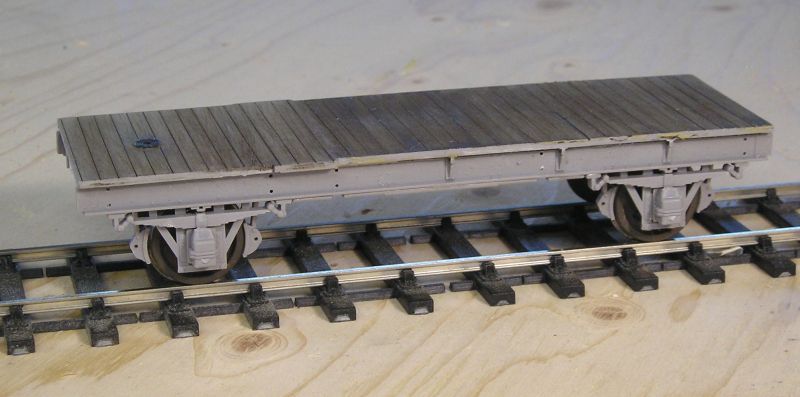
I still need to install the springs and axleboxes.
John
John
Posted
Full Member
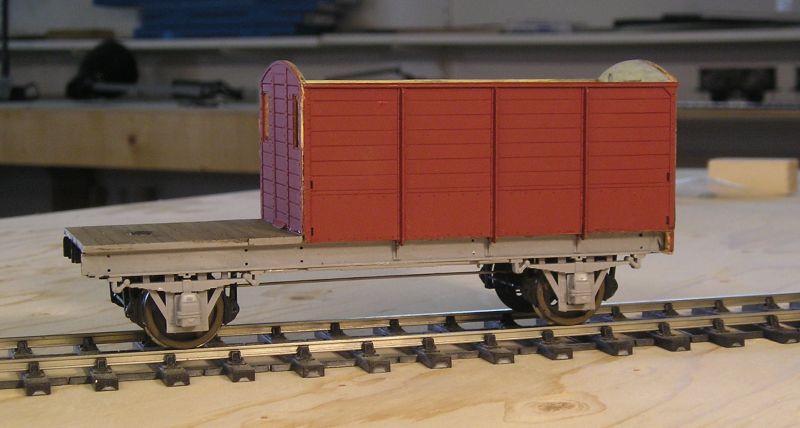
The body assembly went well and fit is good. I added the partition support.
I also fitted axleboxes and springs. Care is needed to ensure that the rocking axle is free to move.
John
John
Posted
Full Member
I was amazed to find a plethora of pictures by googling "GWR toad interior".
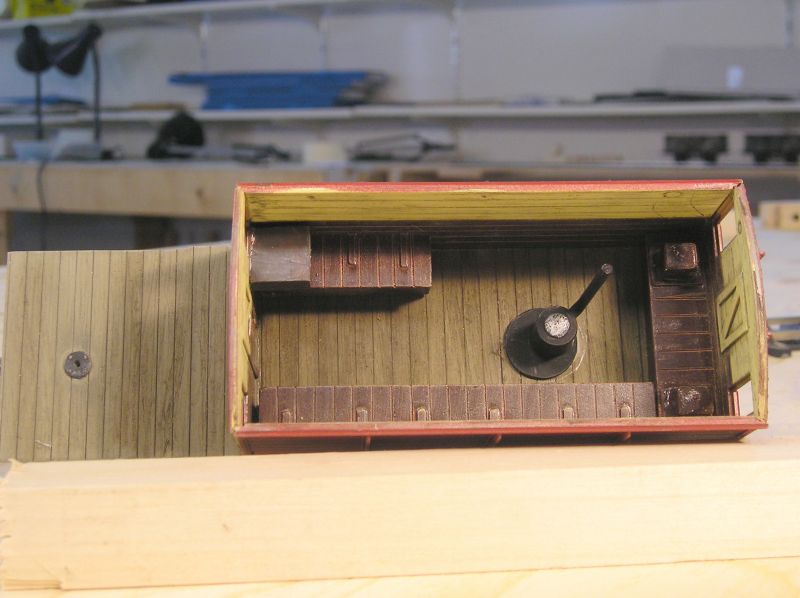
I spent a lot of time on the interior:
Planks were scribed, benches made, door and hatch detailed with some strip. The stove is made from bits and pieces of plastic and some brass tube.
Obviously you don't have to do this but I like to make my builds unique. Besides I quite like the challenge.
The veranda floor had planks moulded but the van floor was plain so I scribed planks. Usual method to get the wood effect.
John
John
Posted

Full Member
Very interested in both of these builds as they are both represented on NE. Kept it coming.
Marty
Posted
Full Member
John
John
Posted
Full Member

Regards Rob
Posted
Full Member
John
John
Posted
Full Member
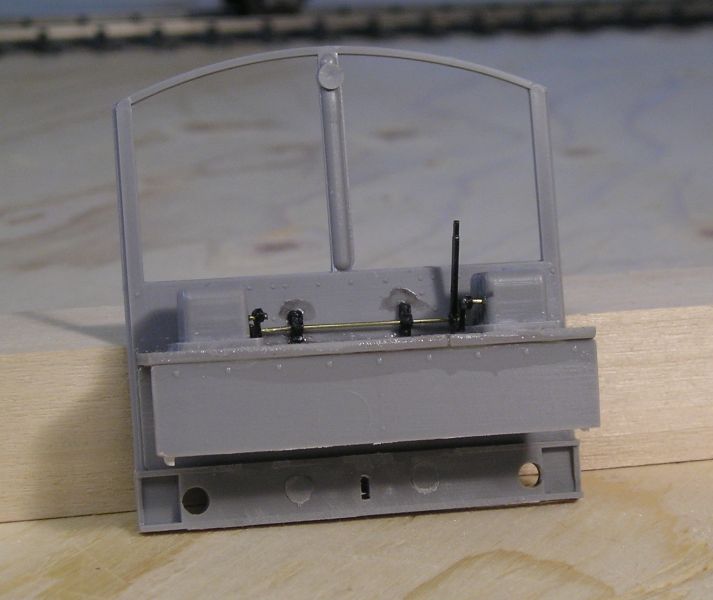
This is the veranda end. There's a screw actuator that operates the brakes. Note the safety loops around the yokes. There's also a safety loop around the screw actuator.
Here you see the brake rod. Also note the vacuum pipe. I reckon BR would have added these (and pictures that I've seen bear this out) to make the van suitable for use on vacuum braked trains. By the 60s the goods wagon fleet was being rapidly changed to vacuum braked.
This is the van end.
John
John
Posted
Full Member
However, when it was dry, I took a fiberglass pencil and lightly brushed with the grain of the planks. The intention was to remove the existing paint so as to not have a too thick coat of paint on the sides.
Instead, I got a very good effect as the brown pigment from the lining paint got worked into the grain.
Viola!

I think it all looks suitably scruffy. Note the desk on the door end. The boxes on the hatch end are sanding boxes. There is a similar arrangement at the veranda end.
John
 Last edit: by Brossard
John
Posted
Full Member

Looking quite smart in ex works gloss varnish. Now ready for transfers.
Screw link couplings are Dapol. Vacuum pipe and lamp brackets are Slaters.
John
John
Posted
Full Member
I do like happy accidents they enhance the pleasure of the build.
Regards Rob
Posted
Full Member
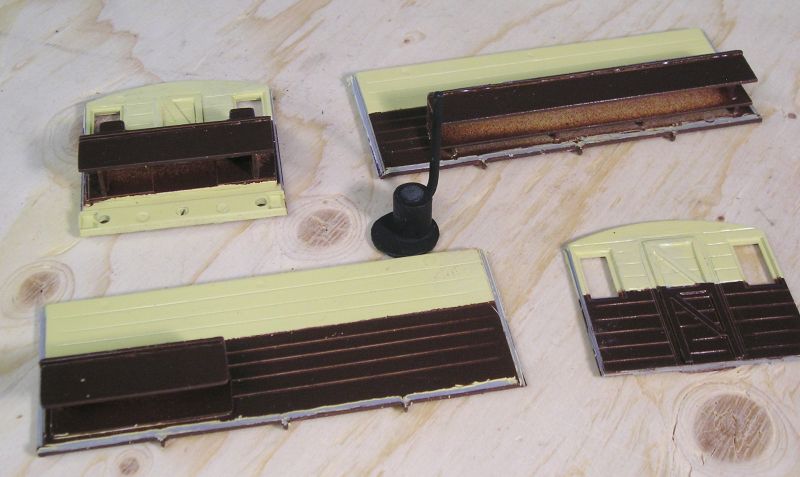
I've built the main cabin onto the chassis:
The parts are a very good fit.
I'm very pleased with the interior:
I've also been working on the veranda:
Sandbox operating lever.
John
John
Posted
Full Member
Marty
Posted
Full Member
Does all that come with the kit for the veranda detail or have you added it yourself?
Regards Rob
1 guest and 0 members have just viewed this.