Johns 7mm Wagon Workbench
Posted

Full Member
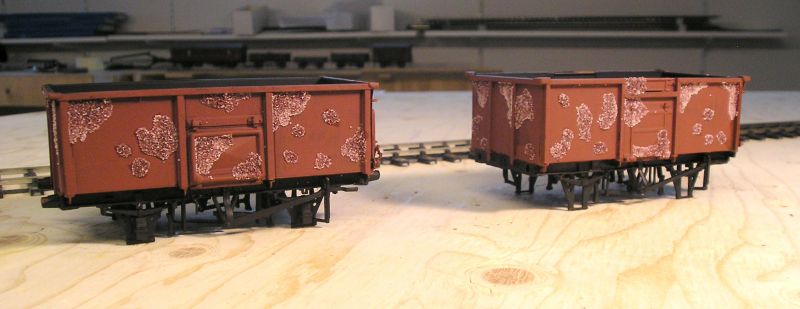
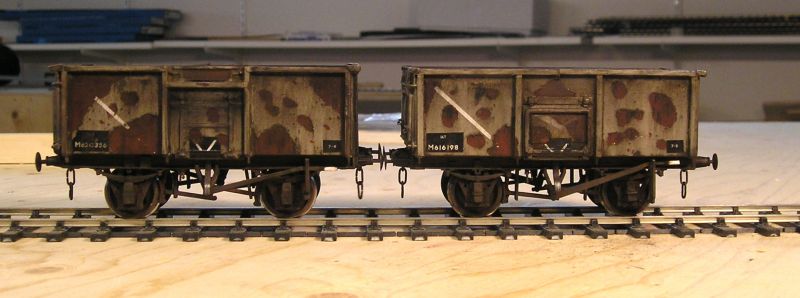
I sprayed the wagons black all over yesterday and today I painted the bodies rust.
I was going to use Maskol but the bottle I have is I don't know how many years old and was unusable.
I recalled something I'd seen from the AFV modellers. The overall rust coat is acrylic. I repainted patches of rust (Humbrol red brown I think) and while wet, sprinkled salt on it as you can see.
This may go all pear shaped before I'm done.
The next step will be to apply grey paint and transfers. When all is dry, I should be able to knock off the salt which will look like peeling paint with rust underneath. Fingers crossed.
John
John

Posted

Inactive Member
Max
Port Elderley
Port Elderley
Posted
Legacy Member
Allan.
Posted

Full Member

Regards Rob
Posted
Full Member
John
John
Posted
Full Member
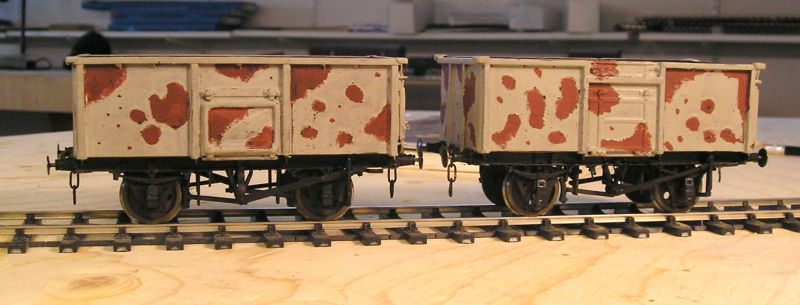
I'm far from finished and final weathering should blend things together.
…and now for something completely different.
While waiting for paint to dry I decided to make a start on the Slaters GWR 18' 6" Cattle Truck.
The kit will make either a Diag. W1 with standard manual handbrake or W5 with Dean Churchward vacuum fitted brakes. I will do the latter since I have photos of these in the early BR era. W5 trucks were built between 1902 and 1911 with a total of 575.

There isn't a whole lot to do on the body beyond fitting wires and door catch.
The interior is painted using rattle can paint from the DIY store, nothing fancy. Exterior has been primed. The final colour is going to be bauxite.
I painted the floor concrete which looks to my eye a lot like natural wood. I'll apply some weathering powder to give it a worn look.
I used 0.040' x 0.040" plastic strip for the roof battens. Nothing was included in the kit.
John
John
Posted
Legacy Member
I know what you mean, John. It happens to me on occasion !…They actually look like what I intended. Pics soon.
John
Allan
Posted
Full Member
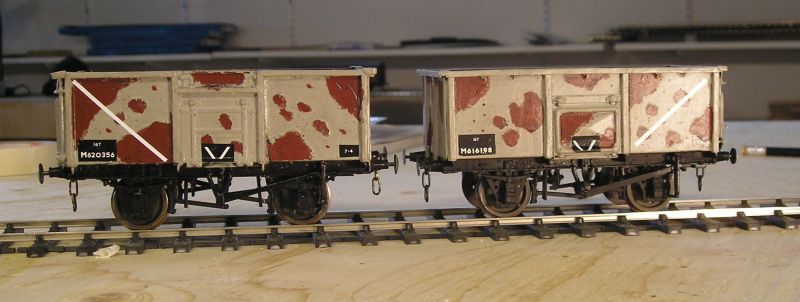
The wagon number was assembled digit by digit, very stressful.
Still a ways to go.
John
John
Posted
Full Member
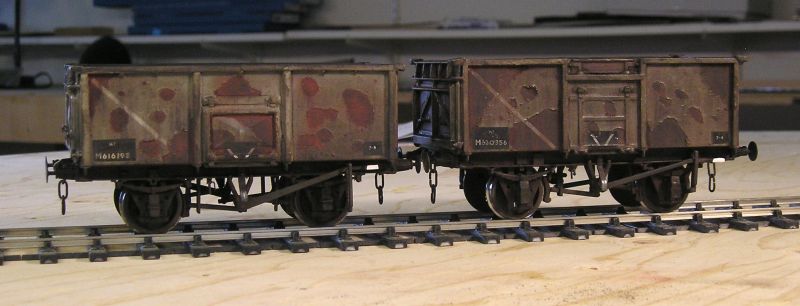
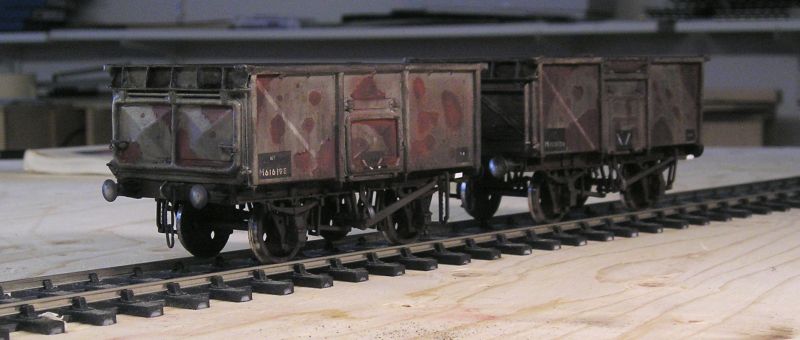
It's all about layering really. The key to the effect is, of course the peeling paint.
The wagon on the right got an extra layer of black powder. The one on the left left with more rust coloured patches.
I think I prefer the one on the right.
Opinions?
John
John
Posted
Legacy Member
I'm sure there's a lot more to it than just 'splashing about', John.So, I've been splashing powder on the minerals and got this:
It's all about layering really. The key to the effect is, of course the peeling paint.
The wagon on the right got an extra layer of black powder. The one on the left left with more rust coloured patches.
I think I prefer the one on the right.
Opinions?
John
Lovely work as always. I can't get enough of Brossard builds !
Allan
Posted
Inactive Member
I can't separate them.
Max
Port Elderley
Port Elderley
Posted
Full Member
That's not to say that there is anything wrong with the the other one though!
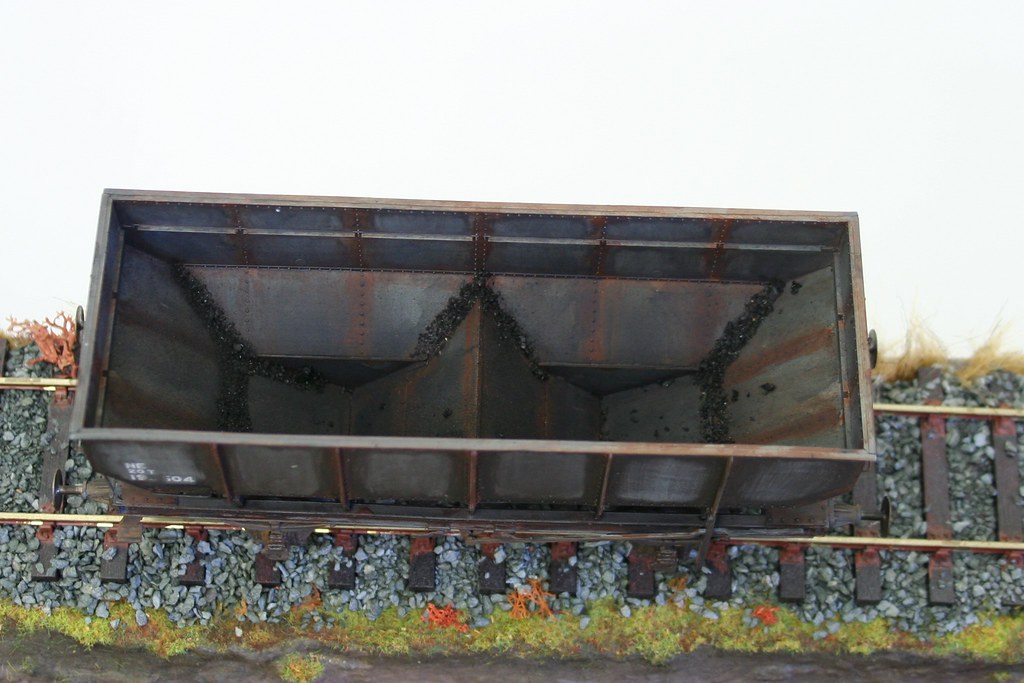
I haven' done any peeling paint with rust patches yet, despite thinking about it. The nearest I have come is this.

Apologies for the highjack John
Regards Rob
Posted
Full Member
I think the rust is perhaps too red on the left wagon, it should be dirtier.
John
John
Posted

Full Member
Does the water tank wagon filler cap need handling marks like the brake handles of the 3 plank wagon?
Cheers
Marty
Posted
Full Member
The white marks on the brake handles were to help shunters see them in the gloom of a yard at night, or so I believe.
John
John
Posted
Full Member
Hi John,Nice work, and done without powders I'm guessing.
Yes, all done with brush painted acrylics cut back with meths. Which I had at the time just discovered allows you to do the same sort of cutting back as a cotton bud and white spirit with enamels.
I have since discovered that IPA does the same. It's worth noting though, that both really need to be diluted with water a bit or they cut right back to the bare plastic if you are a bit over zealous - guess how I found that out :oops:
Regards Rob
Posted

Full Member
Those mineral wagons - bees knees. The only thing that jumped out at me were the diagonal stripes, should be whiter on the rust than on the faded paint, when presumably somebody came along with the paint pot and brush and slapped it on the rust (otherwise the stripes would have gone the way of the grey paint).
Nigel
©Nigel C. Phillips
Posted
Full Member
John
John
Posted
Full Member
John
John
Posted
Full Member
I think I'm a wee bit happier with them now.
John
John
1 guest and 0 members have just viewed this.