Johns 7mm Wagon Workbench
Posted

Full Member
As delivered the model has parts for Dean Churchward (DC) brake levers but brakes for the standard lever system. I know this now because of a discussion on RMWeb:
http://www.rmweb.co.uk/community/index.php?/topic/49132-dc01-brakes-after-1948/
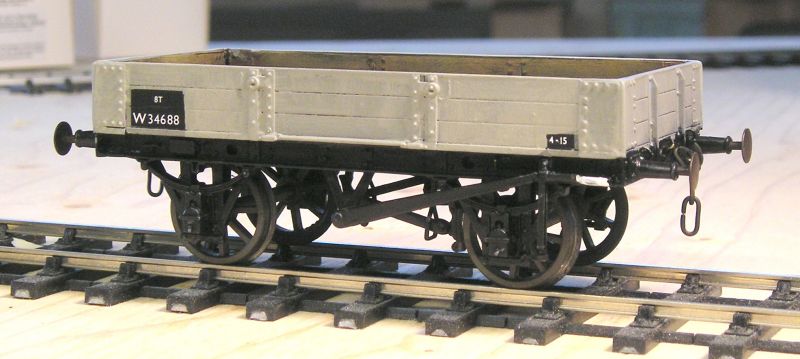
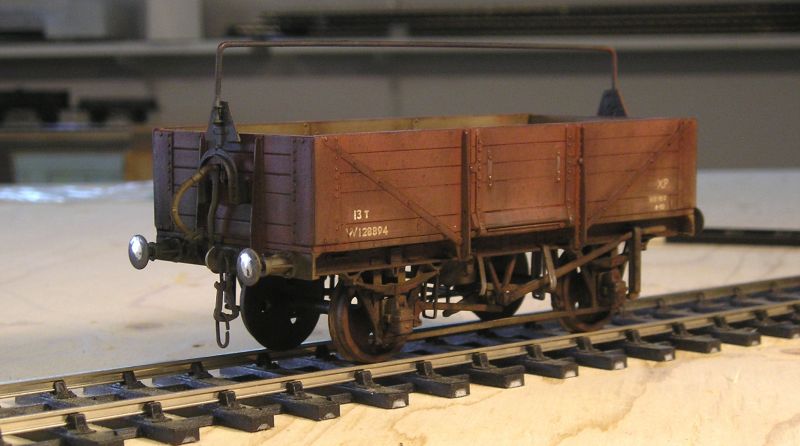
Only after I reworked the brakes for DC did I learn that these 3 planks had lever brakes :roll:
So, I spent a fair bit of time making new brakes from parts in my spares box.
The result:
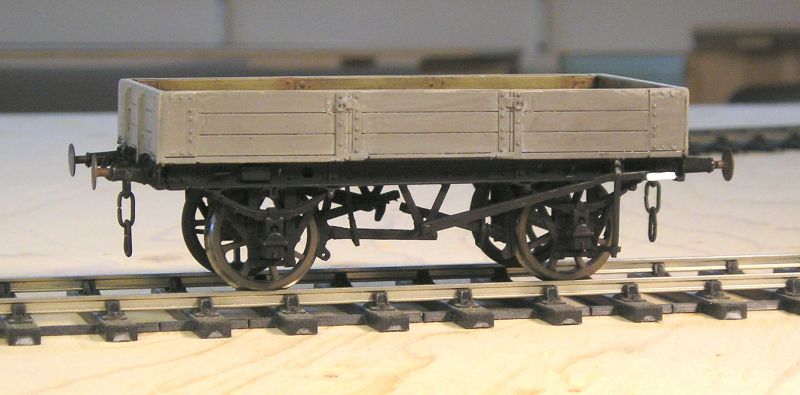
The kit comes with horrid solid buffers but I put on my hair shirt and modified them for springing - quite a learning experience. I had a set of Slaters buffers.
The couplings supplied are also quite dreadful so I used Parkside 3 links.
Safety loops are from 1mm phosphor broaze strip as are the brake handle guides. Levers are from my spares box.
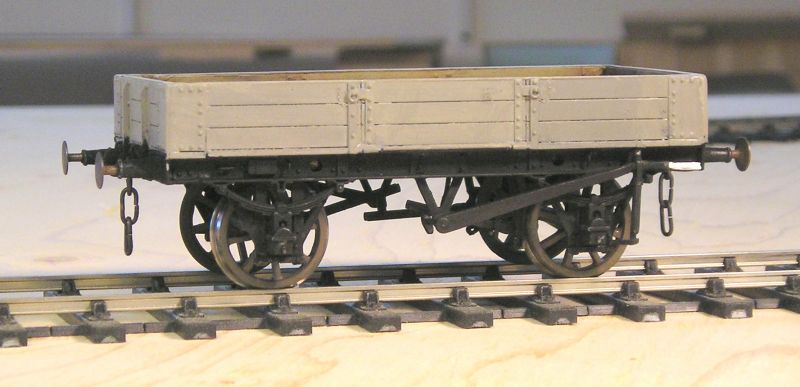
The prototype wagon was probably built at the turn of the last century and when built was fitted with brakes on one side.
In 1912 (I think) the Board of Trade mandated that wagons have brakes on both sides and I've built this to reflect compliance with that order. There's only one brake on this side and each side is independent.
Some good info here:
http://www.gwr.org.uk/nowagonbrakes.html
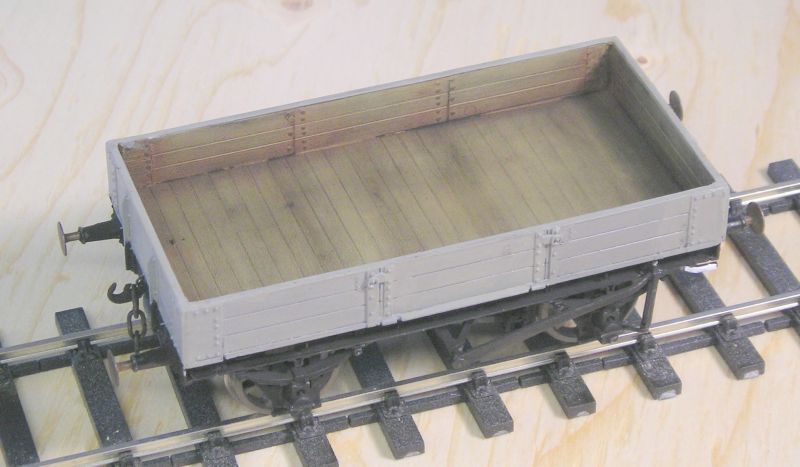
A shot to illustrate the interior weathering. The mouldings don't have bolt detail so I took an idea from Barry Norman and made them from blobs of PVA.
John
 Last edit: by Brossard
John

Posted
Full Member
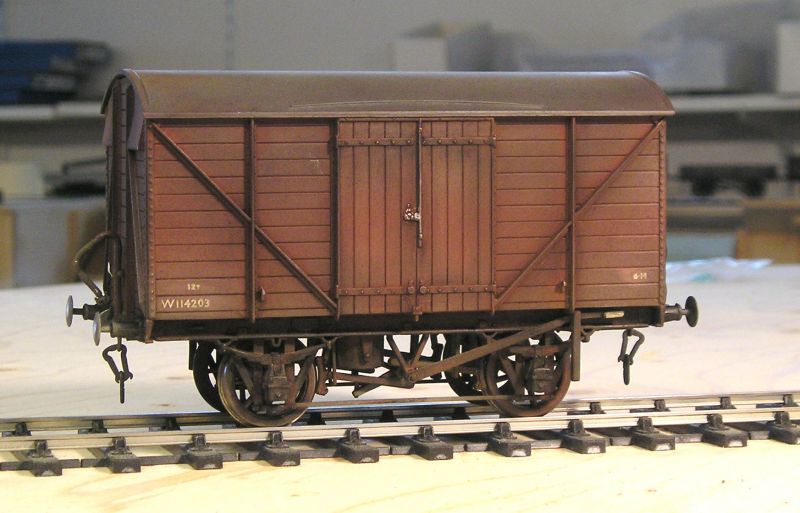
It's a Parkside kit of a Dia. V33 - 9' WB, unfitted. However, I felt that to be plausible for BR service in 1962 it had to be fitted. This meant conversion to V21. Even so we are in Rule 1 territory because 9' WB stock was ruthlessly culled in the early 60s.
Further discussion here:
Parkside PS24 GWR Goods Wagon, Dia V33 - 7mm+ modelling - RMweb

I used Slaters instanter couplings and GWR coach vacuum pipe.
Tie bar is 1mm phosphor bronze strip.
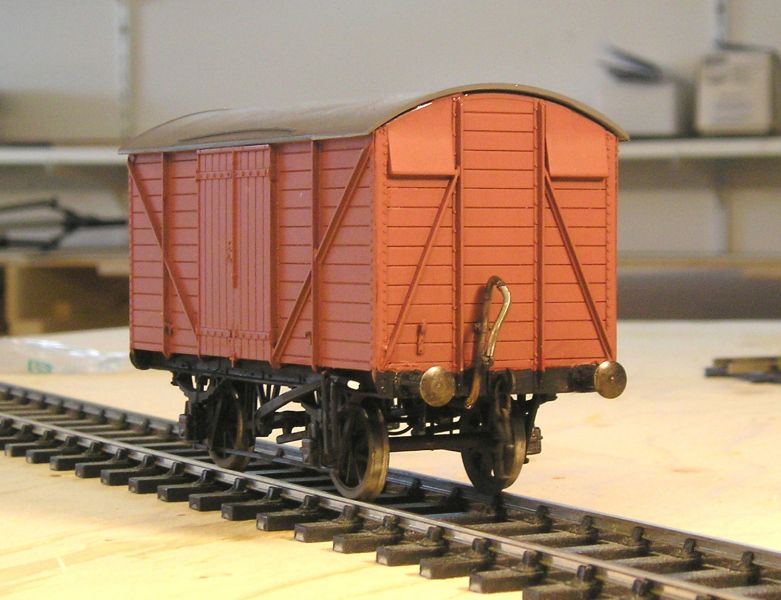
Lamp brackets, which would not be fitted to an unfitted vehicle, are Slaters.
John
John
Posted
Full Member
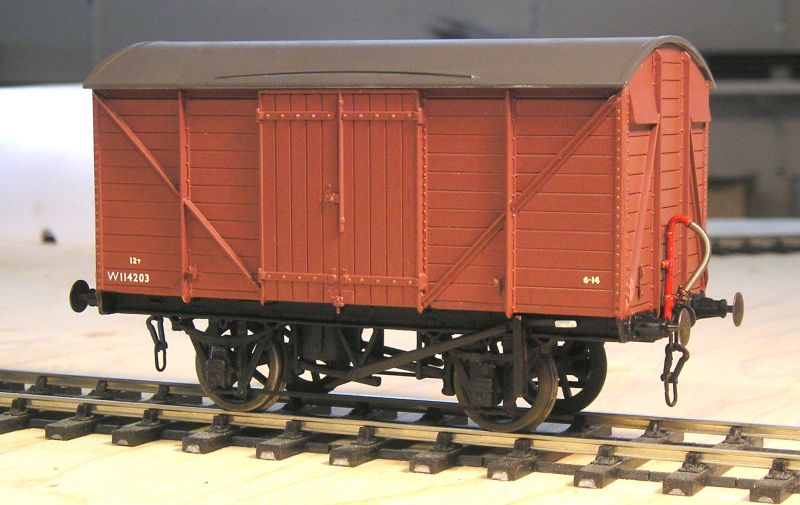
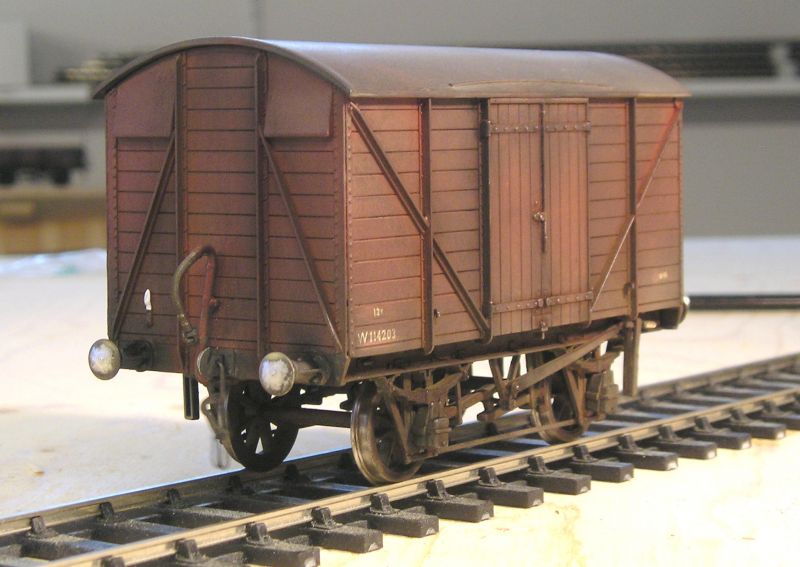
This is a shot from the cylinder side.
I had to make a composite number from individual numerals which was a PITA.
Vacuum braked stock was supposed to have red pipes and all the pictures I've seen had this. Through piped vehicles were supposed to have white pipes.
At least the Coopercraft instructions had some info on numbers and Tare. I used Fox transfers.
John
John
Posted
Legacy Member
A masterclass on how it should be done if ever there was and completely wasted on me !
Allan
Posted
Full Member
John
John
Posted
Legacy Member
This is how it ended up.
Allan

Posted
Full Member
Don't really know what to say.
John
John
Posted

Inactive Member
Just a touch, mind you.

Max
Port Elderley
Port Elderley
Posted
Legacy Member
Allan.
Posted
Full Member
Actually, I think you've been feeding it the wrong kind of mineral supplement!I gave up on a Slaters wagon, John, for much the same reason.
This is how it ended up.
Allan
Jeff
Posted
Full Member
Never one to surrender and recognizing the goal is to obtain a model of said wagon, I went for Plan B, which is a Peco Mineral Wagon chassis.
I've been working of the wagon and here's where I am:
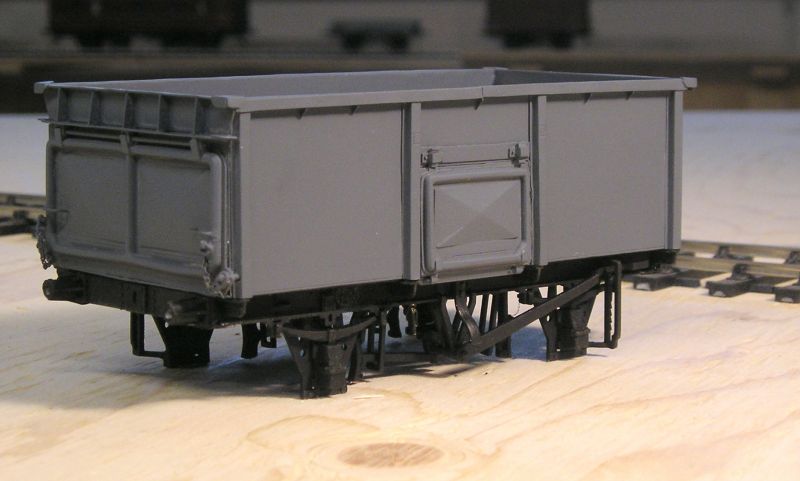
At least I was capable of soldering the body together. A fiddly job with laminations and individual gussets. I'm quite pleased with the result.
I'm also extremely happy with the Peco chassis. I made a few modifications to make it look more like the LMS wagon. Everything fit nicely and it is sprung by virtue of squidgy plastic springs.
It took me two hours this morning to remove the brass floor and fettle it so as to fit over the Peco floor. Must think about that for my next one.
These were built in 1947 in two lots totaling 2,599 examples. They had independent manual brakes on both sides.
I've also been building a Parkside mineral wagon. The model is supposed to be a BR Dia 1/108, but as the kits notes say, the kit can be made into a LMS Dia 2134 by making a few mods.

These were built in 1948 and 1949 with 3,500 constructed. Again, they had independent manual brakes.
I've been reading Martyn Welch's The Art of Weathering and will try his method.
Next step is an overall coat of spray matte black, followed by a coat of brushed on rust. Then, you dab on blobs of Maskol, let that dry and brush paint the wagon grey. Next you tweeze of the Maskol to reveal patches of rust and peeling paint. We'll see how that works.
John
John
Posted

Full Member
I have diag 2109 myself that I bought by mistake by not paying attention on the old MMP website. I really ought to put it in the small ads because it's really too late for my era.
Regards Rob
Posted
Full Member
Thing is, the level of effort to produce the MMP body was pretty high, while the Parkside kit fell out of the box and went together like a breeze. There's not a lot to choose between the two.
John
John
Posted
Full Member
Anyway, I thought I'd have a go a weathering the 4 WR wagons that I recently finished. I've sprayed all 4 using my airbrush. I start with a light dusting of earth and follow with a light coat of black.
I have done the 3 plank though:

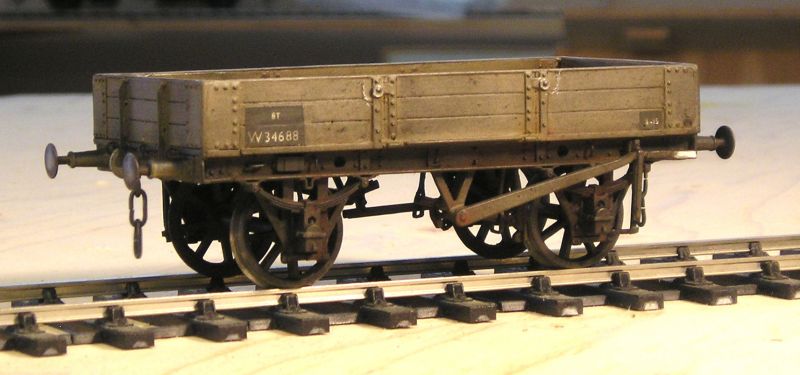
I think the weathering really brings to life. It didn't really thrill me when I took the earlier pictures but now I think it's super.
I use three powders; rust, umber and black and layer these.
I start with rust on the axleboxes, springs, brakes and solebar. I then follow up with umber in the same places but also on the metal fittings of the body. Finally I apply black to finish off. Powder is one of those things that you want to be careful not to use too much.
I used the fiberglass pen to polish the buffer heads and rub a bit of the weathering off the black patches (I reckon these would have got a clean now and then) carefully! I also rubbed the weathering off the brake handle, again this would have been kept cleanish.
I used a silver pencil to highlight the door pins.
Happy days! :chicken
John
John
Posted
Inactive Member
Max
Port Elderley
Port Elderley
Posted
Full Member
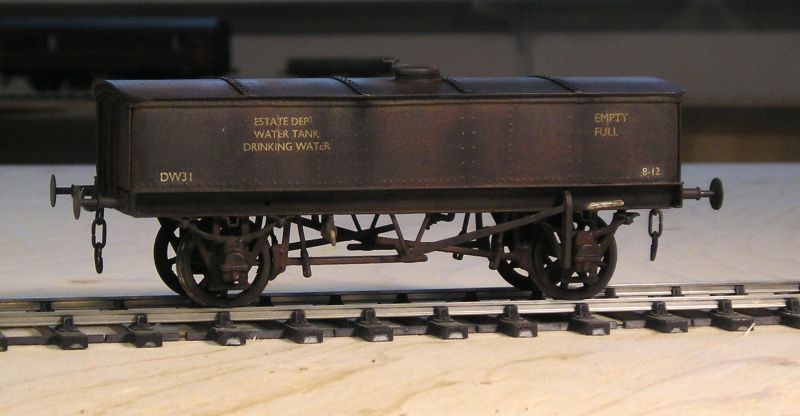

As the body was steel and it carried water, I gave it a rusty patina. The weathering has disguised the ropy lettering as I had hoped.
John
John
Posted
Inactive Member
Max
Port Elderley
Port Elderley
Posted
Legacy Member
But then would we expect anything else ?
Allan
Posted
Full Member
I forgot to polish the tyres - tsk.

John
John
Posted
Full Member
These are ready for delivery to their owner now.
John
John
1 guest and 0 members have just viewed this.