Johns 7mm Wagon Workbench
Posted

Inactive Member
Max
Port Elderley
Port Elderley

Posted

Full Member

I received a drawing from a kind member of RMWeb that enabled me to complete this.
Transfers next.
John
John
Posted

Full Member
Regards Rob
Posted
Full Member
John
John
Posted
Full Member
Well John, you certainly achieved what you set out to then. I would certainly be both pleased and proud of a result like that.to make the planks look different.
Regards Rob
Posted
Full Member
John
Posted
Full Member
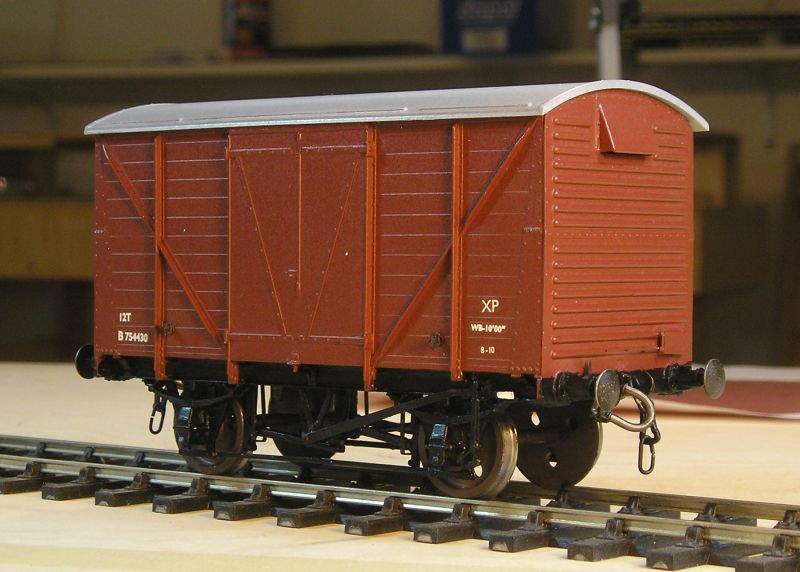
Here's the Conflat A (finally!):
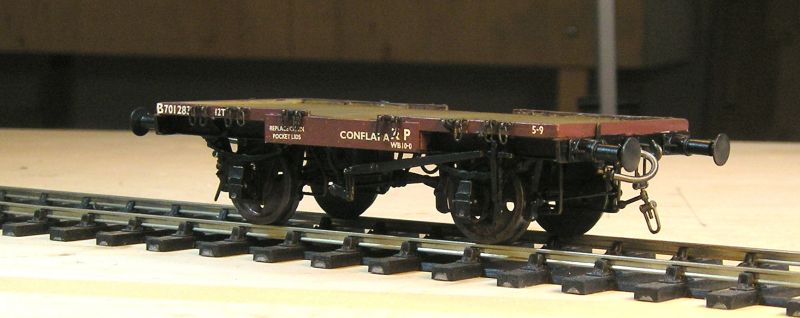
Fox transfers.
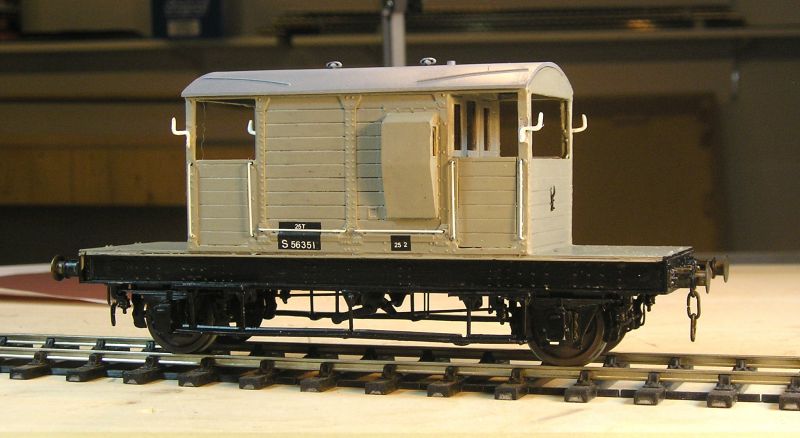
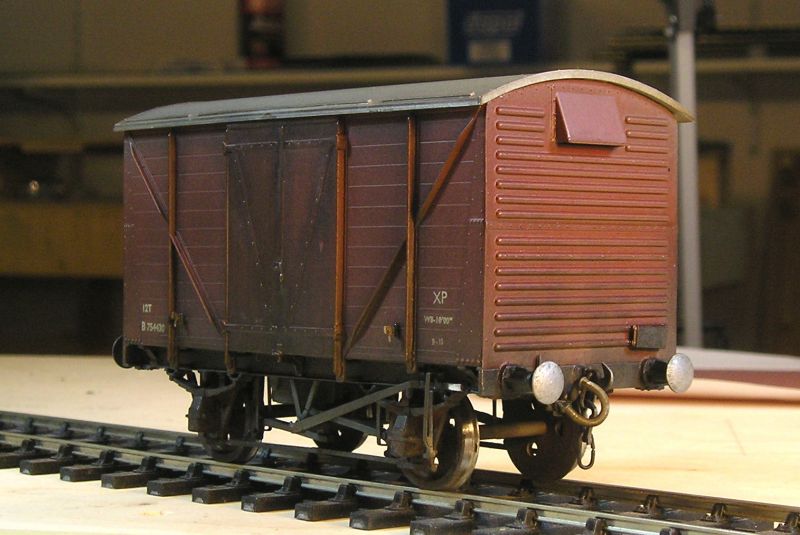
I've done the SR brake. Had to redo the tare marking today because I noticed that the original had gone ahoo. I also did the BR insulated van again. I didn't like my weathering and when I cleaned that up I took the transfers with it :roll:.
John
John
Posted
Full Member
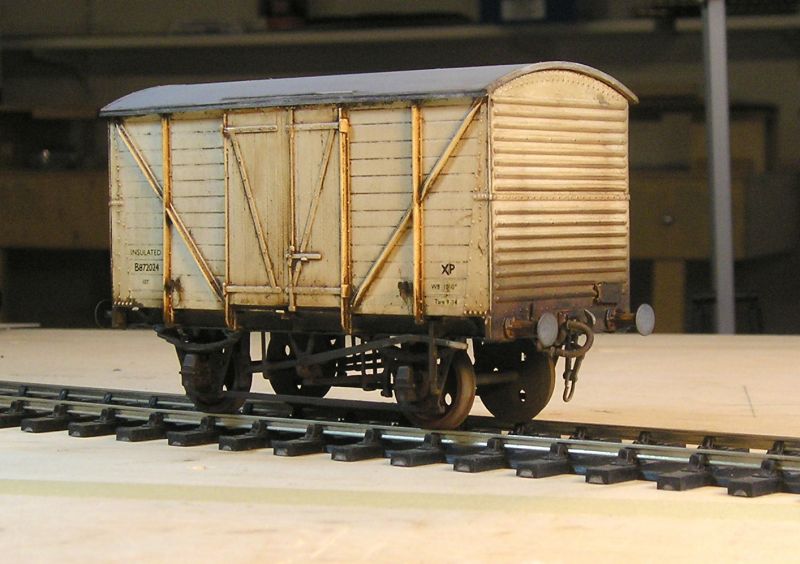
My previous attempt to weather this van produced something execrably filthy despite trying to keep the powder use to a minimum. I scrutinized pictures of vans and in no case were they all that filthy above the solbars. I used IPA to wash the old powder but in so doing wrecked the transfers. I redid these yesterday.
Today I tried something new, Tamiya Panel Line paint. It's a thin wash, brown in this case. I think the result is quite pleasing.
I need to give the tyres a polish.
John
John
Posted
Full Member
The corner post lamp brackets are bent NS scrap. I gave up on the plastic ones after breaking two. Center lamp brackets are Slaters cast brass, again plastic are supplied but I think they won't stand up in use.
Step hangers supplied were…you guessed it, plastic. Again I replaced these with brass wire assemblies that feel much stronger. If they do get knocked they'll bend rather than break.
John
John
Posted
Full Member
Decided to sort out my Lionheart BR van. These are very good models but can do with some titivating. I detailed the buffer beams:
From left to right:
- cast brass lamp bracket
- cast brass QR connector receptacle
- vacuum pipe
- coupling with instanter link
All these were sourced from Slaters.
Underneath I ran a pipe and connected the vac cylinder to the pipe.
I broke a tiebar and repaired it by gluing a strip of plastic to the back. I did the same with the other one.
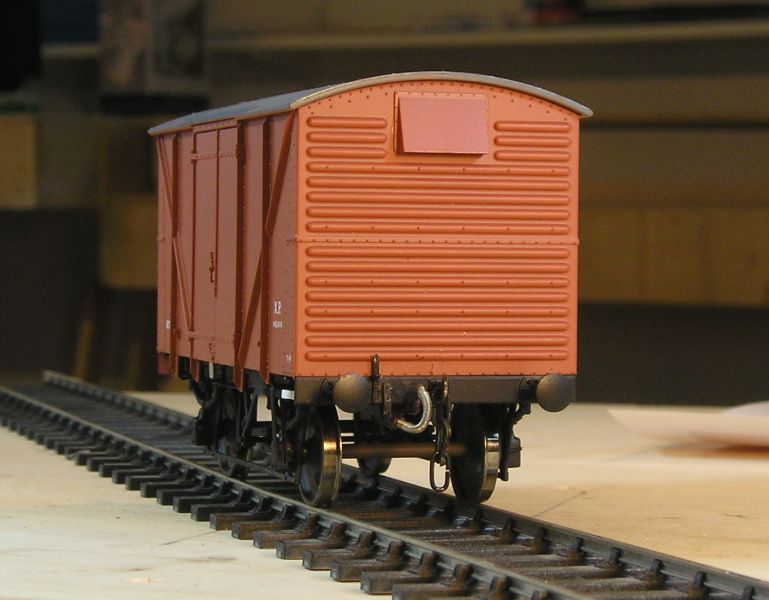
I also rolled out a completed Slaters BR standard van:
Nothing in particular to note. As the kit notes point out, the only thing standard about these is how non standard they were.
John
 Last edit: by Brossard
John
Posted
Full Member
I like the finish on the insulated van, it's very realistic.
I did a search on the Tamiya Panel Line paint and unless I can find some either post free or locally it works out at about £10 a bottle - Ouch! I have a brass kit for an Insix Fish van to build soon for sale, and I reckon that if I can get a finish similar to yours it will fly out of the door.
Regards Rob
Posted
Full Member
Tamiya 40ml Panel Line Accent Color Black # 87131
Funny how some products are priced at the same number in different currencies.
John
John
Posted
Legacy Member
Keep it coming.
Allan..
Posted
Full Member
John
John
Posted
Full Member
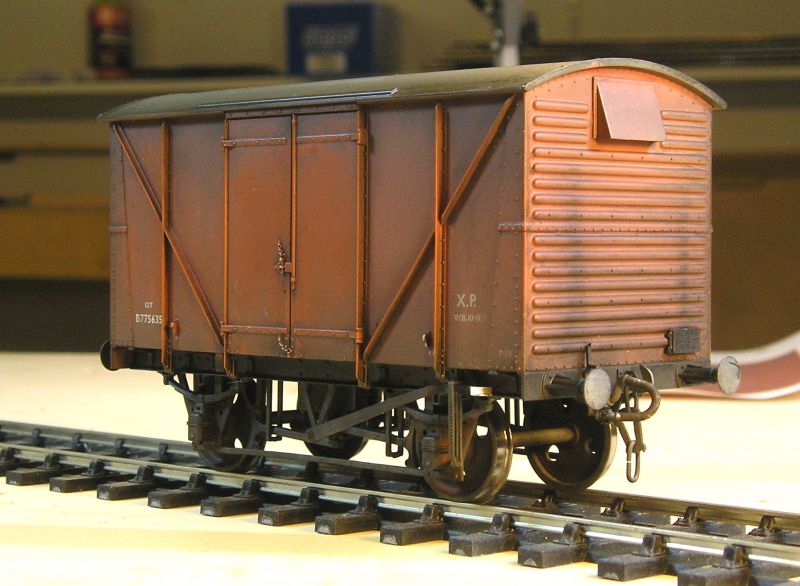
Slaters BR Std van, planked sides:
Usual methods for beneath the solebars - airbrush earth/black then rust powder followed by brown/black powder.
The body was also airbrushed lightly. I then highlighted the ribs and door details with brown/black powder. Following this I used my panel lining colour give an overall subtle weathered look (well I think so). Most of the powder got washed off but some seeped into crevices.
Dapol BR std van, plywood sides:
Same methods as above.
John
John
Posted
Full Member
John
John
Posted
Legacy Member
Posted
Full Member
John
John
Posted
Full Member
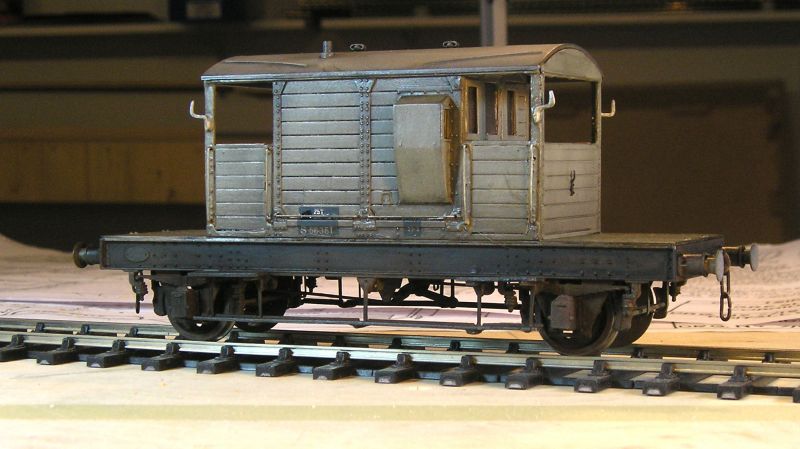
First I received my Class B tank wagon from Dapol:

Excellent. The icing in the box is a second hand Corgi Morris Minor. Prices for new Corgi are pretty steep so I was glad to see this in Hattons' pre owned section for a reasonable amount. Everyday cars seem rare as Oxford tend to produce a lot of limousines and upmarket vehicles.
Next, I decided to have a go at an etched brass kit.
This is from David Parkins' Modern Motive Power (MMP) range. It's a LMS Dia 2134 steel mineral wagon. BR based their design (of which I have two MMP kits; Dia 108/1 and 109/1) on this I believe. All were unfitted so will make an interesting train along with the 3 PO wagons.

The sheet on the left is the chassis and on the right is the sheet for the body.
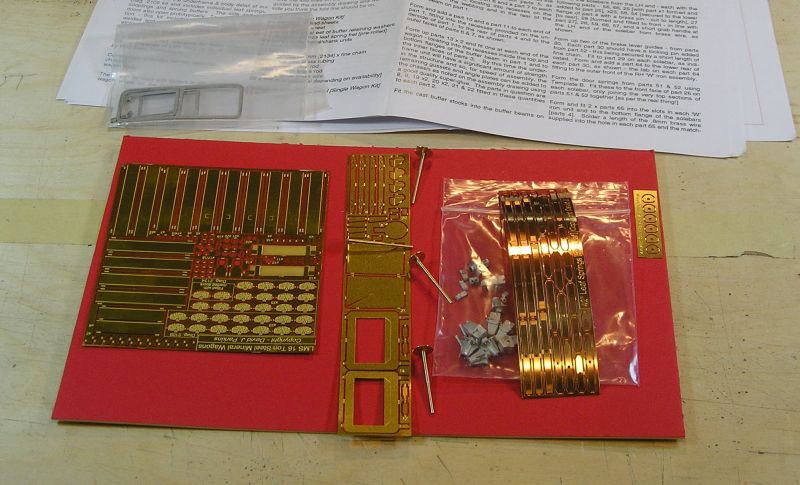
Additional detail sheets which I haven't fully sussed out. Lots of etched builders plates.
I particularly like the phosphor bronze strips, these will make up working leaf springs.
There are a number of bends to make and I decided top use bending bars to accomplish these. My setup is simple and I've described it before.
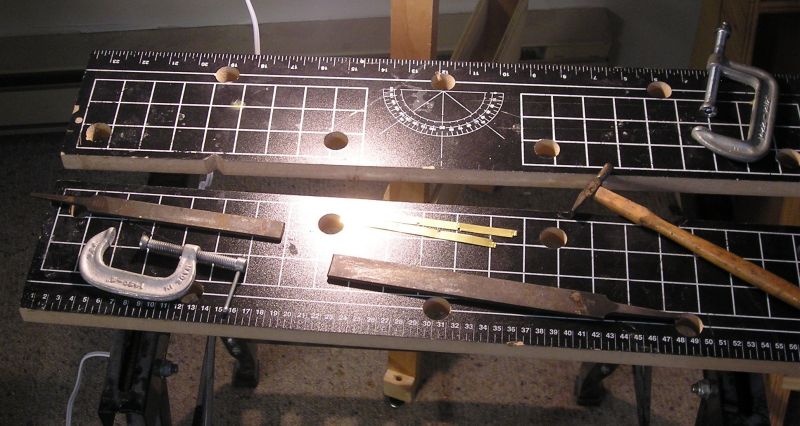
The idea is to clamp the piece to be bent between the edge of the workmate and a steel file. The half etched bend line is lined up with the edge of the bench and everything tightened. Use a tool (in this case the medium file) to push the material up against the edge of the file (mine happens to have a dead edge) and make sure the bend is 90 degrees. I use the small hammer to get the bend crisp against the file edge.
Here's where I am right now:
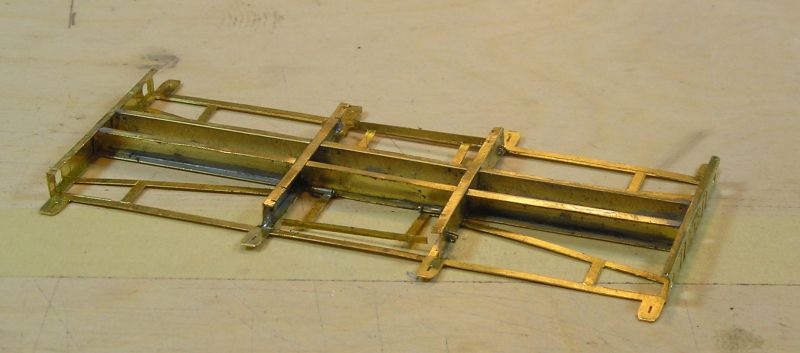
Lots of bends as you can see. The two brackets on the central beam were the very devil to do. There are etched slots for them but, of course these are undersized. Fettling was the order of the day but I still managed to lose one of these tiny brackets. I made a new one from strip. In the end I had a stroke …. of genius and soldered the bracket to some wire. I could then wield the thing without fear of dropping or losing and get the bracket seated through the beam. Phew! :pathead
John
Last edit: by Brossard
John
Posted
Full Member
I found that there is a certain mindset with MMP kit's and once you are in it they go together superbly. I also David (Parkins) idea of using thin laminates to build strength in rather than using thick etch which is sometimes difficult to fettle and bend.
Regards Rob
1 guest and 0 members have just viewed this.