Johns 7mm Wagon Workbench
Posted

Inactive Member
Max
Port Elderley
Port Elderley

Posted

Full Member
Regards Rob
Posted

Full Member
John
John
Posted
Full Member
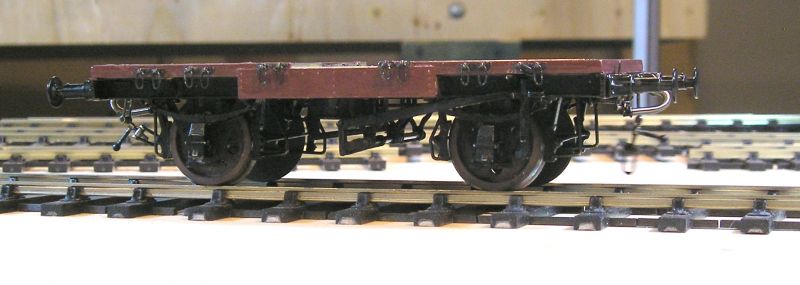
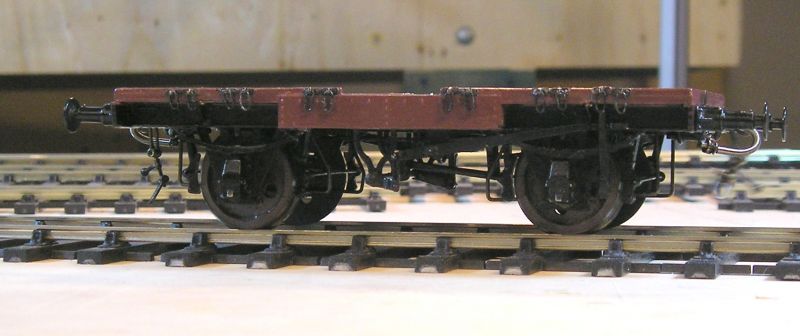
I wanted to show both sides because, if you are sharpo eyed, you will see that the brake lever arrangement is different. This is so that the brake pull rods work from either side. I obviously still have to do the transfers.
John
 Last edit: by Brossard
John
Posted
Full Member
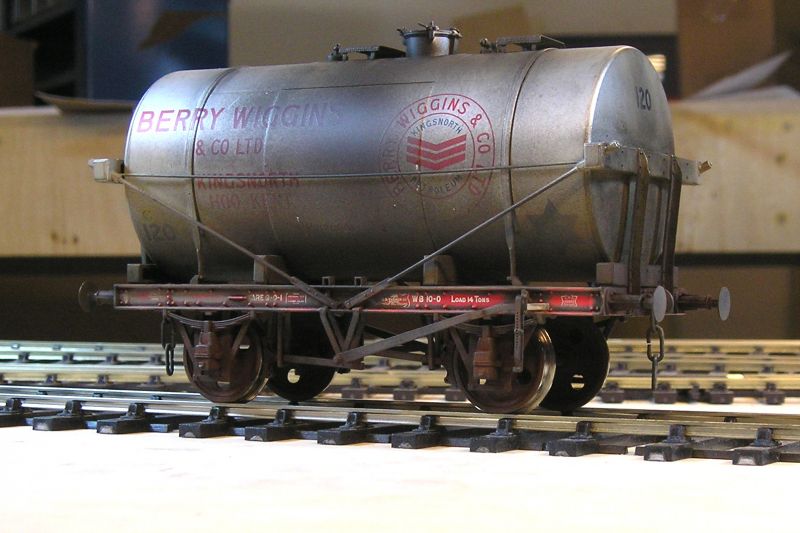
Looking at photos, it is evident that some effort was made to make the wagon data legible so I cleaned off the solebar.
John
John
Posted

Full Member

Posted
Full Member
I am not sure how I missed these. Are they the Slaters kit? Do you have any idea of the origins of this particular type of conflat? By that I mean was it a BR design or did it originate with one of the big four? I would like some LNER examples but in the absence of a finding a kit that I could perhaps modify I might have to scratch build some. I have some basic drawings for the larger type LNER containers and would like to have a go as some.
Regards Rob
Posted
Full Member
The kit comes with a very good screw link coupling kit which actually works, in that the links can be tightened - not that I'll ever bother with that.
John
Last edit: by Brossard
John
Posted
Full Member
I agree, while a bit fiddly to put together, the Slaters screw link couplings are amongst the best there is for fidelity in my opinion.
Regards Rob
Posted
Full Member
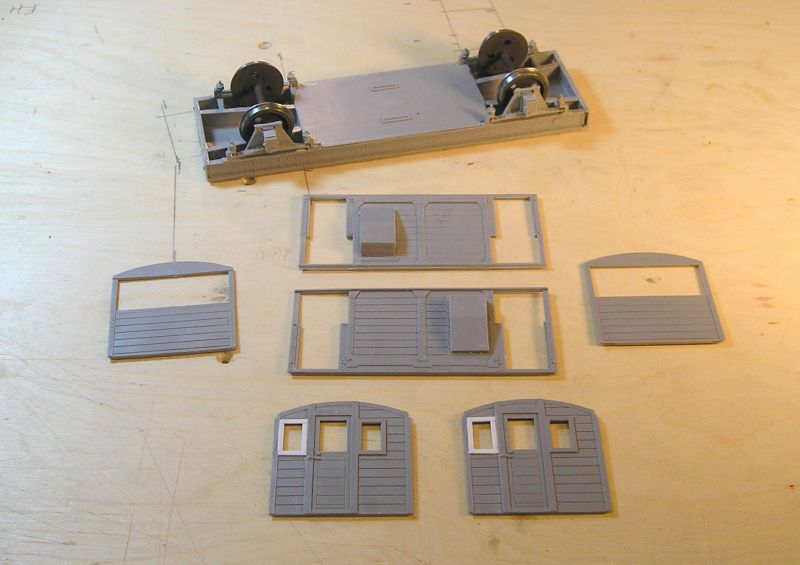
Parkside Dundas also do a kit, I've nearly finished my second.The model is Slaters and a very good one. I daresay the Conflat A can trace its' origins to one of the big 4 but I haven't sufficient familiarity with them to say which. Perhaps someone can enlighten us. The brake gear is pure BR though, it is quite convoluted but Slater's supply a brass etch which makes things easier.
The kit comes with a very good screw link coupling kit which actually works, in that the links can be tightened - not that I'll ever bother with that.
John
I'm doing one in early BR livery and the other in GWR (it was originally
a GWR design, H7) as I have a couple of containers, 1 BR and 1 GWR!
BTW, the transfers (decals) are a PITA, there is not a lot of
room on the sides.
Jeff
Posted
Full Member
John
John
Posted
Full Member
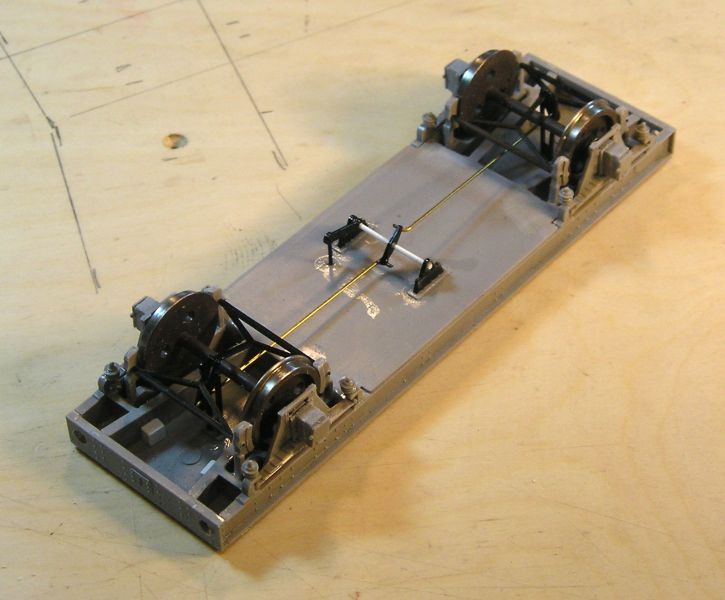
Here's where I am:
I have the wheels installed. Note that I blackened and painted them prior to this. Up to now I have done spring suspension in my kit wagons. This time I built the underframe as intended. The axleboxes are free to move in the axleguards providing a modicum of compensation.
I built up the duckets and installed these in the sides.
The inner ends have had windows added. Most of the pictures I've seen show the added windows in BR days.
My reference material is very thin for SR stock (basically limited to quite good pictures in Geoff Kents' The 4mm Wagon), if anyone has info on the interiors I'd be obliged.
I'll have to hit pause on the upper works for a while until I can do the interior.
John
John
Posted
Full Member
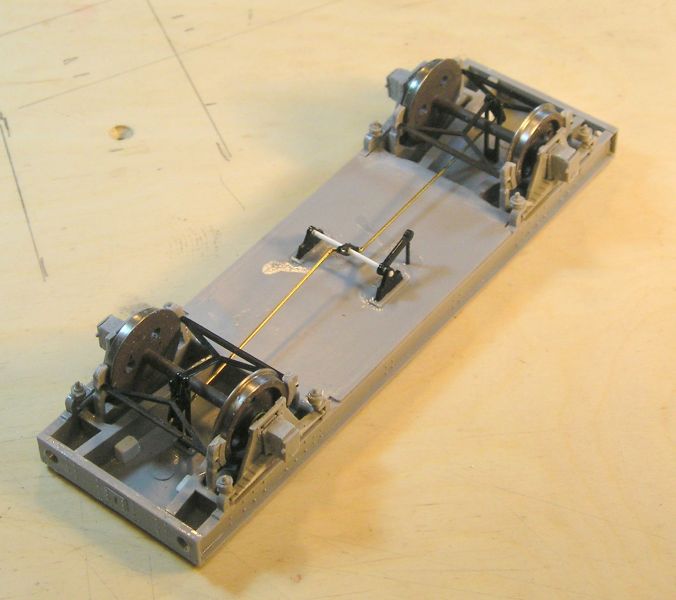
Being unfitted, the gear is relatively simple. Getting the yokes done was a fiddle. Patience is the key.
John
John
Posted
Full Member
It sure is, making sure that the glue is dry before you try to push the yokes through the holes in the mounting/operating mechanism being the key to success I think. But at least you do get it with the Parkside kits, you don't with many of what are otherwise excellent brass kit's. In fact I would say that brake gear in general is a weak point of many brass kits. Sadly many think that a single layer of etch is sufficient to portray brake blocks which are pretty chunky things even on the smallest of wagon or loco.Patience is the key
Regards Rob
Posted
Full Member
I've had 4mm brake frets (Mainly Trains I think) that are three layers thick. Of course 4 shoe brake gear pull rods should be two layers of plate not solid as so often portrayed in kits.
I'll put this away for now until I get some sort of inspiration about the interior. No shortage of jobs.
John
John
Posted

Full Member
I do however treat a lot of the modelling I see with the "reality stare" in that if I can look at a model for a short time and nothing jumps out at me and says 'Model!' I'm impressed with the workmanship of the creator.
I'm impressed.
Marty
Posted
Full Member
John
John
Posted
Full Member
Marty
Posted
Full Member
John
John
Posted
Full Member
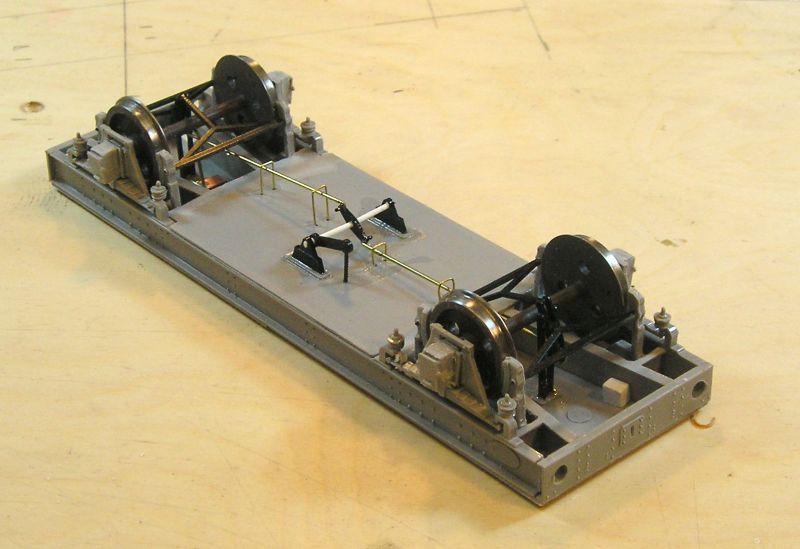
Not easy to see but I soldered a piece of 0.032" wire to some copper clad, just visible under the far axle. The trick was to get the top of the wire so the axle rested on it and pivoted.
I also inserted some 0.5mm thick plastic strip between the top of the near axle boxes and springs to make them rigid.
Additionally, I've added safety loops to the pull rods.
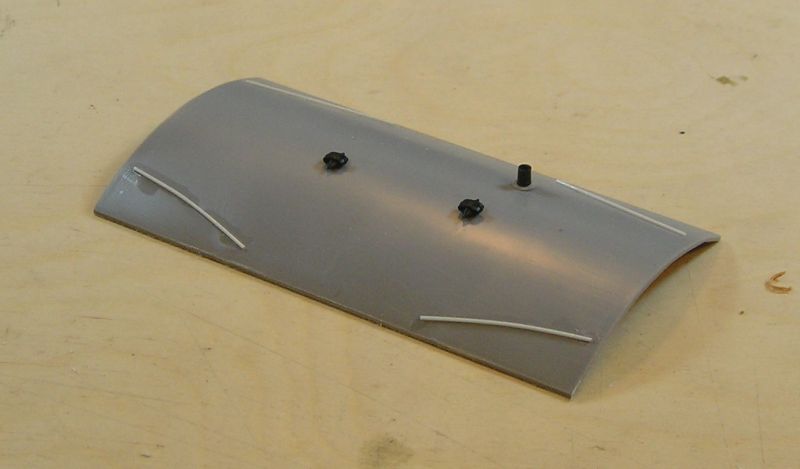
I did the roof too. Mostly a doddle but the rainstrips needed care. These ore 0.020" plastic rod.
John
John
1 guest and 0 members have just viewed this.