Converting the Midland 0-6-0 2F to EM
Posted
#185719
(In Topic #10439)

Full Member
From the 00Works Model
I'm at it again. While I wait for paint to dry, I thought I'd take a look at this model that I've had for quite some time.These locos were first built with round top boilers starting in about 1885. Over the years they acquired belpaire boilers and lasted into the BR era.
Again, I bought this model (and it cost quite a lot) using the rationale that it would give me a head start on the EM gauge loco that I wanted. Looking at it again this evening I have to admit, it does look very good.
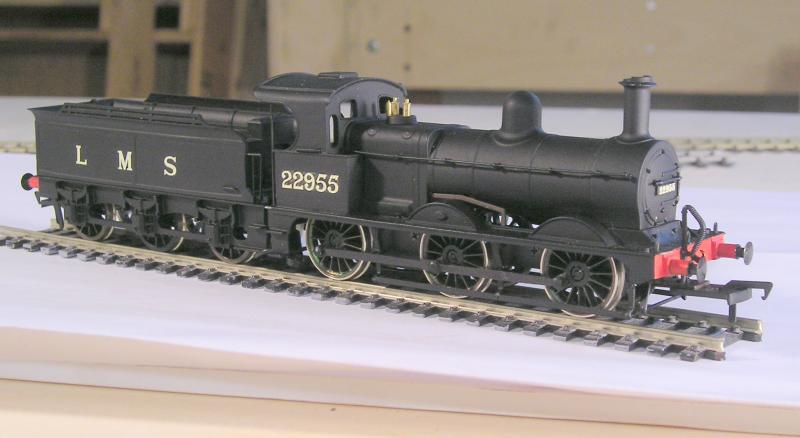
The loco body is whitemetal, the tender is plastic. Not sure about those rods, I will have to consult my books.
Taking it apart we see this:
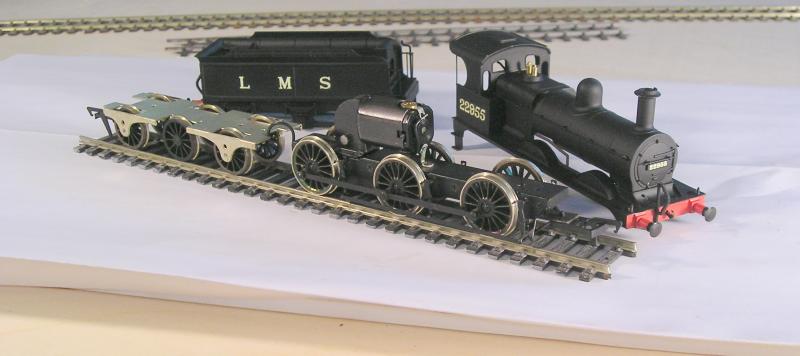
The motor and gearbox look to be similar to the Saddle Tank which proved to be unsuitable. I'll take a closer look and decide as things move forward.
Wheels are Markits which suit me down to the ground. I have EM axles for these.
The tender chassis is pretty basic, the wheels one side are uninsulated extending electrical pickup.
My first job was to cut the wire to the tender. The chassis will not be used for this build.
I removed the wheels and found that they appear to be Markits and correct for EM.
I insulated three wheels by knocking out a brass bushing and replacing it with some plastic bushes from spare wheels. The pinpoints on the axles were cut off since the new chassis will have inside bearings.
I confirmed that the wheelbase is 6' 6" x 6' 6" and, oh joy, I have a Comet chassis kit:

That's all for now.
John
 Last edit: by Brossard
John

Posted
Inactive Member
Best of luck with this rebuild.
Derek.
Posted
Full Member
John
John
Posted
Inactive Member
Any thoughts on your railway track design yet.
Cheers,
Derek.
Posted
Full Member
As for a layout, I keep swinging from one extreme to the other. A small single track branchline like Karl Crowther's Kentside
http://www.trainweb.org/drs/Kentside.htm
to something like Heckmondwyke.
http://homepage.ntlworld.com/russelliott/nlg-heck-model-pics.html
There was a very good EM layout on the circuit here called "Patrick Brompton" - a circular layout featuring a branchline and very well executed. I can't find a link unfortunately.
John
John
Posted
Inactive Member
Games crashing are a pain and puts one off.
Cheers,
Derek.
Posted
Full Member
The other thing that's complicating matters is that I like to exhibit. Heckmondwyke is just too big. I s'pose I'll have to do one of each. :roll:
John
Last edit: by Brossard
John
Posted
Inactive Member
The big build in the basement.I like that 9ft width gives one leeway for decent radius curves in EM.
Now the other railway for exibitions.Your branch line job in 0 gauge should fit the bill fine scale 33mm gauge of course.
Well you did mention an interest in 0 gauge
 .I must confess its a lovely scale to work in.However I quit it because I like mainline railway running and one would need an aircraft hanger for a decent circuit.Otherwise one is stuck with an end to end with fiddle yard.Its the min 6ft radius curves that are space killers.But thats just me.Slaters 7mm scale wheels are okay and have a Markit type axle.Cast wheels cost a fortune.
Anyway thats all if I keep writing 0 gauge I may get tempted again :):).
Cheers,
Derek.
Posted
Full Member
Actually, Dapol's foray into affordable O gauge gave me hopes of doing something, but the models have come in for so much criticism, I think I'll pass.
I spent all day getting the Comet tender chassis frames set up for CSB. :shock: I was muttering to myself that with so much self inflicted work, I might as well be doing P4.
John
John
Posted
Inactive Member
Its only an idle post John.Not that I mind coal in my christmas stocking .Glad you got that tender chassis sorted and kit bashing can be a trial to put it mildly.
I always found it hard to get into the kit designers head when it came to some of their builds.
P4 with diesels or inside cylinder locos can be managed,When it comes to outside valve gear I get lost.
Anyway you are doing great with your EM stock and one day they will be rolling on your railway.
Cheers,
Derek.
PS:I have a load of C&L turnout drawings in EM if you fancy them will post them.
Cheers,
Derek.
Posted
Full Member
If I had built the Comet kit as intended, it wouldn't have been difficult at all. My thought was though, if I don't spring the tender, I'll have a nice sprung loco hauling a tender that rattles through points.
Agree about P4 - you can get drop in wheel sets for many diesels for a quick conversion. Steam locos are a different matter.
Thanks for the offer of the C&L templates, I have a set though. Two sets if you count those from EMGS. Anyway, I need to study Templot at some stage.
John
John
Posted
Inactive Member
I too need to study Templot in depth only scratched the surface so far.I must also study that Comet Jinty chassis and get the iron out as the Bachman one is the worse for wear with all the experiments.
Cheers,
Derek.
Posted
Full Member
You can review my Jinty thread to learn how not to do the Comet chassis. It'll be interesting to compare notes.
My chassis that was the result of experiments is in rough shape too. I did try the Bachmann motor in a gearbox but the fixing holes aren't the same. I'll have to have a think.
This morning I put the 2F tender frames together. I actually used that wooden jig I showed you in the Jinty thread - it still has its' uses. It's all a great faff. I just washed it and will let it dry.
John
John
Posted
Full Member
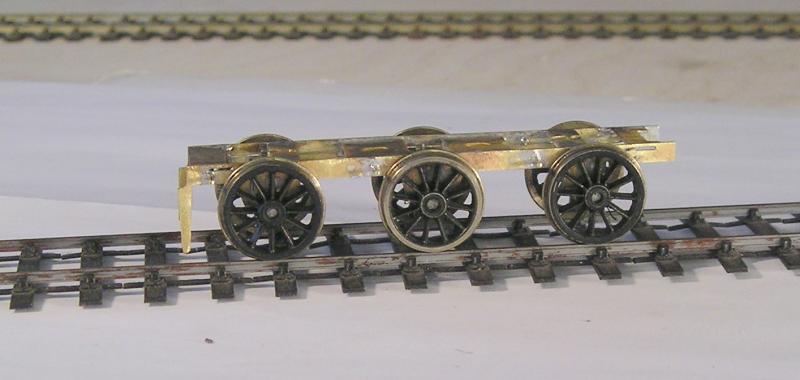
It was a lot of work setting this up for springing and, looking back with a critical eye, I wouldn't do it with a Comet tender again. The incremental improvement in running isn't worth the enormous labour. Live and learn as I've said before.
Nevertheless, the chassis does run nicely.
While I was at it, I made sure I could fix the chassis to the tender body:
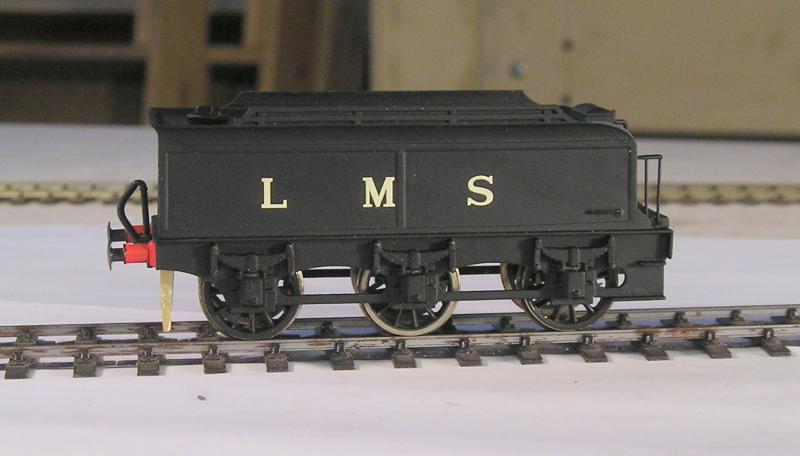
Quite good I think. It still needs brakes which were missing on the original model.
Next step is to paint the chassis.
John
John
Posted
Full Member
Meanwhile, I wanted to look at the loco chassis a bit more closely.
I removed the wheels and found that the brakes were loose in a couple of places - rushed or sloppy soldering I guess.
Here's the main components:

The brakes and pull rods are one piece brass, bent to shape. I can work with that.
Couplings are plain and one piece, overlapping at the center for articulation. Not happy with that. I think I'll need to laminate some spare rods over them.
Gearbox looks reasonable but, alas, the final drive is integral with the frames so I won't be able to use that. I can salvage the motor though. I anticipated this and have a gearbox and motor on order from High Level.
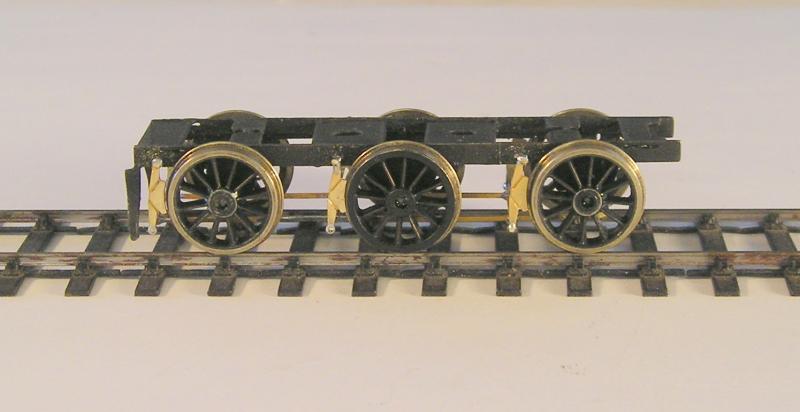
I disassembled the frames next:

The brass frames are secured to the milled brass block with tiny screws. The center hole is oval to allow the center wheels to spring. Axle holes also act as bearings being a slop fit, but not too sloppy, to the axles.
I'm slightly more impressed with the design of this chassis than I was with the L&Y ST.
I will use the frames for my conversion and it looks as though I'll have to use a fret saw to cut slots for hornguides because springs are in the way. I will probably need to add material above the bearing holes because once the hornguide slots are done, there will be very little meat.
John
John
Posted
Inactive Member
Looks like the loco chassis is another challange to your skills.The oval centre axle slots I think are an old method of compensation.When one thinks of it a centre sprung axle about covers most track bumps with 6 wheel jobs.
Best of luck with the project.
Derek.
Posted
Full Member
Yes, the idea of this quasi compensation goes back to the 60s when Hornby were doing it. My fairly recent Bachmann 08 has a sprung center axle.
John
John
Posted
Full Member
It's always a bit of a fiddle to get everything sort of square and looking reasonably neat. With soldered bits you can have as many do overs as you like.
John
John
Posted
Inactive Member
While searching through old boxes I came across some packets of Slaters 4mm scale plastic brake blocks which I must have bought for some reason.I might check them against the ones on the frets if I run into trouble.
Cheers,
Derek.
Posted
Full Member
John
John
1 guest and 0 members have just viewed this.