Converting a Hornby Pug to NBR G class (LNER Y9)
Posted
#197003
(In Topic #10932)

Site staff
Or my attempt at destroying a perfectly good Loco
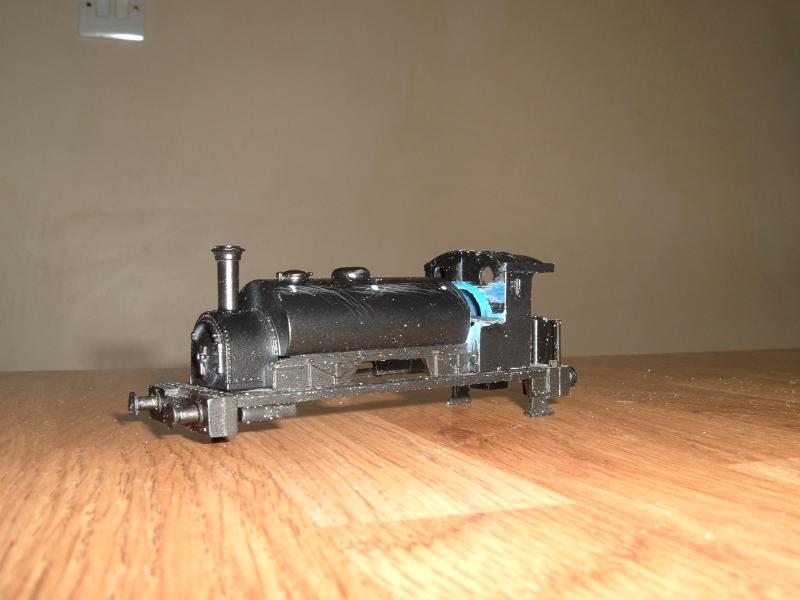
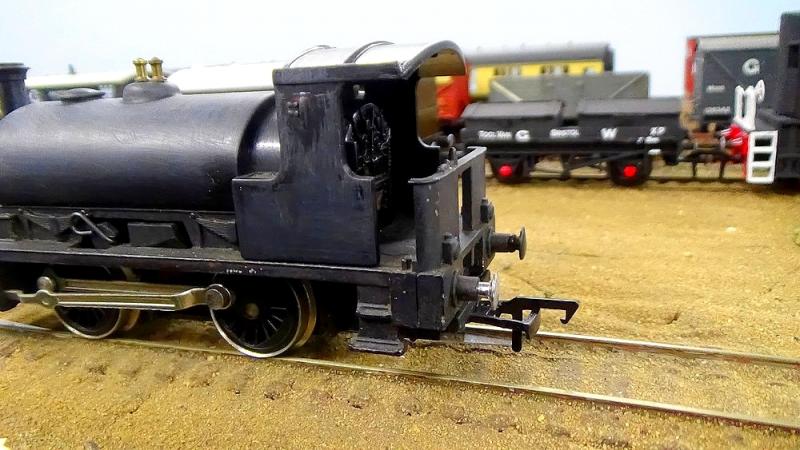
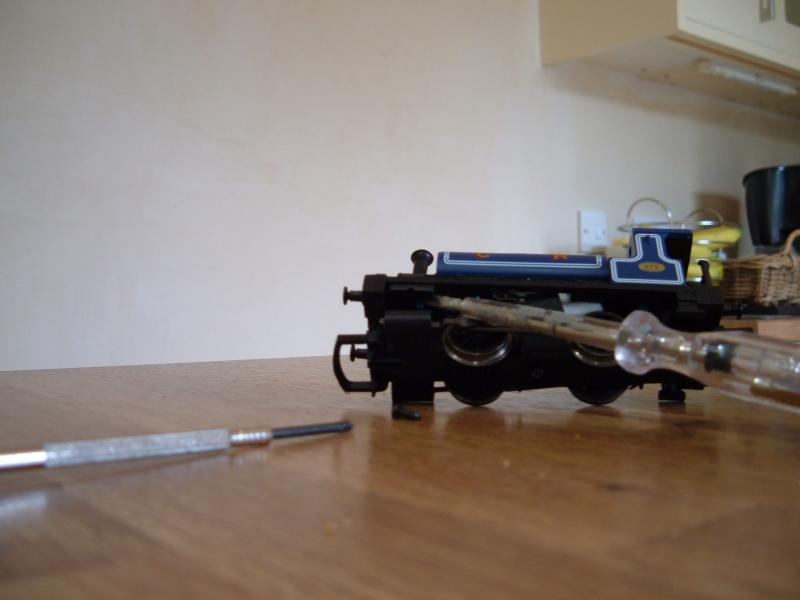
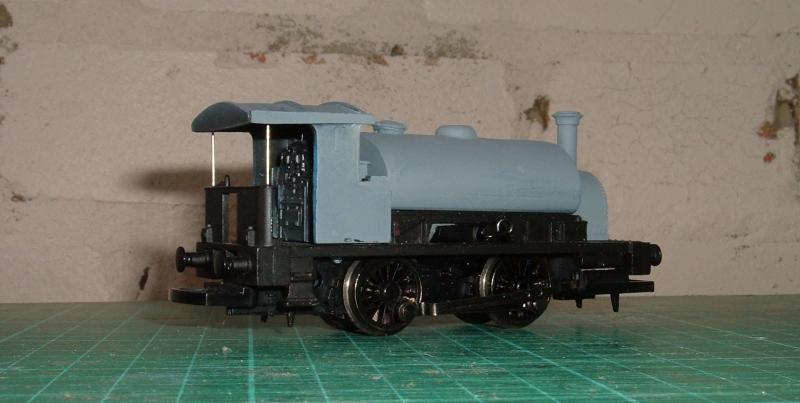
This may all go horribly wrong, but anyway here goes.I am not trying to build an exact model of a Y9 just something that resembles one, and as I have another spare Pug, if I do make a complete 'pigs ear' of the whole thing, I'll put the old spare body back on this chassis.
Stage 1
Separate the tank and cab sections
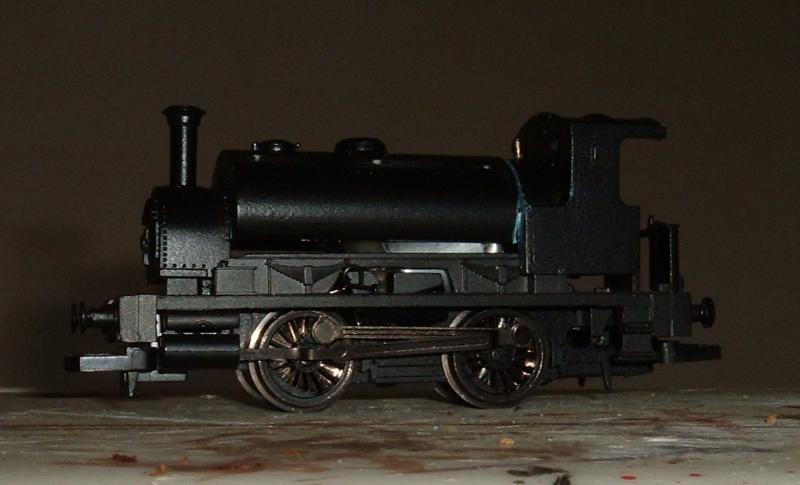

Make cab ends flush
Remove section of boiler where it meets the cab
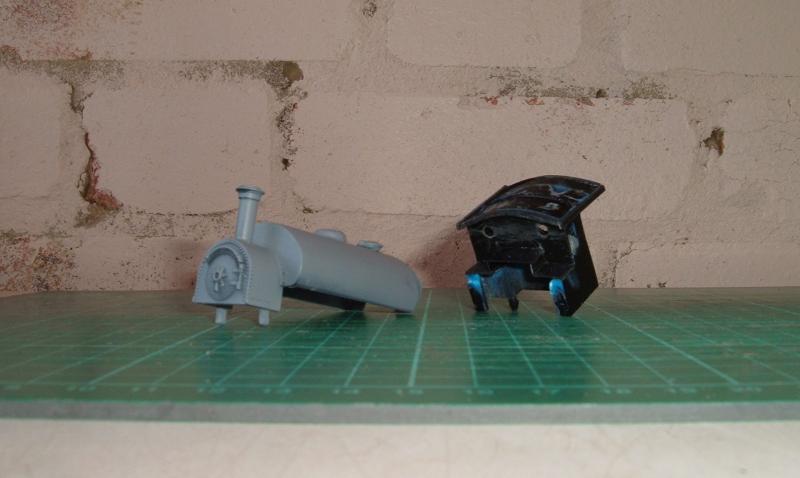
Stage 2
Replace removed boiler section with plastikard straight across front of cab

Stage 3
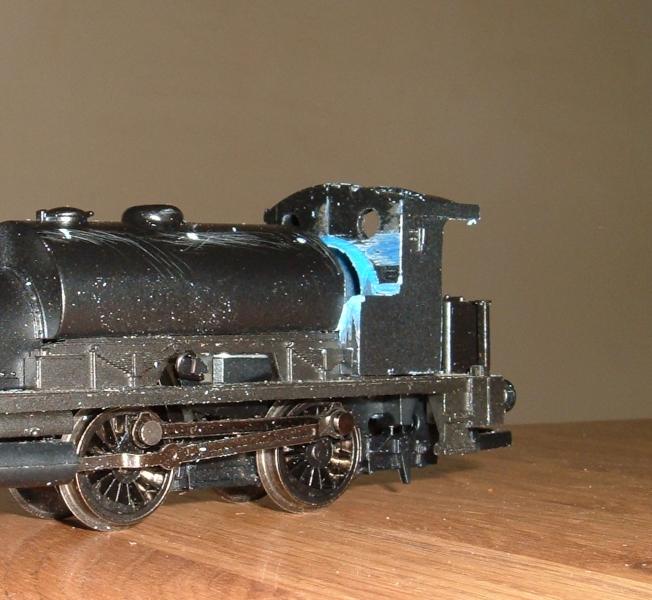
Move the tank filler to behind the dome (and start filling the hole), blank off the end of the saddle tank, but leave a hole for the top of the motor mounting.
Cover front of cab, drill new smaller holes for windows, then extend cab roof front and back and make a stepped section to accommodate the top of the motor mounting.
Stick some handrail (over-long at present) to the chassis.


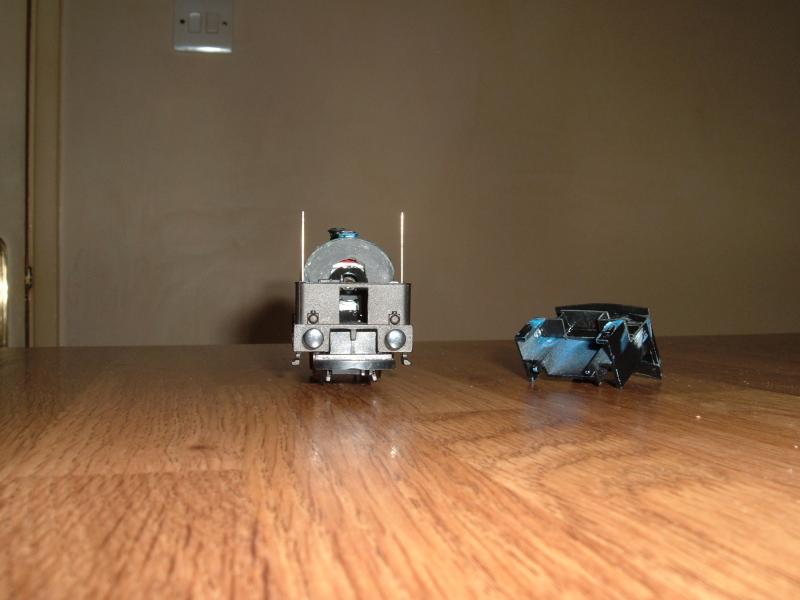
Just roughly putting the bits where they will eventually be fitted.
Lots left to do, including dumb buffers and converting a five plank wagon for the tender.
Ed

Posted
Site staff

Maybe, just maybe……………………………………. this might not turn out too bad.
Ed
Posted

Inactive Member
This is looking quite interesting.!!
I am not familiar with the particular model of loco you are reproducing, however what you have done so far looks as though it will return a nice model.
Are you replacing the big couplings as well.???? I have made a start on a similar model and fitted small Bachmann couplings and they make quite a difference visually. I am only repainting and detailing, so have parked the project for a while so that I might concentrate on the railway build.
:cheers Gormo
"Anyone who claims to have never made a mistake, never made anything!!"
https://sites.google.com/site/greatchesterfordmodelrailway/home
https://sites.google.com/site/greatchesterfordmodelrailway/home
Posted
Site staff
http://en.wikipedia.org/wiki/NBR_G_Class
Couplings will stay as they're part of the chassis, but note no hooks for magnetic uncoupling.
…………………… still sanding
Ed
Posted

Full Member
This is a lovely build.
I've been watching progress on your conversion and hope your stamina holds out to get through all that sanding! Thanks for posting the Wiki link, as that single photo makes total sense of all the effort you're putting in. It's such a worthwhile project for a loco rarely modelled and I particularly like the use of the 5 plank coal wagon tender. A most practical solution where a small wheelbase loco is essential.
Looking forward to the rest of the build and I hope you can squeeze in as much detail as possible.
Bill :)
At 6'4'', Bill is a tall chap, then again, when horizontal he is rather long and people often used to trip over him! . . . and so a nickname was born :)
Posted
Site staff
Here's another link.
http://www.lner.info/locos/Y/y9.shtml
Just realised that at the end of this link it says "It should be possible to adapt the Hornby model into a Y9.", so ……………….
.. if doesn't look very good I can blame the LNER Encyclopedia

Ed
Posted
Inactive Member
Thanks for the link……I see where you`re going now.
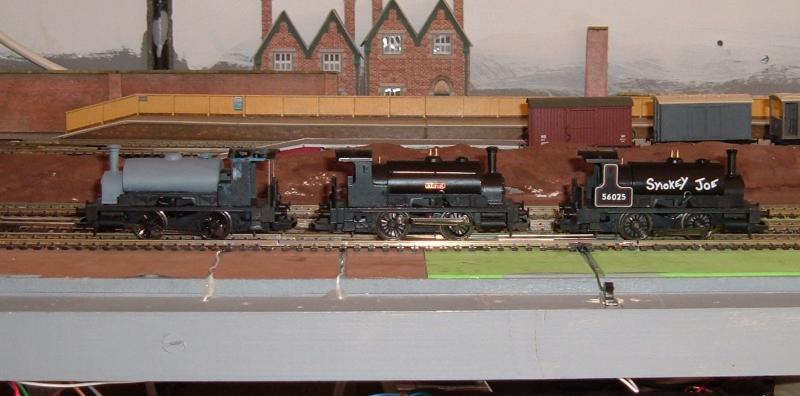
Here is mine in the early stages……used to be Smokey Joe.
And here is how it looks underneath with the original couplings cut away and replaced.


It`s a bit of extra work to do the couplings but it worked out OK.
Sorry for the hijack…….it`s easier to explain with pics.
:cheers Gormo
"Anyone who claims to have never made a mistake, never made anything!!"
https://sites.google.com/site/greatchesterfordmodelrailway/home
https://sites.google.com/site/greatchesterfordmodelrailway/home
Posted
Site staff
You've made a good job of that, but I'm leaving hooks off all my shunters so that the 'Brian Kirby' type uncoupling magnets only have to lift one hook.
I don't really like the big plastic bar sticking out the front though, and I may experiment with cutting them off and replacing with a less conspicuous wire ring.
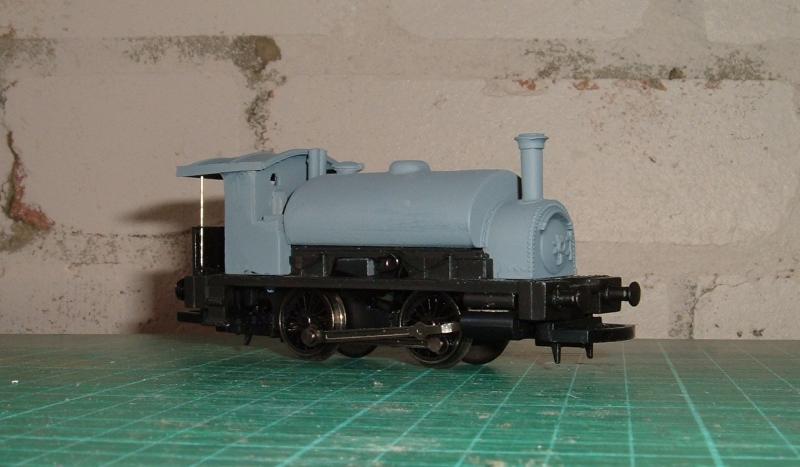
Some comparison pics


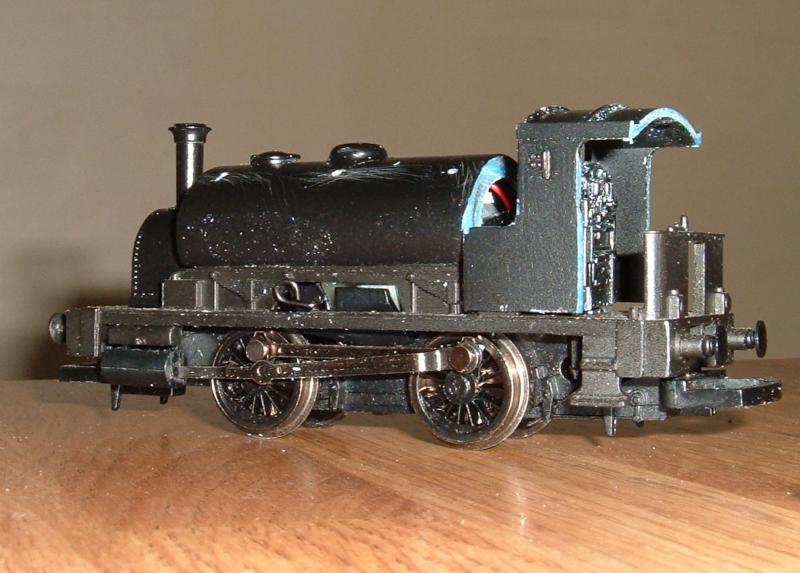
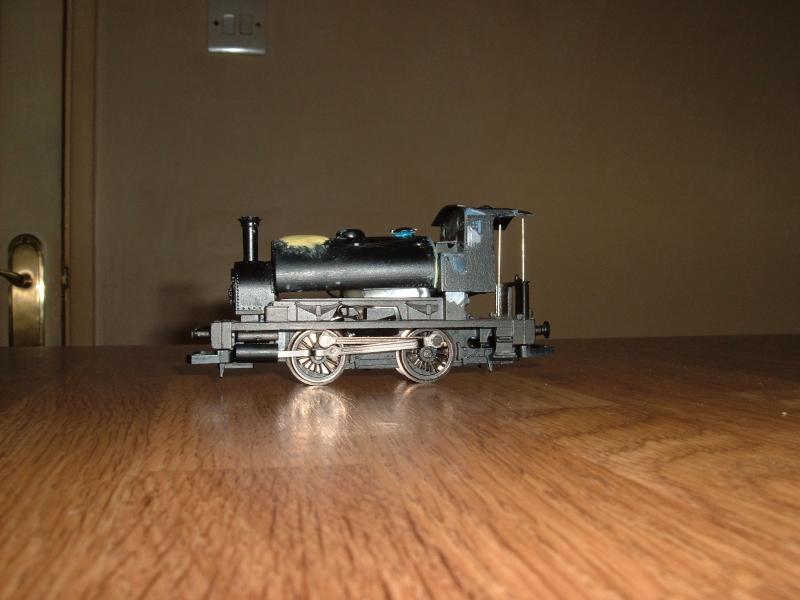
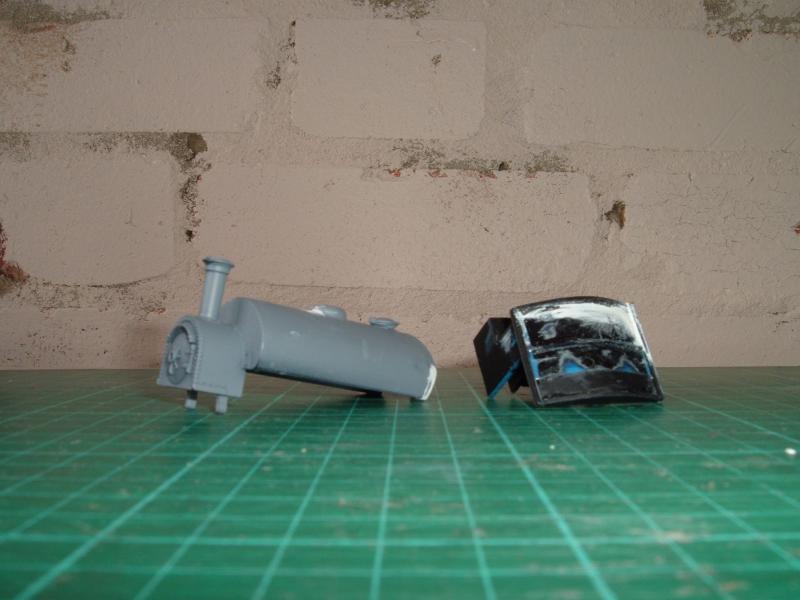
Still not happy with the saddle tank and I'm giving it light sprays of grey undercoat to better highlight any blemishes, then sanding again.
Been doing a bit more to the cab roof as well this afternoon, but I don't know if it's really noticeable.
Meanwhile, heading up the incline behind the embankment was ….
Ed
 Last edit: by Ed
Posted

Full Member
Thanks
Ron
Proper Preparation makes for Perfect Performance!!
http://yourmodelrailway.net/view_topic.php?id=13331&forum_id=21
http://yourmodelrailway.net/view_topic.php?id=13331&forum_id=21
Posted
Inactive Member
Keep at it …….I think it`s going to look great. The loco in the centre between Smokey Joe and the rebuild……is that one you`ve converted?,… because that looks really good.!!
:cheers Gormo
"Anyone who claims to have never made a mistake, never made anything!!"
https://sites.google.com/site/greatchesterfordmodelrailway/home
https://sites.google.com/site/greatchesterfordmodelrailway/home
Posted
Site staff
Smokey Joe is an old second hand one not converted to DCC I picked up for about £10 on flea bay.
The one in the middle was a Furness Railway version which I think was ex a train set, again picked up from flea bay but from a model shop.
I just gave it a few coats of paint and added some Hornby hand rails and a name plate.
The one I am attempting to convert (destroying), is the Caledonian Railway version I recently showing Darius how to take apart.
Ed
Posted

Banned
Nice little conversion in the making you have. Looking foward to the final outcome. I found a pic of a Y9 on the Vectis website, see here : http://www.vectis.co.uk/Page/ViewLot.aspx?LotId=503055&Section=0&Start=160
The trailing tender wagon is very interesting and not just a normal 5 plank open wagon either, which may be of interest to you.
Cheers, Gary.
Posted
Site staff
I know the chassis and wheel base on the Hornby pug are the wrong length for a start.
Mind you think that tender truck is wrong, as from what I've read the back part was for tools etc.
7mm Kit example:-
http://www.jimmcgeown.com/Wagon%20Kit%20Pages/Tender%20Truck.html
That said, I think they often used whatever old truck was available.
Ed
Posted
Site staff
Posted
Banned
So, I guess you will have to build two tenders now…, one with tools, another overloaded with dubious looking coal !
Cheers, Gary.
Posted
Inactive Member
The tender pics are interesting……you could end up with a rather unique model there when you add the tender / wagon. I also reckon you could modify a wagon sufficiently to make a reasonable model of that stepped tender.
Interesting stuff.
:cheers Gormo
"Anyone who claims to have never made a mistake, never made anything!!"
https://sites.google.com/site/greatchesterfordmodelrailway/home
https://sites.google.com/site/greatchesterfordmodelrailway/home
Posted

Full Member
Ièm sure it'll turn out fine Ed! It already looks great! Thanks for taking your pug apart… I couldn't have done it without you!
- Darius
Posted
Site staff
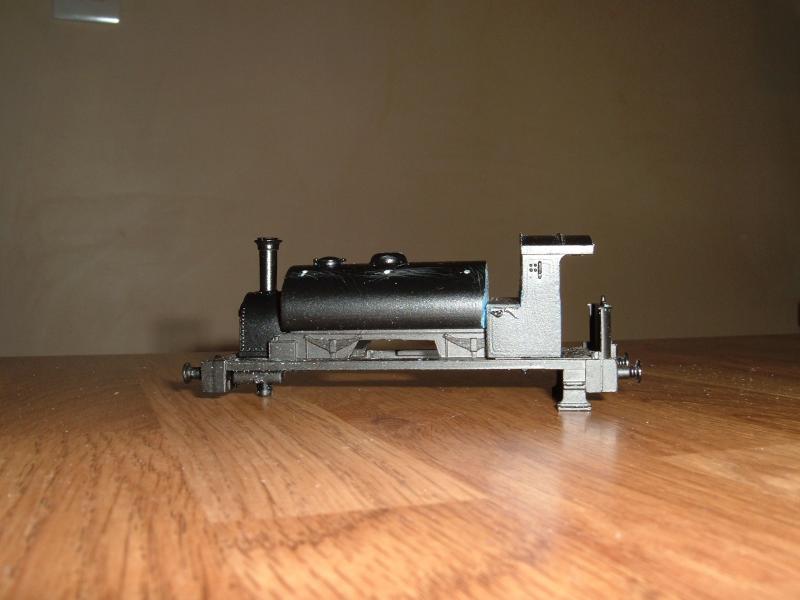
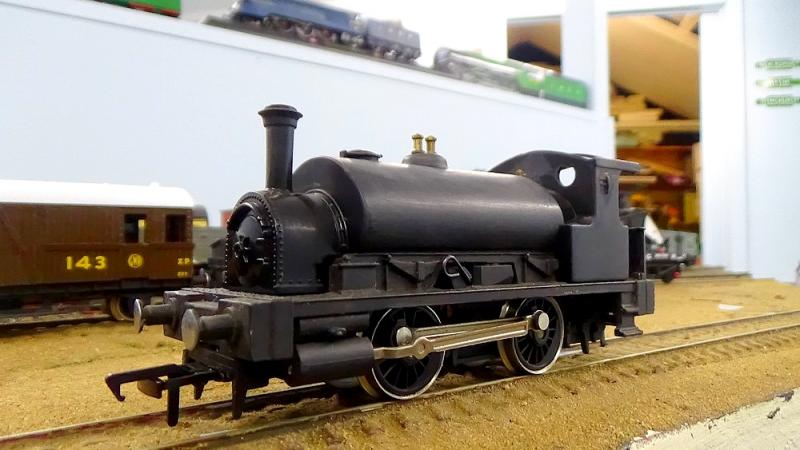
Slow progress, cutting slivers of plastikard to stick round the side of the cab roof and then filing to the right shape.
All a bit 'by eye' as opposed to exact measurements.
Still working on the saddle tank bit as well as I'm not totally happy with it yet.
Ed
Posted
Site staff

Seems ok and dries quite quickly, but I found if I didn't leave it to cure at least overnight it disintegrated into little grains when trying to sand it.
Bit more sanding and undercoat.
Cutting fiddly little bits of plastikard which I can only pick up with tweezers is a bit of a nightmare and I can well understand why older modellers move to O gauge.
Ed
Posted
Full Member
- Darius
1 guest and 0 members have just viewed this.