BR Breakdown Crane from Dapol Kit.
Posted
#196641
(In Topic #10910)
Full Member
Kit-Bashing an old kit.
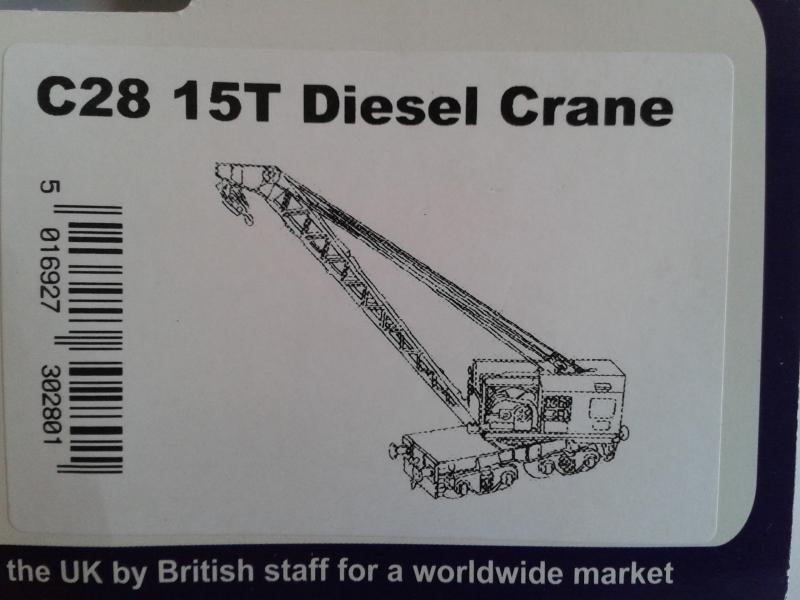
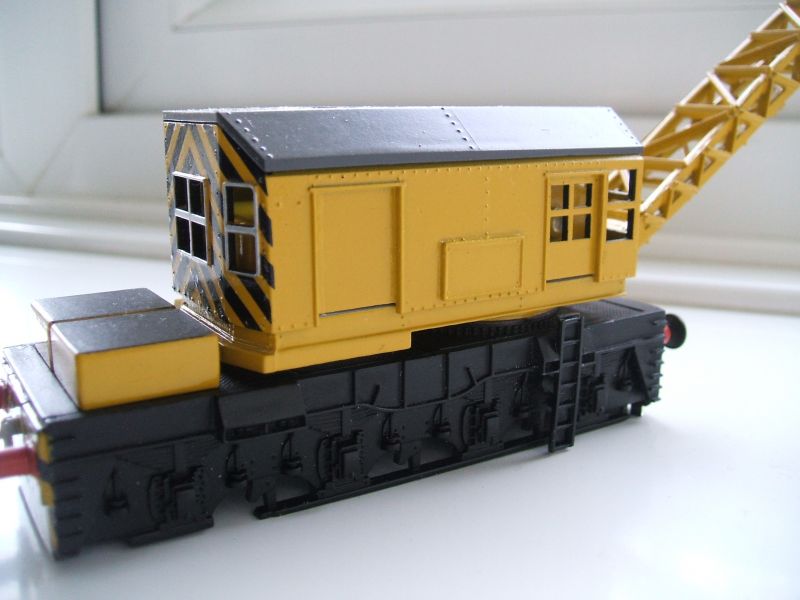
Following on from Gormo's superb thread regarding his breakdown crane, I thought I would do one of my own. Firstly, I must give credit to Robert Stevens who published an excellent article on modifying the Dapol (ex-Airfix) kit in the May 2007 issue of Model Rail magazine. Secondly, this has been a rather slow moving build and will not be a blow by blow account, rather some photographs of the build as it proceeds.This is what the finished model kit, as unmodified, is supposed to look like…

We are on our way…
Terry
 Last edit: by col.stephens

Posted

Inactive Member
You have a tricky build in front of you there methinks. I look forward to watching your progress with the modifications. It sounds like it will be an interesting model.
Good luck with it all.
:cheers Gormo
"Anyone who claims to have never made a mistake, never made anything!!"
https://sites.google.com/site/greatchesterfordmodelrailway/home
https://sites.google.com/site/greatchesterfordmodelrailway/home
Posted
Full Member
Pete.
it was already on fire when I got here, honest!
Posted
Full Member
Thank you Gormo and Pete.
The jib, winding gear and cab are built as per the kit instructions, except that I cut away the over-thick window glazing bars. These will be replaced with finer bars when the glazing is added.

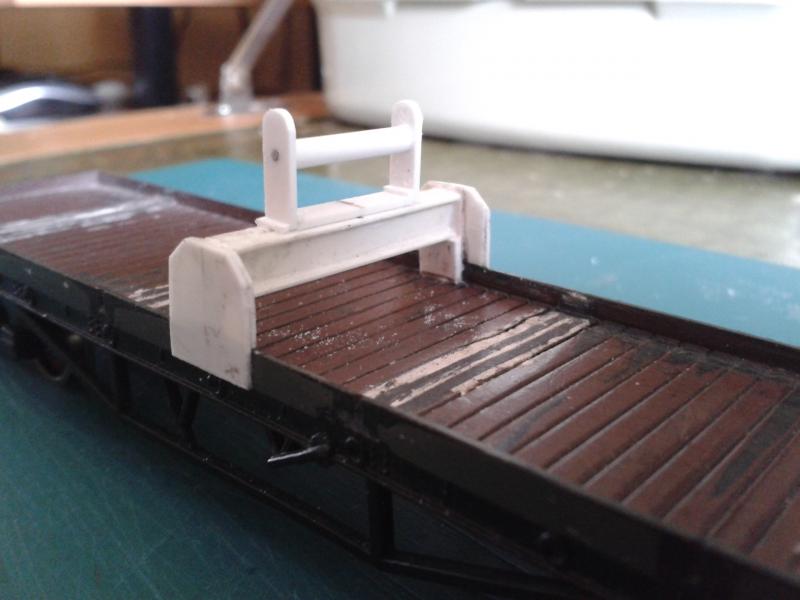
Turning our attention away from the crane and towards the match wagon for the moment. This takes the form of Hornby R6477 GWR Bolster Wagon.
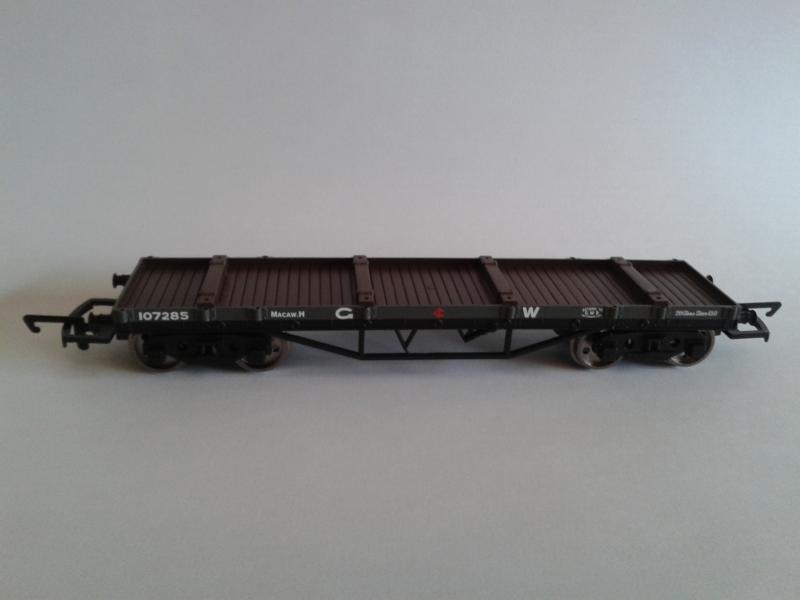
Unfortunately, this comes out of the box with four bolsters moulded to the floor. These have to be removed and I used a pair of pincers to cut them off.
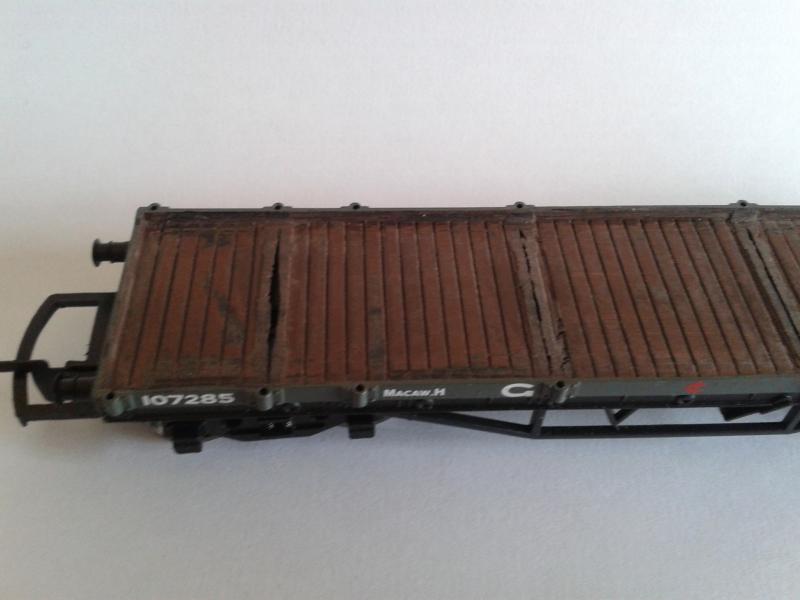
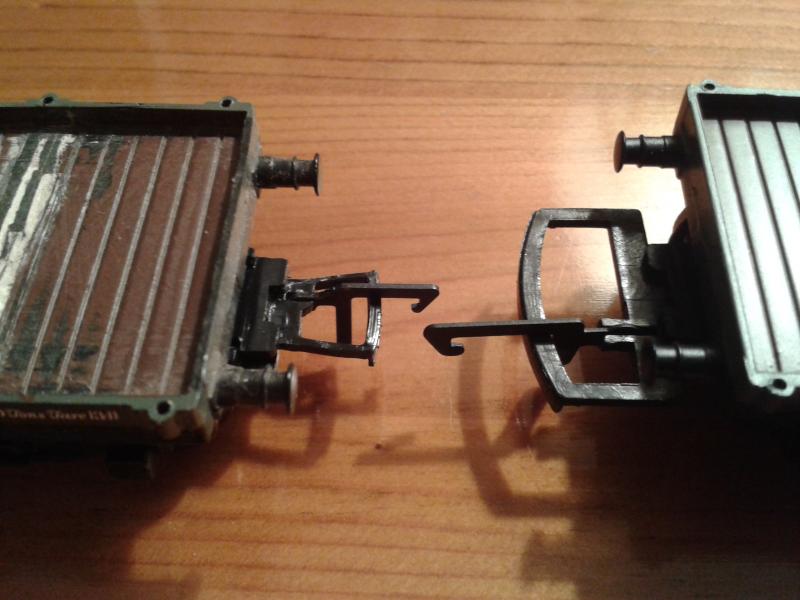
The resulting gaps were by sanded and filled. The dreadful oversized Hornby couplings were easily removed. The bogies simply pull off and the couplings can be unclipped and removed. The replacement Bachmann couplings had to be butchered to fit. No NEM couplings on this model I'm afraid. After all, it is only the 21st century and this is a Hornby model! Bachmann appear to make their couplings from a plastic with all the qualities of Teflon, i.e. nothing will stick to it! After various unsuccessful attempts to fix them to the bogies with all kinds of adhesives, including Super Glue (overrated useless stuff), I decided to use 'Cosmic Shimmer' acrylic glue, as used by the ladies in their crafting efforts. This product deserves to be better known in model railway circles. It is great for glueing both card and plastic. This is how the couplings compare…
The support for the crane jib was fashioned from styrene sheet and strip. Next, the tool boxes need to be made.
Back to the crane chassis. Slots were cut into the headstocks to insert the couplings. The headstocks are as per the original kit and have not been altered in any way. I have dispensed with the coupling lifting hooks and will rely just on the bar. The areas around the couplings have been filled and are awaiting sanding and touching-up with black paint…

Terry
Last edit: by col.stephens
Posted

Inactive Member
Posted
Inactive Member
I like your jib rest…..it really looks the business and the crane is coming along nicely. Does the cab have free movement when pivoting on it`s bearing on the base of the crane. That was one area where I had trouble with my crane. The cab needs to be able to rotate with the lightest of pressure exerted by the jib rest when negotiating a curve. I thought I would mention it now because I didn`t realize it with my crane until all was put back together for test runs. The test runs showed the lack off free movement caused the Match truck to derail.
:cheers Gormo
"Anyone who claims to have never made a mistake, never made anything!!"
https://sites.google.com/site/greatchesterfordmodelrailway/home
https://sites.google.com/site/greatchesterfordmodelrailway/home
Posted

Full Member
I have the Dapol crane kit in my collection with the same sort of conversion in mind. I have been keeping an eye out for a spare A3 or A4 tender chassis to use for the base.
I like what you did with the bolser wagon and crane jib rest. For another crane variation using a kit-built 6-wheeler, I adapted an LNER plate wagon as the runner wagon, but I think that would be too short for the Dapol crane.
Keep up the good work, Terry. You (and Gormo) may well end up with a few imitators here! :)
Last edit: by SRman
Jeff Lynn,
Amateur layabout, Professional Lurker, Thread hijacker extraordinaire
Amateur layabout, Professional Lurker, Thread hijacker extraordinaire
Posted
Inactive Member
If your interested I have about 4 of the A3/A4 chassis in the spare box. You are welcome to one. PM me an address and I'll pop it in the post.
Posted
Full Member
Gormo. Worth bearing in mind, thank you.
SRMan. On the prototypes of this crane, bogie bolster wagons were used for the match wagon.
Terry
Posted
Full Member
Special thanks to 60019Bittern, too, as he is now sending me a suitable tender chassis. I'll have no excuses for not doing this conversion soon!
Jeff Lynn,
Amateur layabout, Professional Lurker, Thread hijacker extraordinaire
Amateur layabout, Professional Lurker, Thread hijacker extraordinaire
Posted

Full Member
Interstingly the diagram book near the bottom of the page in the link below for cranes does appear to show some that are on twin bogies
http://www.barrowmoremrg.co.uk/Prototype.html
Last edit: by Campaman
Cheers
Andy
Andy
Posted
Full Member
Posted
Full Member
I still haven't done mine. I am looking at ways to put finer wheels and axles while still allowing sufficient sideplay for 2nd radius curves.
Jeff Lynn,
Amateur layabout, Professional Lurker, Thread hijacker extraordinaire
Amateur layabout, Professional Lurker, Thread hijacker extraordinaire
Posted
Full Member
That crane looks great Ian. Mine hasn't progressed since my last entry in this thread. Another of my unfinished models waiting for me to stir into action.
Regards,
Terry
1 guest and 0 members have just viewed this.