Greening tutorial
Posted
#104324
(In Topic #5517)
Guest user
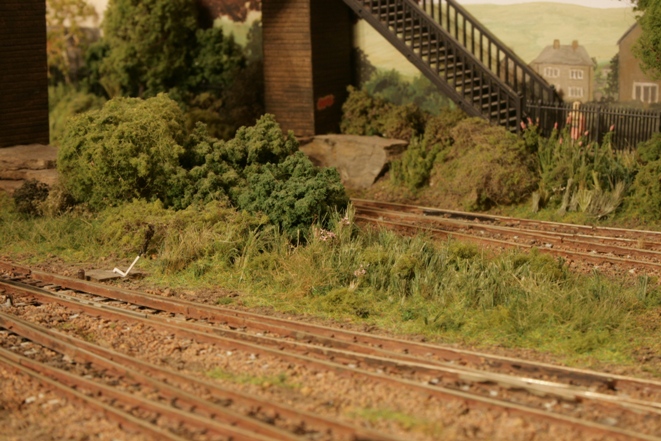
Photo-illustration of one of my techniques
Take a look at almost anywhere a wall or fence is in contact with the ground and you will find some sort of vegetation growth. It may be grass, weeds, brambles or a mix of rough dirt with the above.I show here how I have added some vegetation along the long stone wall which runs beside Ponsangwyn Yard on my layout.
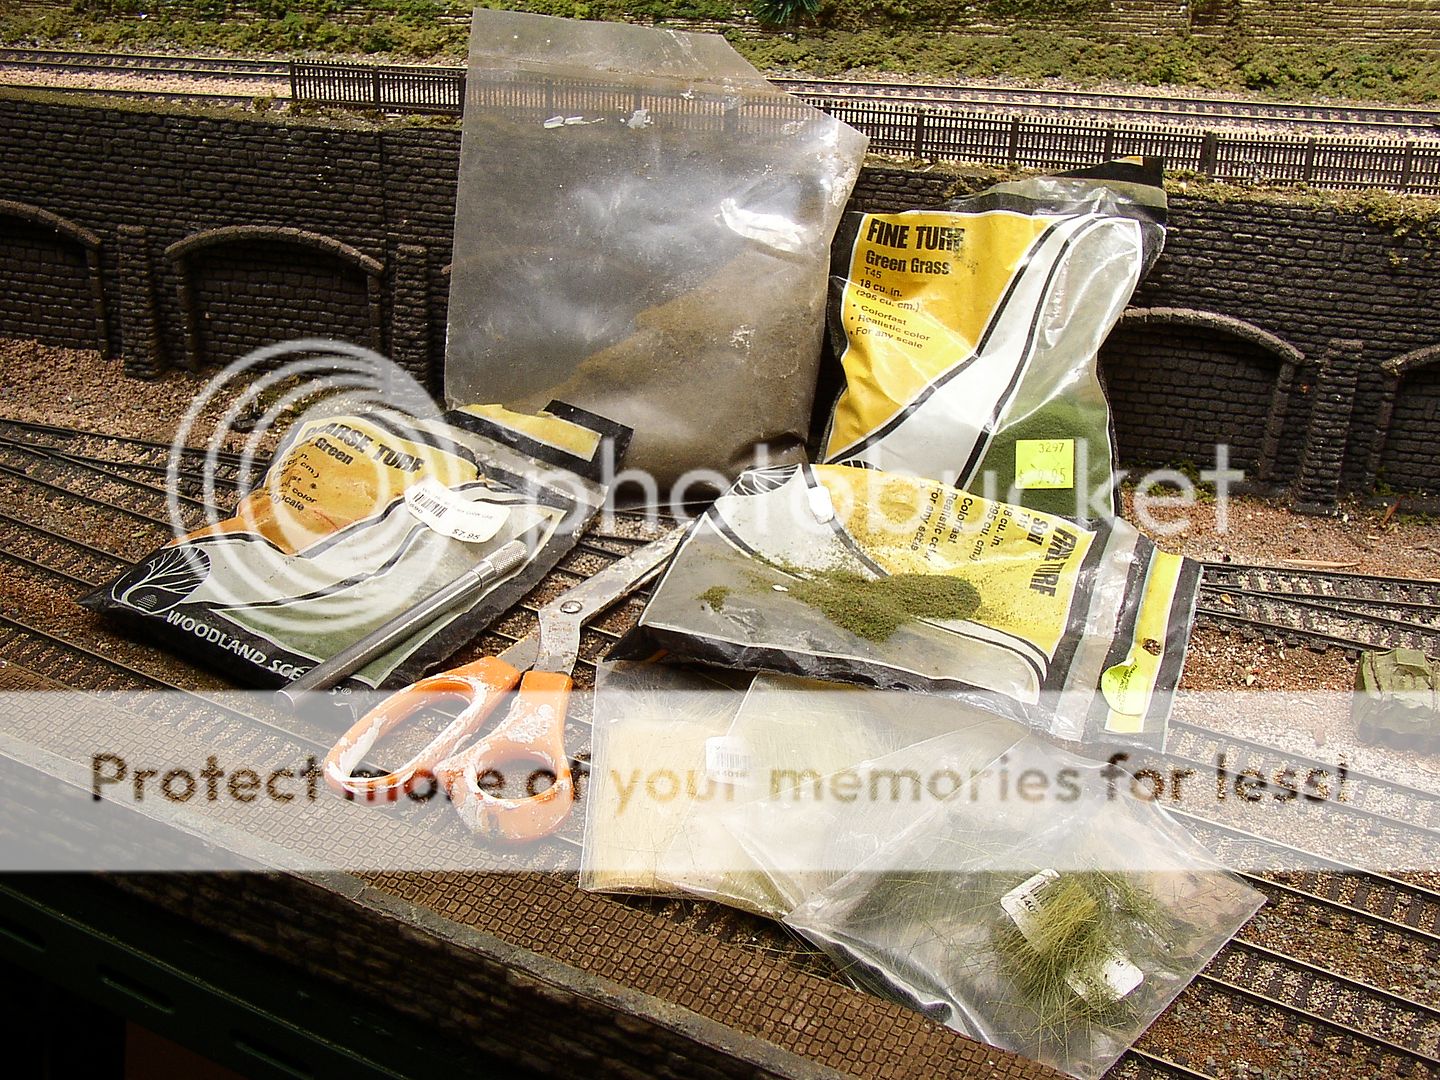
First assemble the required material and tools. I am using a selection of Woodland Scenics "Field Grass", "Fine Turf" and "Coarse Turf" products, plus a bag of Skale Scenics "Soil". Missing from the shot is the adhesive - I am using undiluted PVA for this work.
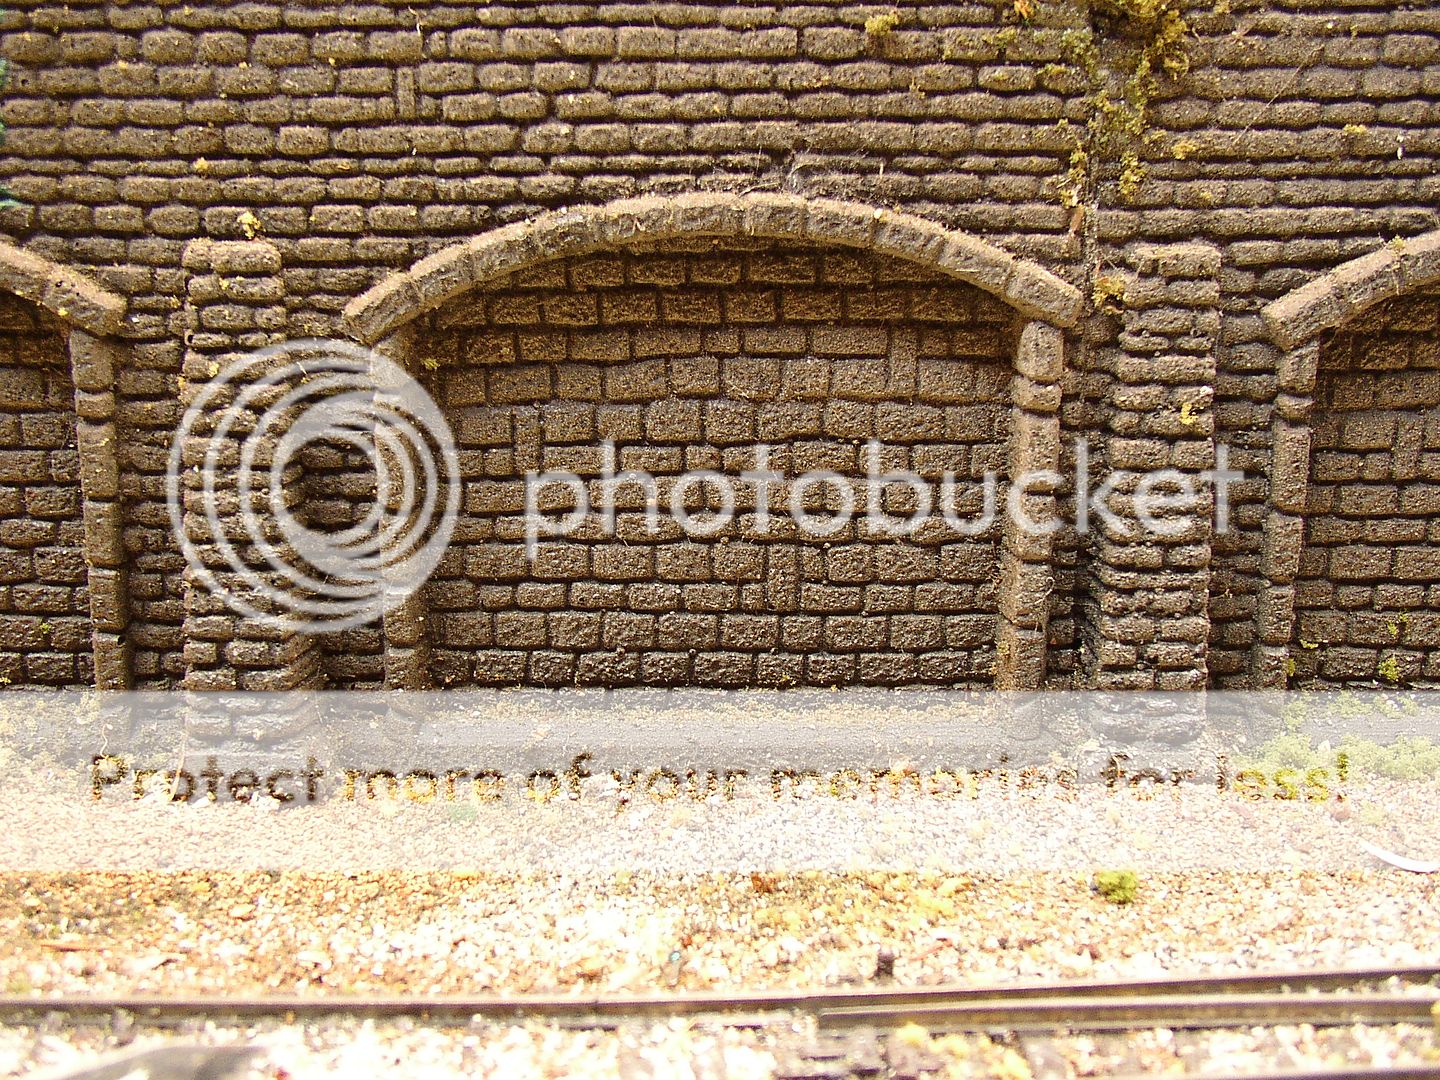
This is the area before work commenced.
First I work the PVA around the base of the wall to which the vegetation will be applied.

I start with the largest or longest item as smaller low-growing material will be added around it later. Here I have a pinch of two different colours of Field Grass mixed together to create a little variety.
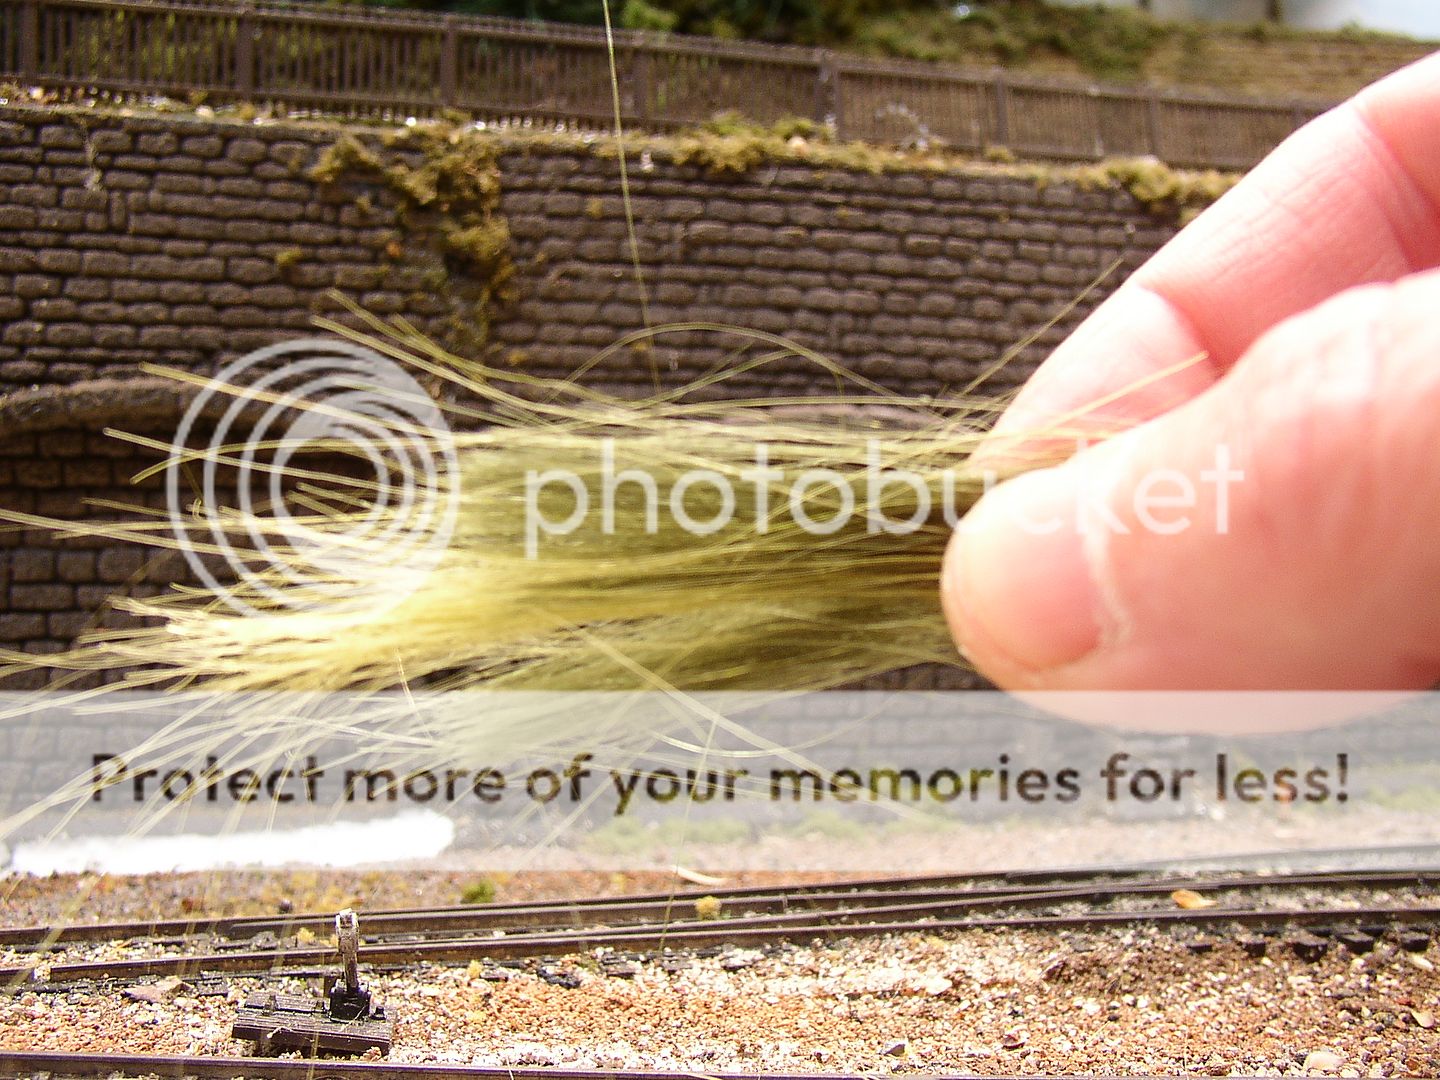
Next this is trimmed with the scissors at both ends. The concealed end between my fingers was first cut square then this end is cut at an angle to represent different growth of the grass.
I find it is quite easy to place this with fingers and ease it into its final position with the scalpel blade. A probe could be used but the blade picks up more of the fibres and I find gives a better result.

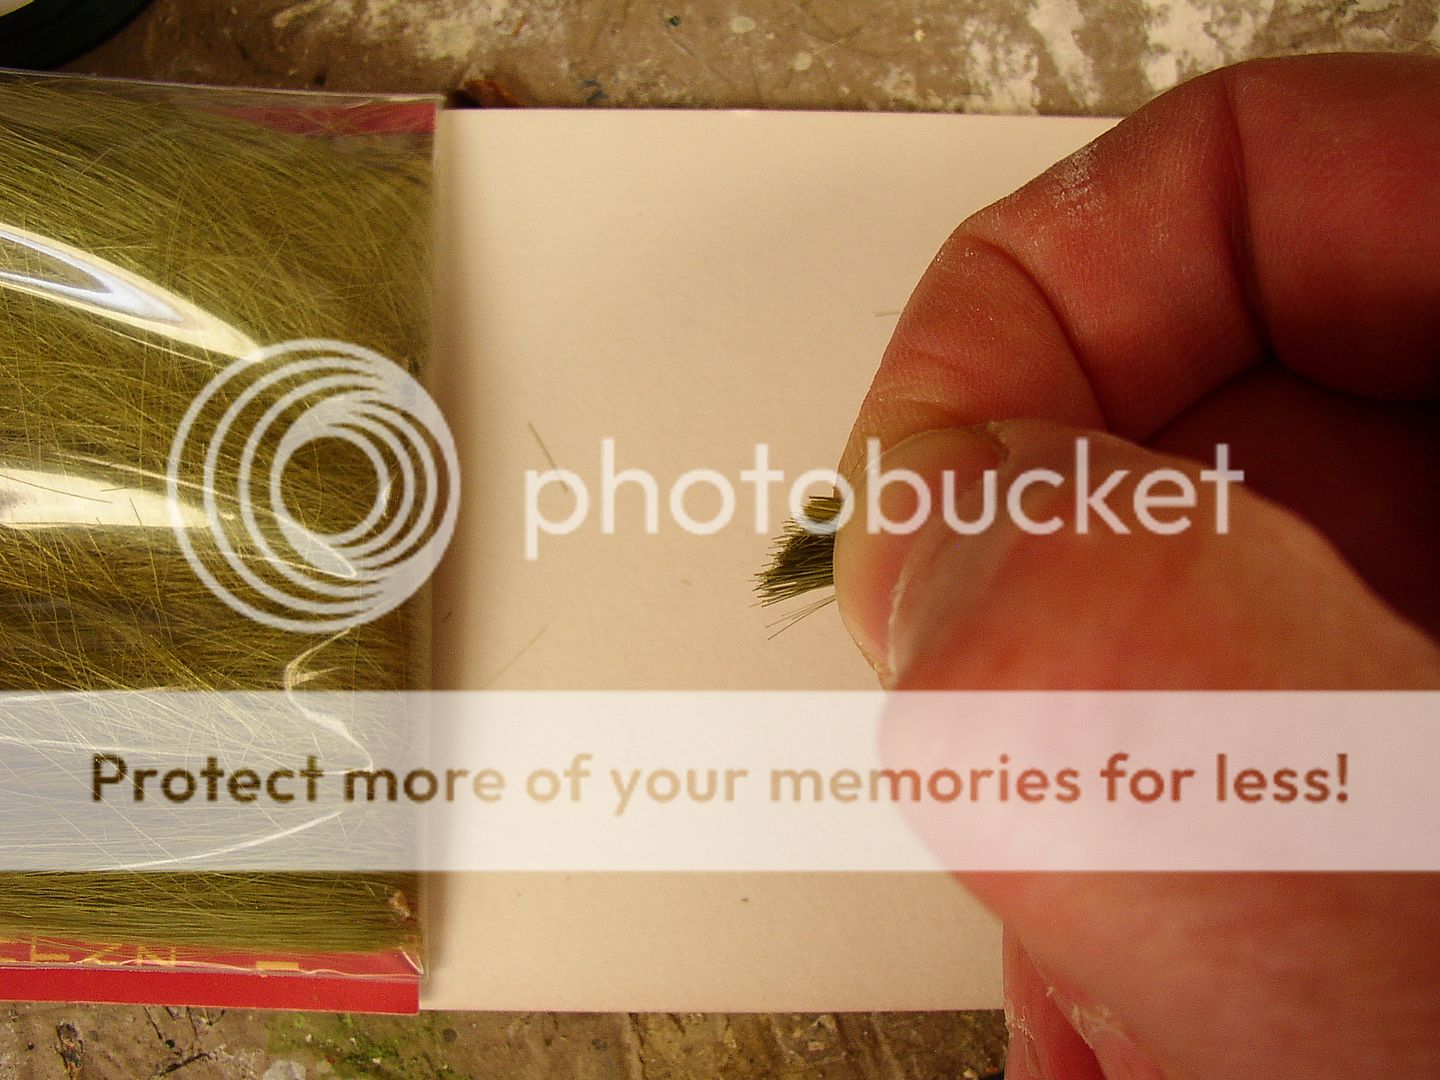
Next I mix a selection of the scatters in my hand again to give a variety of colour and texture. This is about â…“ each of coarse bright green, fine soil and the Skale soil; the coarse stuff hasn't shown up so well in the picture but is there.
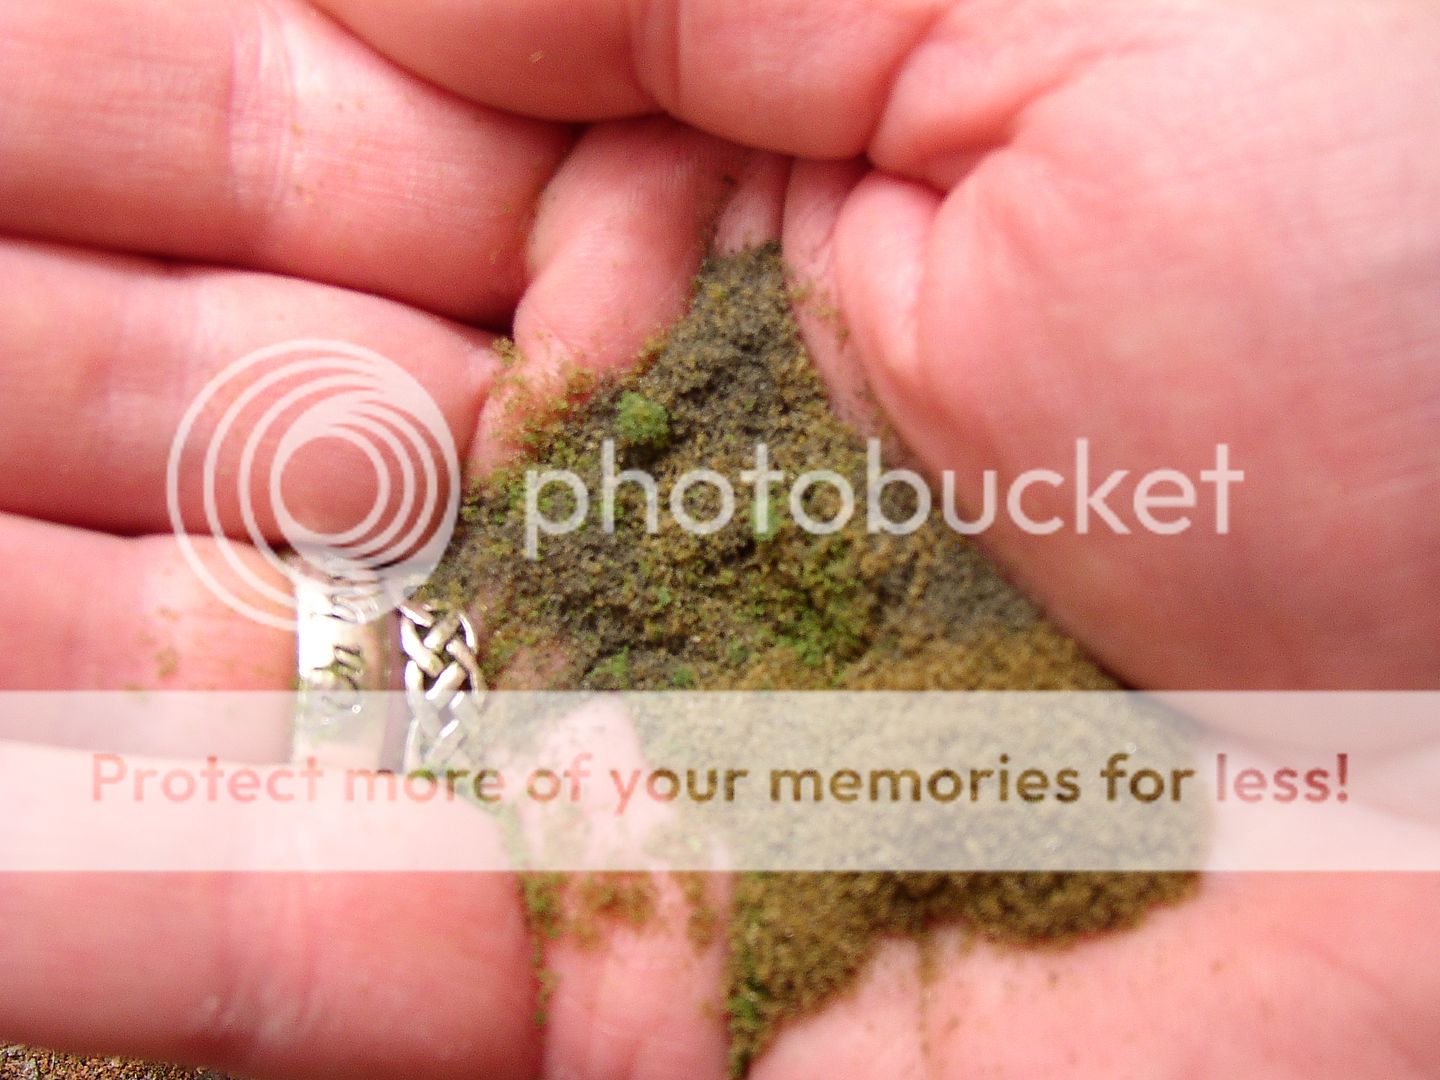
Cupping my hands this is given a good shake to mix it up and is then carefully placed using fingertips. More is eased into the "roots" of the long grass using the scalpel blade again which gives the appearance of everything having been there for some time and not "just plonked".

A little PVA is also dabbed with a cocktail stick onto the top of the stone arch.
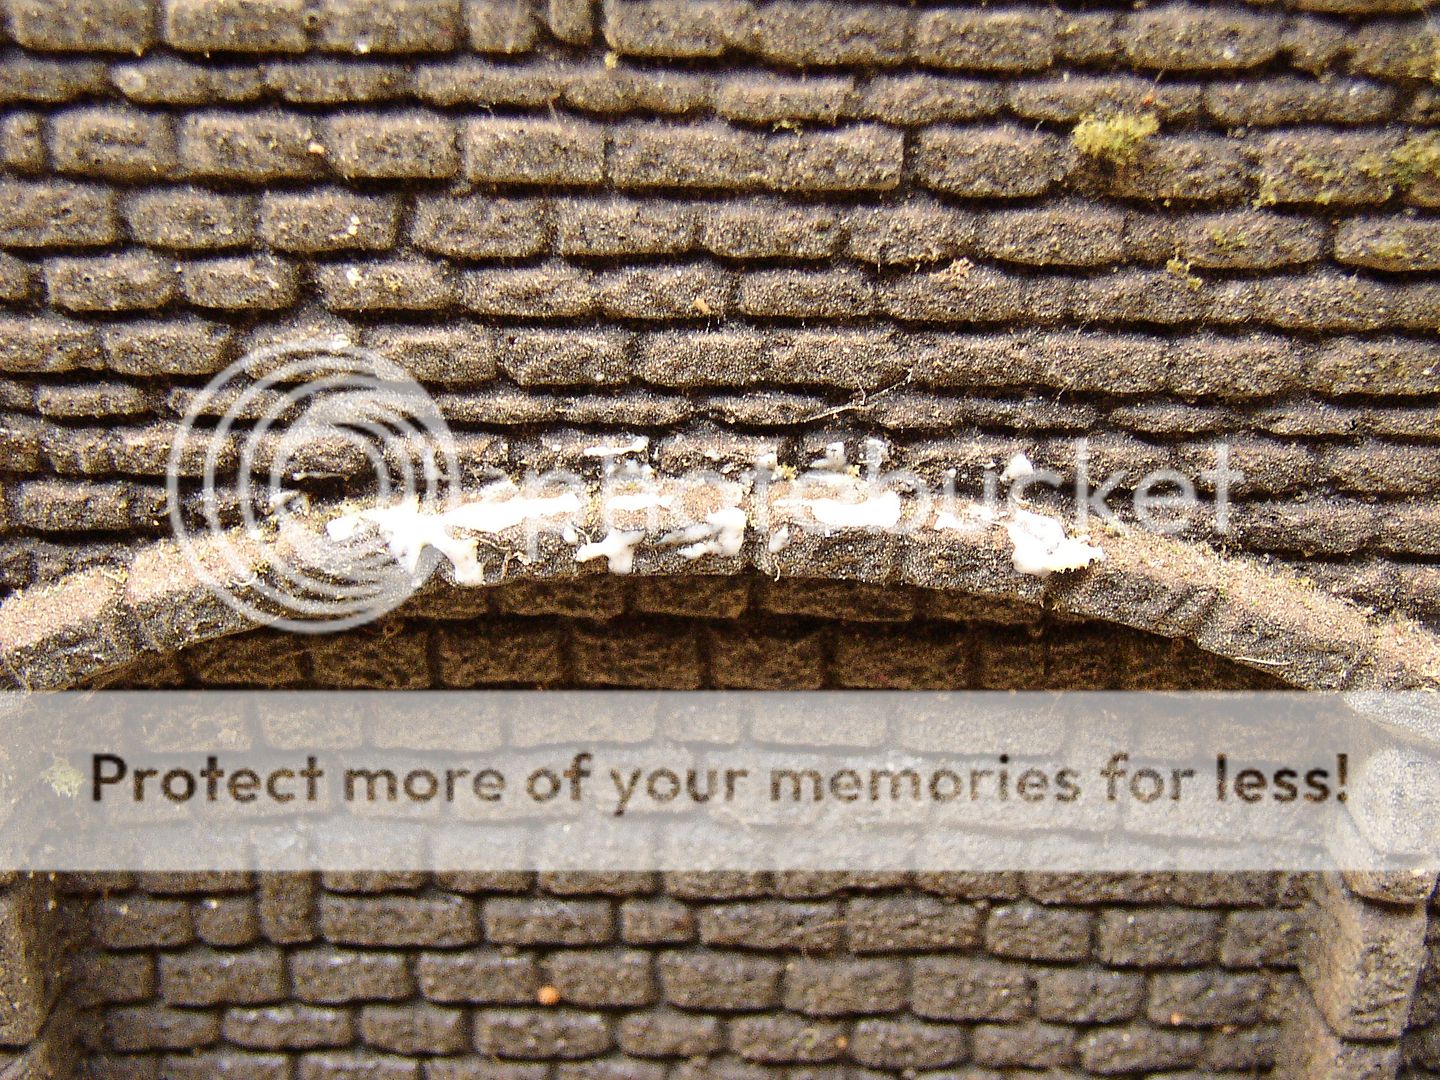
More green is placed onto this to show unmanaged growth on the upper surfaces.
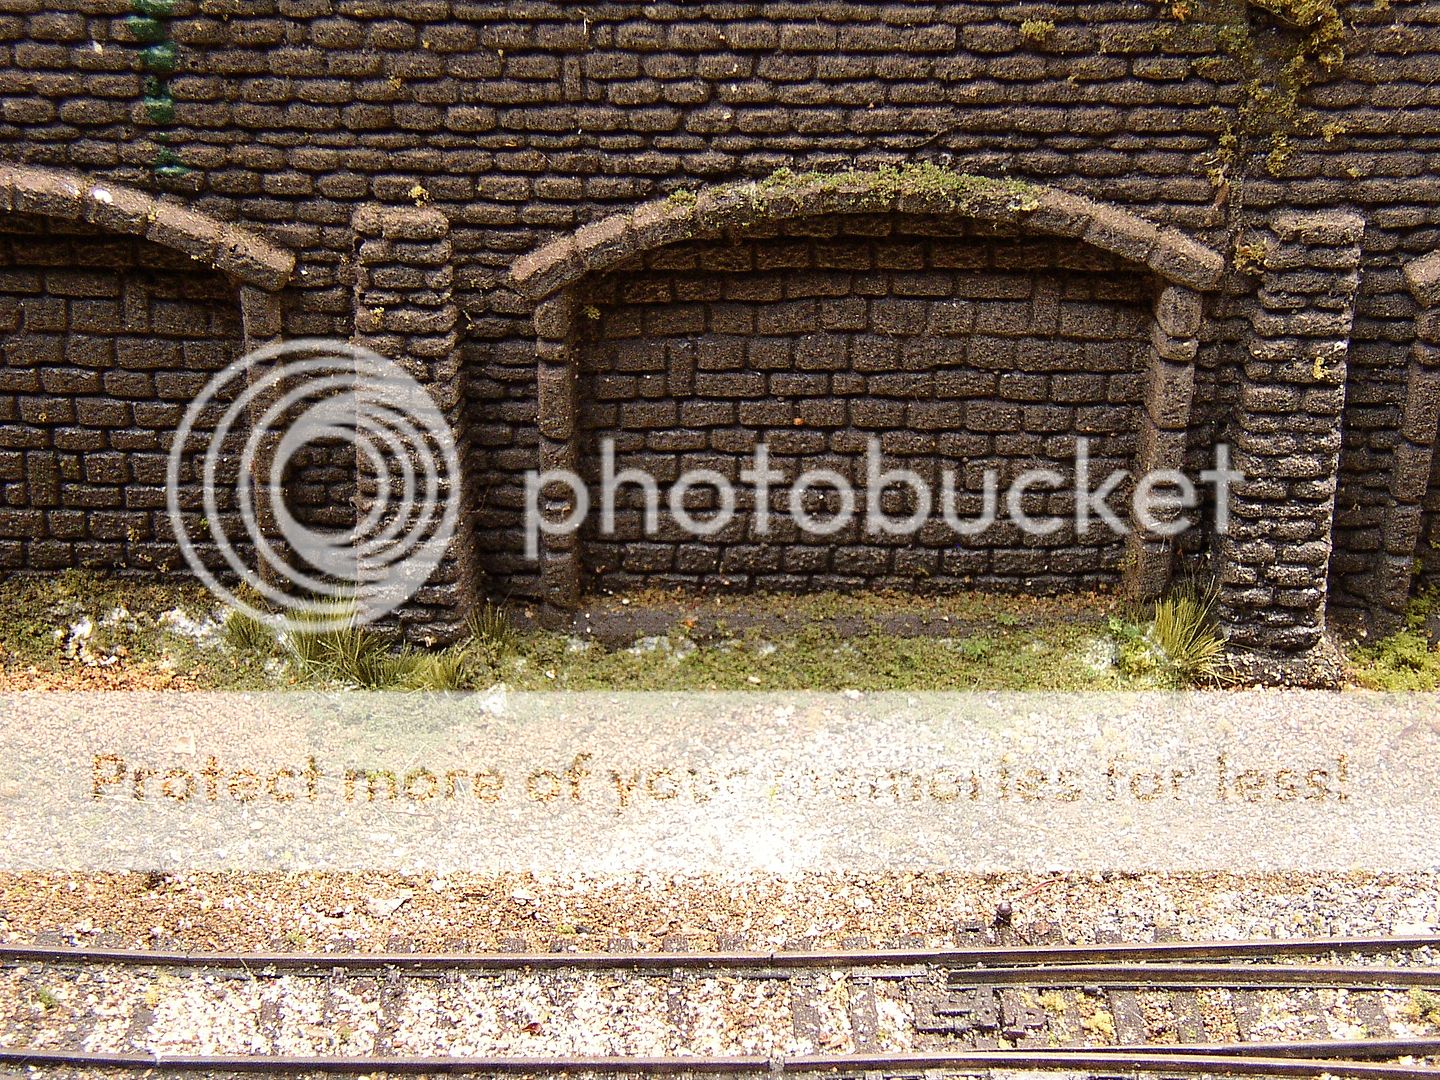
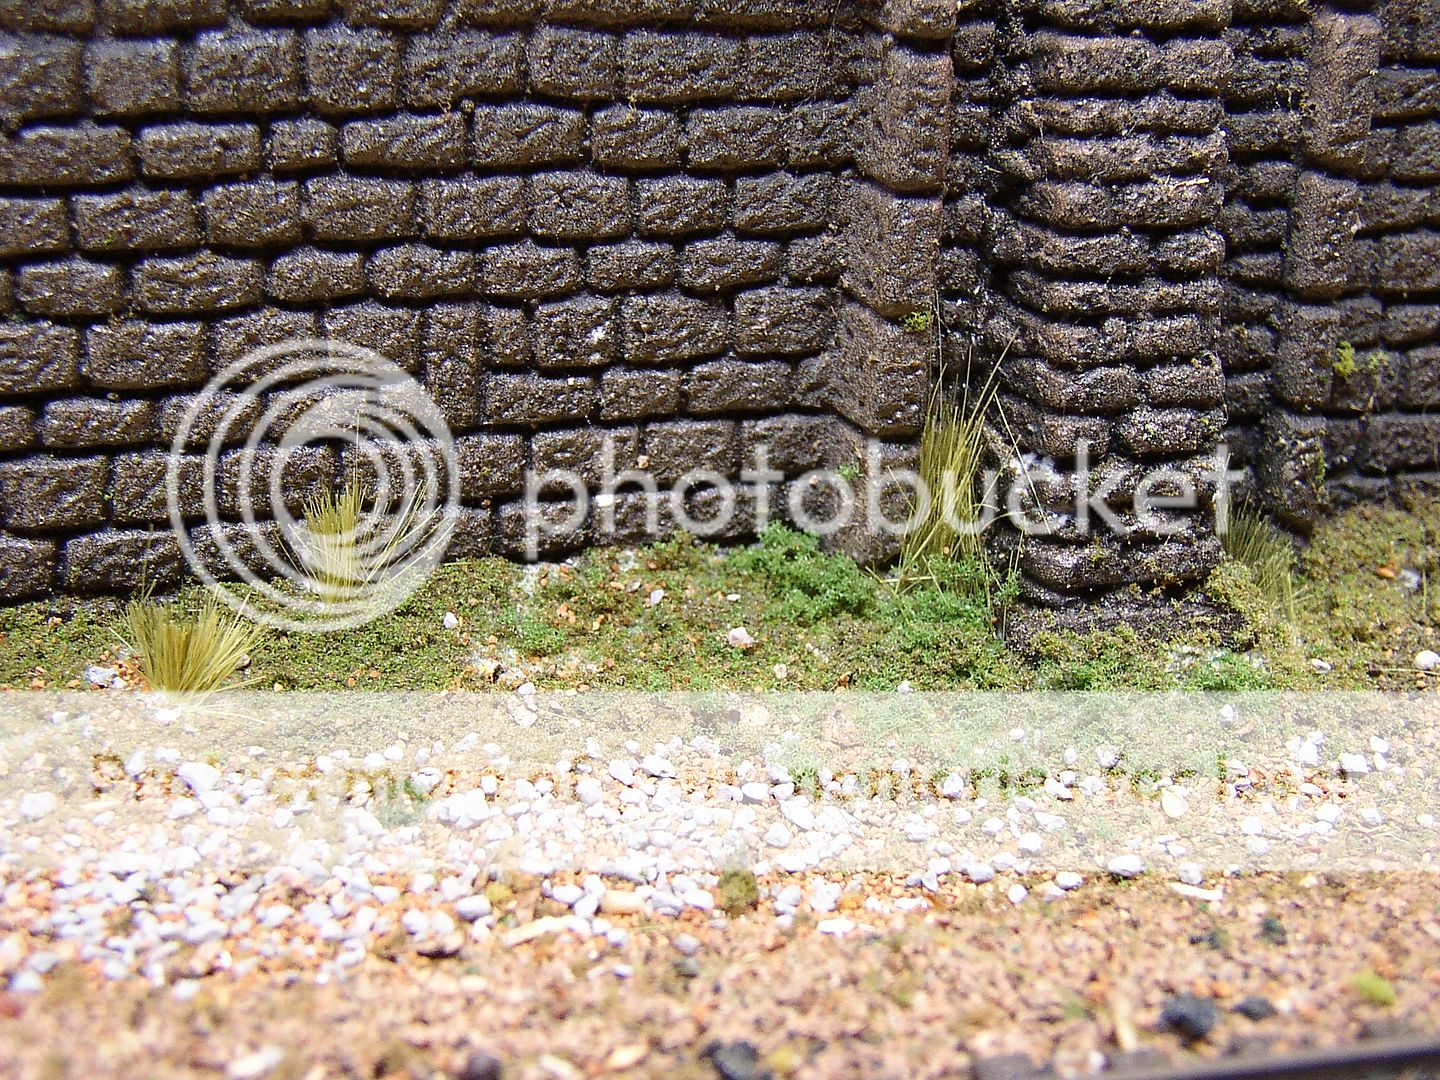
Finally the scene is recorded on camera to check that it appears good in close up. The foreground is a mix of Skale Scenics "grey ballast" and Woodland Scenics "Medium Brown" ballast fixed with a 50:50 diluted PVA spray.
Pictures like this also show up the odd stray grass fibre sometimes not visible to the naked eye; these can be carefully removed with the tweezers once the PVA is dry. Doing so while it is wet can lift the entire clump out and mean the whole job needs to be done again.
Posted
Guest user
And impatient twit that I am, I've ruined numerous clumps because I tried to remove stray fibres before the glue had set.
Mike
Posted

Full Member
Pictures like this also show up the odd stray grass fibre sometimes not visible to the naked eye; these can be carefully removed with the tweezers once the PVA is dry. Doing so while it is wet can lift the entire clump out and mean the whole job needs to be done again.
Like the fibre laying at an angle on the pier

Excellent tutorial Rick. I really like the way that you get a thin covering of weeds on the gravel as well:thumbs

Posted
Guest user
Like the fibre laying at an angle on the pier
That and the single very tall one in the middle clump have been dealt with under Rule 412.
That states that what cannot always be seen by the naked eye shall always embarrass the photographer.
They have both been dealt with. Meanwhile thank you for your comments :cheers
Posted

Inactive Member
Like the fibre laying at an angle on the pier
Don't say that, Woody. Now he'll spend hours looking for it. You know he irons his undies, don't you? :Red Card
Max
Port Elderley
Port Elderley
Posted
Full Member
Like the fibre laying at an angle on the pier
That and the single very tall one in the middle clump have been dealt with under Rule 412.
That states that what cannot always be seen by the naked eye shall always embarrass the photographer.
They have both been dealt with. Meanwhile thank you for your comments :cheers
I thought that the long one looked good, just needed some seeds on the end of it :shock:

Posted
Guest user
Posted

Legacy Member
Brilliant stuff….
Posted

Full Member
Posted
Guest user
 thumbs
It's easy to say in a thread "I used some scatter material to soften the line at the base of the wall", but a few photos do a huge amount to help those who struggle with scenic work (not to mention giving some of the "experts" fresh ideas as well).
Such photo-tutorials are a valuable asset to the forum exclam: Thanks for taking the time.
thumbs
Posted
Guest user
Posted

Legacy Member
Bozzy(never known to pass a pub)
Posted
Legacy Member
reg
Posted
Guest user
Vegetation looks effective I have used a similar technique on Beeches TMD - mixed some static grass in with the coarser fibres. Also mixed in bits of shrub (sea moss and flock), smaller plants to give the look of a range of plants mixed together - as on most bits of land near railways.
Posted
Full Member
Excuse my ignorance but I'm relatively new to the forum. I really liked the glimpse of the layout in the first photo - do have more pics of your layout if so where?Â
If you click on the red "here' on Rick's signature I think you'll find what you are looking for;-)
Posted
Guest user
Posted

Full Member
:pathead
Cheers,John.B.:thumbs
Posted

Full Member
A very well documented presentation - many thanks. :cheers
'Petermac
Posted
Guest user
1 guest and 0 members have just viewed this.