Grassy/soily areas
Posted
#85040
(In Topic #4664)
Guest user
Because of the way my layout is constructed - white polystyrene foam on top of doors - this technique might need some adaptations to work on a hard surface.
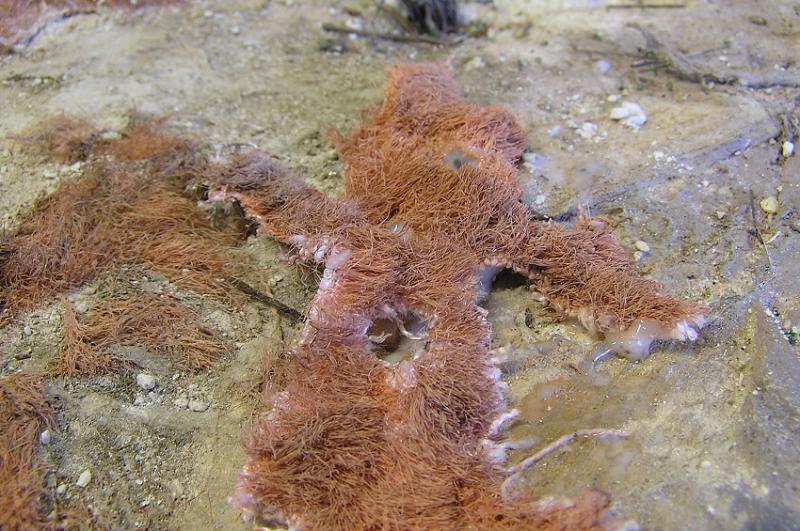
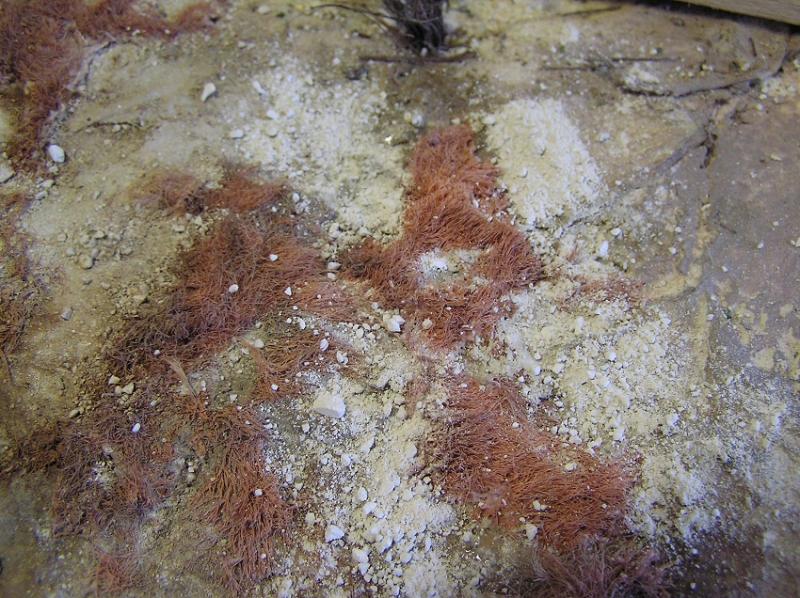
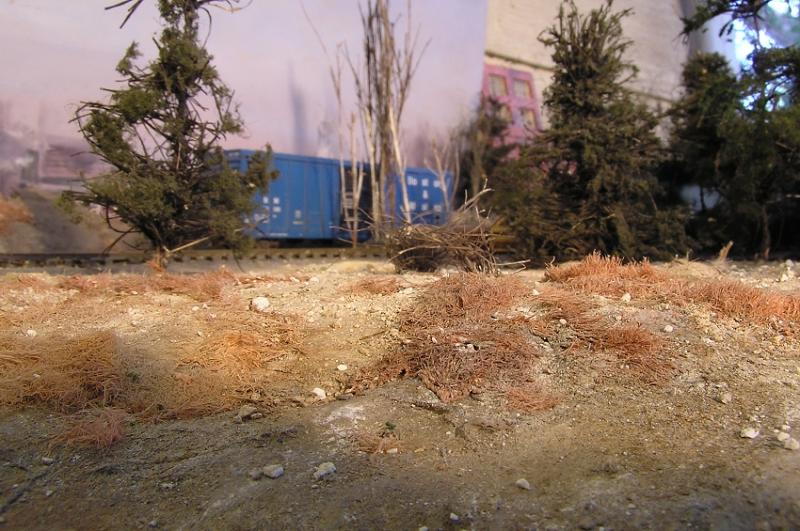
To start things off, the bank I'm working on here has pieces of surgical lint glued down on the white foam with PVA, then painted with any old earthy colours once it's dry. This gives a tough surface with a bit of give.
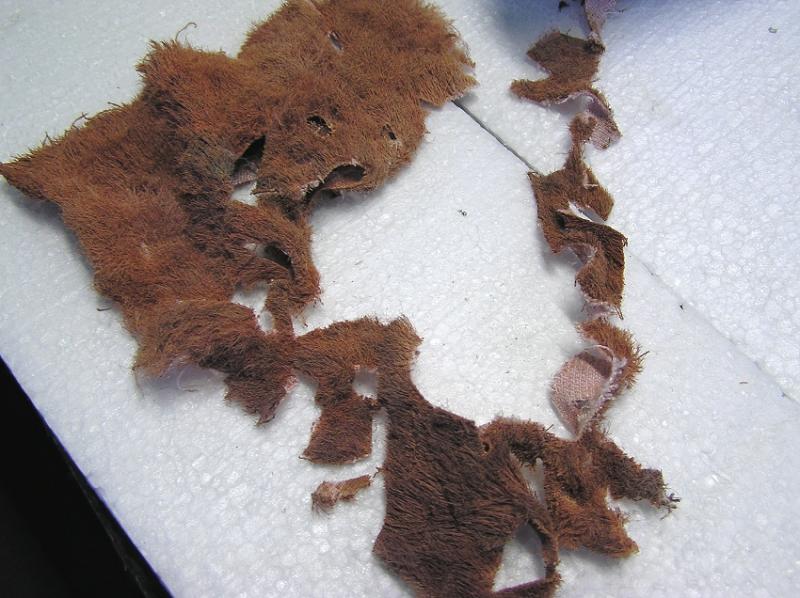
My grasses are made with Edco cleaning cloths - cheap, fine fibre cloths from the supermarket. These I paint with acrylics and pastels. I use them for grass tufts and patches. After hacking little bits out of them I end up with some bizarrely shaped remnants that are absolutely ideal for representing the random nature of grassy patches.
I snip off a nice piece and try it on the layout. When I find a likely home for it, I daub some PVA onto it and press it down.
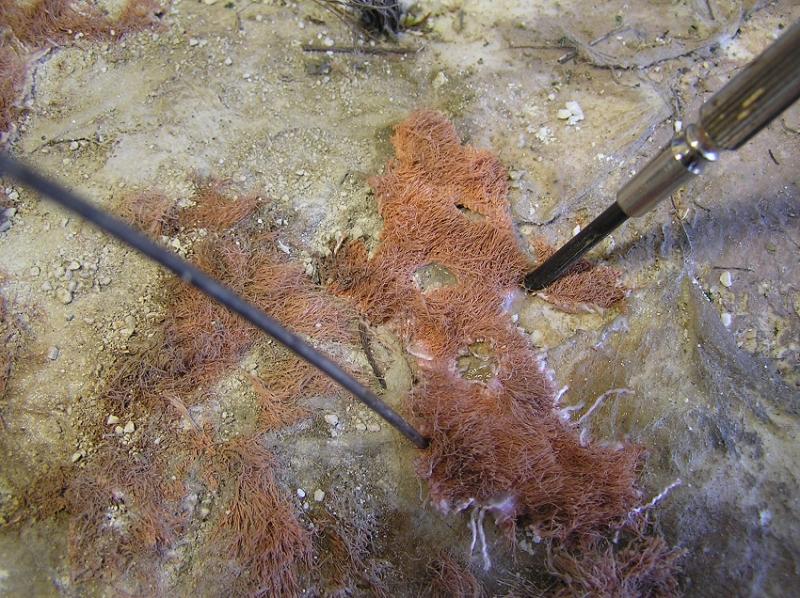
Then I use a small screwdriver and a skewer to ram it home, piercing the tough lint and forcing the grass edges down into the surface
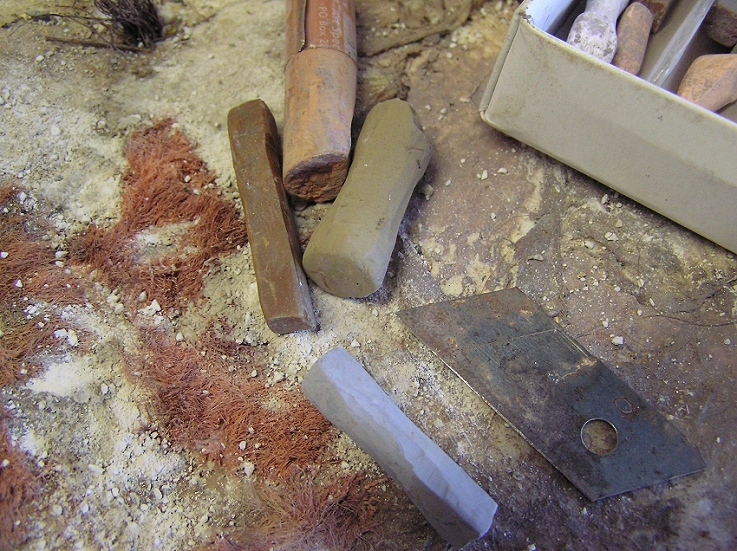
For soil I like to use air-drying clay. This is cheap stuff from the craft shop. I leave some chunks out for a few days, then pound it to powder, leaving a few bigger pieces for variety.
I carefully daub some glue onto the surrounding areas and into the holes in the grass, then sprinkle on the clay. If some goes onto the grass, that's fine. The only thing I don't want on the grass itself is glue.
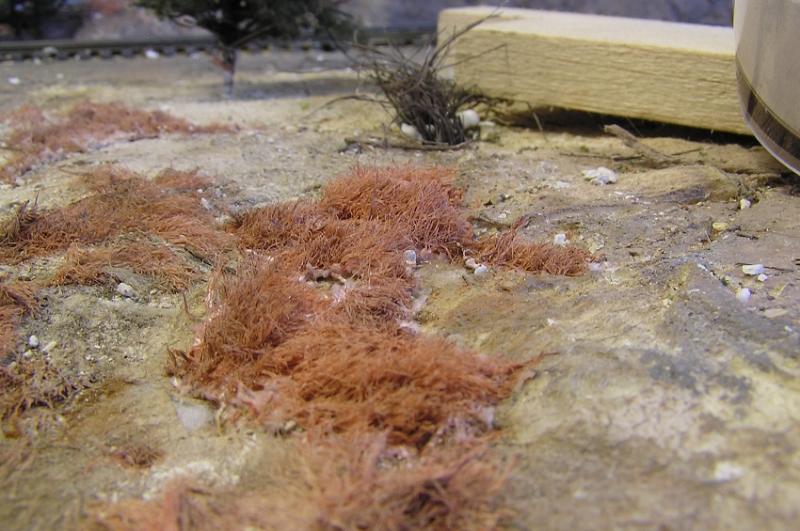
The clay is gently patted down, then I add a variety of powdered pastels - raw umber, raw sienna, burnt sienna and grey, this time.
Posted
Guest user
The clay is gently patted down, then I add a variety of powdered pastels - raw umber, raw sienna, burnt sienna and grey, this time.
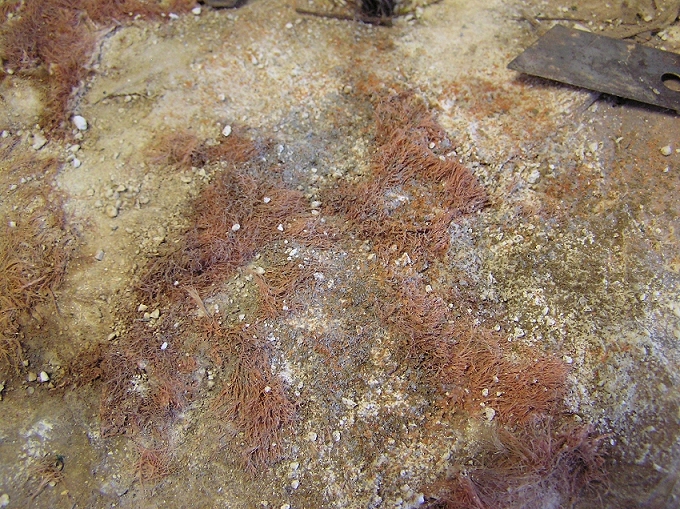
Scrape them directly onto the grasses and soil. Again this is all gently patted and rubbed with the fingers, taking care to avoid getting glue onto the grass.
The bigger pieces of clay add variety. They can be glued down if they missed the initial gluing, and they can be painted if required.
I might add more rocks at some stage. They would need to be painted to make them belong there.
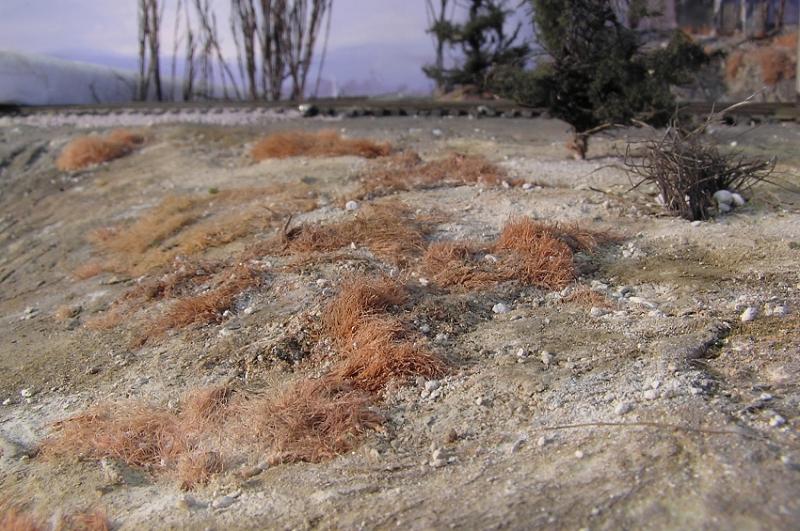
Obviously you could paint your cloths any colour you want.
I see some edges just right of centre - an easy fix with the screwdriver.
I hope someone finds this helpful.
Mike
Posted
Guest user
I hope someone finds this helpful.
I am someone that finds this very helpful.
Posted

Full Member

Posted

Legacy Member
Posted

Full Member
Posted
Guest user
Posted
Guest user
 lol:
lol: :cool:
Posted

Full Member
I'll let you know.
Wayne
Posted

Full Member
Phill
Posted

Full Member
Do you just leave the pastels and rely on the glue to fix them or do you fix them in some other way afterwards?
Posted
Guest user
Nick you could spray it with a fixative if you wanted to, but I find the pastels survive very well without it, because the clay and lint ground cover are very receptive. So is the grass, once it's painted.
Speaking of the grass, Lesley bought me some Chux cleaning cloths yesterday, and they seem almost identical [not the old blue Chux - these are fine fibre cloths much like fake fur]
Mike
Posted
Full Member
cheers
Neil

Posted

Legacy Member
Bozzy(never known to pass a pub)
Posted

Full Member
You make it look so easy Mike but I've said before, it's your ability to "see" things that most of us just don't register as being there and replicate them in minature that is really impressive.
Now all we have to do is copy it - can't be that difficult !!!! :shock::shock::shock::cheers
'Petermac
Posted

Legacy Member
Posted
Full Member
Now all we have to do is copy it - can't be that difficult !!!! :shock::shock::shock::cheers
Now steady Peter, we dont want you getting all confused and mising the show due to it

Phill
Posted

Inactive Member
Are your microfibre cloths a neutral colour to begin with? (Heaven knows where I'll get some though)
How do you paint them i.e.Do you spray them or just go over them with a brush?
You say you use surgical lint. This is as rare as hens teeth both in Spain and the UK but I have hung on to some from a previous project/technique. Did you tear this into pieces before sticking it down or just lay it in sheets? (I presume it is the green stuff under your dyed microfibre cloth).
I'm experimenting with real soil which I have dried and pulverised and wondered if you had tried the same method?
Sorry to be a bore but you know how much I value your opinion in matters like this.
Les
Devon Junction
Kernow Junction
Kernow Junction
Posted
Legacy Member
reg
Posted
Guest user
Hes got plenty of old flannel already
Les teddy bear fur
the wifes mink coat
In fact a lot of furry type fabrics covers would do use a wire bush to tease the fibres up
Brian
1 guest and 0 members have just viewed this.