Painting Hornby 00 Loco Crew Figures

Post

Posted
Rating:
#9328 (In Topic #920)
Avatar
Full Member
Whilst looking through my spares box, here in Liberia, I found a Hornby loco crew figure.  Given that Phill mentioned that he was considering painting his Hornby figures, I thought I would give it a go and report back on the results.  I only have the fireman figure with me so that is the subject I will tackle. Here he is, with an initial coat of dark blue over his jacket and trousers and the flesh areas blocked in:


Bob(K)
Online now: No Back to the top

Post

Posted
Rating:
#9394
Avatar
Full Member
I have finished blocking in the main colours, using a medium grey for areas which will be black:


The next stage is to wash the flesh areas with a thin dark brown:


After this I will add a black wash to the shoes, hat and shovel, which should give the effect of black without masking all the detail.

Bob(K)
Online now: No Back to the top

Post

Posted
Rating:
#9396
Avatar
Full Member
that looks good Bob i,ve got the Hornby crew aswell so will have to have ago at painting them


Brian(G)
Online now: No Back to the top

Post

Posted
Rating:
#9399
Avatar
Full Member
Looking good Bob, when you use the black for the hat and shoes, will you mix a lighter color with it? I assume you use the grey under the black as a base coat to allow the black to cover better. Is that why?

Wayne

My Layout "The South Shore Line":
http://yourmodelrailway.net/view_topic.php?id=509&forum_id=21
This video/animation was made in Adobe Flash Player, which is no longer supported or available for download.
Online now: No Back to the top

Post

Posted
Rating:
#9403
Les
Avatar
Inactive Member
Great Bob. I have exactly this figure (and the driver) so I will follow this one closely and when I have a moment I'll do it as per your advice.  :D  :D  :D

Les

Devon Junction
Kernow Junction
 
Online now: No Back to the top

Post

Posted
Rating:
#9411
Avatar
Full Member
What a difference the brown wash makes to the flesh areas Bob.  Amazing what a lick of paint can do !!

Petermac

'Petermac
Online now: No Back to the top

Post

Posted
Rating:
#9453
Avatar
Full Member

Wayne Williams said

Looking good Bob, when you use the black for the hat and shoes, will you mix a lighter color with it? I assume you use the grey under the black as a base coat to allow the black to cover better. Is that why?

Wayne

Wayne

No, I will just thin the black paint down with water and wash it over the grey.  The grey actually provides  the highlight needed to give depth. The black wash will accumulate in all the crevices and when dry will give an effect of shade.  If I was to use just plain black, in this scale, objects like the hat would look just like a black blob.  The trick is to allow some of the grey to show through giving the effect of worn, dirty items catching the light and the thin black wash does just this - hope I have explained it clearly enough.

Bob(K)
Online now: No Back to the top

Post

Posted
Rating:
#9456
Guest user
I was wondering the same thing. Very well explained Bob :D
Back to the top

Post

Posted
Rating:
#9477
Avatar
Full Member
Thanks for the explanation Bob, I won't tell you that I thought you were actually going to paint the hat and shoes "Black"!  :oops:  :oops:  :oops:
So don't tell anyone! :roll:  :lol:

I does make sense now! :shock:

Wayne :lol:  :lol:  :lol:

My Layout "The South Shore Line":
http://yourmodelrailway.net/view_topic.php?id=509&forum_id=21
This video/animation was made in Adobe Flash Player, which is no longer supported or available for download.
Online now: No Back to the top

Post

Posted
Rating:
#9490
Avatar
Full Member
So the next stage is to apply a wash of black, over the areas previously painted grey, which are the hat, shovel  and shoes.  I also added a thinner wash over the white shirt:


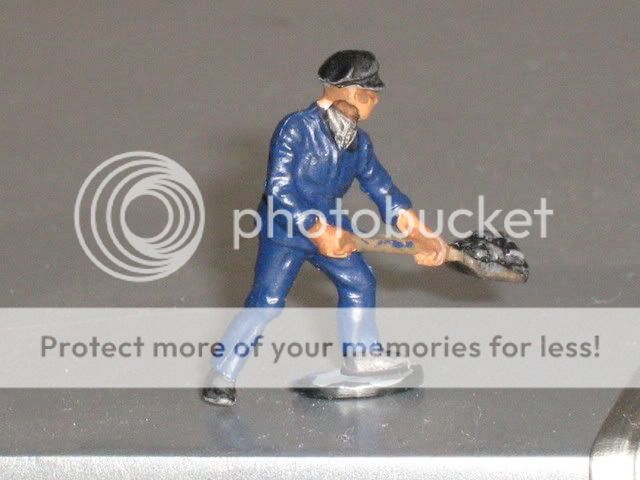
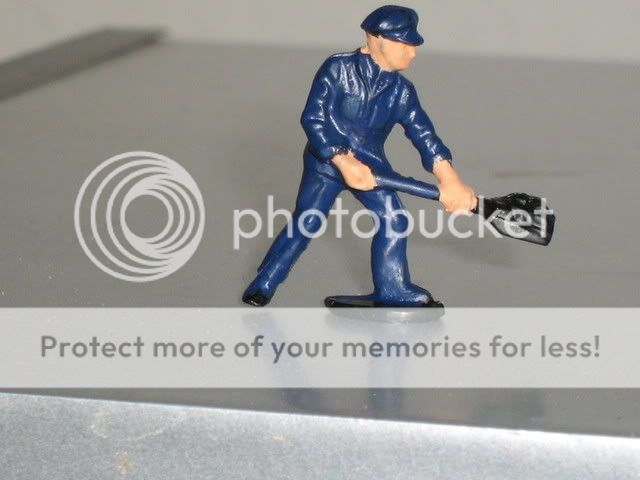
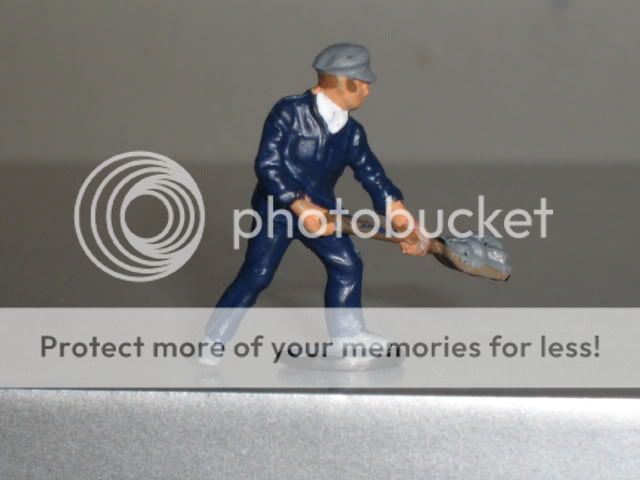
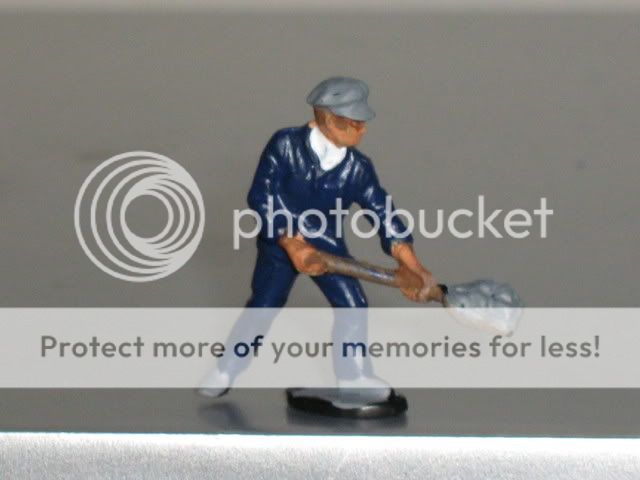
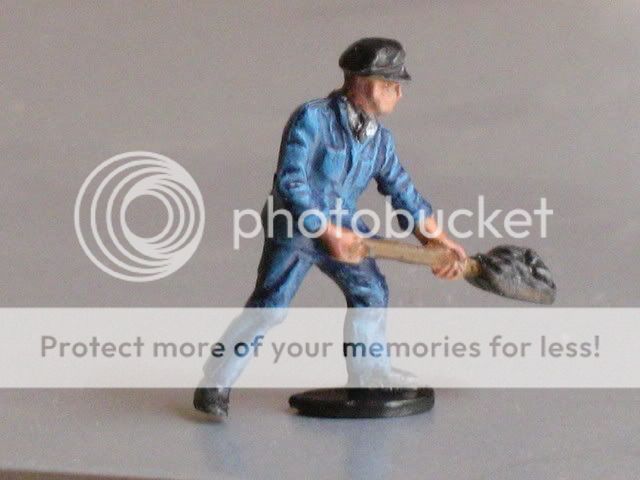
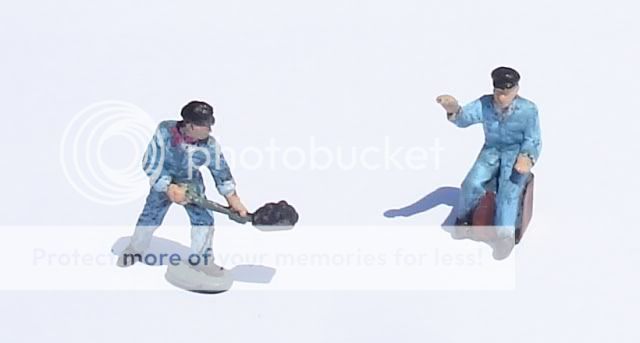
The next task is to pick out the highlights on the clothes.  Using the same blue as the base colour, add some white and a little of the black wash, just to take the shine off it, and then dry brush over the trousers and jacket.  keep doing this until all the raised areas are covered.  This should leave the folds nicely dark blue:


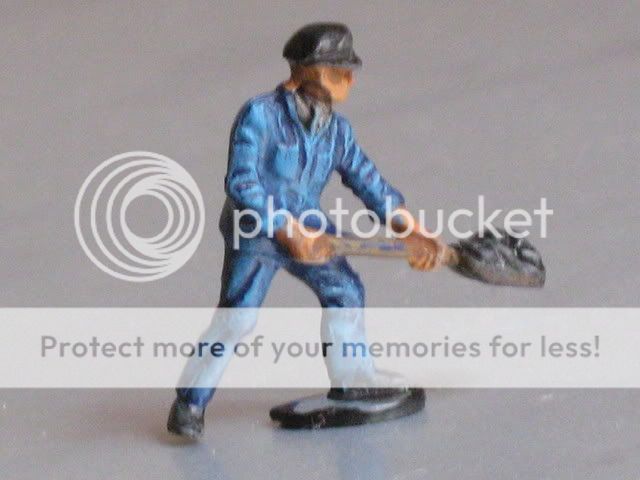
Once dry take some flesh colour, add a little white and dry brush this over the hands and face.  Next dry brush a tiny amount of white over the shirt to pick up any highlights and then, when dry, pick out the tie with a little black.  Finally a bit of brown finishes off the shovel handle and tidy up the base of the figure with a bit of black.  And there we have it one hornby loco crew man ready to be fitted into the loco cab:


Bob(K)
Online now: No Back to the top

Post

Posted
Rating:
#9530
Guest user
And very nice, too  :!:  :!:   Terrific step-by-step Bob, with a splendid result.  I like the matt finish as well.

 Mike
Back to the top

Post

Posted
Rating:
#15079
Les
Avatar
Inactive Member
Finally followed you instructions Bob and I've had a go.

Please don't be too harsh and I did enjoy doing it. :D


Les

Devon Junction
Kernow Junction
 
Online now: No Back to the top

Post

Posted
Rating:
#15080
Guest user
les
thats a superb job you have made of them i would be proud to have them in any one of my loco`s

If this is your first attempt you are an instant expert.

cheers Brian.W
Back to the top

Post

Posted
Rating:
#15091
Guest user
I agree with HP, I consider that an outstanding job for a first attempt, Les.
Very well done :!:
Back to the top

Post

Posted
Rating:
#15095
Guest user
They're excellent, Les  :!:  Very impressive. It'd be a shame to hide them in a cab.

 Mike
Back to the top

Post

Posted
Rating:
#15104
Avatar
Full Member
Nicely done Les, they should show up well in the cab of a loco.
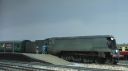
It would be nice to see a photo of them "at work".
cheers

Marty
N Gauge, GWR West Wales
Newcastle Emlyn Layout.
Newcastle Emlyn Station is "Under construction"
Online now: No Back to the top

Post

Posted
Rating:
#15109
Avatar
Full Member
What a astounding superb job for a first attempt mate, well done.
Phill
Online now: No Back to the top

Post

Posted
Rating:
#15111
Sol
Guest user
Good job Les. The main thing is that you enjoyed it.
Back to the top

Post

Posted
Rating:
#15115
Guest user
Excellent Les - I love the necktie around the firemans neck!
Back to the top

Post

Posted
Rating:
#15122
Guest user
Les
any tips on painting combats? i will need to do this for the May project. 8)
Back to the top
1 guest and 0 members have just viewed this.