Trix Trains Signal Box & Huts 00-3 cardboard building kit
Posted
#264692
(In Topic #14407)

Full Member
The building of the vintage Trix Trains cardboard Signal Box kit
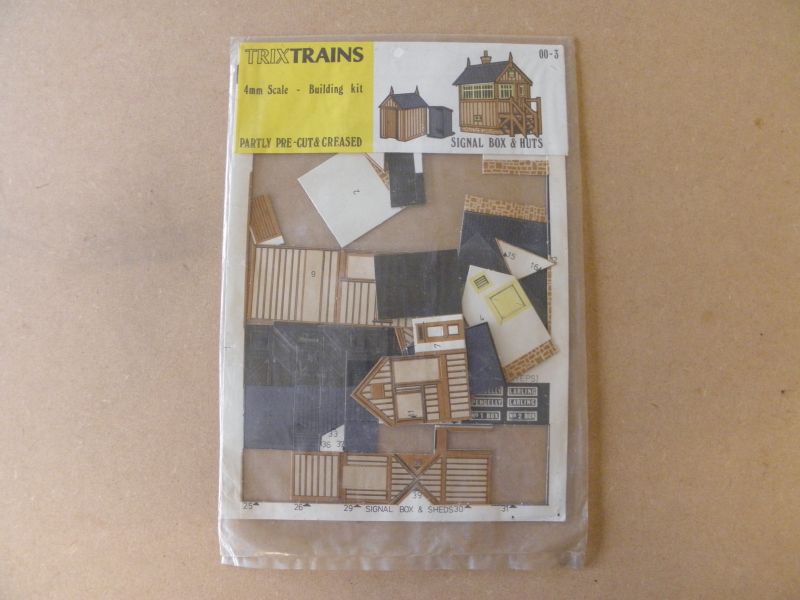
Hello all,Thank you for looking in on the latest Trix kit build, the Trix Trains Signal Box & Huts kit 00-3.
This is a remarkably small kit, consisting of one sheet of card, one sheet of paper, and a plastic window sheet. Trix still managed to squeeze in a couple of small huts too!
As with the previous kits, cutting accuracy was poor and ALL parts were checked and trimmed before assembling (lessons learnt from the first kit!).
The Trix Trains Signal Box & Huts Kit 00-3. All in pieces again!
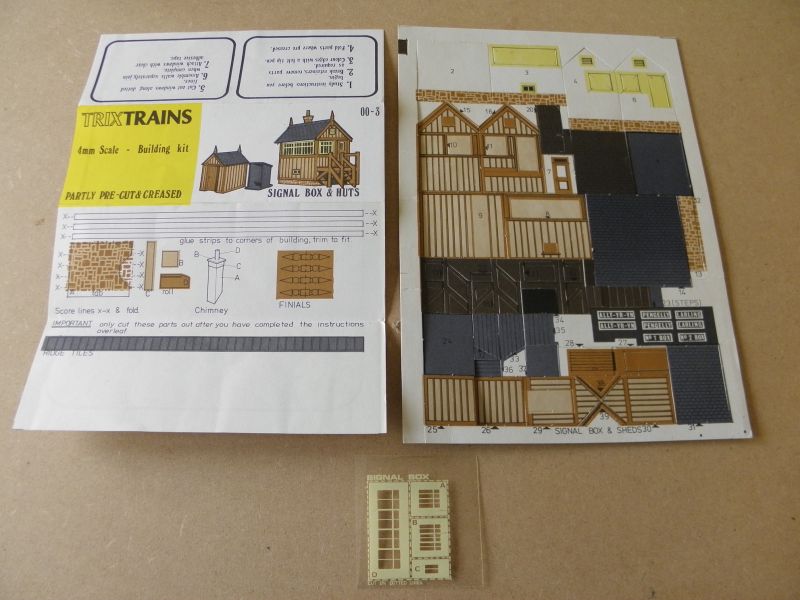
The Kit – A sheet pf paper with chimney, ridge tiles and Finials (which I choose to miss off), a sheet of (badly) pre-cut card, and a plastic sheet of windows.

The instructions.
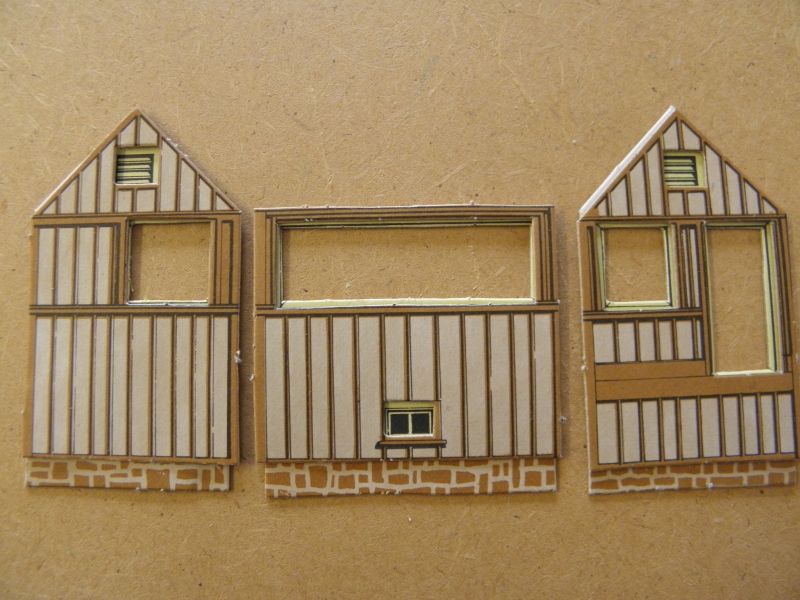
The sides are all double-layered, with the stonework and window frames on the first layer, and wooden structure on the second layer. Above, these are freshly removed from the sheet and have not been trimmed/adjusted. A little work is needed to get things straight and windows and vents in the right place.
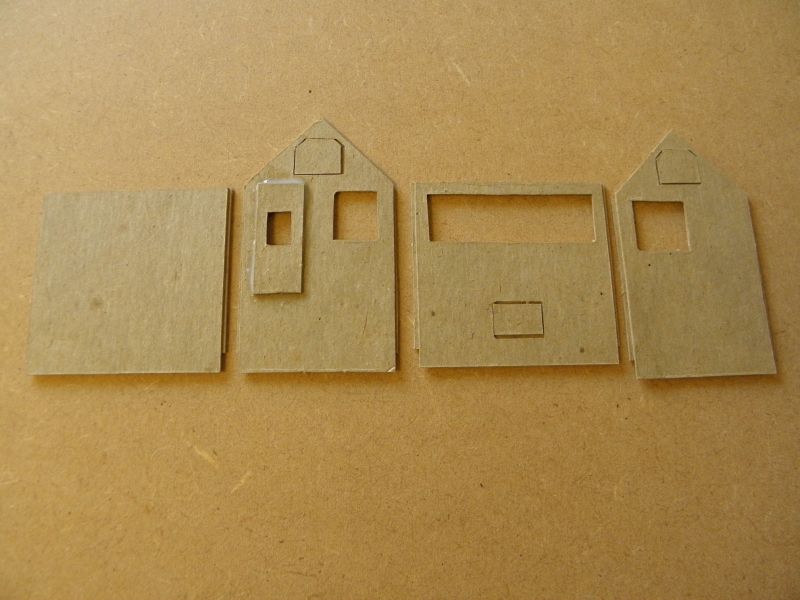
The back of the walls, once trimmed and glued. The vents and lower front window were cut 'free' and moved to the correct position. These sections were allowed to set under some heavy books to keep them flat.
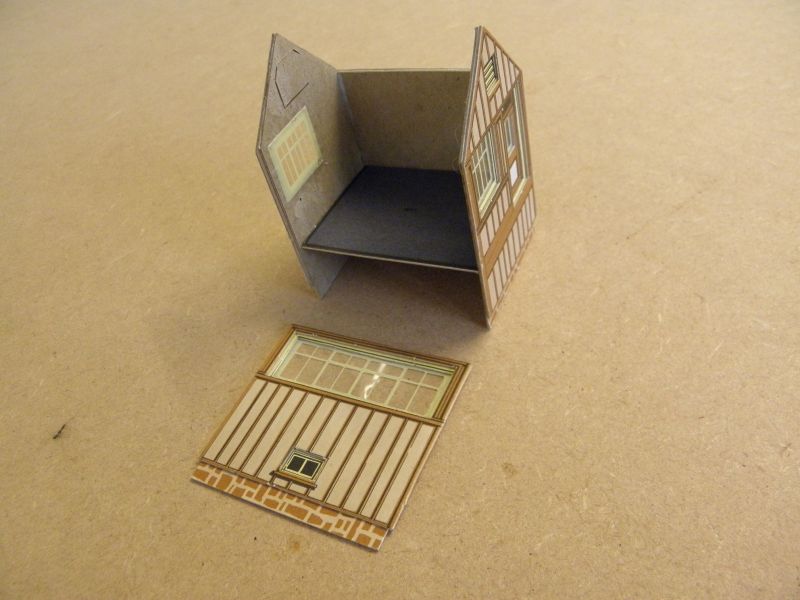
The kit comes with a wooden printed floor, but I decided to use this for the landing! Instead, I used the grey-printed base as the floor. I decided to glue the building ends within the sides, but in hindsight it would have been better to glue the sides within the ends because the bargeboards turned out to be too short!
Windows were first taped in place and fixed with blobs of PVA, as usual.
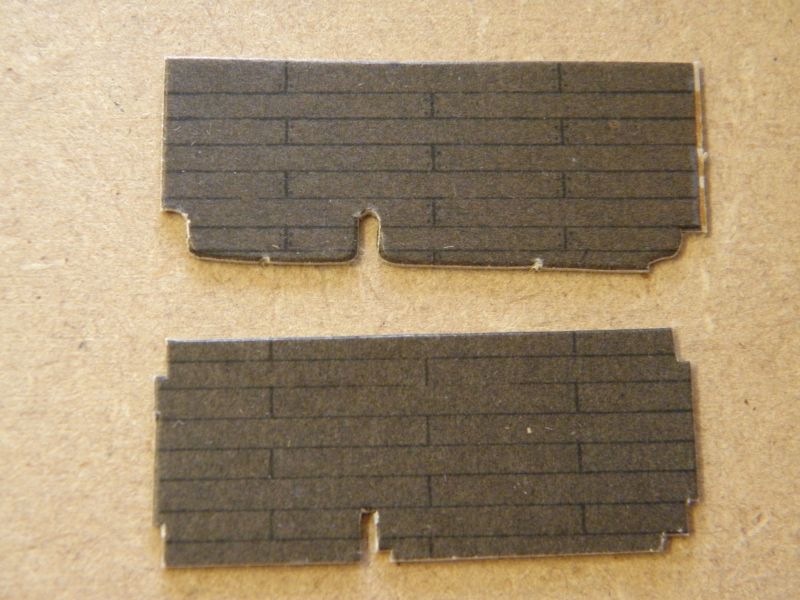
The landing for the stairs was not well cut (top), so, as previously mentioned, I decided to make my own from the signal box floor (bottom).
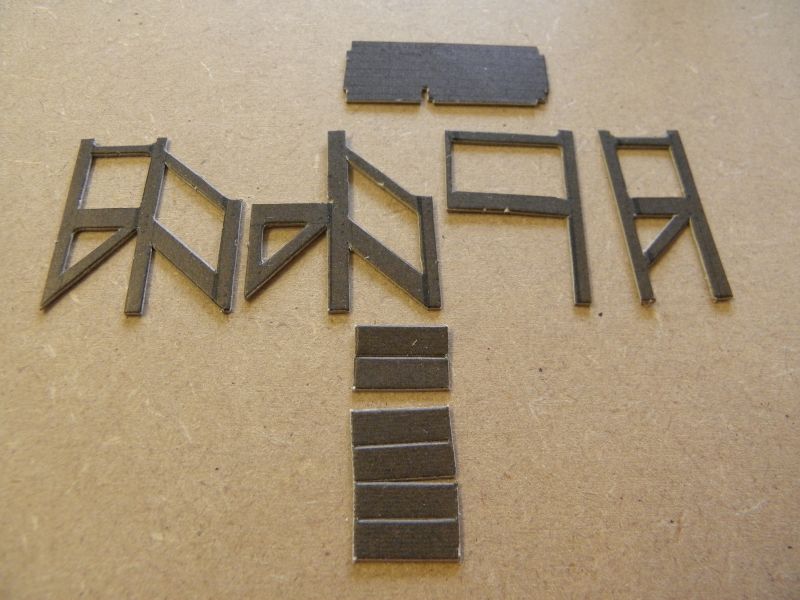
The components for the stairs. These are incredibly intricate for any cardboard kit, especially one dating from the 60s where the cutting tool would be completely hand-made. This one must have had the toolmaker pulling his hair out!
Going off on a tangent, I have worked in the print industry since the 90s – the type of cutting tools which produced these kits are still being made and used today, and some of the presses are still in use too! The cutting tool itself consists of a sheet of plywood, which has the shape of the box (or in this case, a kit) cut into it with a scroll-saw (or, today, a laser), and metal blades trimmed, bent and inserted into the plywood. If you google 'crosland hand fed platen die cutter' you will find videos of these machines and cutting tools. Anyhow, back to the kit!
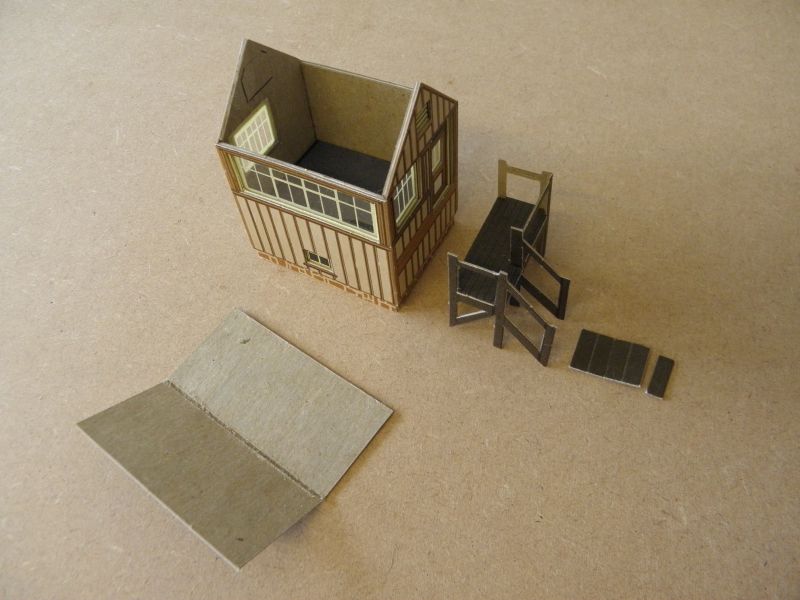
Because the card I used for the landing was a bit narrower than the original, I needed to trim the front landing section down a little. The board being printed on one side only, I decided to have the printed side facing outwards on all sides, but I think it might have been better to have had them all facing the same way. I fixed the stairs onto the building only once all the edges and exposed board had been painted with watercolour and gouache.
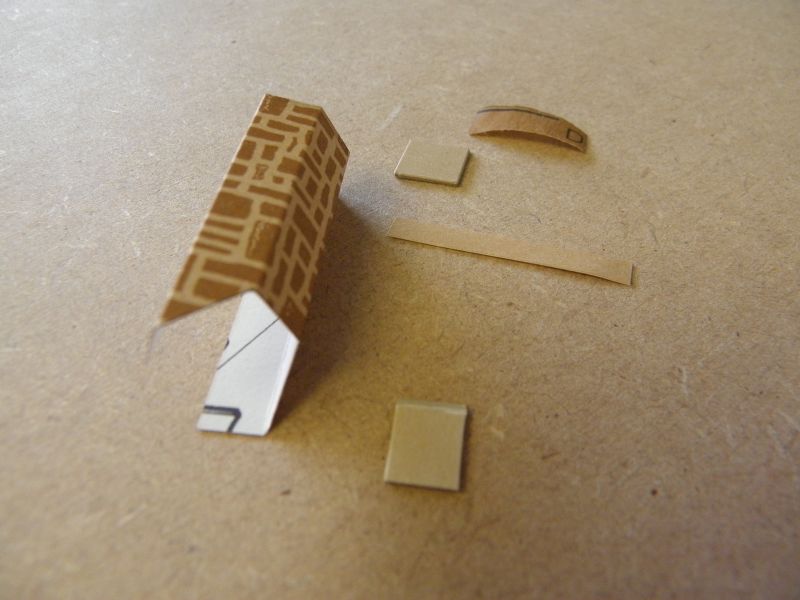
The chimney is made from the paper sheet. I added a card square top rather than the paper original, and also a card base which helped to fix the chimney to the roof. The chimney pot (top) I pre-rolled using the edge of a steel rule, and also separated the paper into two, leaving a very thin top layer. The pot was then rolled around a small screwdriver with PVA and left to dry.
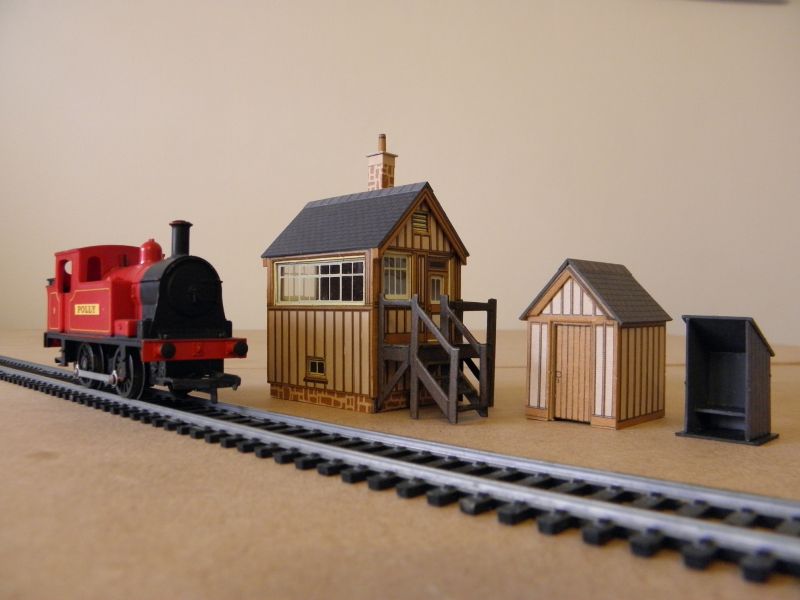
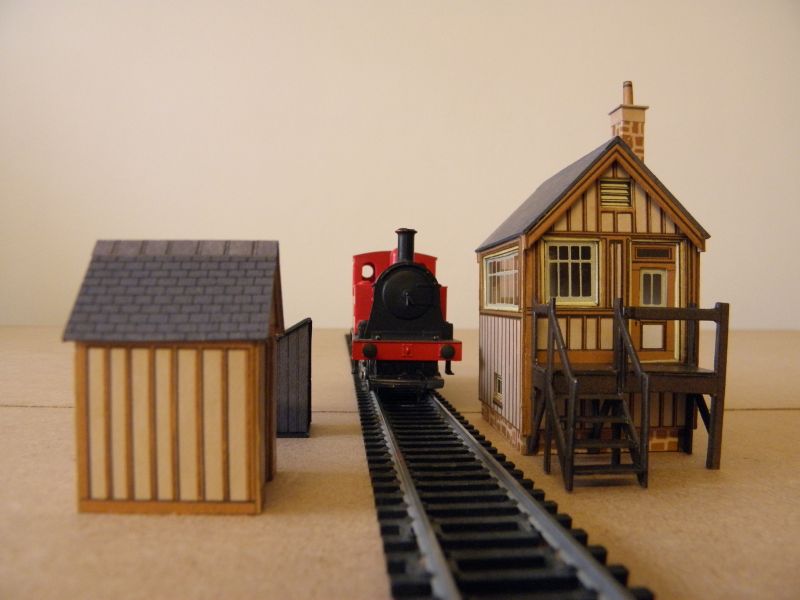
The finished kit with the two small huts. These were straight forward to build, though the small one did require a lot of painting.
The chimney stack is a single piece of card, doubled up below the wooden sides. This required carful painting with gouache, first with the light base colour, then the dark stones, otherwise the card edge would look quite bad.
The bargeboards needed a little extra bit adding to the ends to make them wide enough.
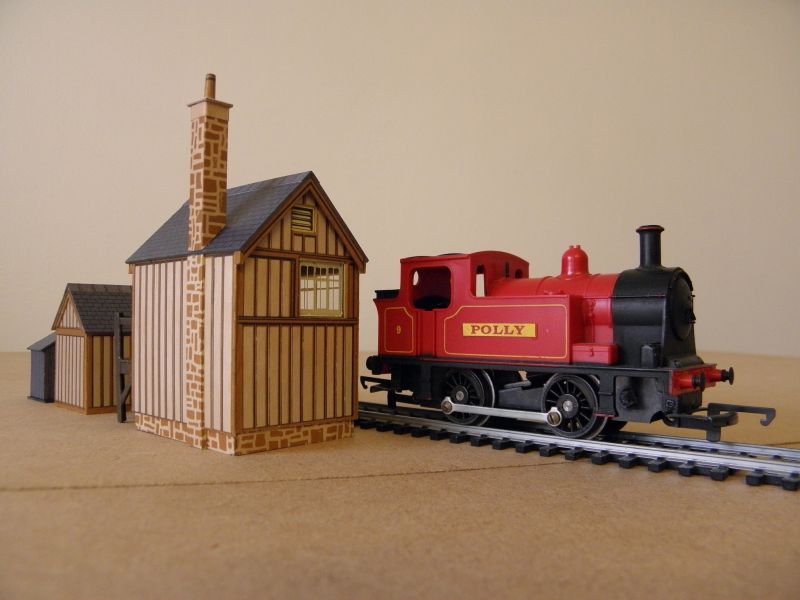
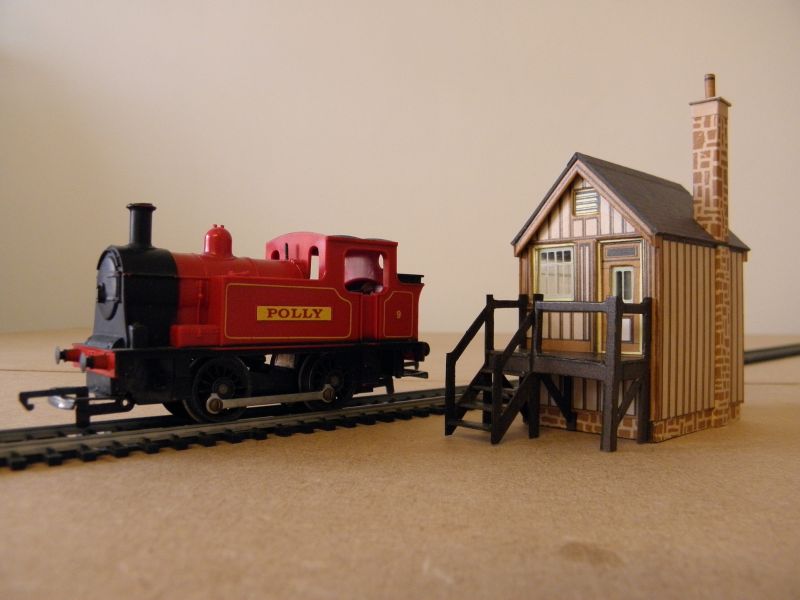
And the final shot. Out of all the Trix kits, this was the most enjoyable to build, and I think is quite charming. It is certainly the smallest Signal Box I have seen!
Thank you again for looking.
All the best
Gordon :-)

1 guest and 0 members have just viewed this.