Trix Trains cardboard station and platform kits
Posted
#263393
(In Topic #14348)

Full Member
The building of two Trix Trains long discontinued card kits
Hi All,A few weeks ago, whilst hunting on that well known auction site, I happened upon three Trix cardboard building kits. I had no idea Trix made such kits, and information online was very limited. Eventually I found a page on the Brighton Toy and Model Museum's website which did give a little history and information about their products.
Category:Trix card models - The Brighton Toy and Model Index
To quote from the site, Trix manufactured various card kits between 1967 and 1973, and included 6 buildings, the platform and station building are the two I am building here.
Before I start the description, I should mention that these are, by quite some margin, the most inaccurate cardboard kits I have ever made! They are typical of a manufacturer who wants to get a piece of the action, but do not have the faintest idea of what they are doing!
I would be interested to hear if anyone remembers these kits, and what people thought of them at the time?
Anyhow, here we go!

The Trix Trains Station Kit. As you can see, after 50-years it is almost jumping out of the packet to be built!
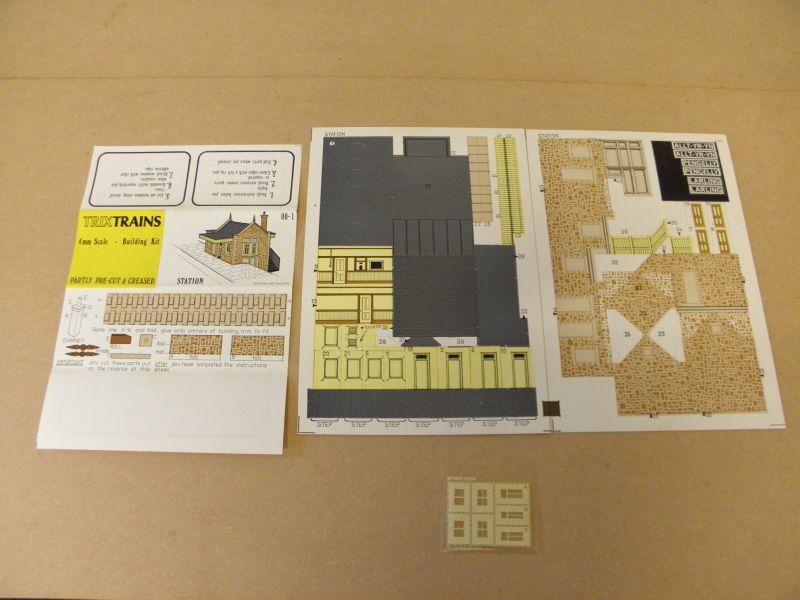
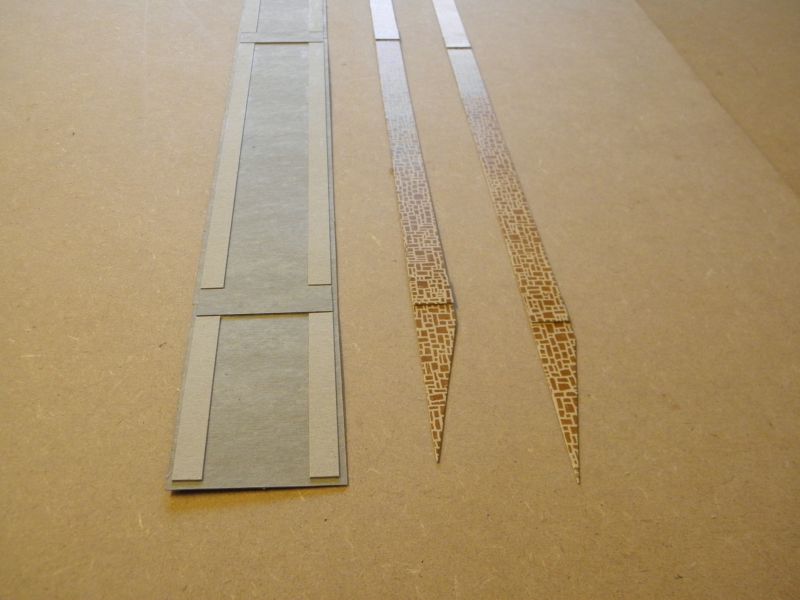
The kits components. I reassembled the parts into sheet form. On the left are the paper instruction and hand-cut parts, centre and left the pre-cut board sheets, and below are the windows.
First off I decided to make the bay windows. The board is creased quite poorly, I decided to cut a couple of channels on the back to help the folds (I did this on other areas which needed folding too). I left the windows in to help keep the part strong while it was being folded.

I used a ruler on the edge of a board to help fold the board.
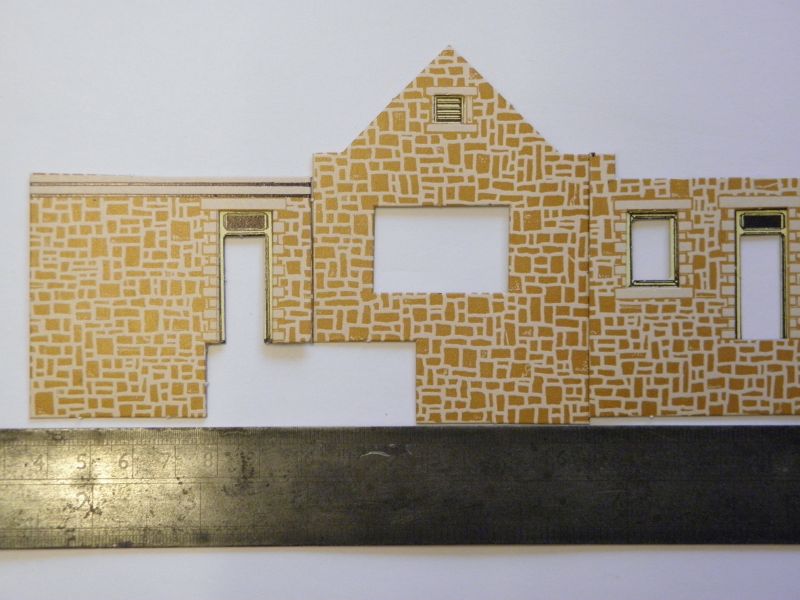
The walls of the main building, door and window frames having been added. This was the first of many inaccuracies in the kit, these walls should form a straight line along the bottom and required trimming level!
With the bay window folded and glued into shape the windows were added. The horizontal sections should have been fixed just above and just below the openings, but this wouldn't have allowed for the room needed to fix the windows! The aperture in the wall for this window needed to be enlarged to take into account the increased hight.
The walls for the building now have the windows and doors added. All of these parts needed to be cut down because they were far to large from the sheet. I've used the usual tape first and blobs of glue method for the glazing.

The base for the building, with strange round holes! Recesses needed to be cut where doors are fitted to the outside walls. Note, I decided to 'open' the platform door after I had glued it into place!
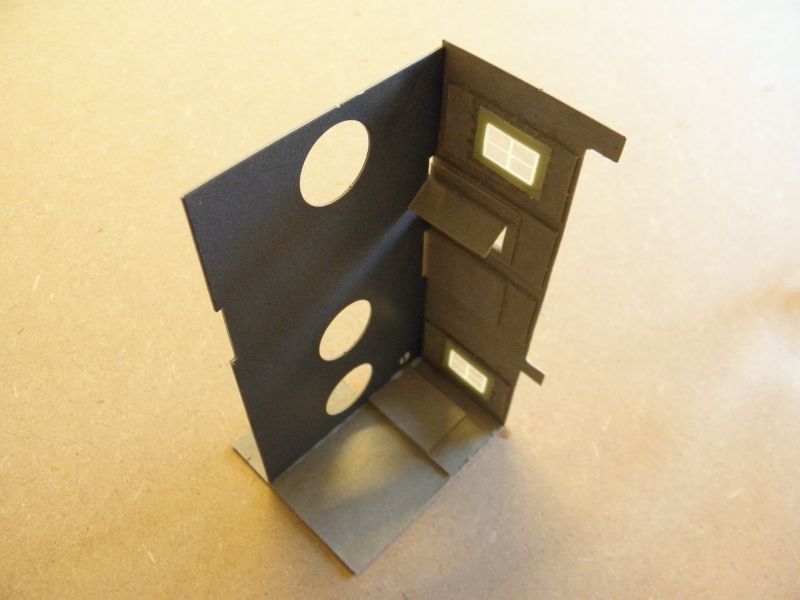
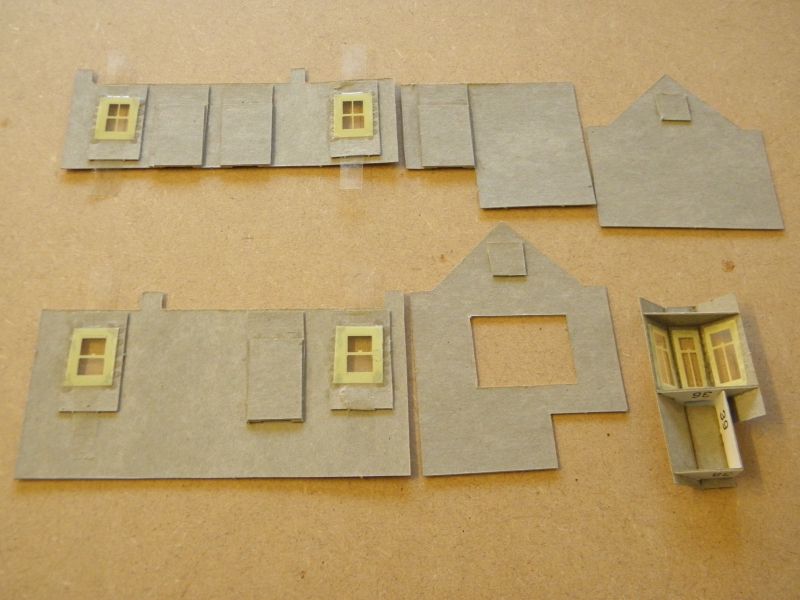
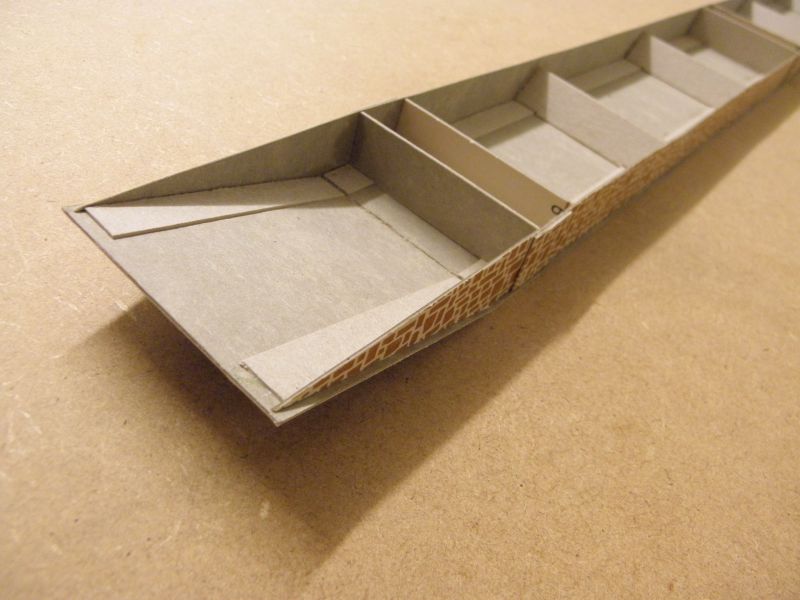
Fixing two outer walls first.
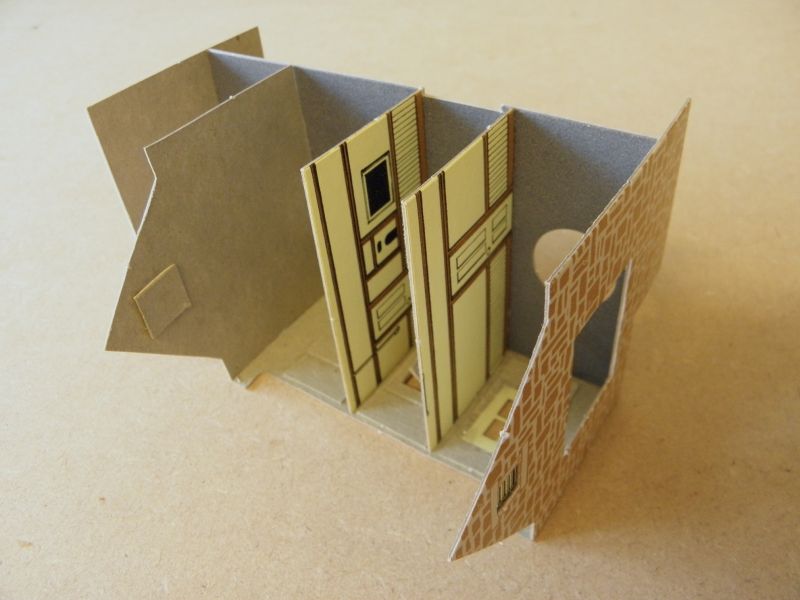
Other walls now added. Because I had only the platform door open I decided to have the second interior wall facing the aperture for the bay window.
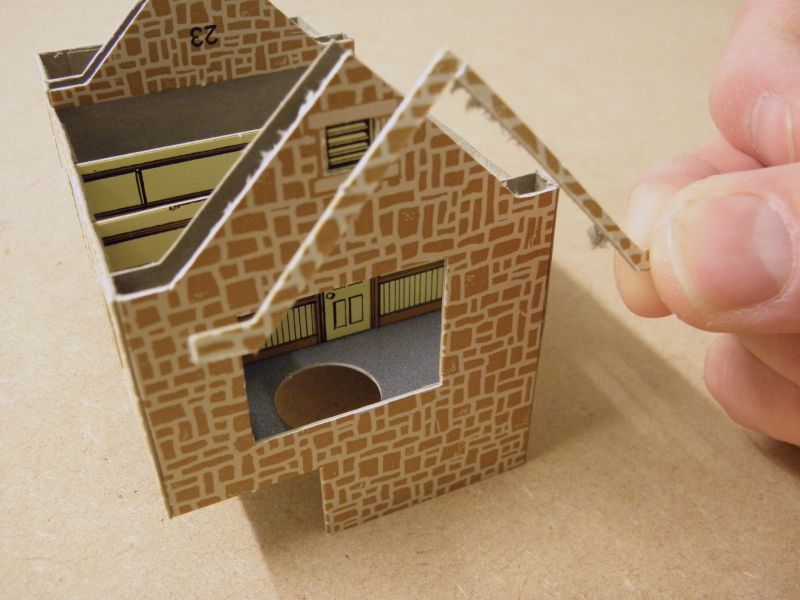
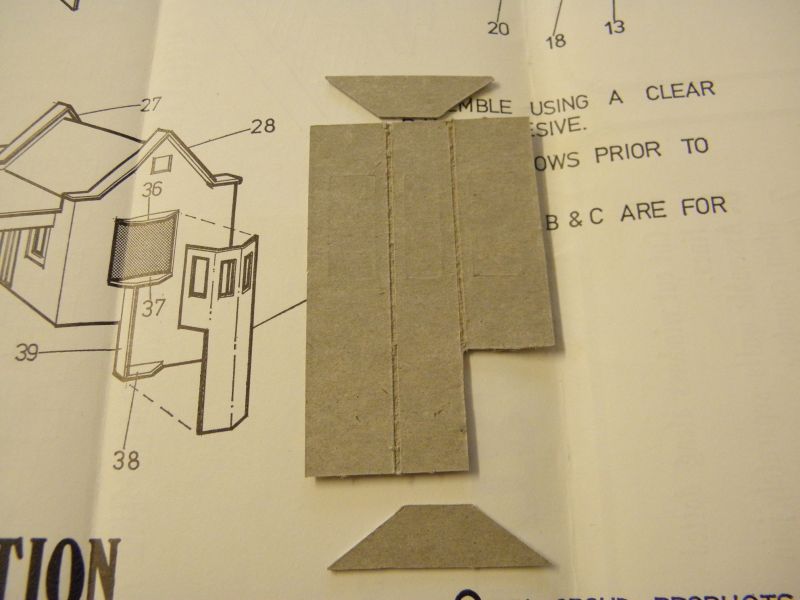
The inner facing roof walls have now been added, which revealed another error. These wall sections were too short! I decided to trim the outside facing walls down to the same hight – I am holding the section I have removed. (this would have been much easier to do BEFORE I had assembled the walls!)
And another problem caused by the reduced height of the walls, now the roof is too tall and will require a few rows of tiles to be removed!
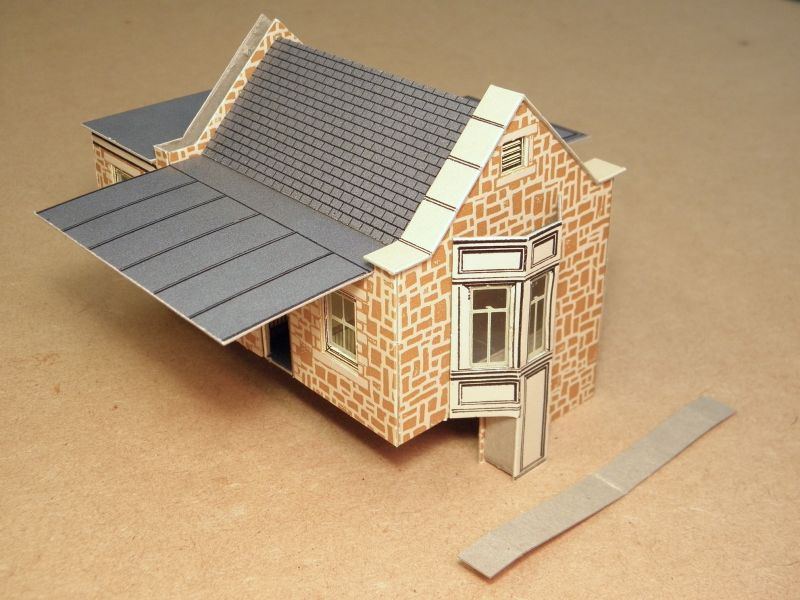
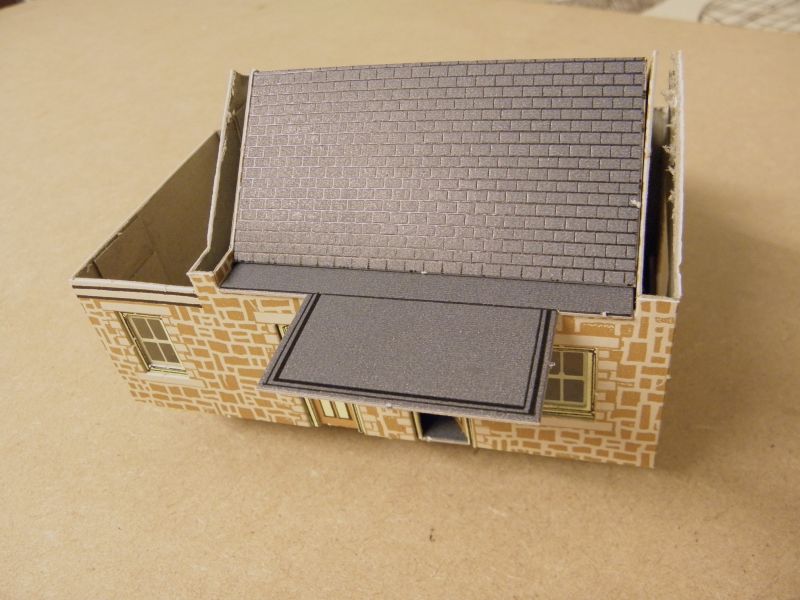
Moving on, the flat roof sections are glued into place, the tiled roof installed, and then the wall coping stones fixed into place. Again, I cut groves to help the board fold.

The station steps! The steps are formed by multiple layers of board being glued into blocks of three. Astonishingly this actually worked! I did, however, trim the steps down to the required width, as I reduced the width of the stair-block slightly.

The steps glued into place. I decided to trim the wall to match the steps. The fence is only printed on one side. I decided to add paper on the brown side, paint it yellow and add black lines to match the platform fencing.
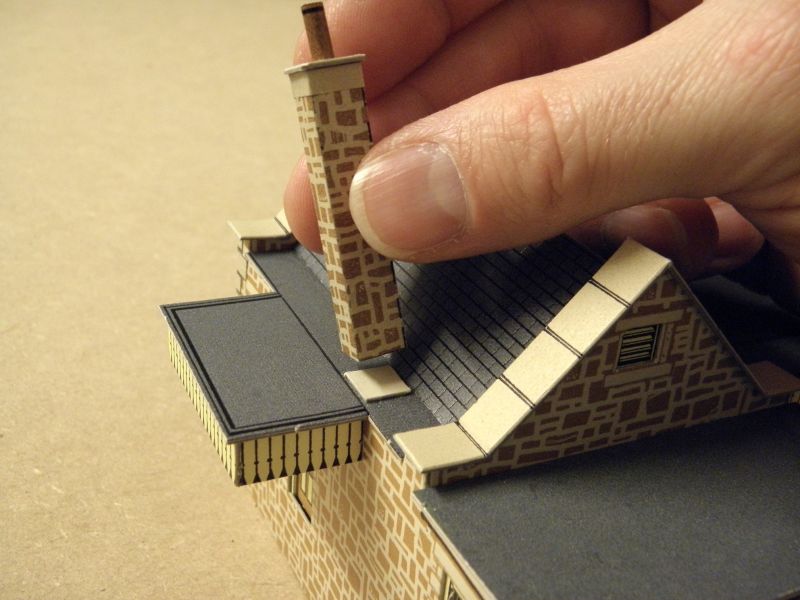
The chimney was made from the paper part of the kit, though I did add a spare beige card section for the top. I also glued down a square of card for the chimney to fit around to help hold it in place, as shown.
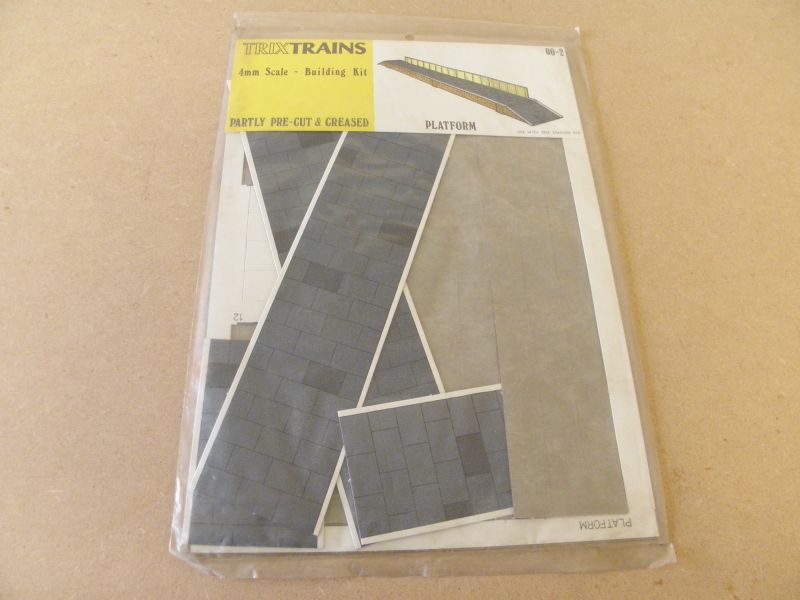
And now onto the platform! This is the Trix Trains Platform Kit 00-2
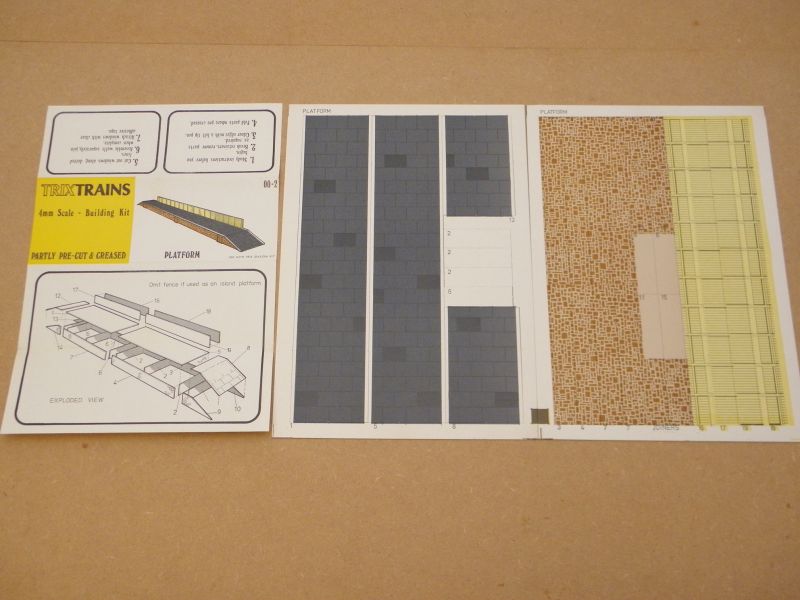
The platform components. Again, the accuracy of this kit was appalling! Every component needed to be trimmed level/square, and I had to reduce the height a little to match the station building. I made a cardboard jig to help with the cutting as the platform walls were very flexible and did not want to cut straight!
I ignored the instructions and added my own strips to help make the build easier and stronger.
I also added extra V sections to help keep things straight and level.

Fixing the station to the platform! The fence is made up of two pieces of board. These needed to be trimmed because of the cut lines being out of position to the print.
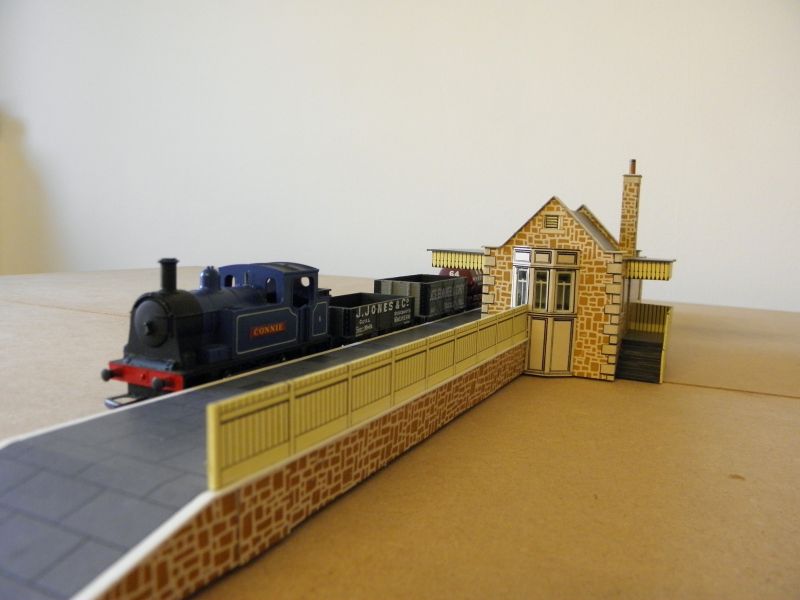
And the finished kit! Note the edging stones on the building, cut from the paper sheet from the station kit. I decided not to add the finials, I just did not like them!
The fence, roof and platform edges have all been painted to help the finish of the model.
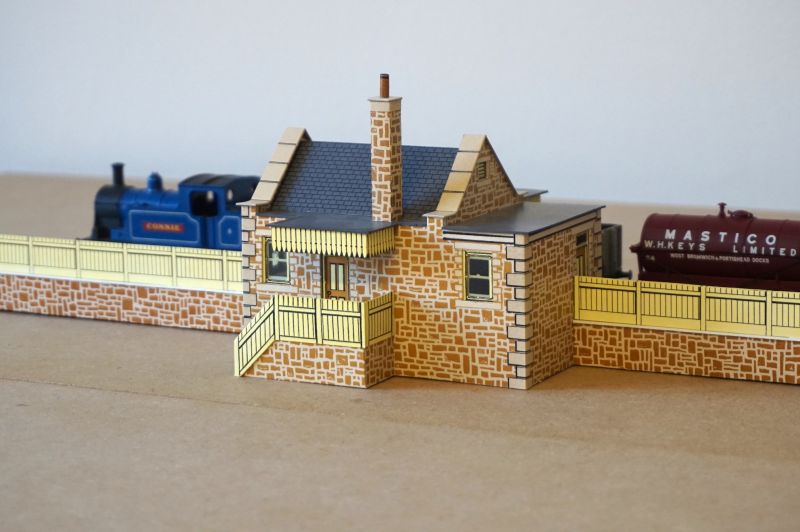
The entrance to the station
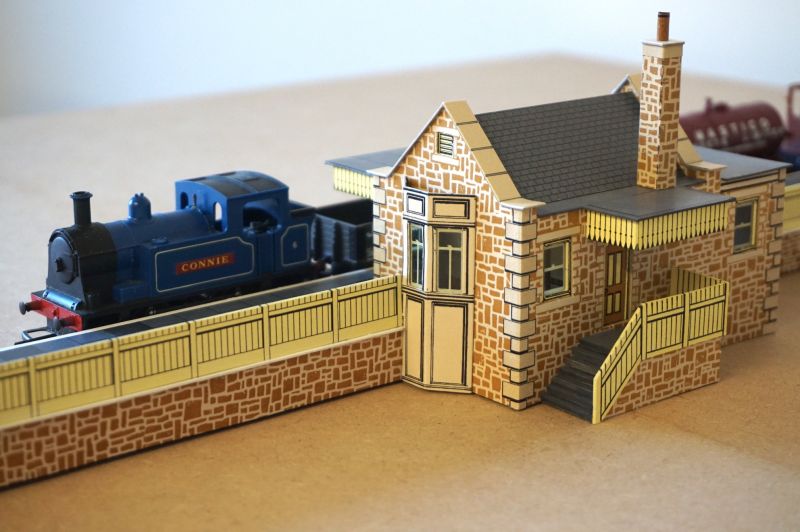
The stairs were also painted in grey. My additional painting on the inside of the fence is also visible.
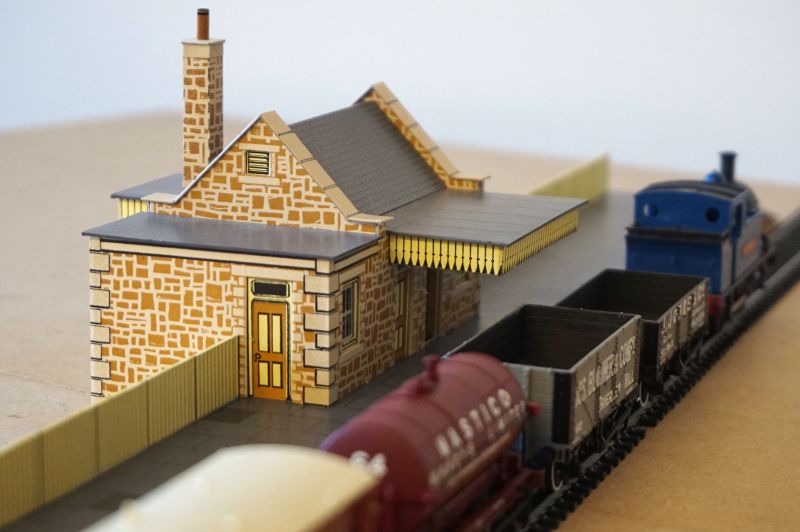
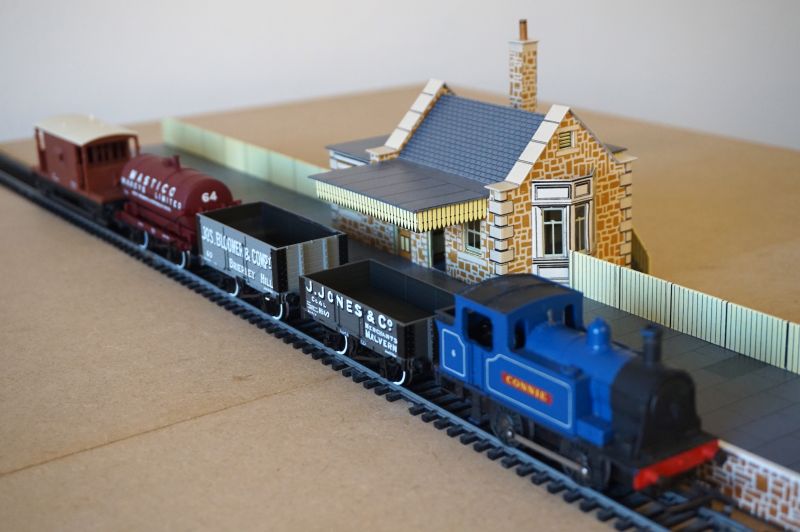
And the final photograph!
I love the look of the finished model, it is a really quaint looking station. But I have to say the printing is more toy like than realistic, and the execution of the product was actually quite appalling – no wonder they produced them for only a short time!
Anyhow, I am very pleased to upload this build because, after much searching, I've concluded that these are the first and only photographs of a Trix cardboard building in the internet!
Thank you for looking.
Gordon :-)

Posted

Full Member
Many thanks for that Gordon. Really like reading about your builds.
Keep 'em coming!
Shaun.
Posted
Full Member
Thank you Shaun,Excellent walk through, and eventually a well made kit!
Many thanks for that Gordon. Really like reading about your builds.
Keep 'em coming!
Shaun.
Much appreciated! I now have the other Trix kits to build. I do like the look of them, but am preparing myself for a bit of a battle, but then that is half of the fun!
All the best
Gordon
Posted

Full Member
Go on, you know you want to…
Cheers
Andy
Andy
Posted
Full Member
Thank you Andy, you could certainly use the holes for that. I decided to fill the holes back in again on the rooms with windows as I was worried about dust getting inside, plus I didn't want to get sued by passengers falling through big holes in the floorMaybe the holes in the floor are for adding lighting?
Go on, you know you want to…

Posted

Full Member
I wonder if it's based on any prototype or just a "Trix dream".
Eventually, a neat little kit but as you say, the printing is very toy-like but then so were model railways in those days compared with today's offerings.
'Petermac
Posted
Full Member
Thank you Peter,A great walk through Gordon and I'm mightily impressed by your accuracy in cutting, the sharpness of your blades and skill in sorting out the various errors in the kit. :thumbs
I wonder if it's based on any prototype or just a "Trix dream".
Eventually, a neat little kit but as you say, the printing is very toy-like but then so were model railways in those days compared with today's offerings.
I think it is just a Trix dream, but it goes well with Connie, my Triang dream engine!
All the best
Gordon ;-)
1 guest and 0 members have just viewed this.