Superquick Covered Footbridge Series A No. 9
Posted
#262517
(In Topic #14312)

Full Member
Building the Superquick Covered Footbridge
Another Superquick build! This time, the current Covered Footbridge, Series A, No. 9.I've been intending to build this kit for some time, I think the model looks nice, but I was curious as to how the kit made up and how much detail there would be inside.
The kit did make up quite well, but not without a few issues…
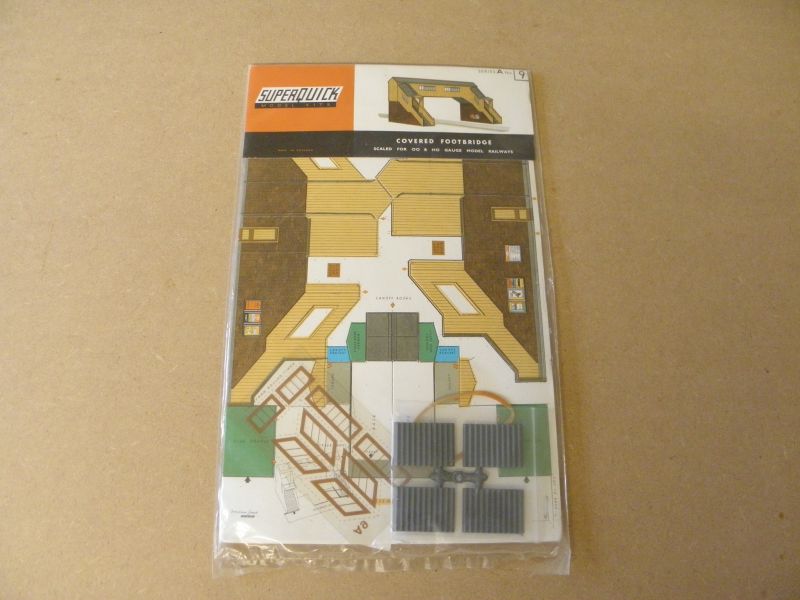
The Superquick Covered Footbridge, Series A, No. 9.

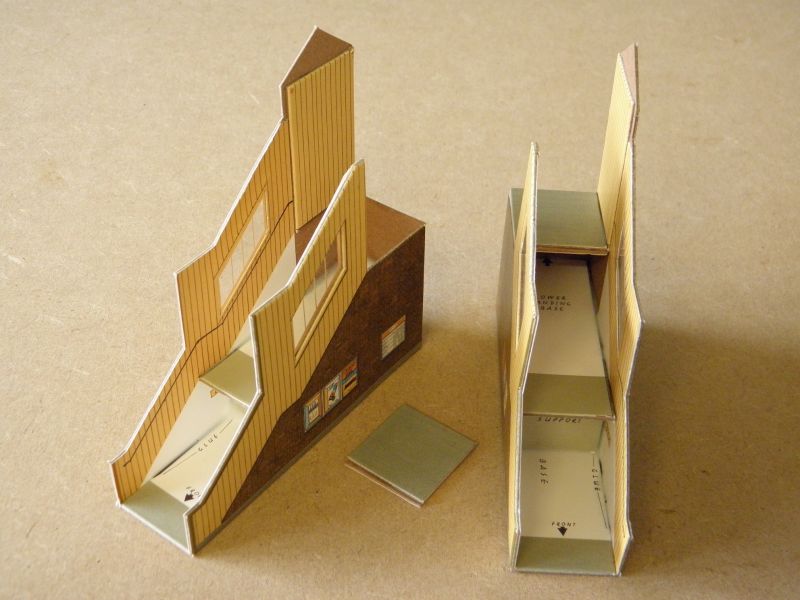
The kit's contents. The elastic band was intended to hold the kit together during gluing, but it was actually well perished!
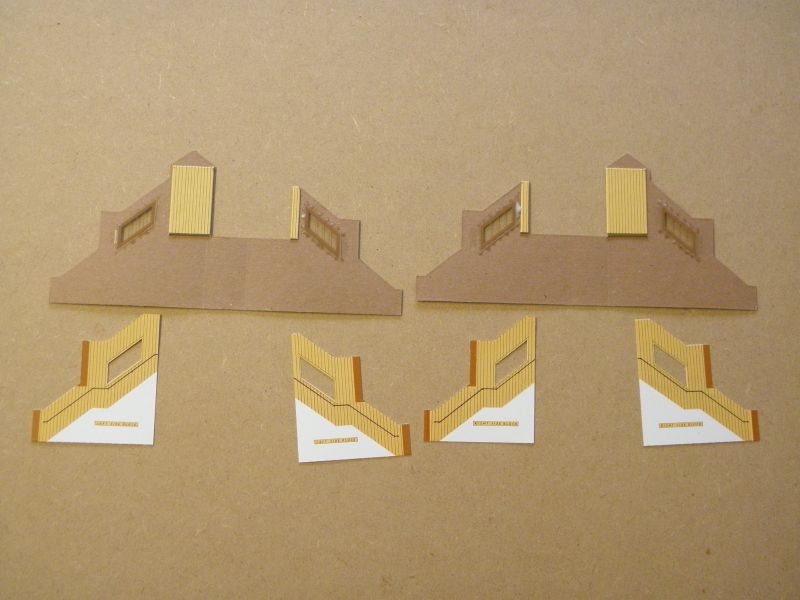
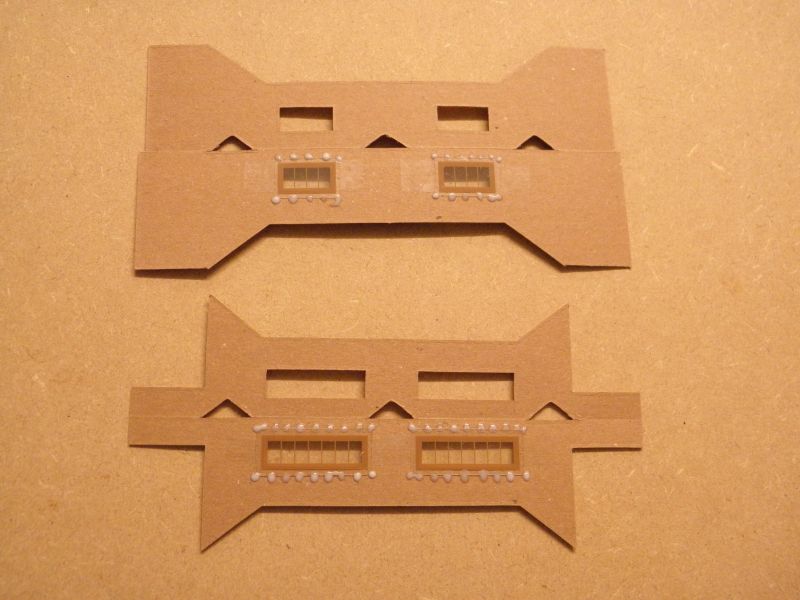
First, the side walls are assembled. The windows are fixed into place (first with tape, but then I like to add glue). Tabs are bent double and glued down. The paper interior walls (bottom) are cut out.
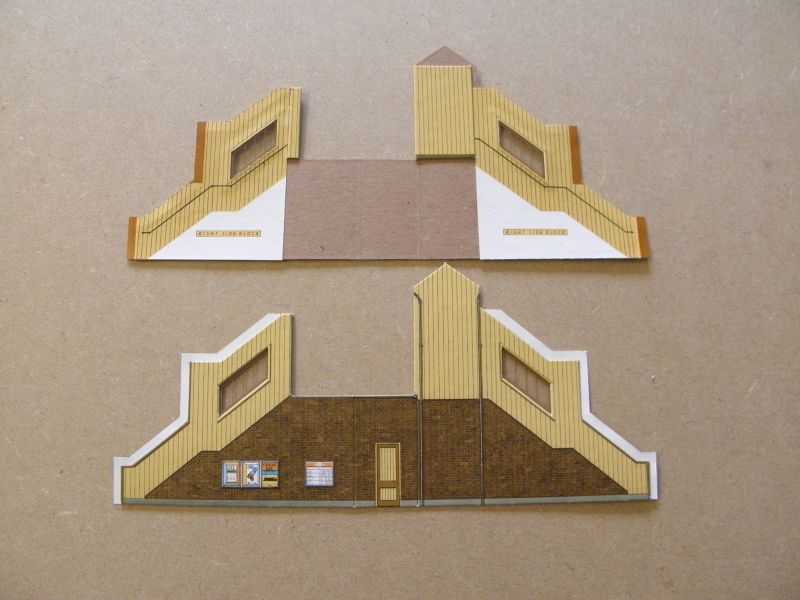
The interior walls are glued into place. I put a layer of folded kitchen towel over the paper and then placed a heavy book on top to keep everything flat while the glue was setting. Once dry the excess is trimmed off. Top is the inside view, bottom the outside view.
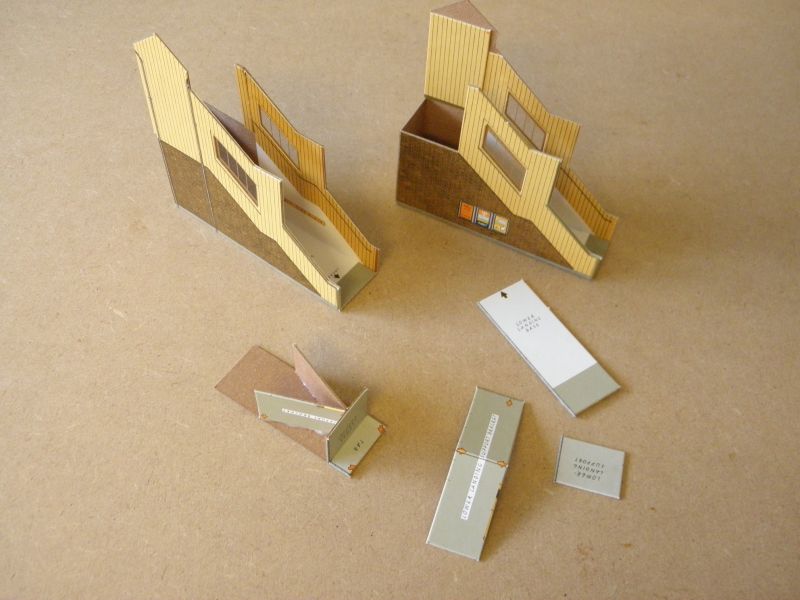
The two blocks of stairs are folded into shape and glued to their bases. The first landing is assembled (bottom right are the components, bottom left is assembled).
The lower landings are glued into place, and the upper landings, made from a double-thickness of board, are glued in position. A little trimming was required on these.
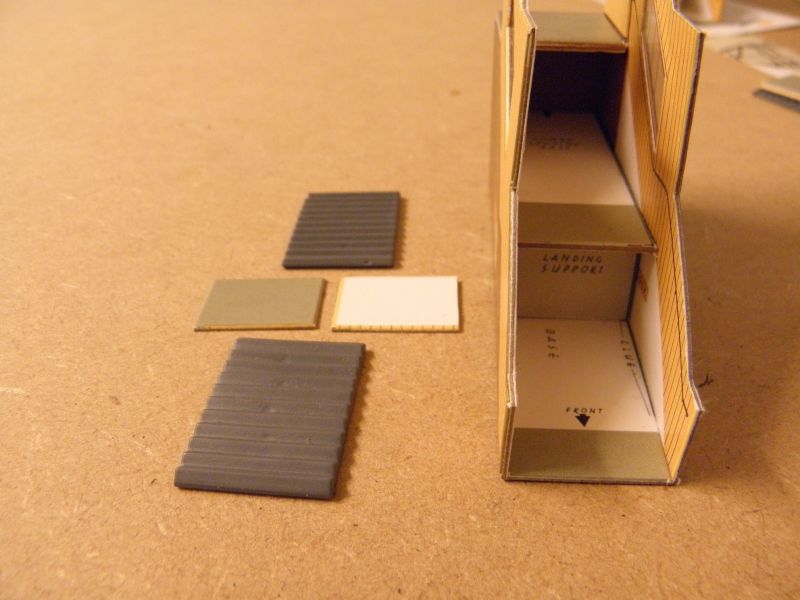
The stairs and layers of board to build up the first landing. The kit uses one square of card, but I found two were needed to bring it up to the right level.
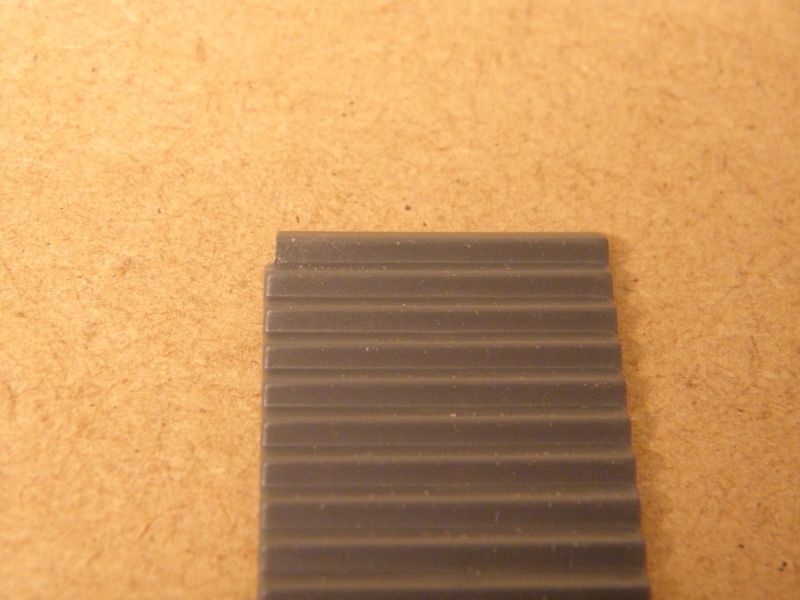
The stairs needed a notch cutting at the top to allow them to fit within the double-thickness of board at the very top of the flight.
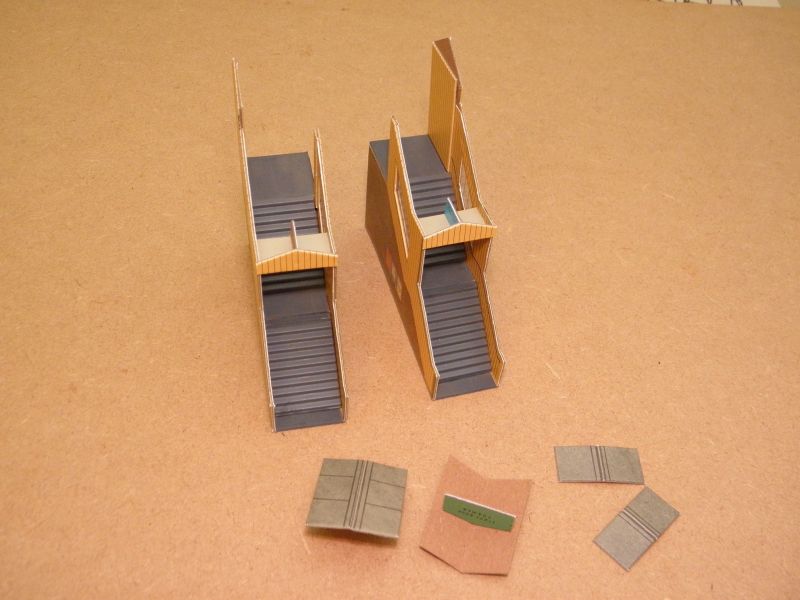
After fixing the stairs into place (two-part glue), I didn't like the colour difference between the plastic and card, so mixed some grey gouache and painted the card areas. The roof sections (bottom) are assembled, but will be added much later.
The passage is then assembled. The windows are added first. The walls are then folded double and glued. Again I placed heavy books on top while the glue set.
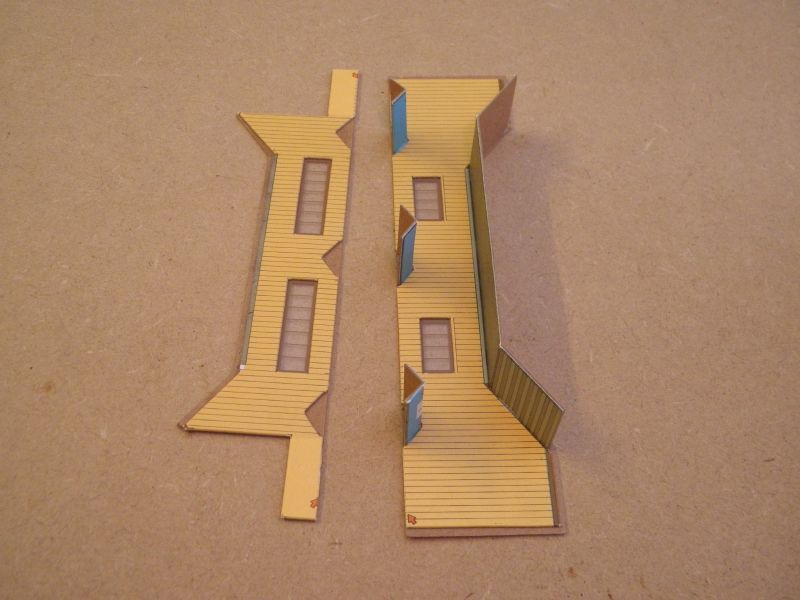
The passageway floor and cross braces are added.

A little trimming was required to both the stair blocks and passage to get a good fit when they were glued together.
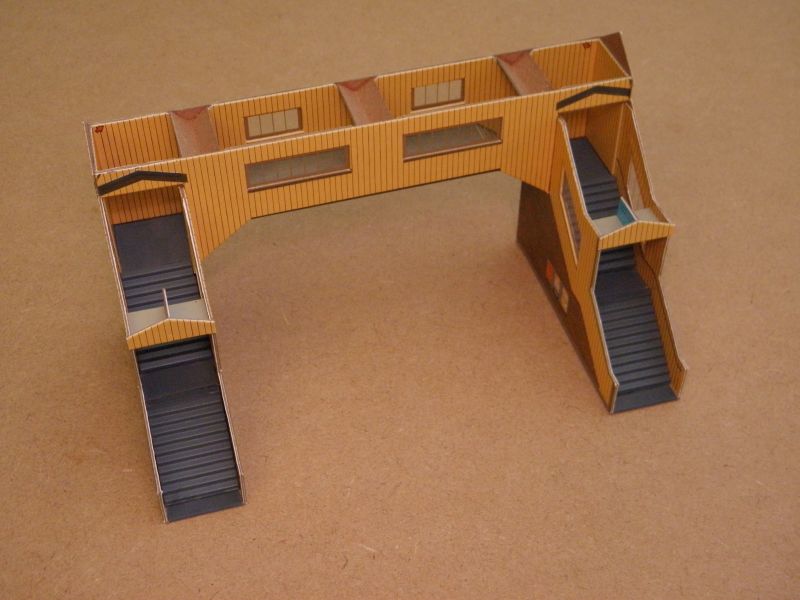
There is, supplied within the kit, a jig to help fix the three sections together. Unbelievable, it is the wrong size and needed several mm trimming off to make it usable! A rubber band (as previously mentioned) is also supplied to wrap around the model while the three parts are glued together. Not in a million years would I be able to glue all three parts together at the same time! Instead I concentrated on one join at a time, gluing the inner walls first, and the outer corners afterwards. The amended jig was used to help make sure it was gluing square.
After the three sections had dried the roof pieces were added. A little fettling was needed on the stair roofs. I did not add the supplied guttering.
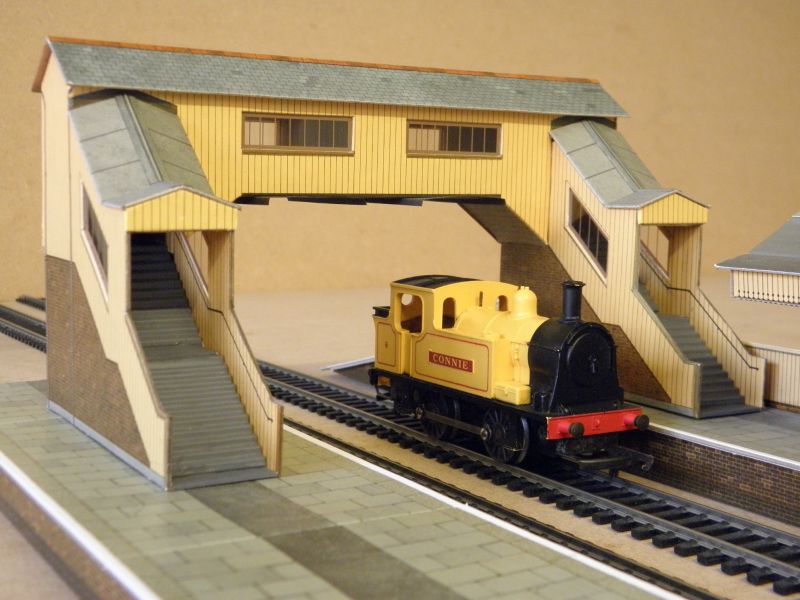
And the finished model. Although I did not add the guttering, I did add smoke shields from my new stock of black paper!
I painted some card edges to help improve the look of the model. On the top of the inside stair walls there is a small gap, just below the roof. It's a bit of a puzzle, and I assume it to be an error?
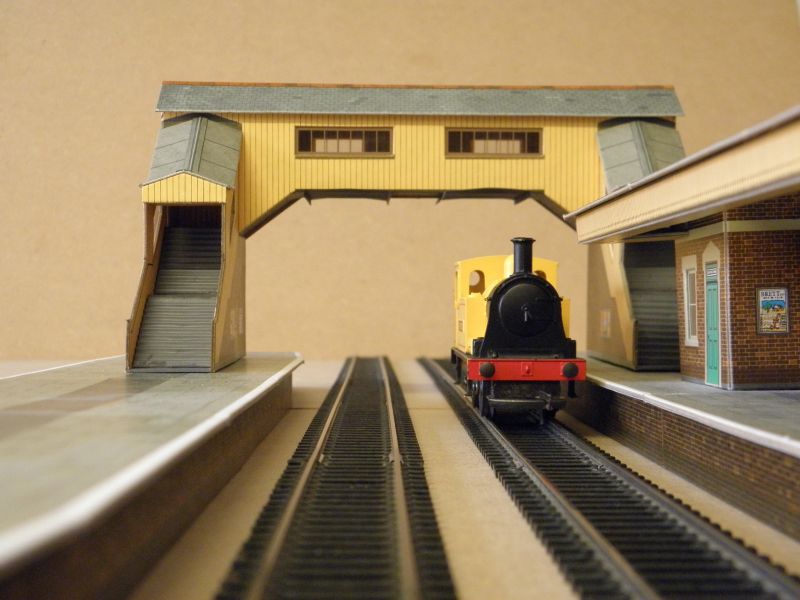
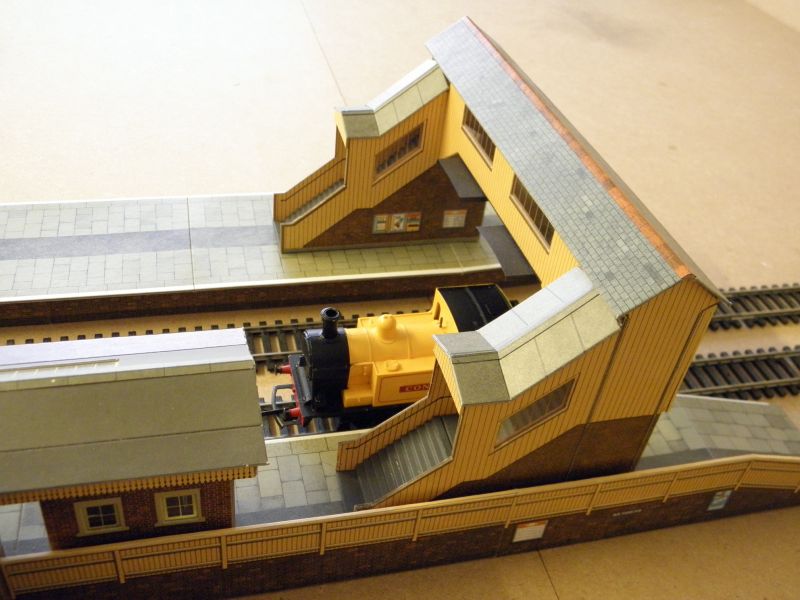
Driver's view!
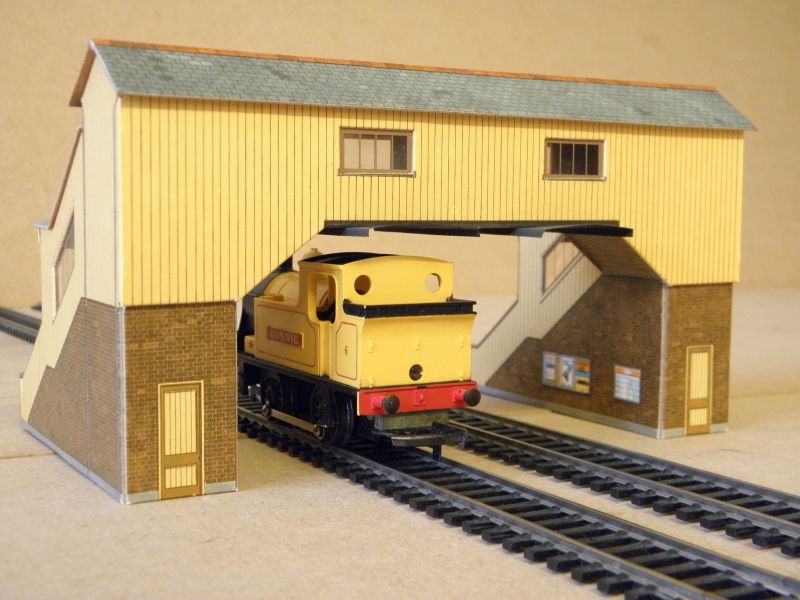
Having the bridge without the platform allows just enough room for the trains.
To sum up, I found it a tricky build, not helped by a few areas which required trimming, and having the jig the wrong size was poor. But once built, I think it looks fine, and the interior detail is excellent.
Thank you for looking.
All the best
Gordon :-)

Posted

Site staff
Ron
NCE DCC ; 00 scale UK outline.
NCE DCC ; 00 scale UK outline.
Posted

Full Member
That rubber band comes as a bit of a shock - why put that in then ask you to go and buy the glue …………….. :hmm
I have built several Superquick buildings in a previous life and always found them a bit tricky requiring far more care and acuracy than one would expect with card kits - certainly more difficult that the Metcalf range.
They do however, turn into fairly nice looking models and, for building things quite quickly, are useful.
'Petermac
Posted
Full Member
I agree that the rubber band was a strange item to include, but no glue!
As much work as this Superquick model has been (for a card kit), it has been dwarfed by the work needed to build my latest station kit, which has really had me pulling my hair out! Its not a Superquick, or a Metcalfe – I will be posting it's build quite soon…
All the best
Gordon :-)
Posted

Full Member
I have to disagree with you a bit here, Peter, from my own experiences. Early Metcalf kits had to be cut out as well, with the pre-cut versions only coming in later. Even so, I never had problems with the Superquick range, having built many of them as placeholders on several layouts. It takes me a fraction of the time to build a Superquick compared to Metcalf: I have built a few Metcalf buildings for other people or shared exhibition layouts. I also always found the reinforcement pieces to be well considered in the Superquick kits.Yes - that's a well presented "How to" Gordon - well done Sir. :pathead
That rubber band comes as a bit of a shock - why put that in then ask you to go and buy the glue …………….. :hmm
I have built several Superquick buildings in a previous life and always found them a bit tricky requiring far more care and acuracy than one would expect with card kits - certainly more difficult that the Metcalf range.
They do however, turn into fairly nice looking models and, for building things quite quickly, are useful.
I had a few Superquick buildings that survived over several layouts and even survived some exposure to weather on one temporary layout that was semi-open to the elements (it was under a house with slatted wood around the base - the house was in Queensland on "stilts").
With both ranges, it pays to take a little extra time to colour all the fold edges to match the surfaces they adjoin.
Jeff Lynn,
Amateur layabout, Professional Lurker, Thread hijacker extraordinaire
Amateur layabout, Professional Lurker, Thread hijacker extraordinaire
Posted
Full Member

'Petermac
Posted
Full Member
I've heard on more than one occasion that Metcalfe are better quality than Superquick. Perhaps the board is thicker, and no one can argue that Superquick's instructions could be a little clearer! But I have never liked Metcalfe's printing; the bricks are pink and the roof tiles look like they have come off a dolls house, and, to be honest, the printing has really put me off buying any. Superquick's printing, on the other hand, is generally excellent with well chosen light-fast colours and fine detail.
I must confess, I am one to favour the underdog and Superquick has, for many years now, been just that. They do have quite a large product range, but a new item is quite an event! In comparison, Metcalfe release new products constantly. It would be nice to see Superquick expend or change their range, but they have managed to continuously supply the market since 1960, so they haven't got their business strategy all wrong.
Anyhow, I like Superquick, they generally make up well, perhaps with a few tweaks along the way. The printing is not prone to colour fade, and when made with care and lots of PVA (in hidden areas!), they seem to last well for things made out of card.
All the best,
Gordon :-)
Posted
Full Member
That's fair enough Jeff but you have to take into account that I'm a stone mason to your brain surgeon ……
I didn't mean to denigrate your efforts, Peter; far from it. It is more a case of horses for courses. We each have our preferences and skill-sets. My Achilles heel is working with brass.
Not sure about the brain surgeon bit. I might be a bit of a hacker there.

My only real gripes about Superquick is (as brought up in the next post from Gordon) are the paucity of new releases, and the consequent appearance of the same old buildings on so many layouts.
Both Superquick and Metcalf benefit from extra detailing and relief added. A friend over here used to add the timbers to half-timbered buildings and change the colours sometimes, add proper relief roof tiles, etc., and that made the buildings almost unrecognisable as to their origins.
Jeff Lynn,
Amateur layabout, Professional Lurker, Thread hijacker extraordinaire
Amateur layabout, Professional Lurker, Thread hijacker extraordinaire
1 guest and 0 members have just viewed this.