Original Superquick Water tower & Weigh House Series A No.8
Posted
#233406
(In Topic #12794)
Full Member
A build of the original Superquick kit
Hi Folks,Another original 60s-style Superquick kit. Unlike the Supermarket, this kit was replaced with a similar one which is still in todays range. The build, however, is different, and the detail is a little different too. This old kit is still quite common and is easily identifiable by the weigh house which comes with it.

The new 40-year-old Superquick Water Tower & Weigh House kit Series A No. 8
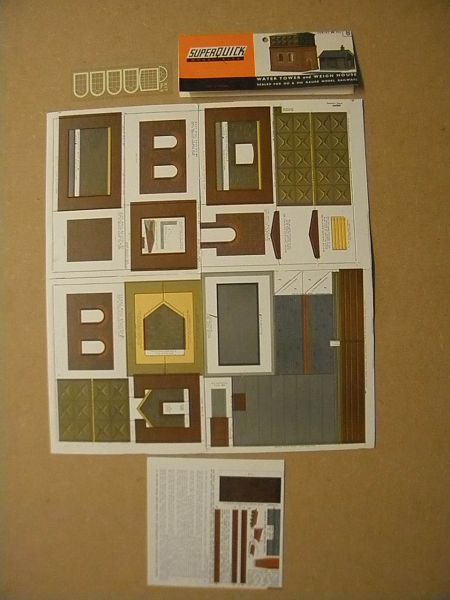
The components of the Superquick kit
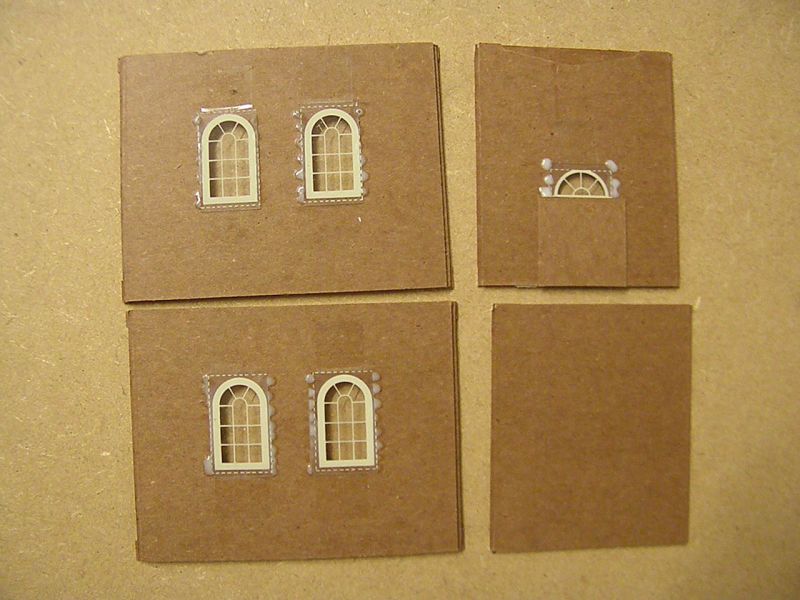
The walls made up and windows fixed into place. The walls are built up of two main layers which provide a reasonable joint. Plinths are fixed top and bottom to the side walls only. Tape is used to fix the windows in place (Holding the wall over the glass to get the position), then blobs of PVA provide a good hold.
The four triangular supports were glued to the end walls and left to dry – taking care to fix them right to the edge of the inner card.
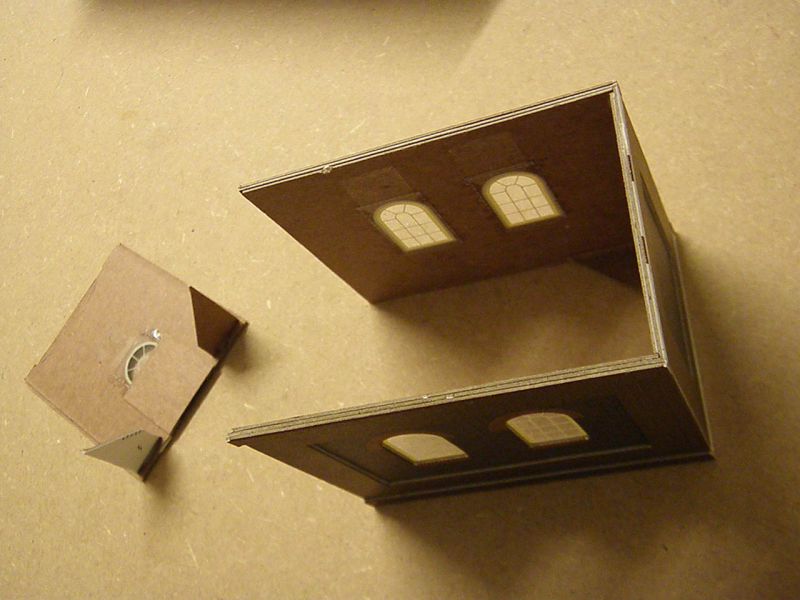
The walls assembled together. I use a little PVA on the inside of the joint to keep it clean on the outside. When the joint has set, I blob PVA down the inside to help make it stronger.
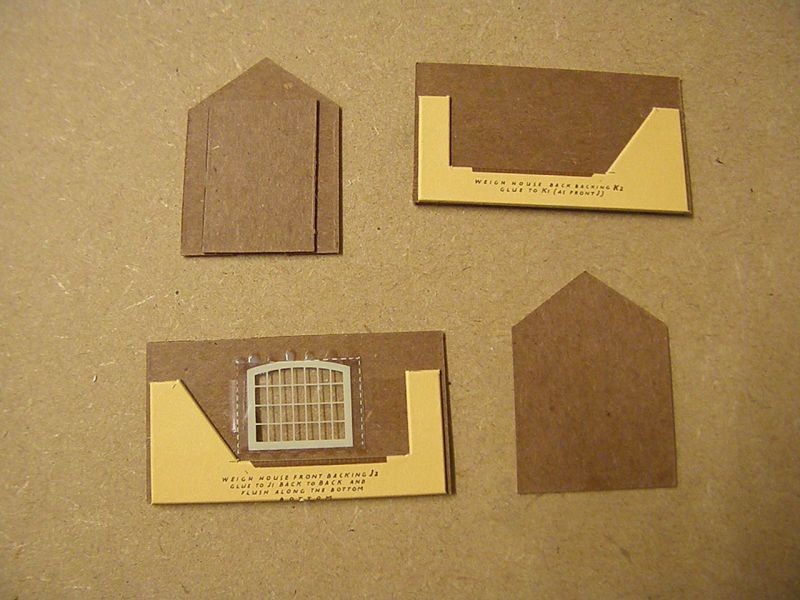
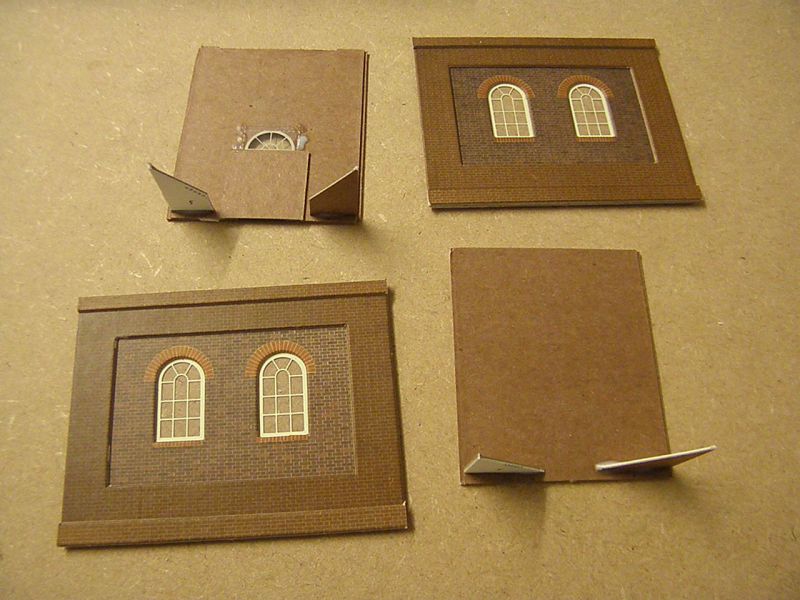
While the Water Tower is setting, work can take place on the Weigh House. Here the walls have been made up and the window fixed into place.

The Weigh House walls. Card plinths are fixed to the side walls, paper plinths are cut to size and fixed to the end walls once assembled.
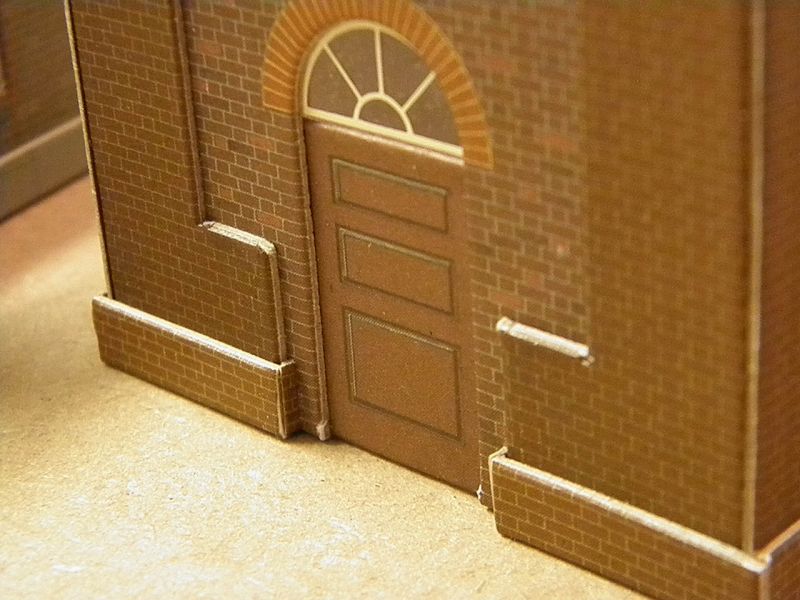
A detail of the Water Tower doorway. I was not happy with the two-thick card edges on the plinths, so opted to cut, chamfer and insert small sections of plinth. It might have been better to cut a groove from the back of the plinth and fold these.

The top section of the Water Tower is made up in a similar fashion to the bottom and again fixed on with a little PVA and bigger blobs on the inside. The roof was fixed to the Weigh House by using blobs of glue on the inside of the walls and the whole building held up-side-down. The chimney is made up from paper which you need to cut out and crease yourself. I find a chopstick handy to help glue it together! I had to cut the plinth away with a sharp knife to mount the chimney to the wall. The long piece in the photo is the ridge tiles which are cut, folded and glued before the tiles are shaped.
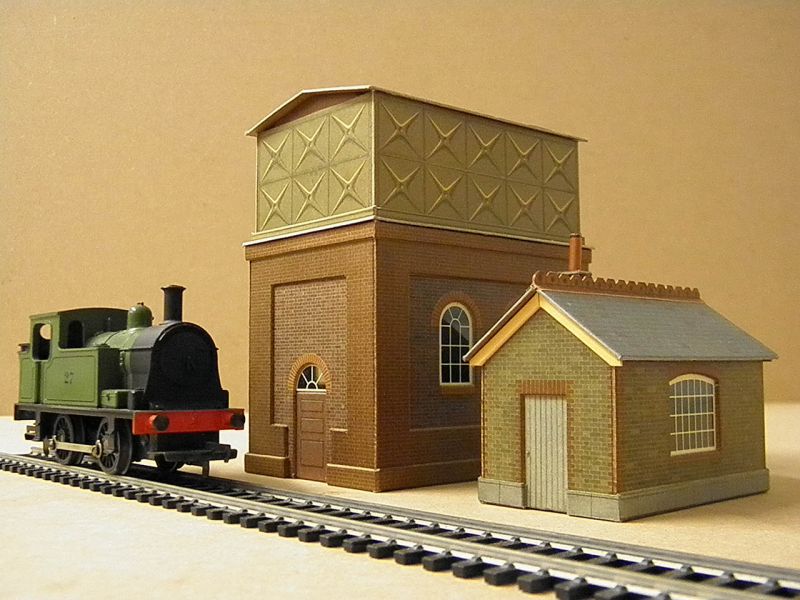
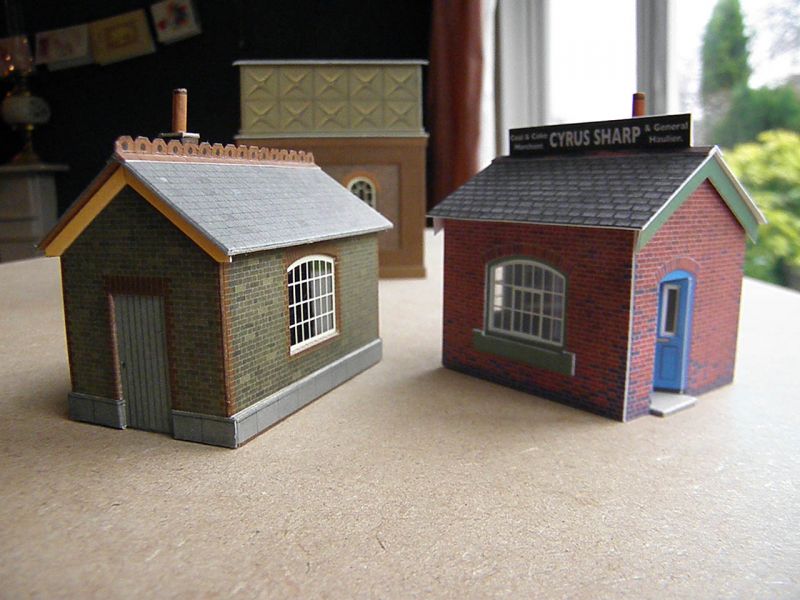
The completed Water Tower and Weigh House with Nellie No. 27. Because the brickwork is so dark on these, painting with watercolour along the edges of the card really improves the look. Windows and doorways were also painted brick by brick.

The backs of the buildings. Though it is not so easy to tell on these photographs, I found that painting every other brick first, and then filling in the gaps was the way to go. It took almost as long to paint the edges as it did to build them!

A slightly closer view!
A comparison of the 1960s Superquick kit and the very similar Metcalfe model released in a recent magazine. A daylight photograph to show the colour off better.
The Superquick kit is made up from paper laminated onto brown card, and the Metcalfe kit is printed directly onto thin white card which is then re-enforced by brown card. I did not make up the Metcalfe kit quite as intended as I did not like the extra layer of brown card around the windows. The model would also be improved by painting in the white edges as I did with the Superquick models.
Other than the materials, the models are printed in quite different colours – the Metcalfe being quite bright with exaggerated roof tiles, the Superquick model is printed in quite earthy tones by comparison.
Thank you very much for reading about my latest build!
Gordon

Posted

Inactive Member
Max
Port Elderley
Port Elderley
Posted

Site staff
A nice job Gordon
Ron
NCE DCC ; 00 scale UK outline.
NCE DCC ; 00 scale UK outline.
Posted
Full Member
Superquick the kit might be called, but there are still a few evenings work to get it to that stage – Well, for me there are anyway!
I like the look of the Scalescenes water tower model (I've just had a quick peek on their website). I wouldn't trust the ink in my printer to be light-fast enough. I printed out some pictures for my boy's wall a year or so ago, and they're looking very faded now, but then that was using budget ink cartridges…
Gordon
Posted

Full Member
Well done Gordon.
Posted
Full Member
As these original kits are now several decades old and many people, including myself, will not remember or will not have built them, I thought it would be interesting to post the builds on here.
They still come up on eBay, some more so than others, so folks can decide whether to try an original kit, or one of the newer ones, or do both!
I've been surprised at how fresh the kits look, despite being as old as I am!
I should have another dropping through the door soon, and am looking forward very much to building it. I'll try to get it posted too when done.
Gordon :-)
 Last edit: by Gordon Curtis
Posted
Legacy Member
also helps should the glue(in my case pritstick) wonder on to the printed side in error.
reg
Posted
Full Member
On the subject of getting glue where it shouldn't go – I managed to dip my sleeve in the glue while I was building one of the models. What should one do – abandon the model or let the shirt get ruined?
Well, it was an old shirt…
Gordon :-)
1 guest and 0 members have just viewed this.