Nearly but not quite a building....
Posted
#222699
(In Topic #12146)

Full Member
At the time, what Phil needed to charge to produce them, was more than I could justify for what was effectively a photo plank. So I left it at that and I pretty much forgot about it.
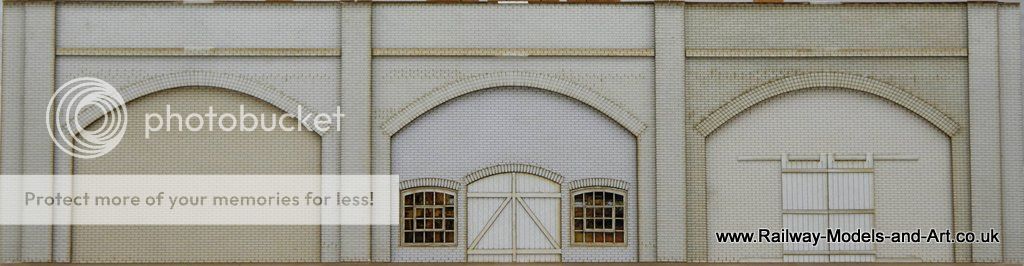
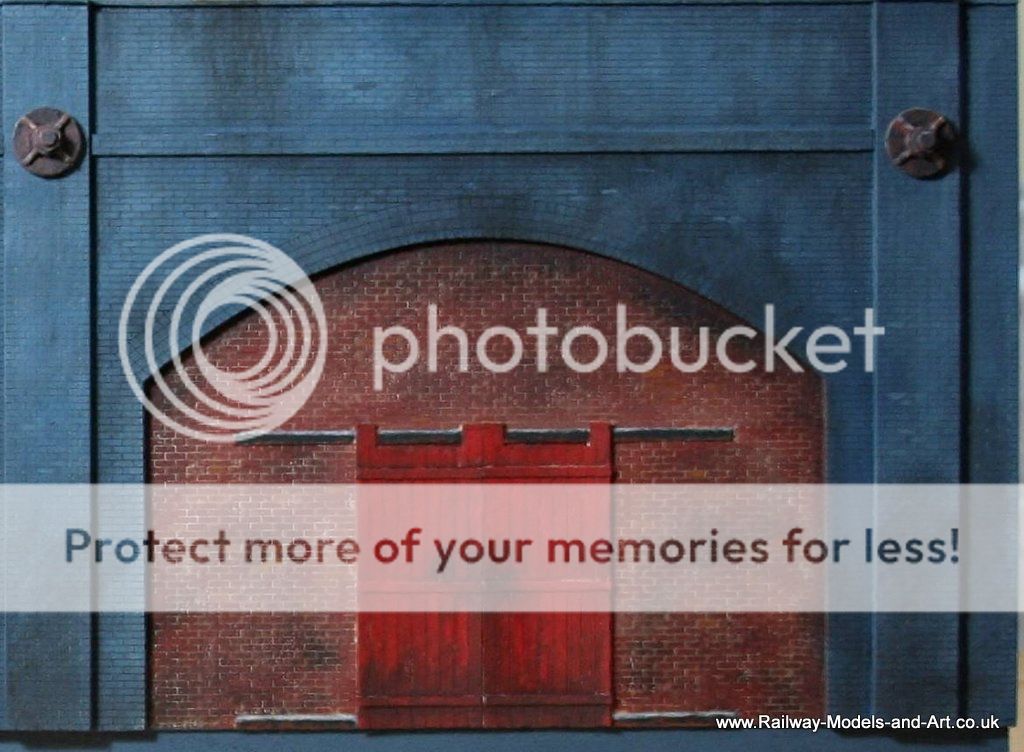
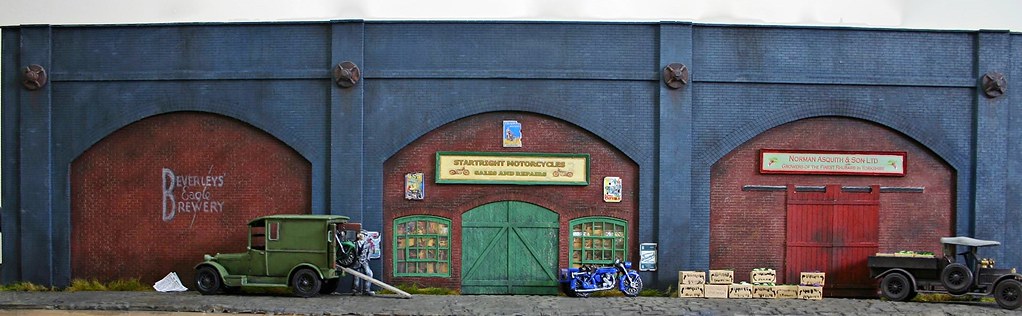
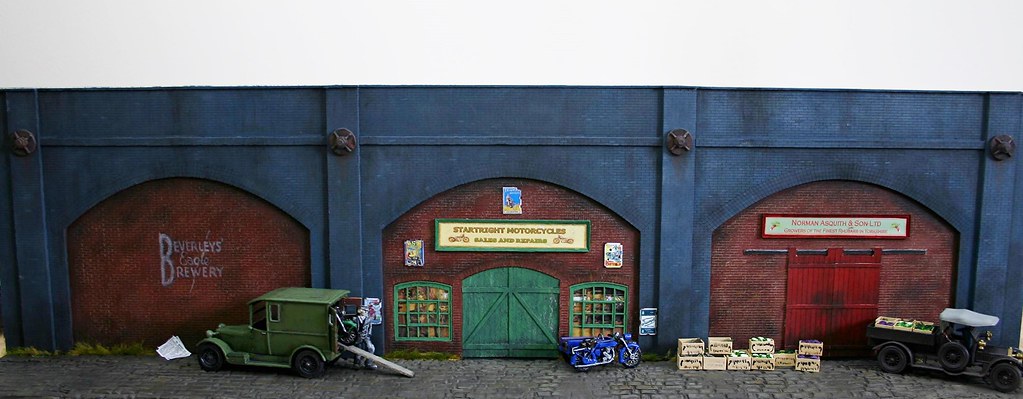
Whilst mooching around Telford last September we happened upon the LCUT Creative stand. They had plain infilled arches and a couple of options of occupied versions, all of them for just under £8.00 each. I asked for measurements and worked out that three arches would be sufficient to create a backdrop for the diorama. And for just under £25, I decided that I could better justify the outlay.
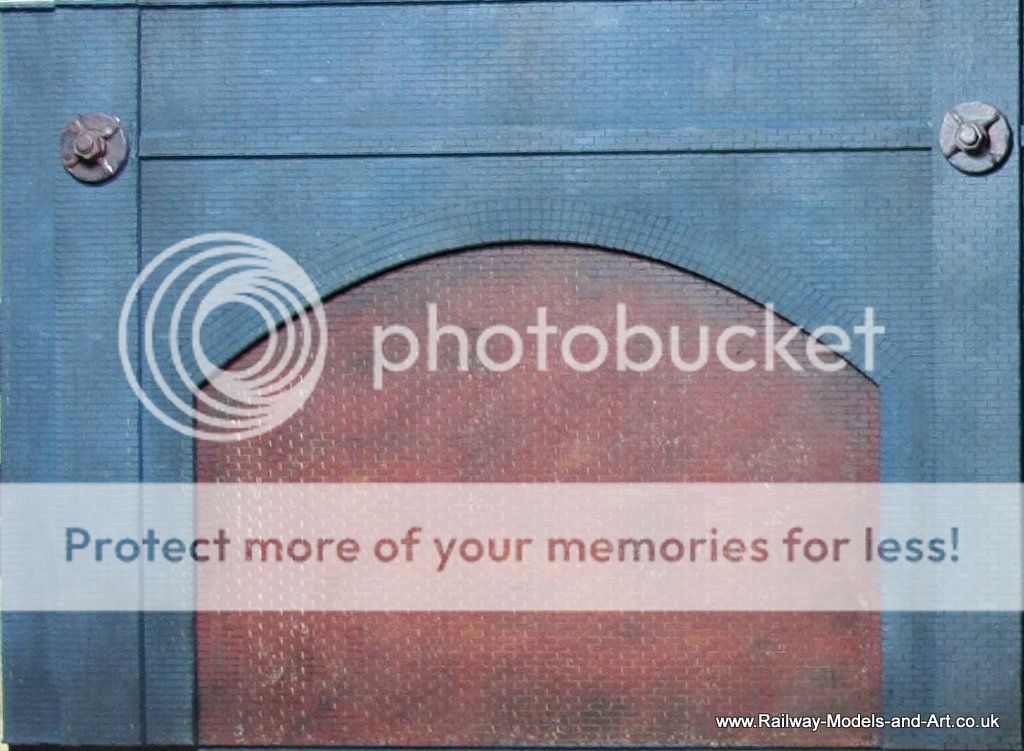
Now it has to be said that they are made from a very thin fibreboard and can't in any way be compared to what Phil produces but they will serve the purpose.
I had to use some of the offcuts as packing pieces to allow them to sit back against a piece of plywood that I cut to support them - this is because they come supplied with an internal sections which represents the inside of the parapet but I chose not to use is because I plan to use the spare pieces for something else.
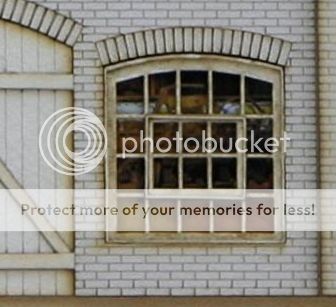
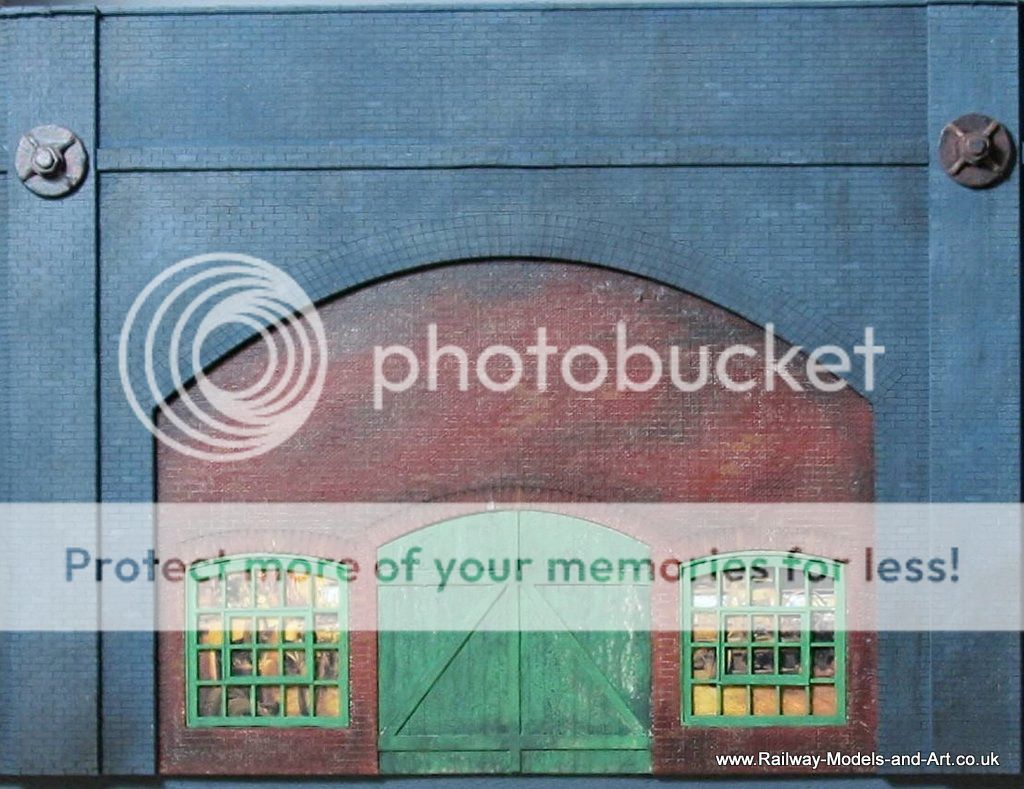
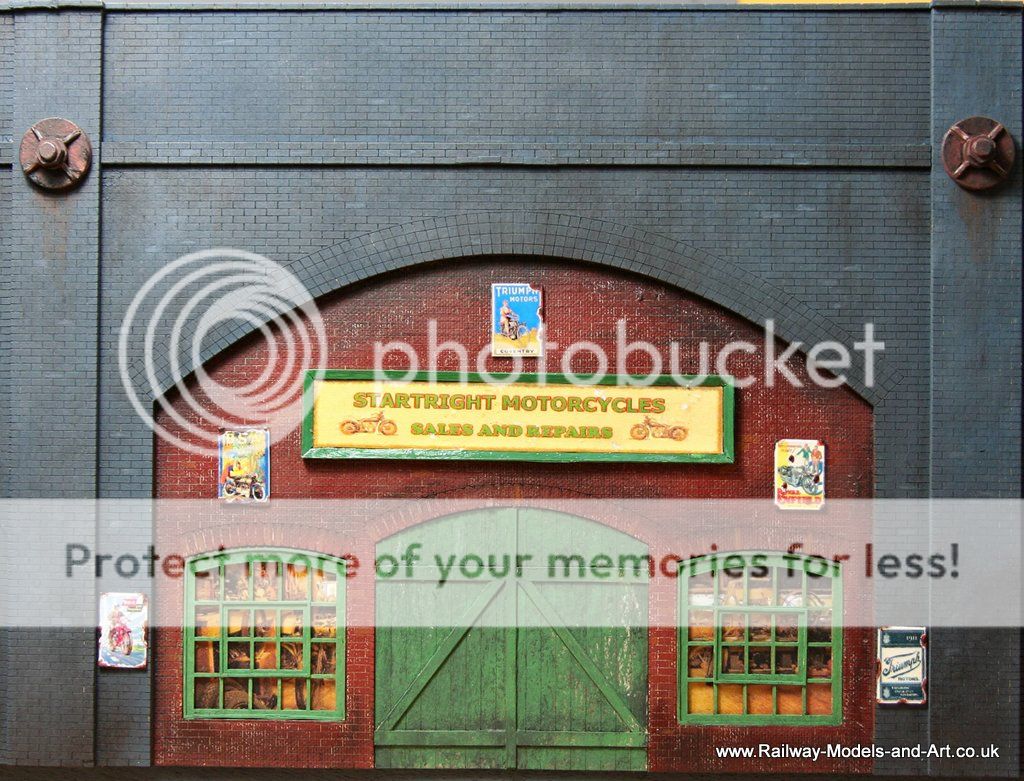
Chris came up with the idea of printing of some old workshop scenes from the internet and sticking them behind the glazing on the windows and this is what it looks like before it get's any paint on it.
Regards Rob

Posted

Full Member
Just took a look at the site. Some very impressive stuff for a reasonable price. Unfortunately, as is so common, there is no word on the origin of many buildings. I suppose I should know but it can be hard to tell.
In the meantime, I've made several small buildings using Scalescenes as a basis.
John
John
Posted
Full Member
I know what you mean, they are a bit generic - looking closely at the brick work forming the header layers for the arch leaves a bit to be desired but for a back scene at the price I thought it acceptable. I am not sure that I would be that forgiving on the layout itself (but the less said on the layout the better….).
Regards Rob
Posted
Full Member
They are made up from multi layers of 20thou sheet and sadly I didn't take photos of the finished articles before sloshing on the paint but here they are before fitting to the arches.
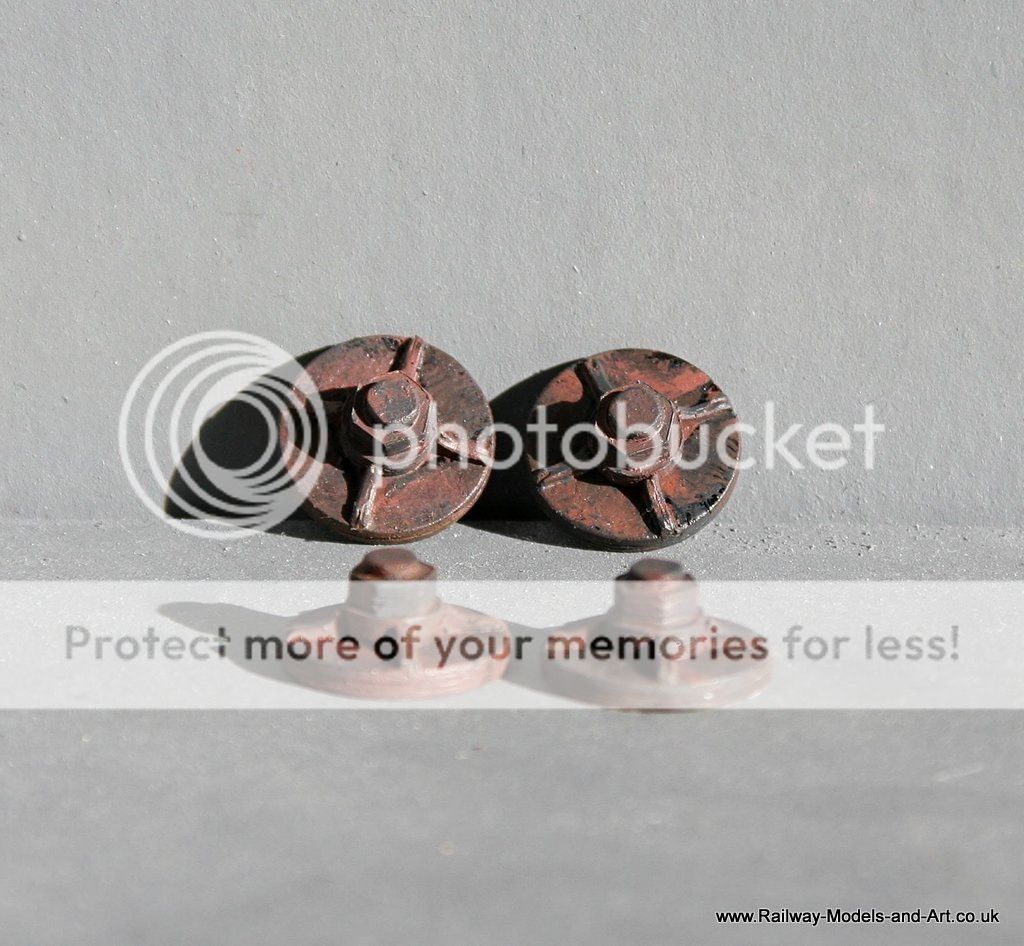
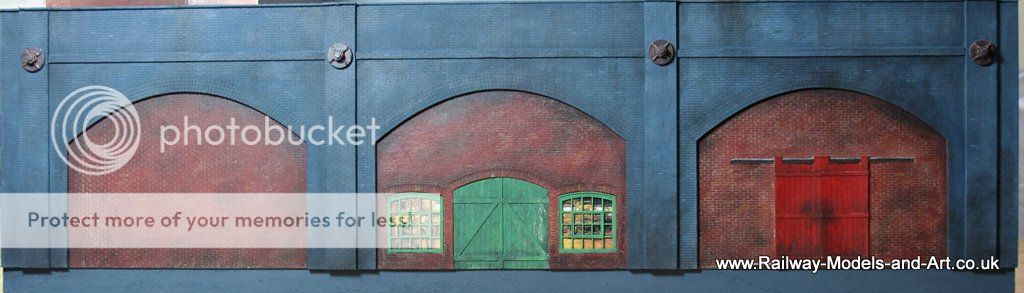
Here are some photos of the Occupied Arches when they are painted and the Pattress Plates are fitted.
The doors are really quite flimsy and they buckled quite scarily when the paint was applied but they went back thankfully as they dried. - all the painting is done with Acrylics from the Vallejo and Anitas Acrylics ranges.
Regards Rob
Posted
Full Member
A bit of dabbling in MS Word created some sign writing which I scaled and printed then covered with Vallejo Gloss Medium to seal them. A bit of paint and a whiff of weathering later and we had these ready to fit.

Both are/were genuine local companies, Startrite are still in existence about 6 miles away on the outskirts of Leeds
Regards Rob
Posted
Full Member
They started as images downloaded from the web, resized and printed on my laserjet.
Then they were cut out and stuck with pva, to some offcuts of 20 thou styrene sheet. I have an old washing up bowl under the table where my Silhouette cutter is sited , into which I place offcuts. Besides being a tight Yorkshireman, such is the ability with Silhouette Studio to place the object on the cutting mat where you like, you can do test cuts on the smallest of pieces.
Once dry, having cut them out and stuck them last night, I then stuck a strip of sellotape over them as being simpler than messing about varnish something so small. I then trimmed the excess sellotape and cut the signs from the strip that I had stuck them to.
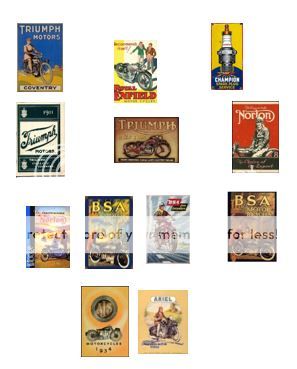
Finally I really wanted them to show their age a bit, because one of the signs has a date of 1911 on it so by grouping they would have been around a while.
The aging was done with the aid of a strong light, a magnifier and a very fine brush along with an enlarged online image of a battered enamel sign as a guide. - My eyes still ache…
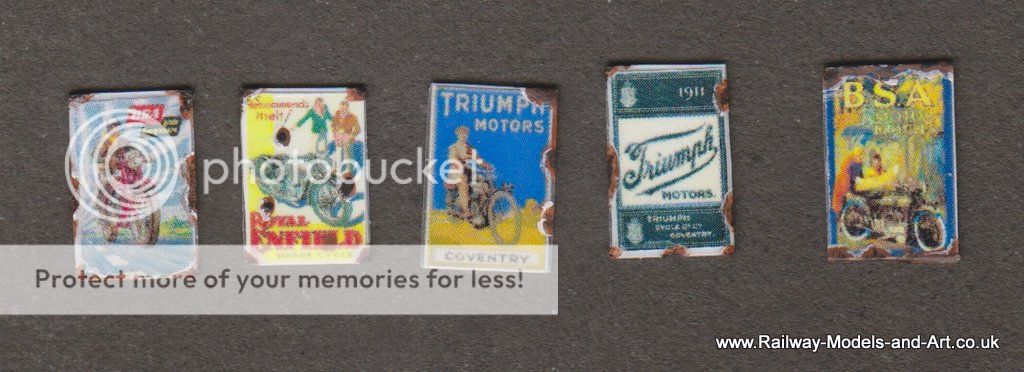
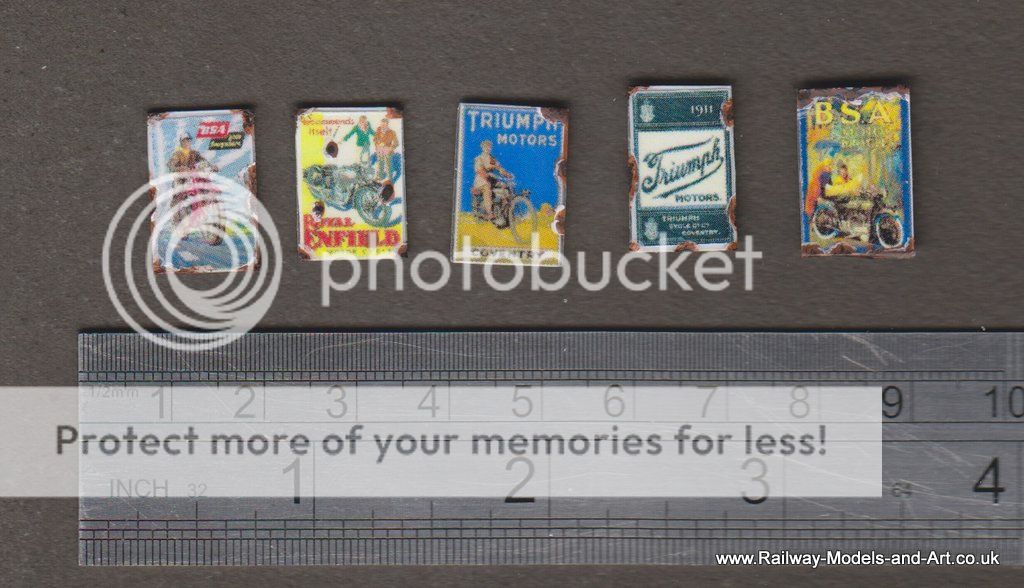
I scanned them again including a ruler to show just how small they are.
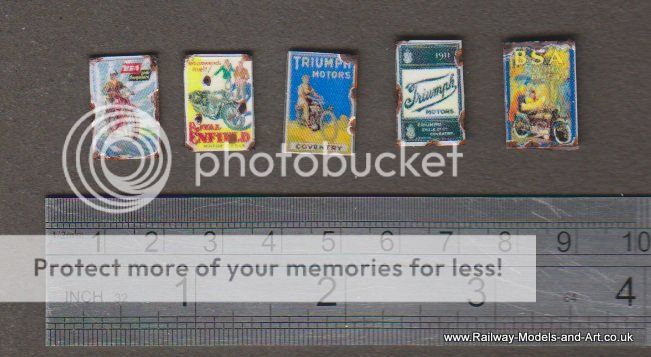
And finally I scanned them a third time at a lower resolution to give an idea of how they will look from normal viewing distances.
Regards Rob
Posted

Full Member

Posted
Full Member
Unfortunately not. To be honest the whole structure is quite flimsy and the doors etc. buckled frighteningly when the glue and paint were first applied. Thankfully they straightened as they dried out.The overall effect is quite nice. Out of curiosity, do those sliding doors work?
Here is a shot with the enamel signs in place.
Regards Rob
Posted
Full Member
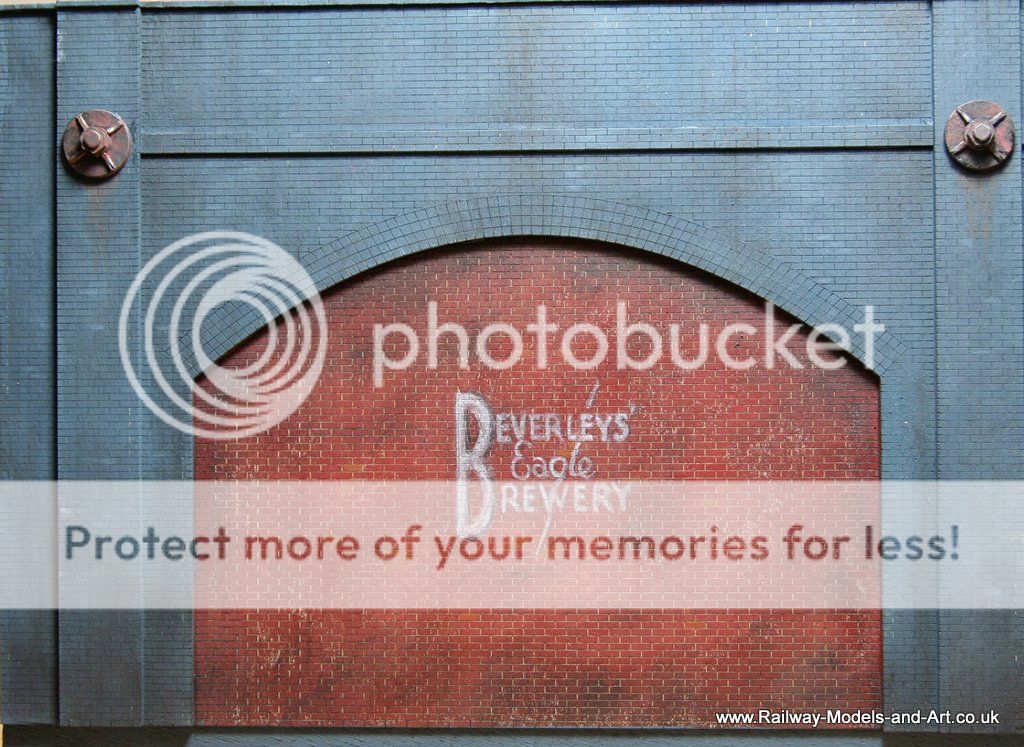
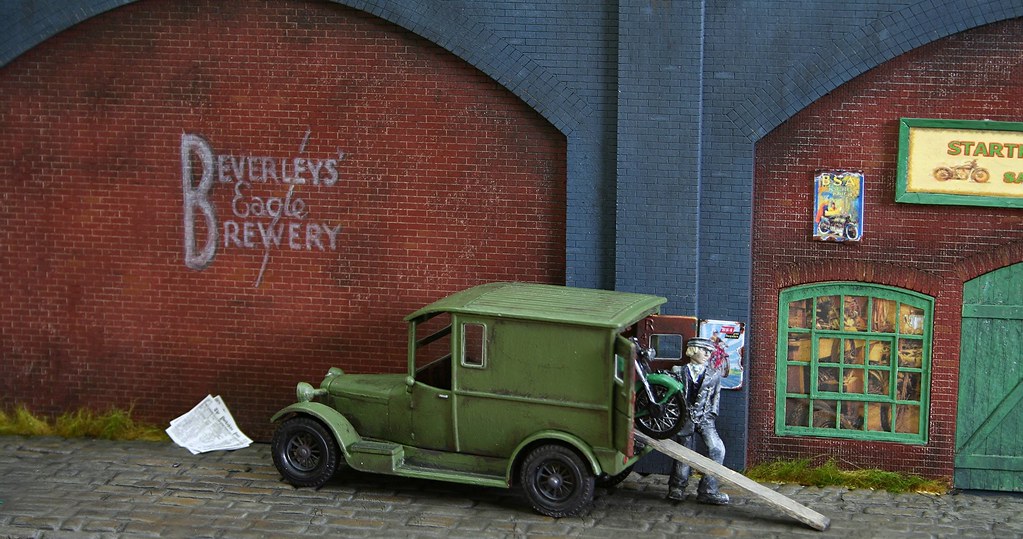
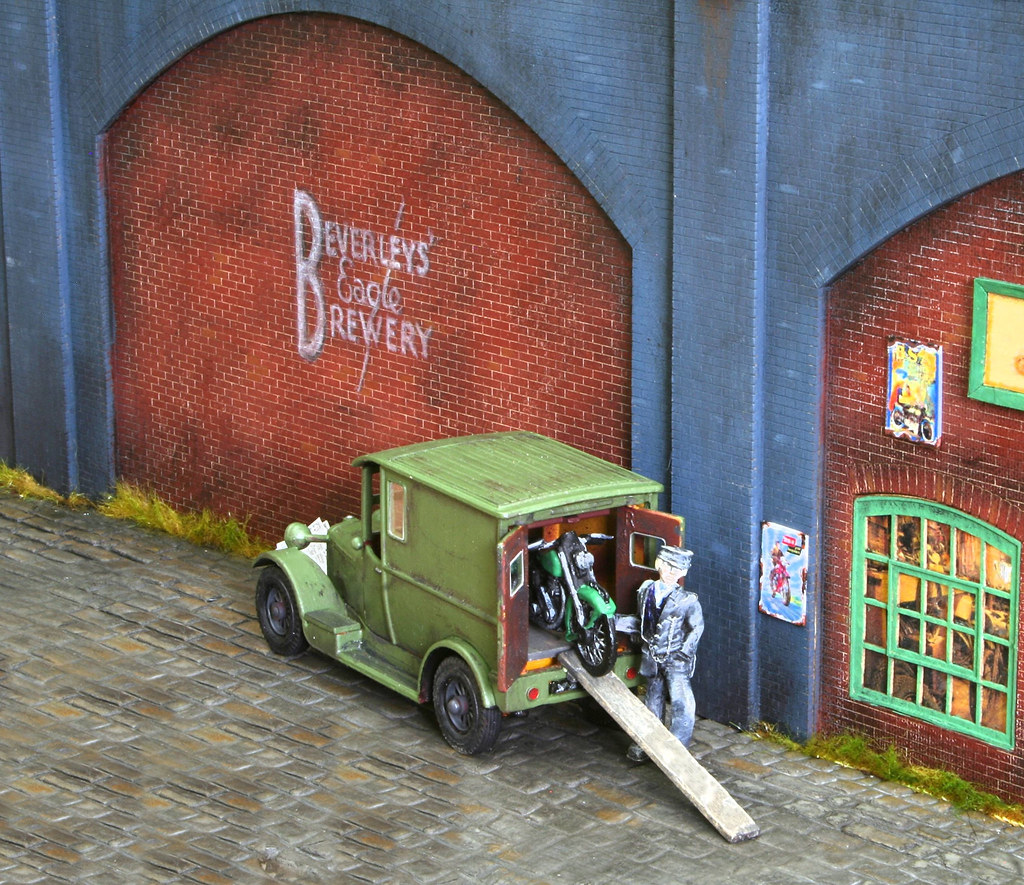
This is my interpretation of not so ghost writing using what was a local brewery, when it existed.
Regards Rob
Posted
Full Member
Cheers,
Martin
Manifestly it is better to use simple tools expertly than to possess a bewildering assortment of complicated gadgets and either neglect or use them incompetently. ( L.T.C.Rolt)
Posted
Full Member
I think that the weave pattern is a trick of the light being picked up on the photograph, because there is nothing that stands out when looking at it in the flesh.
I hear what you are saying on the brick pattern, it's very generic and if I am honest the bricks that form the arch (sorry I don't know the technical terms for them) don't represent any brick pattern that I have ever seen. The two gents that run the company are Polish and I owner if it's either that they are not that familiar with british brickwork or that there is a limitation in the CAD software that they use to produce the drawings for their laser.
Ultimately I was aware of their shortcoming when I bought them but I couldn't really justify spending any more on a more accurate representation for a photo backdrop. It must have a made a positive impression on the judges at Guildex this year because the diorama took second prize in the scenery section of the modelling competition - perhaps they didn't look too closely at the specifics of the brickworks. I ought to update this thread with the finished article which I will do now that you have prompted me.
Regards Rob
Posted
Full Member
I took the completed diorama along to Guildex at Telford in September and entered it into the modelling competition where it took second place.
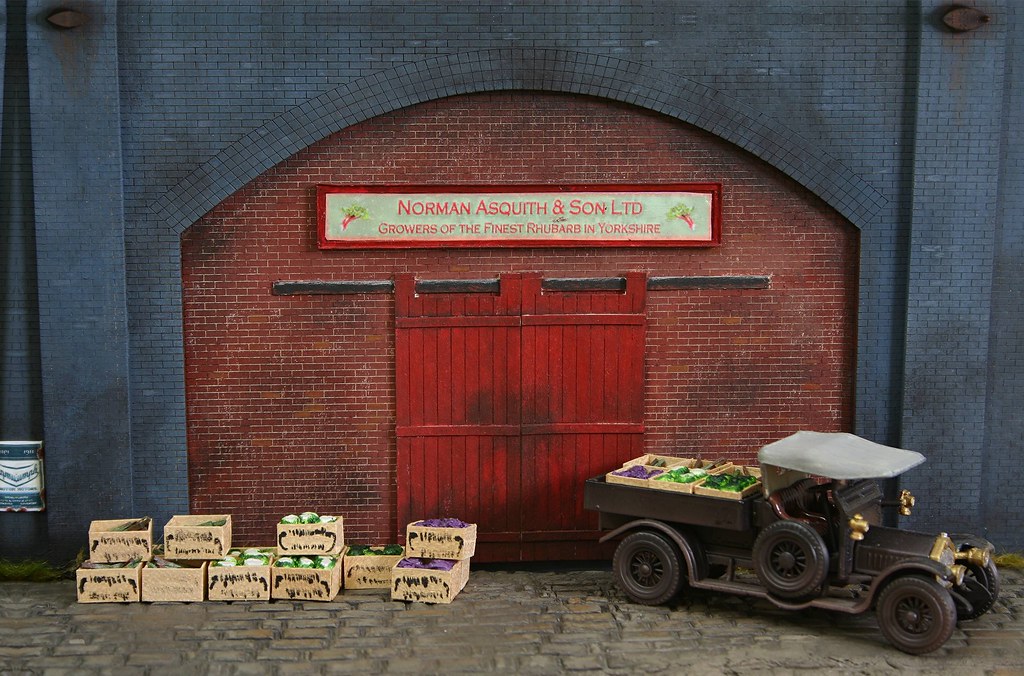
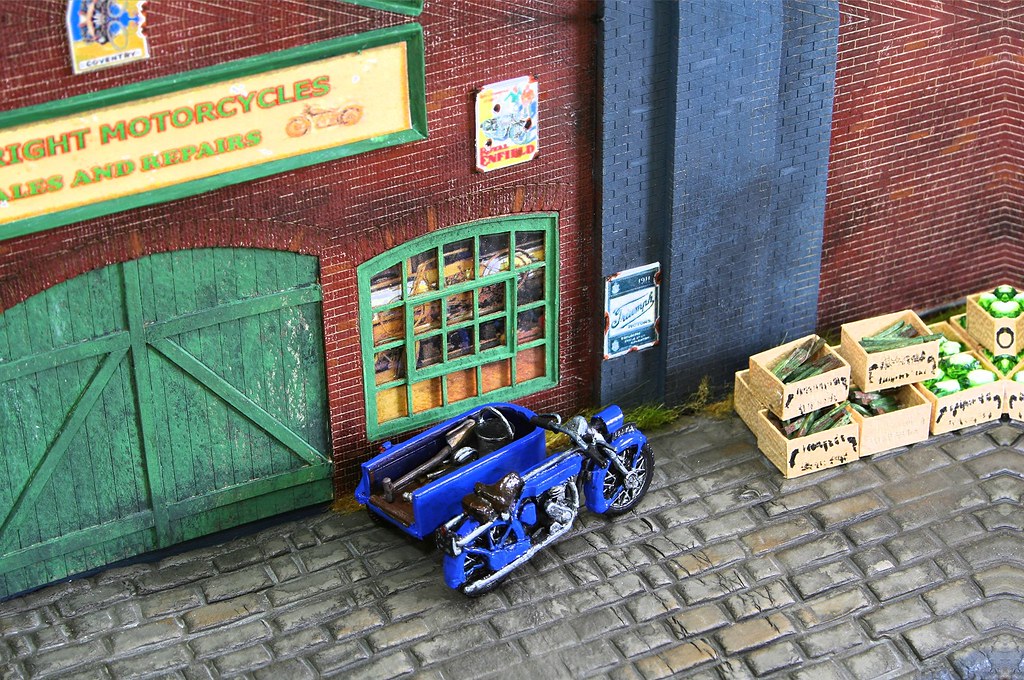
The truck and van are a couple of my £1 bargain buys which I have repainted and weathered and the boxes of vegetables are made from some veneer and tissue paper. The two motorcyles are from Lynx models and probably cost the most after the arches themselves.
 ]
] ]
] ]
] ]
] ]
]
Regards Rob
1 guest and 0 members have just viewed this.