Dapol Booking Hall
Posted
#790
(In Topic #250)

Full Member
Firstly, there is some preparation to be done. The Dapol range of kits, which are ex Airfix, were introduced in 1958 and consequently they are crude by today's standards and now suffer from warping a bit of flash and mould marks. But, at around a fiver it is a cheap way to construct a station building. Any warped parts can be straightened by immersing in very hot water, quickly bending them into shape and then dunking them in cold water. It is worth washing the parts in soapy water as they can be oily from the moulding process.
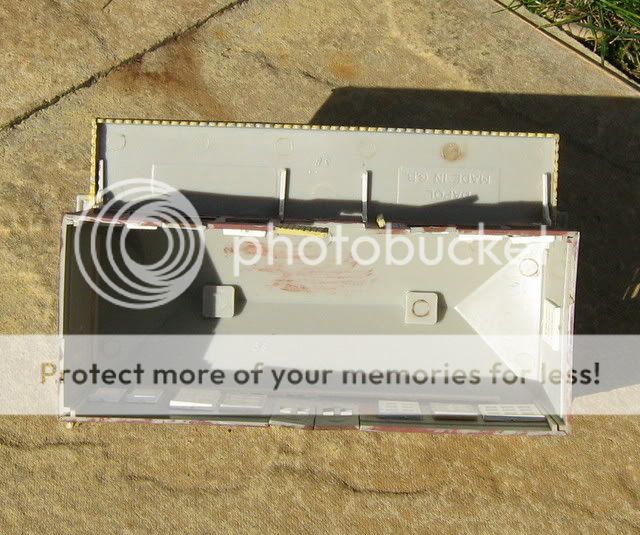
When built straight from the 'box' the kits are little more than an unglazed shell:
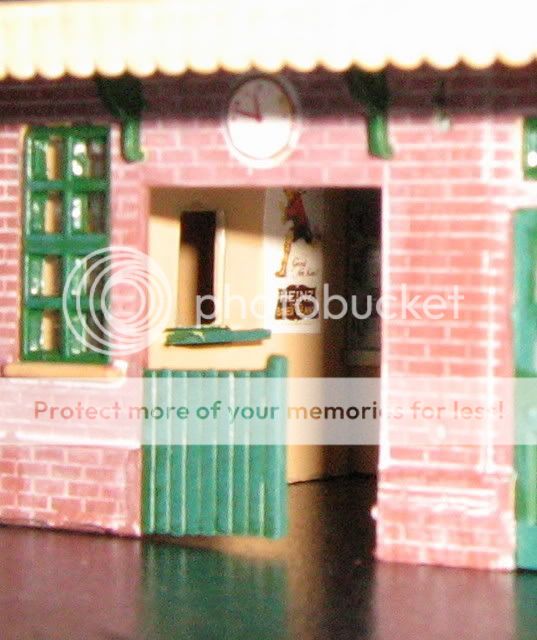
In order to give the buildings depth and to prevent being able to see right through it is necessary to construct interior walls. Once built it is quite hard to see in and thus the interior detailing need not be great to look effective. This is the sequence of construction that I use:
1. Build the kit shell as per the instructions.
2. Paint the doors and window frames the desired colour and when dry glaze them. I use clear plastic from food packaging fixed in place with super glue.
3. Paint the whole building red brick colour. I use humbrol 70. Paint the roof dark grey.
4. Install the doors windows. The double doors at the rear can be glued open.
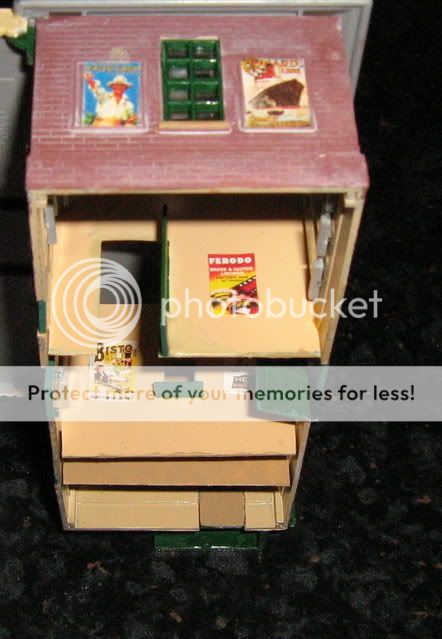
5. Look at the doors and windows and work out how the building might be divided up inside. Entering the building from the street side I thought it may have an entrance lobby, with a ticket office and staion master's office on the right side and a waiting room on the left. Behind the ticket office are the toilets. So I needed 3 walls, which divide the building into 4 areas from front to rear.
6. Measure the depth and height of the interior and cut out 3 walls to size. Snip off to top 2 corners of each wall section to permit it to fit around the ridge that holds the roof in place.
7. One wall (toilets) is left blank. The second (ticket office) I cut out a small rectangle half way up to form a hatch and added a small shelf from scrap card. The third wall had a doorway cut out to form the waiting room entrance. The piece cut out is then glued back in at an angle to represent an open door.
8. I then painted the interior of the building and the new walls a buff colour and the ticket office shelf and waiting room door green. I added a few posters and could have added other items of detail, but I stopped here.
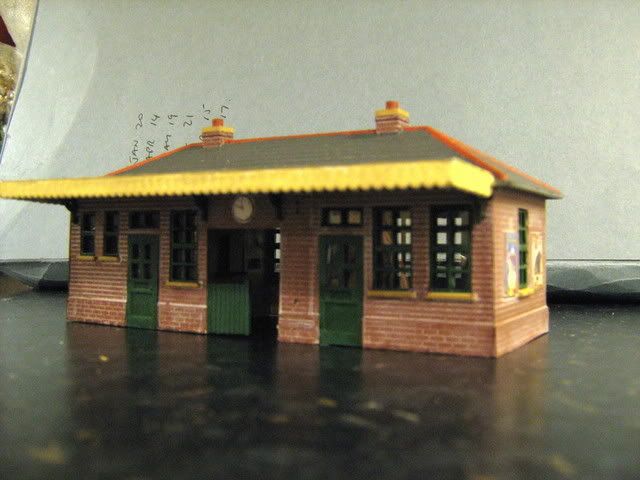
Next it was time to detail the exterior which is built as per the instructions
9. I gave the whole of the exterior, less roof, doors/woodwork and windows a wash of water thinned white acrylic. Once dry I 'dry brushed' with the brick colour as can be seen from the bottom right corner of the next picture.

10. The doors, windows and toilet screen received a wash of water thinned black acrylic paint. The roof received several coats of the black wash.
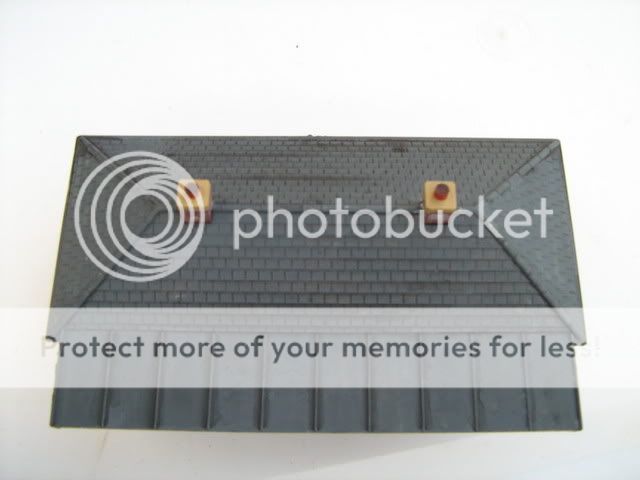
11. I painted the ridge tiles and chimney pots in terracota, again weathered with a black wash. Some posters were added and the finished model:
The interior walls are quite effective as can be seen from this close up:
Novice

Posted
Guest user
I'm sure there will be plenty of readers that will find that useful.
Posted
Guest user
It looks really good. That's a terrific job, Novice. Your interior walls add hugely to the look. Thanks for showing.
Mike
Posted
Full Member
Posted
Full Member
Airfix appeared to use a harder plastic than Dapol. The difference in quality is obvious when you compare products from both manufacturers.
Terry
 Last edit: by col.stephens
Posted
Full Member
Ah that's interesting Terry. It would explain the reduced definition in some of the kits - which I had attributed to worn out moulds.Very nice job :thumbs. I think that the warped parts have nothing to do with the original moulds and more to do with the recycled plastic which I understand Dapol is using.
Airfix appeared to use a harder plastic than Dapol. The difference in quality is obvious when you compare products from both manufacturers.
Terry
Bob
1 guest and 0 members have just viewed this.