Ply girder frame baseboards
Posted
#62437
(In Topic #3354)

Full Member
I've just completed the two side members of a "ladder rack" type structure. The boards will be a "metric" 4ft x 2ft. Those dimensions fit in perfectly with a standard sheet of ply - a "metric" 8ft x 4ft.
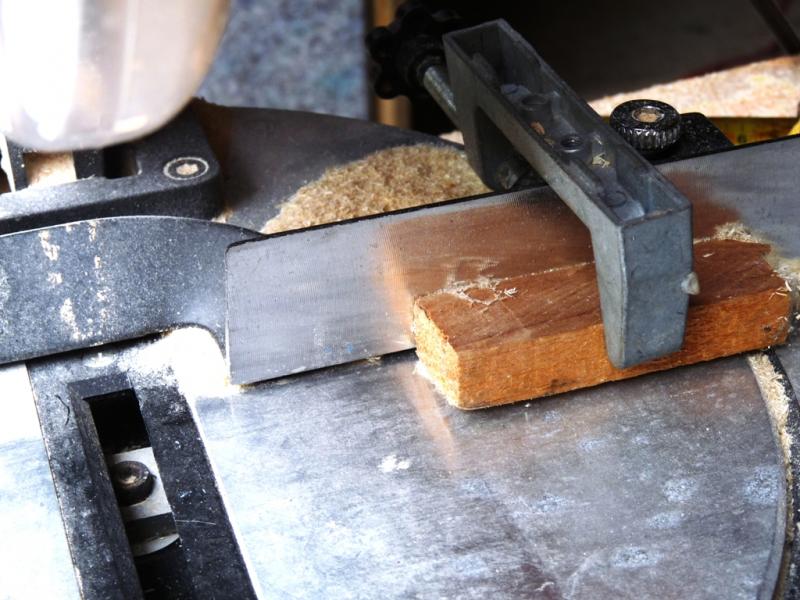
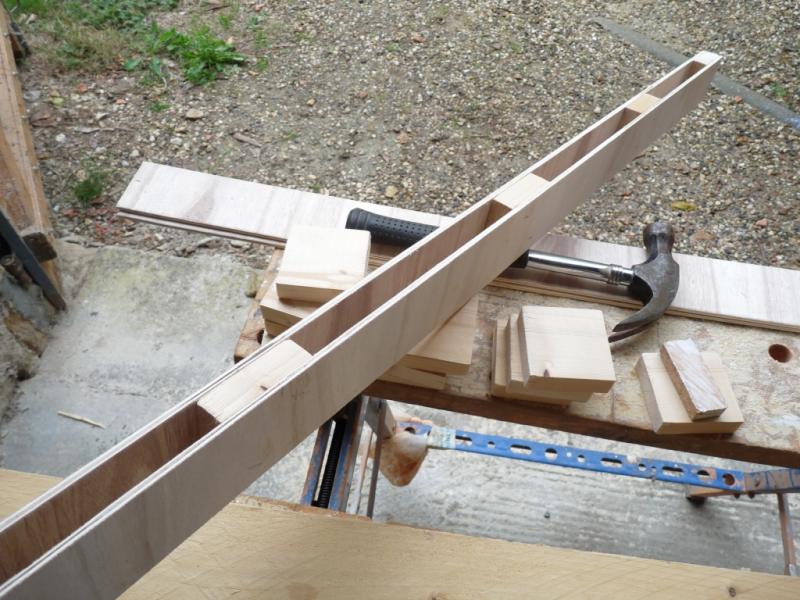
The first job was to cut the softwood spacers on a chop saw. The spacers are square - in my case 70mm x 70mm. The thickness isn't really important but, in my case, 22mm.
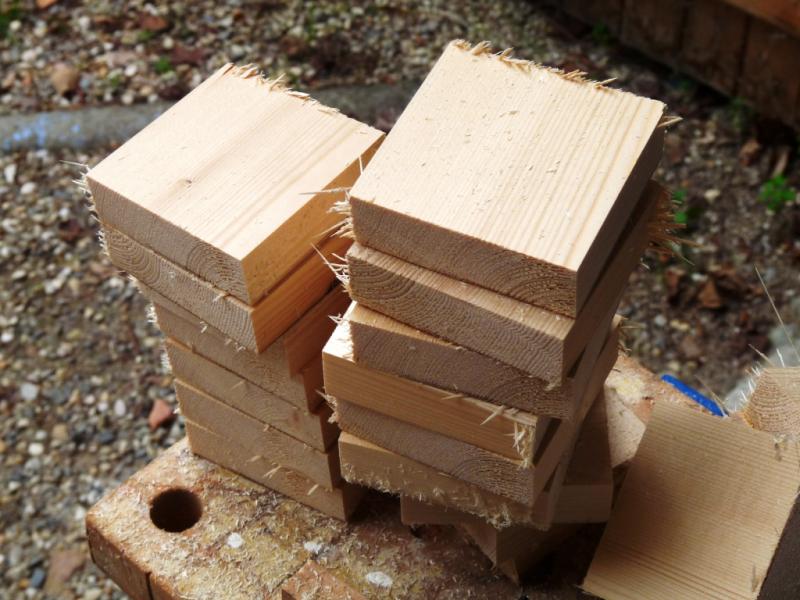
I used a "stop" clamped to the fence on the chop saw to save time measuring - as described by Ralph in his thread (but not angled :oops: - good tip Ralph :thumbs)
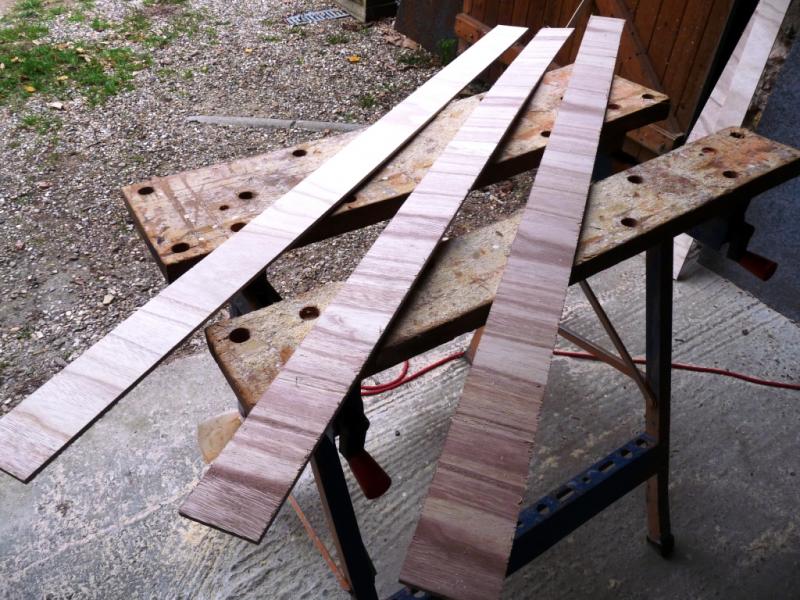
The next operation was to cut the ply sides of the frames. I used 5mm ply but 4mm would have been adequate - it wasn't available where I bought my sheet. An 8ft x 4ft sheet of 5mm ply cost me €19 - near enough £20.
The ply was sliced off exactly the same width as the softwood spacers - 70mm wide. I used a skill saw and sliced enough to complete this single baseboard. (At least, that was the idea but I miscalculated and am 2 short !!! :twisted::twisted::twisted::oops::oops::oops:)
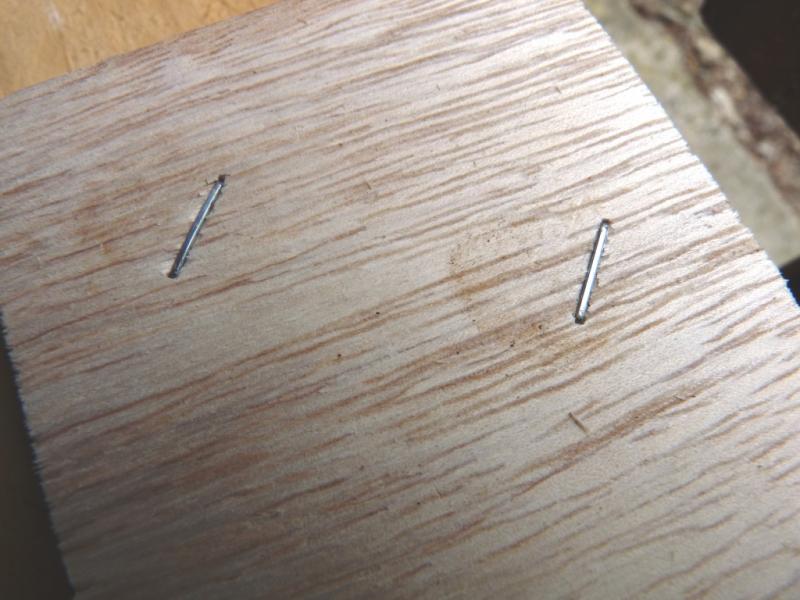
After a quick rub over all the rough edges with coarse sandpaper, the softwood spacers were glued to one of the side pieces. They were glued one at each end and one where the "rungs" of the ladder structure would be fitted. The spacers, being square, can be fitted either way round so thinking ahead would avoid any future "end grain" fixings.
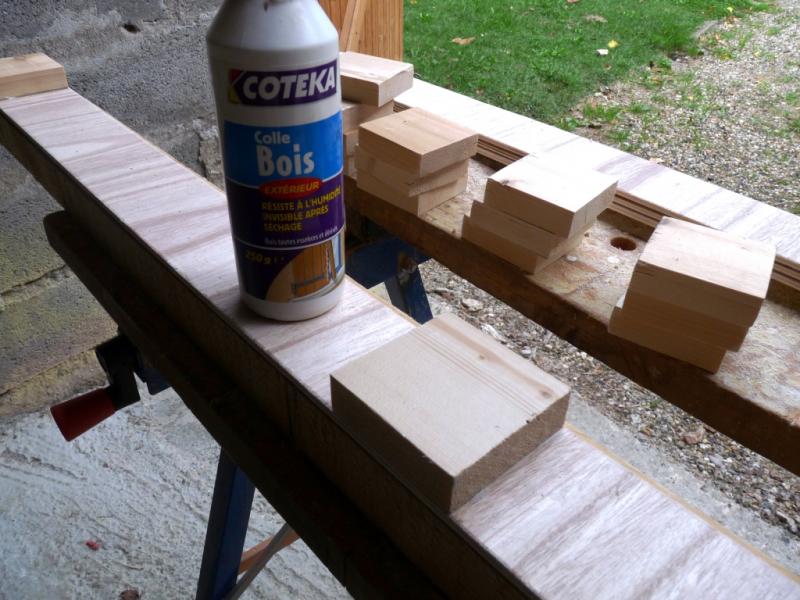
I used staples to hold the blocks in position whilst the glue set. These staples give no strength to the structure - that all comes from the glue.
When the first "side" is pinned and glued in place, the structure is turned over and the second "side" attached in the same way.
The finished "beam" is extremely light but will carry a substantial weight being in effect, 70mm of 10mm ply.
Watch the next thrilling installment soon. :thumbs
'Petermac

Posted

Full Member
Tip: Ensure the vibration doesn't loosen the clamp on the chop saw.
Not good for the blade or nearby humans if the clamp gets into the cutting area.
Posted

Inactive Member
Well done mate and I really hope this works out for you. I am ahead of you by only a few weeks because I have just built a 5ft 6in x 3ft baseboard using exactly the same method a la Barry Norman. I did this whilst I was in the UK and had the timber cut exactly to size by a local timber yard in Watford. The size will fit the back of my VW Touran so that I can trawl it about if necessary (in fact I've brought it back over the Pyrenees to work on the surface).
The main reason for building with this methodolgy is the same as yours i.e. lightness and inability to warp. HOWEVER I am seriously thinking now of scrapping the board and going back to the conventional method for two reasons a) It has finished up being quiet heavy, maybe even heavier than convential material and b) this could be paranoia, but I actually think it is starting to warp, or at least twist. It certainly isn't as stable as I would have liked. Before abandoning it I am going to try some diagonal cross pieces of conventional timber to see if they stiffen it up.
I really hope yours is satisfactory so I shall watch your thread with keen interest.
Les
Devon Junction
Kernow Junction
Kernow Junction
Posted
Full Member
 thumbs
I'm surpirsed you've found yours is starting to twist. :hmm I'd have thought the ply was rock solid being laminated across both grains so, as you say, it must be "twist" rather than warp. What are your ply dimensions ? Maybe it's the size - mine is, as I said, 4ft long by 2ft wide.
Maybe the diagonals will help - they will certainly give it far more rigidity but I wonder if they'll help with the twist. Could it be the change in humidity ?
I'll paddle along with mine and, once I get it done, I'll check the weight against "conventional" materials.
Barry Norman apparently came up with the method to AVOID twist and warp on softwood. :???::???::???:
'Petermac
Posted
Guest user
Some heavy duty metal brackets wide as possible will take out a lot of twist in the corners.
Angled 2 x 1 ribbing would also stiffen it
Looks light to me compared to standard baseboards Les
cheers Brian
Posted

Legacy Member
I'm likely to use similar construction for the new version of Eastwood Town but it will use a basic frame plus open plan track bed and mdf supports to make a U shaped track base. I have used that on the hidden sections of Eastwood and found it gave a completely flat and warp free track bed. There are pics of that construction in my layout thread.

Posted
Full Member
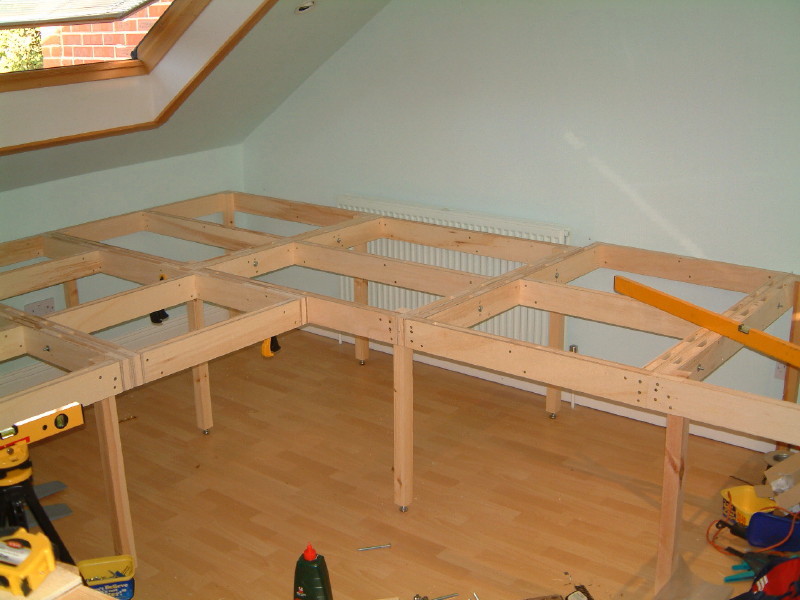
thumbsI can imagine how heavy - and strong - it is with 12mm ply. My layout isn't going to be portable (more like "moveable") but it is in the attic and the boards I built previously: sorry - photobucket says the image has been deleted :???::???::???: - go to "Petermac's layout on "Members Layouts" if you're interested - were very heavy once I'd got the chipboard top on.
I saw this method and thought it might be an answer. I'm also going to use ply rather than chipboard for the track bed. At my age, hernias are all too common and I'd hate to be laid up with nothing more than a crate of St. Emillion for company !!! :roll::roll:
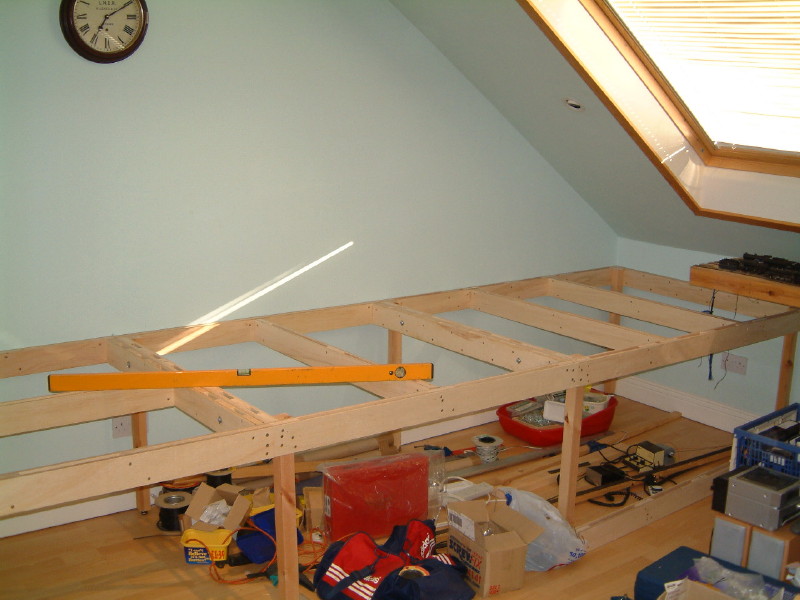
Incidentally, I like that idea of using the laser level - presumably you marked the wall with it for levelling ?
'Petermac
Posted
Legacy Member
Once I had set the levels across the 18' width and set a datum point, the true gradients of 1:100 were easier to set. It wasn't an expensive piece of kit and made the job a whole lot easier.
Posted
Inactive Member
I'd hate to be laid up with nothing more than a crate of St. Emillion for company !!! :roll::roll:
Great minds thinking even more alike Peter, except I WANTED to be laid up with……..etc.:roll:
Les
Devon Junction
Kernow Junction
Kernow Junction
Posted

Full Member
thats the same method we use too. 9mm scandinavian ply tops with 6mm sides 5 inches deep - 2x1 spacers.
One tip we found that really speeds up the construction and improves the accuracy is to make your sandwiches as 1 big sheet and then cut them to size on a table saw. It means the tops are perfectly flat and square.
Cheers
Jim
Jim Smith-Wright
Rule 1 - Model what you really see and not what you think you know!
www.p4newstreet.com
Rule 1 - Model what you really see and not what you think you know!
www.p4newstreet.com
Posted
Legacy Member
I've been making mine slightly oversize and then cutting them accurately afterwards to ensure the ends and sides are perfectly square. To make up one large sheet and then cut it into strips is something I hadn't considered and possibly makes far more sense.
A couple of questions though. I usually screw and glue my blocks in place, but have give some thought to using a nail gun. I'm assuming the marking out is a little more complex if you are making say four beams together using your method. What do you use to fasten the softwood blocks/strips in place and how do you mark up the multiple beams? Do you just draw cut lines across and insert screws/nails in approximate positions or is it marked out to the last mm…..
Posted

Full Member
….won't the trackbed/baseboard being fitted to that frame straighten things out???
Cheers,John.B.:thumbs
Posted
Inactive Member
Peter - You are right in that, at this stage, it appears to be twist rather than warp. It seems to be much too flexible compared to the more rigid construction of conventional boards. I'm just very sceptical in that unless it is stored flat the twist will eventually become warp. Anyway by the time you read this, no doubt you will have completely finished and the result will be known. Every confidence!:pathead
Les
Devon Junction
Kernow Junction
Kernow Junction
Posted
Full Member
Hi GordonA couple of questions though. I usually screw and glue my blocks in place, but have give some thought to using a nail gun. I'm assuming the marking out is a little more complex if you are making say four beams together using your method. What do you use to fasten the softwood blocks/strips in place and how do you mark up the multiple beams? Do you just draw cut lines across and insert screws/nails in approximate positions or is it marked out to the last mm…..
We just use glue and use a nail gun to assemble them - we do work out where the blocks need to go first though. If you are doing curved boards we only make a half sandwich and laminate it together in situe
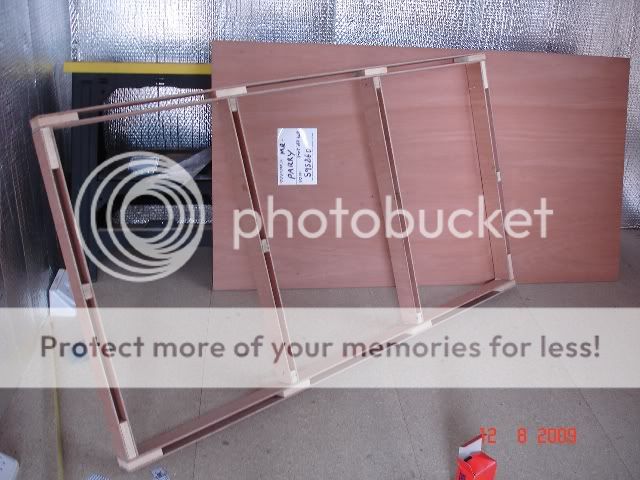
Referring to Peter Macs comments, regardless of the materials used without any diagonal bracing it will still warp. The diagonals only need to be 2x1 softwood though. The following shows the underside of one of the boards in its packaging
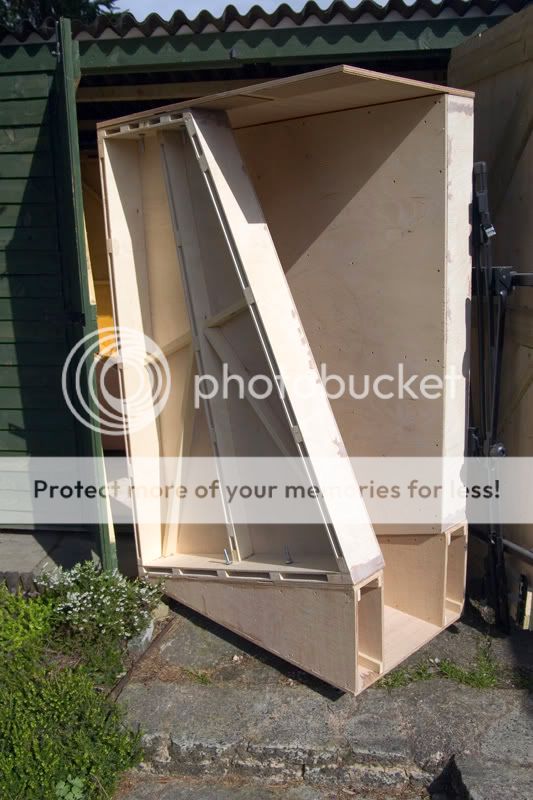
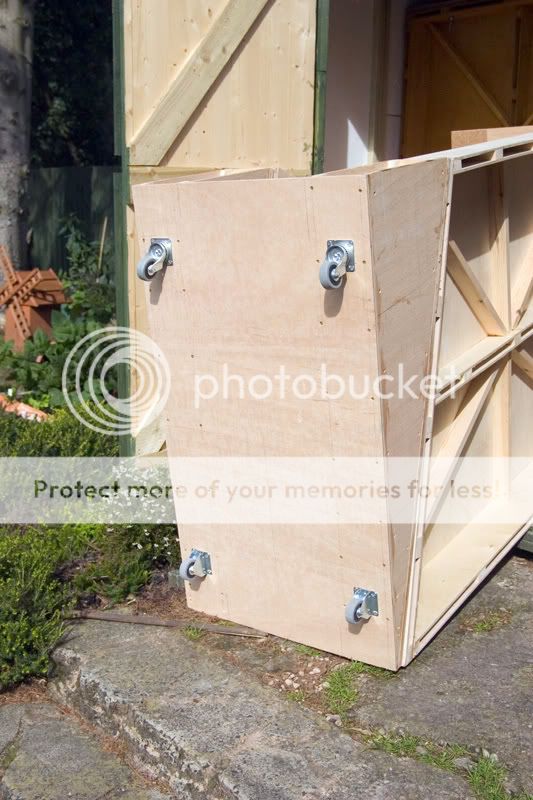
We dont compromise stability in any way - we built similar construction baseboards about 15 years ago with an emphasis on keeping them as light as possible and they warped like mad. So only top quality materials will do regardless of the weight. It doesn mean the boards are VERY heavy but to help transport them each 'pack' has been fitted with wheels
Finally the boards are treated (Both sides) with silkens Yacht varnish - again only treating one side will lead to the baseboards warping.
HTH
Jim
 Last edit: by jim s-w
Jim Smith-Wright
Rule 1 - Model what you really see and not what you think you know!
www.p4newstreet.com
Rule 1 - Model what you really see and not what you think you know!
www.p4newstreet.com
Posted
Full Member
:oops::oops::oops::oops::oops::oops::oops:John - I have actually fitted the baseboard, although I notice Jim is using 9mm ply and Gordon 12mm whereas I used 6(5)mm like Peter and which Barry Norman says should be fine. This is why I'm keen to see how Peter gets on so I'm waiting for him to extractum digitatum then we'll see.:thumbs
Peter - You are right in that, at this stage, it appears to be twist rather than warp. It seems to be much too flexible compared to the more rigid construction of conventional boards. I'm just very sceptical in that unless it is stored flat the twist will eventually become warp. Anyway by the time you read this, no doubt you will have completely finished and the result will be known. Every confidence!:pathead
Les
You know I had miscalculated on the number of "girders" I needed - well I only had enough softwood for what I made - I'll have to go and buy some more !! Plenty of ply - just the softwood I'm short of.

'Petermac
Posted
Guest user
Have you added the wood needed for that into your calculations :question:question You'll be starting that soon, I guess :question
Posted
Full Member
I'm throwing alternative ideas around at present about exactly WHAT the module will be. Narrowed it down to 2 possibilities. I tend to mull ideas over with a glass of red so after a few more bottles, I should have it all finalised !!! :cheers:cheers:cheers
'Petermac
Posted
Full Member
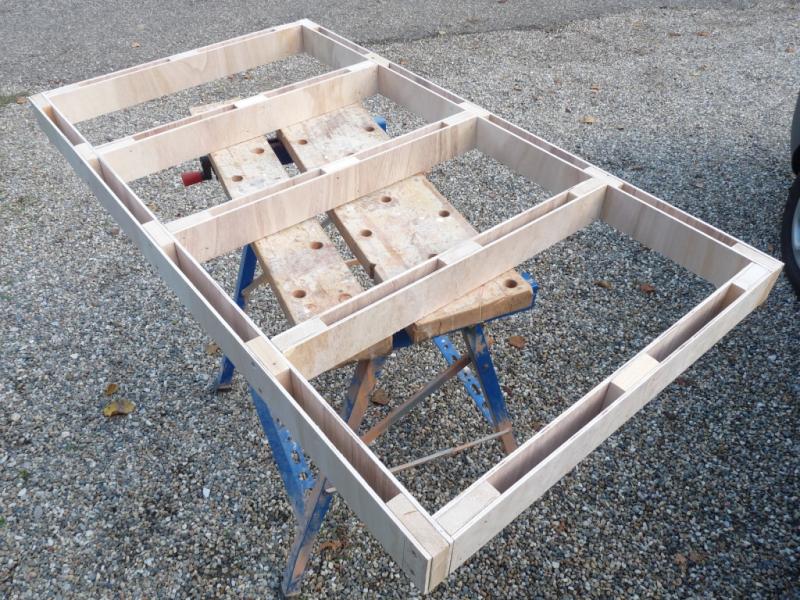
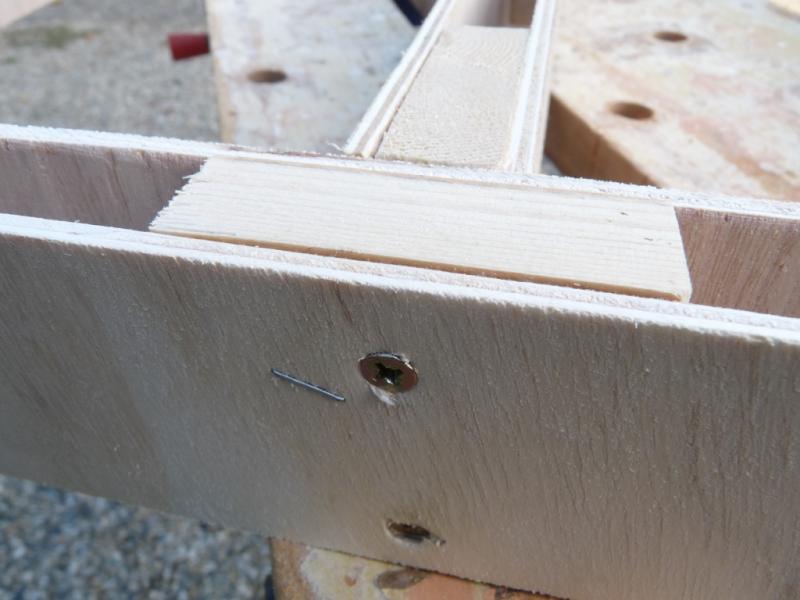
All joints were glued (normal white PVA wood glue) and screwed with 45mm wood screws having first drilled a pilot hole:
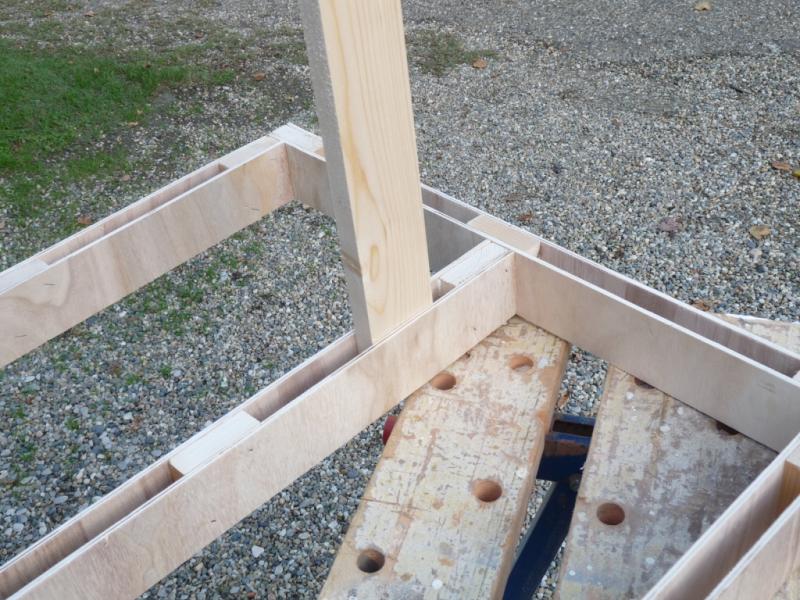
An advantage with this type of construction is that risers - cut from the same stock as the spacers - simply slot into the girders wherever required:

They are cut to whatever length required to support the upper level(s). In theory, there is no limit to the number of levels one can add. This photo just shows the principle - the riser is a "dummy" !! :
I have found my frame - only 4ft x 2ft - is reasonably light although, as Les discovered, not as light as I'd have thought !! Without diagonal supports it will flex out of square but this would probably be negated once any track bed was fitted. The system is not as quick as using conventional softwood framing but there should be no "warping". We shall see………………………
Having studied the posted photos in more detail, I now realise I didn't allow for any wiring to be installed "within" the baseboard. Fortunately, I can still gain access to drill 2 or 3 holes in each cross member to accomodate this. :oops::oops::oops::oops::oops::oops::oops:
'Petermac
Posted

Full Member
Phill
Posted
Full Member
'Petermac
1 guest and 0 members have just viewed this.