Johns 7mm Loco Workbench
Posted

Full Member
I got a pack of blacktack while I was at it. This is similar to bluetack but quite a bit stronger.
I have read that speakers do need to be sealed in their housing to get good sound.
The PVA I've used sets rock hard. I have been using some Tacky Glue for sticking turnout timbers to templates, this is similar to PVA but dries slightly rubbery and peels off.
John
John

Posted

Full Member
I have only recently become aware of Black tack - since reading up on DCC articles after having a few problems. I may have to invest in some.
In my experience watered down PVA's seem to set like concrete but the thicker stuff remains rubbery - or I have just been lucky.
Regards Rob
Posted
Full Member
I plan to use Tacky Glue to stick foam roadbed and track down, it might keep the noise down.
John
John
Posted
Full Member
You are probably right - thick pva is sold over here as water based superglue and branded tacky glue.
Regards Rob
Posted
Full Member
John
Posted
Full Member
Turns out I got the speaker leads touching so no sound. I wanted to peek under the circuit board to see what I'd done but then I noticed a broken wire. The wire wasn't long enough to get a grip to strip it. Long story short, I ended up rewiring the CB and everything works now.
Unfortunately the tiny pads on the decoder for stay alive came adrift after soldering - should have used fine wires and soldered the SA to those. Drat!
I'm thinking decoder installation in the J50 will be easier since there's no CB.
John
John
Posted

Inactive Member
Normally if you touch the speaker leads together, the amp is "Out to Lunch."

Max
Port Elderley
Port Elderley
Posted
Full Member
John
John
Posted
Full Member
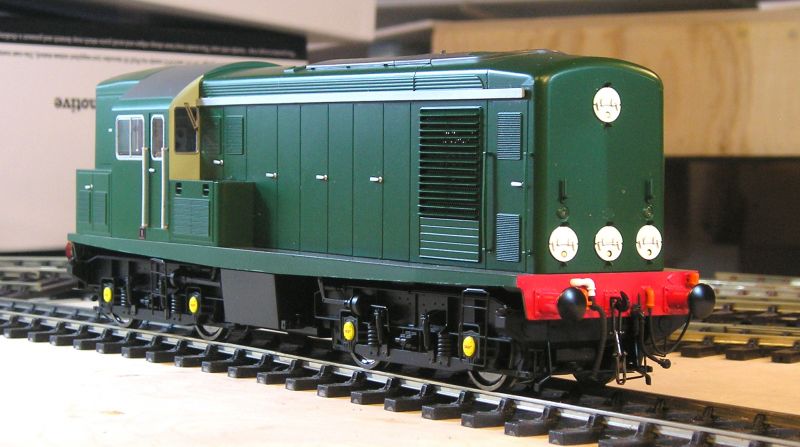
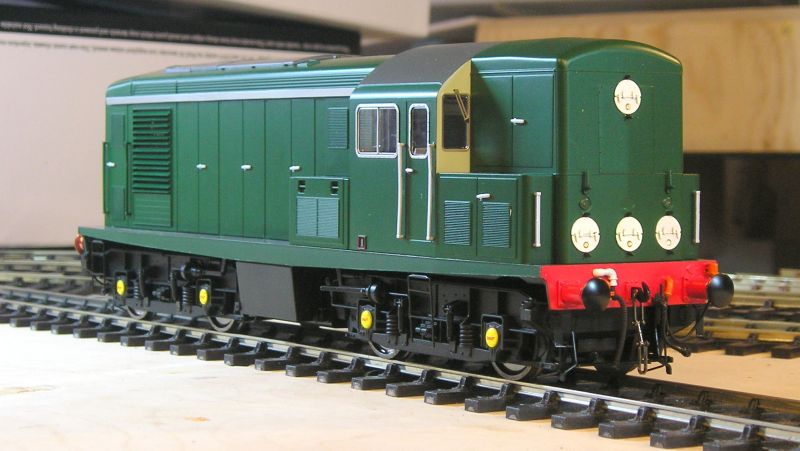
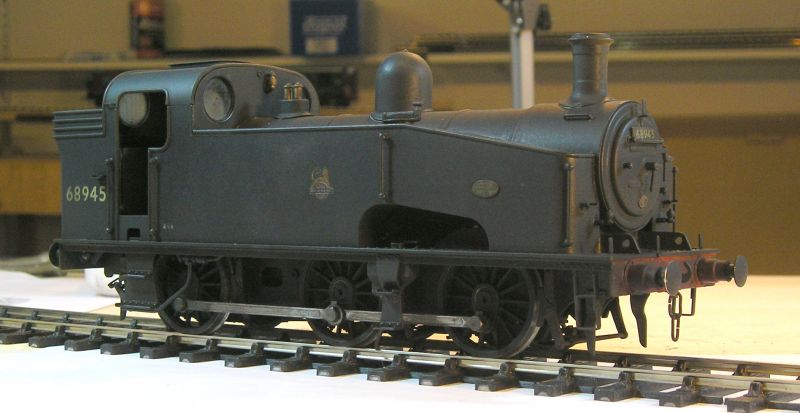
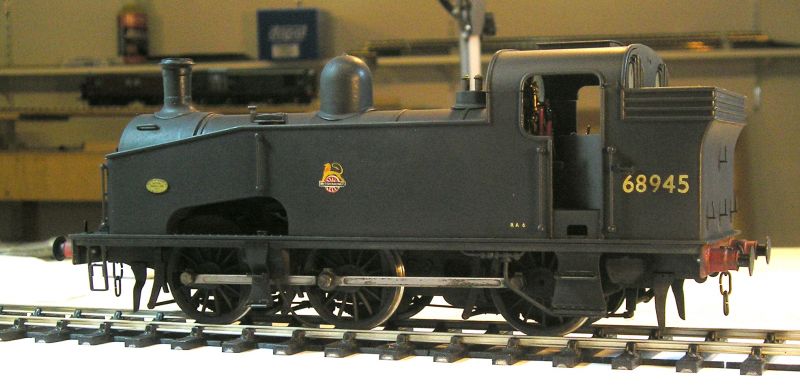
Very impressive. First impression is the weight! There's a bag containing etched plates and a decal sheet so I'll need to have a sit down to figure all that out.
Everything works as advertised when power is applied. I got the sound on board version with Zimo/Paul Chetter sound.
The default mode is heavy load and momentum setting is high - getting the loco moving then cutting power, it wants to keep going…and going. There's also a light load mode selected by a function key. In this mode the loco stops fairly quickly.
Marker lights are individually switched using function keys. As pictured it is coded for the Royal Train, so will have to fix that.
Top marks!
John
 Last edit: by Brossard
John
Posted

Full Member
Posted
Full Member
John
John
Posted
Full Member
Posted
Full Member
John
John
Posted
Full Member

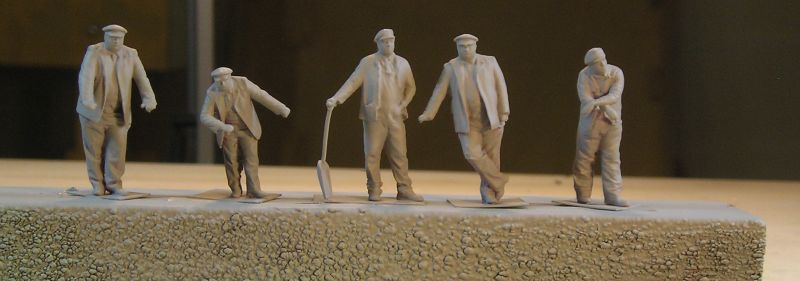
From left to right:
Fireman, driver leaning, and three goods guards.
I drilled their feet and stuck some wire in. I made bases out of plastic and stuck those on filing the wire flush. The bases are temporary and will be trimmed when it comes time to install them.
I expect the detail will become more pronounced after priming.
John
Posted
Full Member
I finished off with a coat of satin varnish:


I wasn't sure about the OLE flashes and discovered they began to be added around 1960. This would have been completed quickly because of the safety implications.
Also primed the crew figures:
John
John
Posted
Full Member
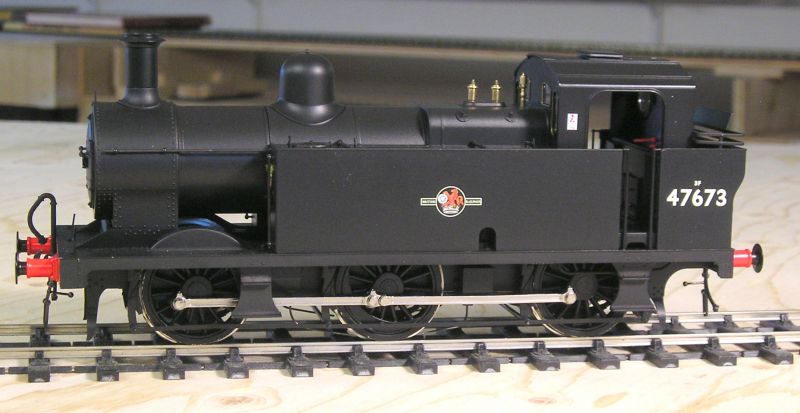
I finished the decoder install today and oooh! it all works, I am 'appy. :pathead

While I was at it, I replaced the naff couplings with a Parkside set. There was a nasty vacuum pipe fitted but these J50/3 engines were all steam braked and fitted with 3 links.
I also made a reversing lever which is inside the tank cutout.
While the body was off I decided to make a start on the weathering. I airbrushed light coats of earth and black on the chassis and lower half of the body. I then airbrushed light coats of dirt and black on the top.
Still work to do, the windows want a clean for a start. There's powdering to do as well. I'll have go with making the rods look a bit better. I'll give them a clean and try some gun blue on them.
Toot toot! :chicken
John
Last edit: by Brossard
John
Posted
Inactive Member
Max
Port Elderley
Port Elderley
Posted
Full Member
All very subtle I think. I scrubbed the rods clean after my last post and tried gun blue. I got no reaction at all. I also tried chemical black with the same non result. I used a thin brown wash in the end. I'm open to suggestions about improving the appearance of the rods.
For the rest, umber and black powders mostly rubbed off with my fingers. Grey powder was lightly applied under and around the smokebox door to simulate ash residue.
Brakes got rust powder followed by black.
I used a brown wash on the top.
Finally I finished with matte varnish. Note the windows are clean. I used window cleaner to get rid of the acrylic overspray and made circular round plastic masks to prevent the matte varnish from getting on.
John
John
Posted
Full Member
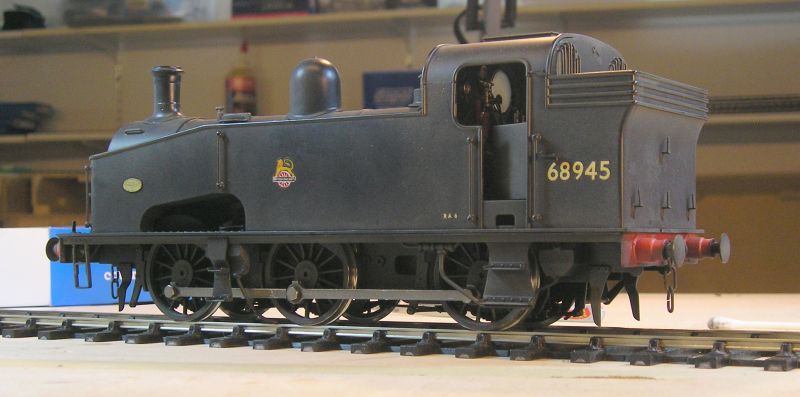
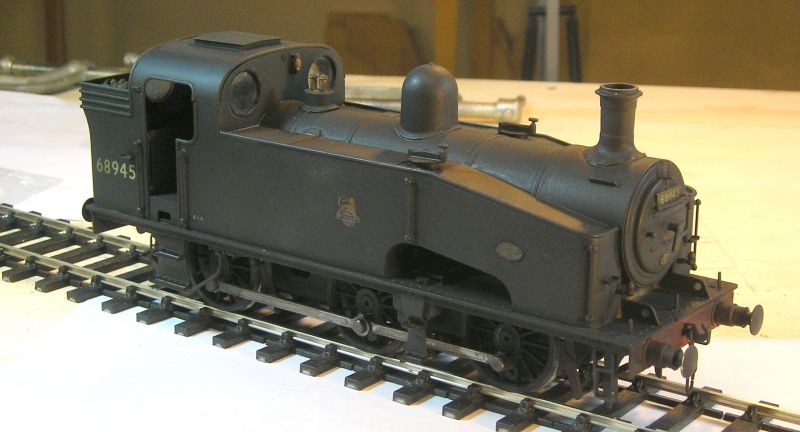
 Just as it comes out of the box.
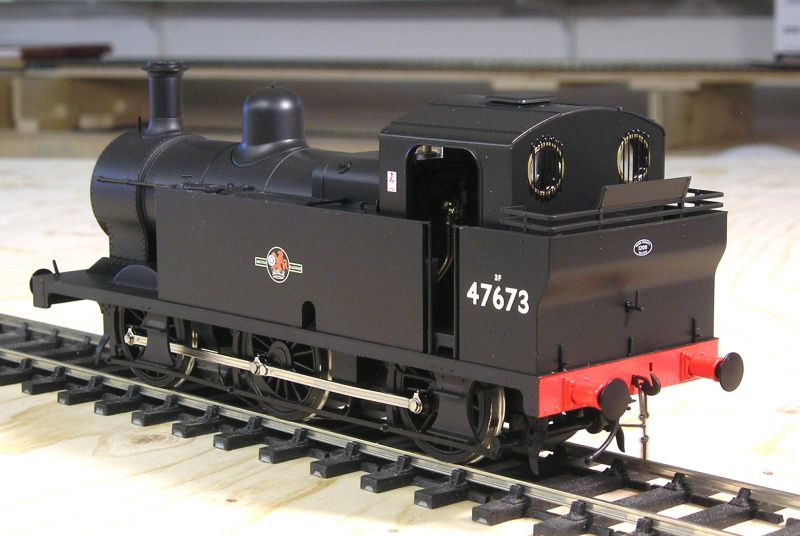
I'll have to address the bent lamp bracket. I also noticed that the coupling spring is very weak, must look at replacing it. The chimney seam looks a bot too pronounced. All first impressions.

The cab is nicely detailed.

I am soooo pleased with this. It is currently DC and as such it runs very smoothly. Paul Chetter has announced a sound file for this but it is not quite ready. I think it's worth waiting.
John
John
Posted
Full Member
I cancelled the one that I had ordered, purely because my enjoyment is in the building.
Regards Rob
1 guest and 0 members have just viewed this.