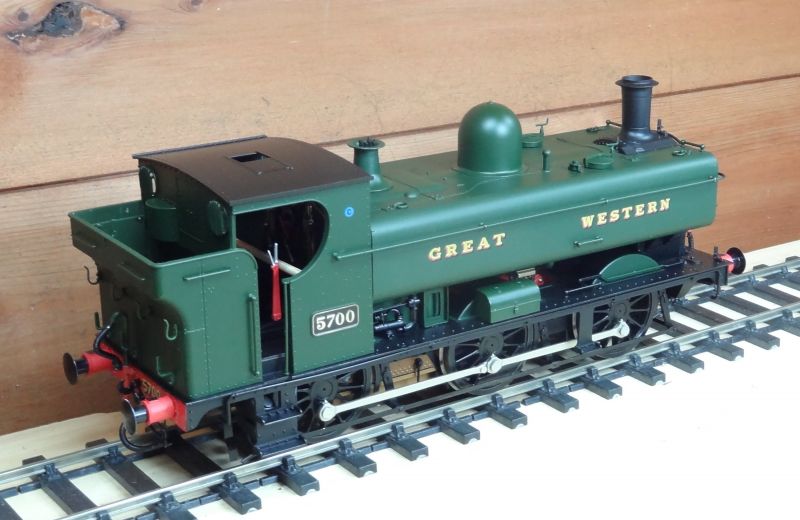
7mm pannier Tank from Dapol
Posted
#242372
(In Topic #13399)

Full Member
Changing the details
I have purchased 7mm RTR GWR locos on and off since 2008 but I`ve ended up falling out of favour with them and selling them on.I think it`s usually because they don`t, for one reason or another, look as satisfying as my kit built locos. Or run as well.However, Dapols recent O gauge offerings are a different matter…..
Having researched other modellers comments and experiences and being tempted by discount offers I have purchased a Dapol 57XX Pannier tank and have not been disappointed.

She runs very smoothly and so quiet and has a hefty motor between the frames.
I was so impressed I decided to strip her down and change a few details to match her up to my kit built stock.
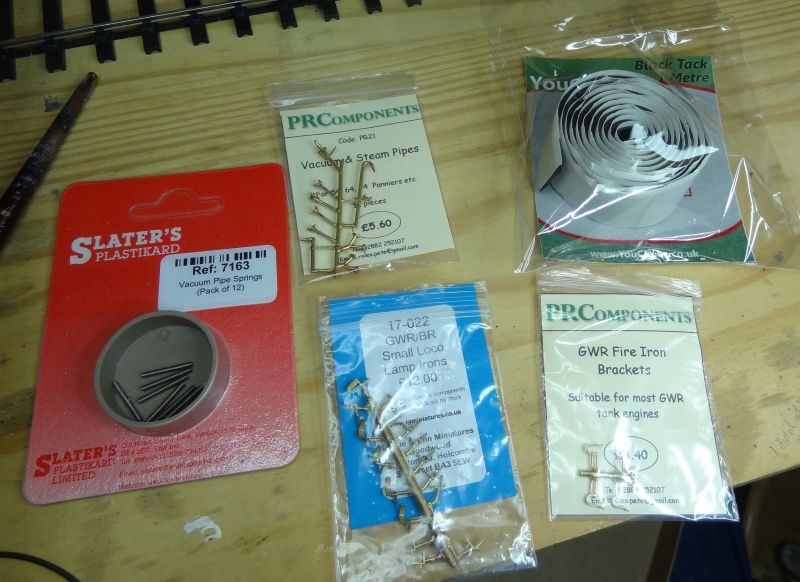
I did`nt really need to as the detailing is spot on but I have a thing about buffer beam detailing, which is never quite right on most RTR offerings and also i like better quality lamp irons ( metal if I can get them)
I also had a spare sound decoder from Youchoos which I duly sent back to them for a Pannier tank re-blow. this will mean totally removing the DCC ready 21pin socket and thereby loosing the firebox `glow` when I hard wire it all in. I don`t like firebox glow anyway so no real loss there.
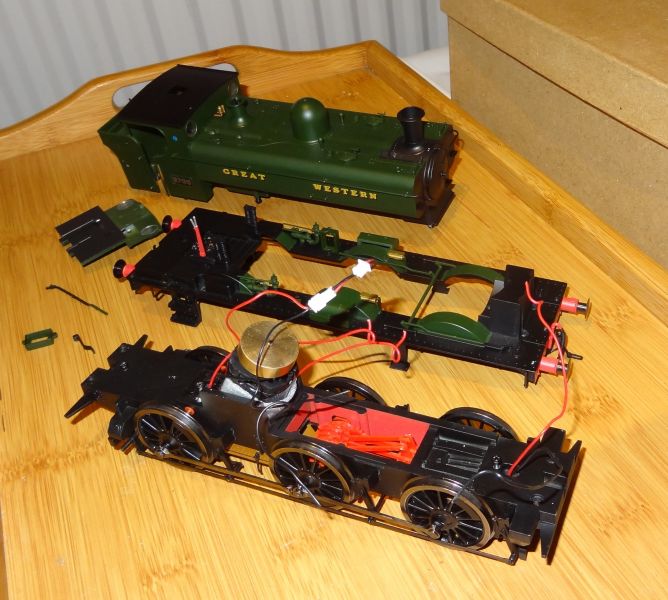
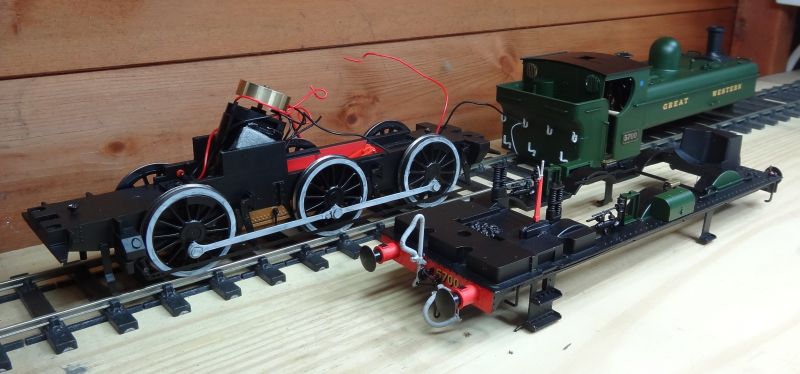
So using these replacement parts i set about taking her apart….
Not a particularly difficult task if you take time……
Then I set about pulling off the plastic lamp irons etc and re - drilling to make the replacement and to add the missing pair of lamp irons from the footplate.
so as it came……

and new ones fitted…

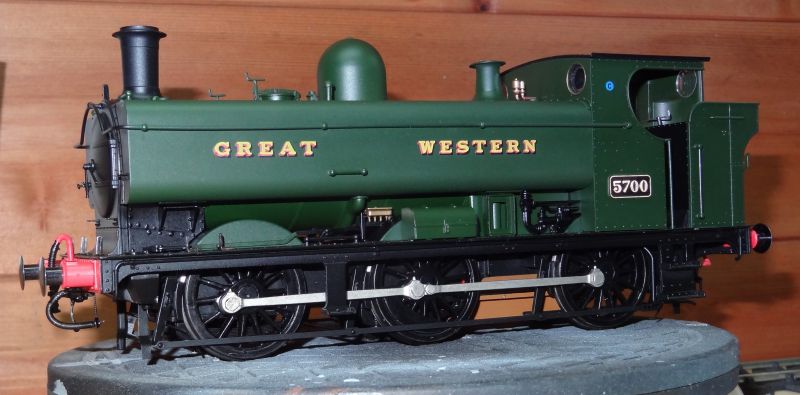
I also decided to add boiler bands to the body work……..
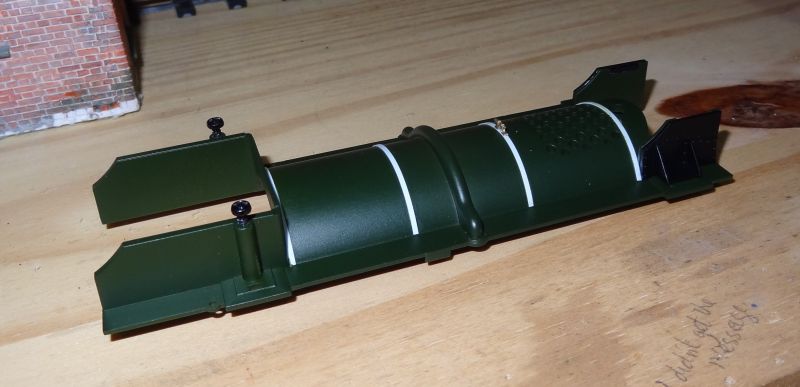
After fitting all the replacement metalwork, I hand painted some Closterman grey etch primer to all necessary parts that needed re painting…
I also painted the wheels and wheel splasher tops black.
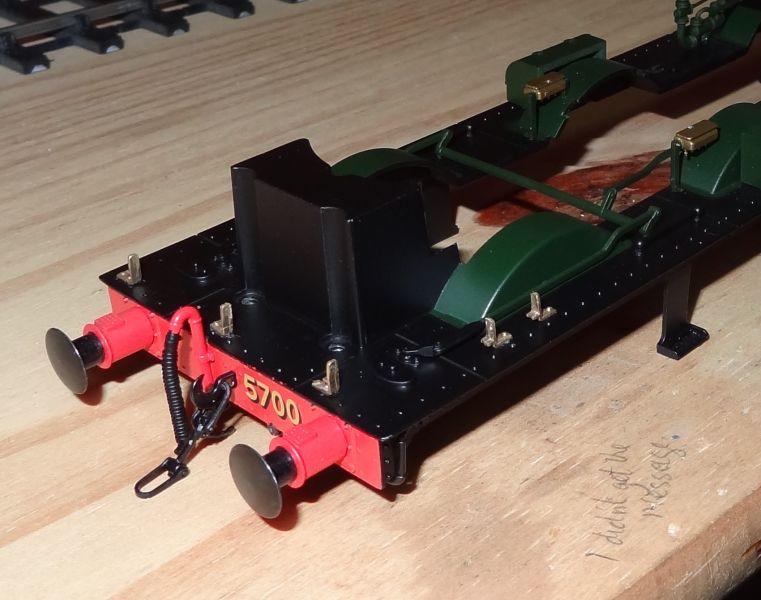
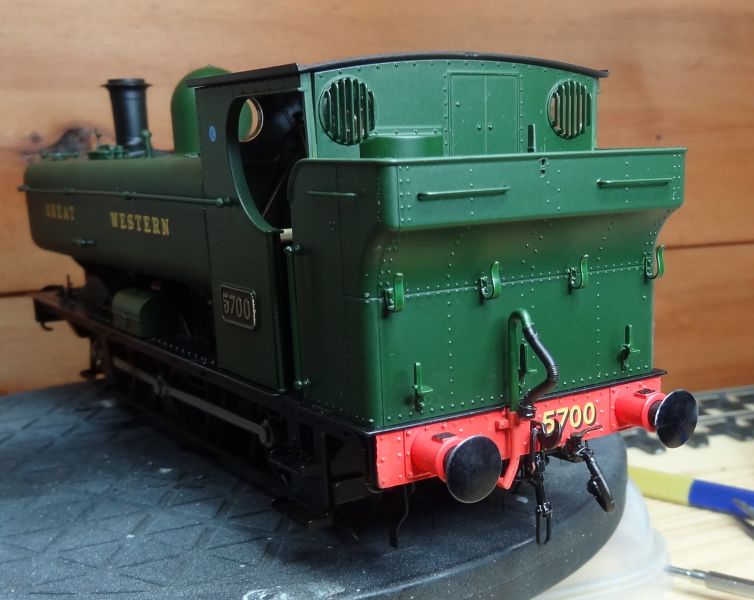
So, the buffer beams before…..
and after……..
I`m happy with the results and have proceeded with the electrics…….
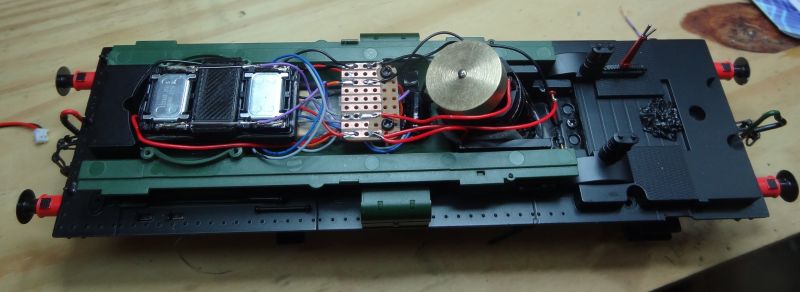
this time I`ve fitted a Zimo double Dumbo 2W speaker.
Here she waits until full trials tomorrow……
Twobolt John

Posted

Full Member

Posted
Full Member
Painting the wheel rims black really improve the look of the loco!
Did you use enamel or acrylic?
Regards Connor
CC Weathering Services: https://ccgwr1.wixsite.com/ccweatheringservices/
CC Weathering Services Facebook Page: https://www.facebook.com/ccweatheringservices/
CC Weathering Services Facebook Page: https://www.facebook.com/ccweatheringservices/
Posted
Full Member
For locos and rolling stock I always use enamel paints as I feel they are harder wearing than acrylics and I don`t like paint that dries too quickly in case of errors.
i`ve now moved over from Humbrol to Revell enamels. The black I used was Revell SM302 thinned slightly with cheapo Meths. I discovered that Revell SM363 green is a lovely weathered shade of GWR 1930`s loco green.
John
Twobolt John
Posted
Full Member
Thanks for the reply. I also agree with using enamel paints due to there harder wearing, I also find they give a smoother finish than acrylics, hence why I use enamels for most of my locomotive weathering. I have been on the look out for a decent GWR green lately so I am thankful that you think Revell SM363 is a good match, now the challenge of accessing it in Australia.
Out of interest, what do you think about the colour of the ash pans on those Dapol 5700s, I am not sure they were that colour, and if they were I'm not sure how long that colour would have lasted.
Regards Connor
CC Weathering Services: https://ccgwr1.wixsite.com/ccweatheringservices/
CC Weathering Services Facebook Page: https://www.facebook.com/ccweatheringservices/
CC Weathering Services Facebook Page: https://www.facebook.com/ccweatheringservices/
Posted
Full Member
I`m sure Connor that that ashpan colour is purely a marketing ploy.
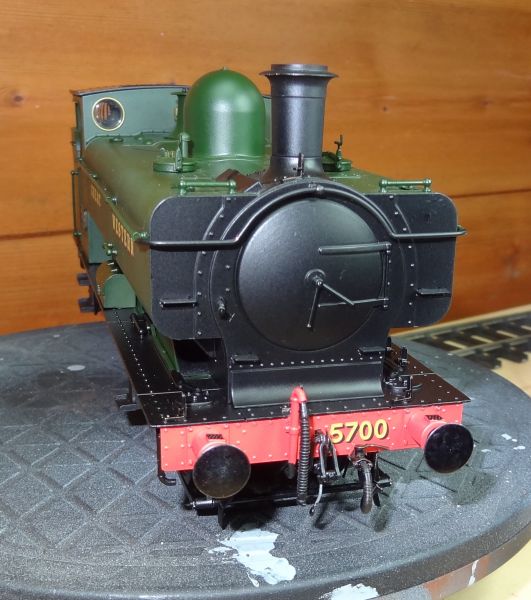
Us GWR affectionardos know they would have been outshopped as plain black as mine is about to become.
After use they would have changed to this………………..

I`ve got to get on with learning some proper weathering skills this year…..
I usually fork out a lot of dosh on quality enamels from Phoenix/Precision or Railmatch but If I`m aiming for a weathered finish i thought I would investigate cheaper alternative strategies from Revell….. so I`m in the process of
looking for GWR goods brown, grey and buffer beam red.
I`ve also discovered that Revell Flesh makes a good weathered GWR dark stone for buildings just need to find a light stone alternative…..may have to work out a mix of two colours…
I get my Revell products form Wonderland Models..who ship internationally…
https://www.wonderlandmodels.com/
John
 Last edit: by Twobolt
Twobolt John
Posted
Full Member
Agreed about the colour of the ashpan. What sort of weathering style due you like to utilise?
Regards Connor
CC Weathering Services: https://ccgwr1.wixsite.com/ccweatheringservices/
CC Weathering Services Facebook Page: https://www.facebook.com/ccweatheringservices/
CC Weathering Services Facebook Page: https://www.facebook.com/ccweatheringservices/
Posted
Full Member
But I`m going to do more reading up on the subject before starting…
John
Twobolt John
Posted
Full Member
Regards Connor
CC Weathering Services: https://ccgwr1.wixsite.com/ccweatheringservices/
CC Weathering Services Facebook Page: https://www.facebook.com/ccweatheringservices/
CC Weathering Services Facebook Page: https://www.facebook.com/ccweatheringservices/
Posted

Full Member
Nice detailing. Is that hole below the too bunker lamp bracket meant for anything?
ls there a maker's plate in the model?
Nigel
©Nigel C. Phillips
Posted
Full Member
I think painting the ash pan improves her looks…….
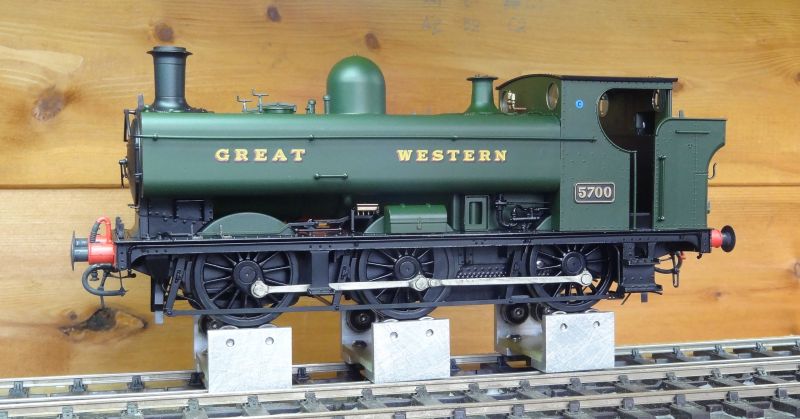
She is successfully wired up and runs well…. no lubrication either yet…..
Last edit: by Twobolt
Twobolt John
Posted
Full Member
Hi John,
Nice detailing. Is that hole below the too bunker lamp bracket meant for anything?
ls there a maker's plate in the model?
Nigel
hi Nigel
Those holes should be rivet heads as the lamp iron is fixed on the inside of the bunker…..
However, some GWR bunkers had a lamp iron on the outside…..
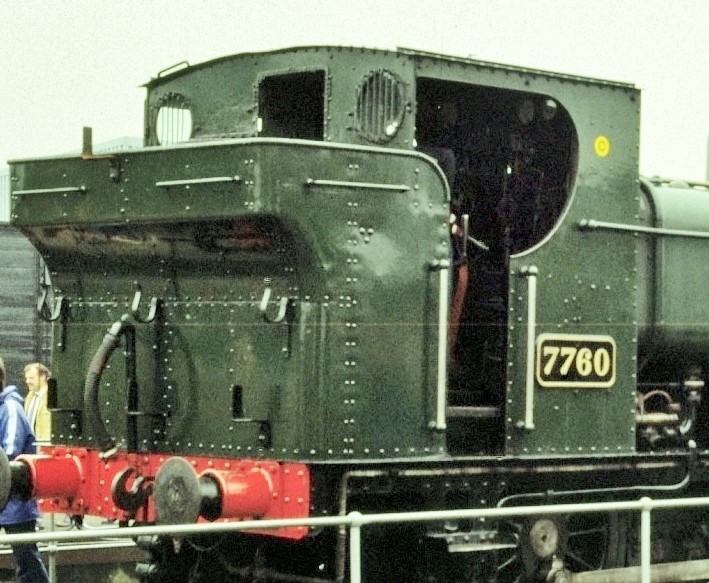
not sure what Dapol had in mind
Dapol don`t usually supply makers plates and only those GWR engines built by outside contractors had them.
Pannier No 5700 was swindon built…so plate free…..
Cheers
John
Twobolt John
Posted

Legacy Member
I watched your video she is sounding good it would have been rude not to put a sound decoder in that.
Brian
OO gauge DCC ECOS Itrain 4 computer control system
Posted
Full Member
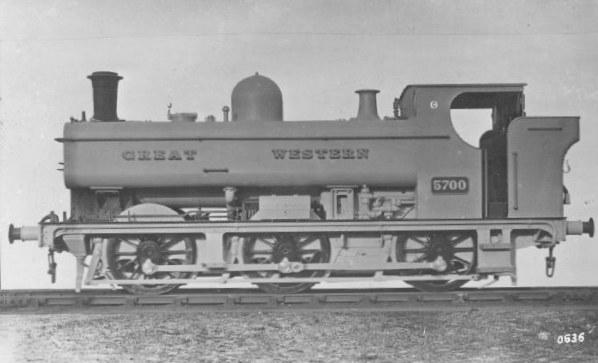
5700 was built by NBL at their Hyde Park Works in 1929, not by the GWR. 250 of the class were built by external contarctors. Hence my question re works plate (RCTS, usually correct). Some sources say they were originally painted green. Number plate was apparently brass, not iron.
Nigel
EDIT:
Should have one of these somewhere (from 7740). Left side front splasher probably (that's where the Kerr Stuart plates went on 7714).

©Nigel C. Phillips
Posted
Full Member
I shall begin writing 1000 times ` I must never assume`
Your right ,i should have checked with BRdatabase…..
Just ordered a set from Narrow Planet……
Thanks for pointing it all out….
John
Last edit: by Twobolt
Twobolt John
Posted
Full Member
Regards Connor
CC Weathering Services: https://ccgwr1.wixsite.com/ccweatheringservices/
CC Weathering Services Facebook Page: https://www.facebook.com/ccweatheringservices/
CC Weathering Services Facebook Page: https://www.facebook.com/ccweatheringservices/
Posted
Full Member
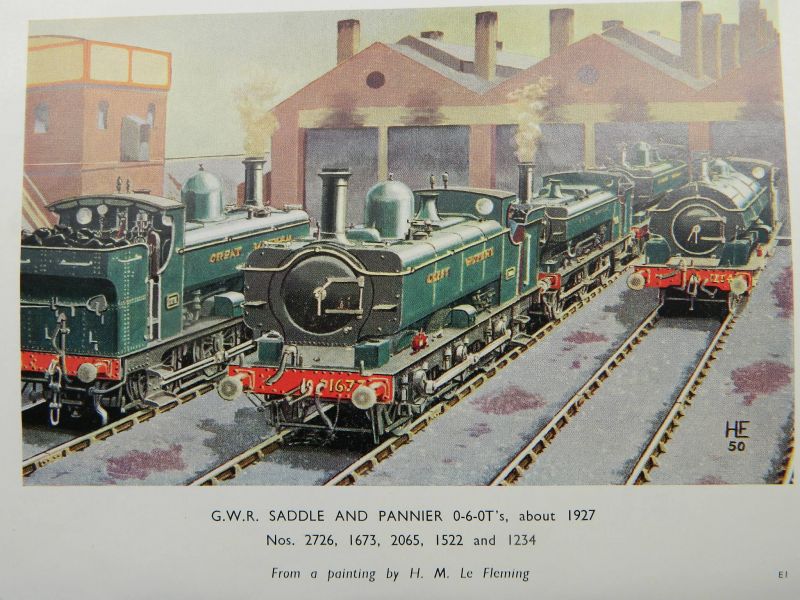
I thought the photo below (taken from the RCTS "Six-Coupled Tank Engines" 1958) showing the state of play in about 1927 before the 57xx class was introduced would be useful for fellow modelers. Le Fleming was an accurate artist, especially with respect to detailing and colors, what is of major interest is the 2726 on the far left, on which class the 57xx class were largely based. Put an enclosed cab on and it would like a 57xx. My photos of the class show that as built the top bunker lamp post was inside, at some point it got moved outside because of damage from coal.
Nigel
©Nigel C. Phillips
1 guest and 0 members have just viewed this.