Hedges - From Sawdust
Posted
#587
(In Topic #189)

Legacy Member
OK, now comes the artistic bit. Mark out on the layout where you want your hedges to be. Up and down bits don't matter as this method will automatically take account changing levels. The next step is to put spoonfulls of the mix along the line where you want the hedge to be, about four or five inches at a time, then gently pull and squeeze the mix together, using both fingers and thumbs, until you have your hedge shape with about half an inch width at it's base, that's for 4mm scale. The height can be as you wish, hedges along country lanes can be anything from 4 or 5 feet to 12 feet or more, depends if they have been cut lately and what they are being used for. Don't forget to vary the height unless the hedge is meant to be a formal one where it's height is uniform.
There is no need to squeeze hard to get the mix into your shape, gently does it is the key here, that will give you varying heights and depths as well as a fairly loose texture which looks good.
The final step is to gently apply a 25/75, white PVA glue to water, solution with a little washing up liquid added, the washing up liquid is to make the mixture "wetter" to break down the surface tension, to the hedge. Use an eye dropper or syringe and once again be gentle as the hedge is in a very delicate state at this stage. Start at one end and apply the glue drop by drop along the length of the hedge and continue with this until you are sure the whole hedge is soaked, we are relying on the glue mix for it's strength.
At this stage the hedge will be darker in colour than when you started but after a couple of days drying, depending on the ambient temperature of your railway room, it will lighten up. This method works equally as well for formal hedges too, it is only necessary to smooth the top and sides of your hedge before applying the PVA/water glue. The first picture here shows this gunk being applied with an eye dropper but now I use a syringe for speed. I hadn't realised that the eye dropper had emptied itself by the time I took the photograph.

This second photograph shows some finished hedging which is just waiting to be 'bedded' into the road surface with a sprinkling of greenery and earth around it's base.
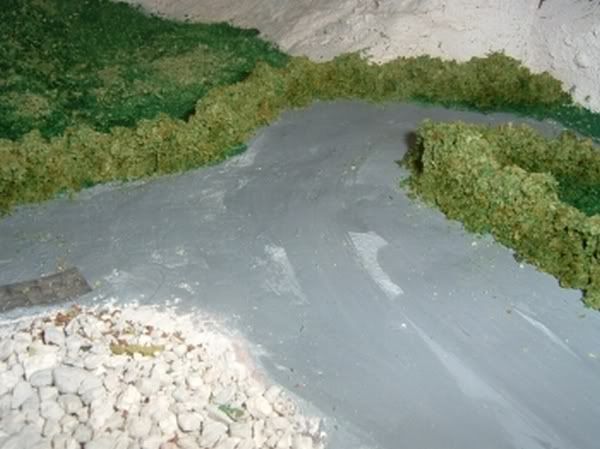
And finally a photograph of the almost finished scene.


1 guest and 0 members have just viewed this.