Hardstand for engine shed
Posted
#249375
(In Topic #13739)
Inactive Member
Finding the right concrete
HiThis has been doing my head in - my wife calls it obsessing! So I hope someone can help
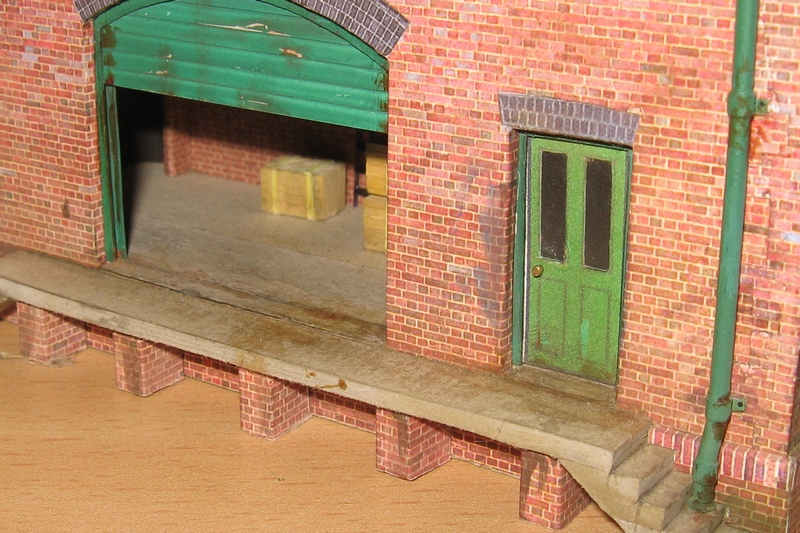
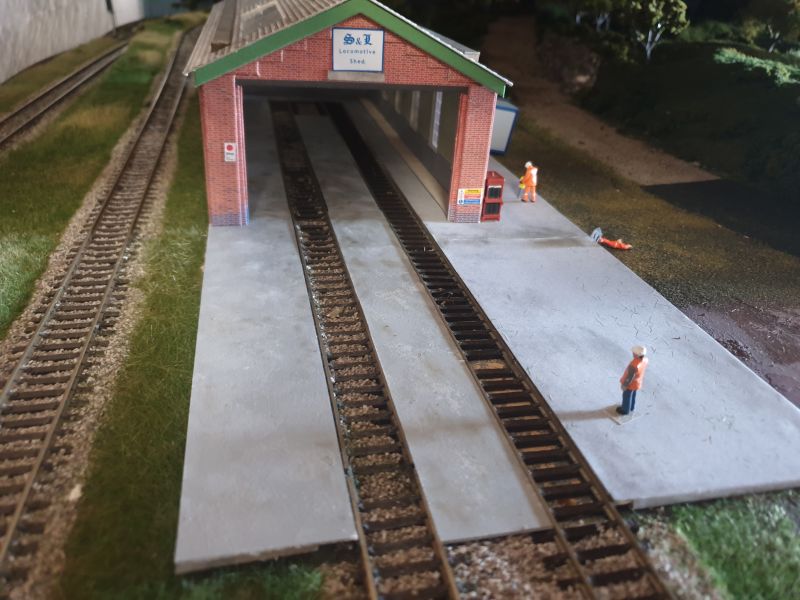
I decided to include an engine shed/TMD on my layout. I put together the Metcalfe shed which was straightforward, even for me. I am impressed with how it is coming out.
But I now need to paint or cover the concrete hardstand that it will sit on.
From my searches, there are a couple of paints that regularly crop up. Phoenix Weathered Concrete and Railmatch concrete are 2. I usually get my bits from the UK but from what I read mail delivery seems to be now snail delivery. (And I am an impatient bu**er). Phoenix are enamels and in the past, UK shops would not send enamels.
I couldn't find an Australian supplier for either of these.
My next step was to downloaded a scalescenes sheet. Looked ok on the computer screen but is very flat when printed.
So, I am looking for some advice about what I can try.
Cheers
Evan

Posted
Full Member
had quite a textured finish.
He got it from B&Q, from the 'specialist' paint area, so it might be worth
checking Bunnings, or whatever other equivalent DIY stores you have.
Jeff
Posted

Full Member
You could also visit Textures.com. It is free to sign up and you can download free small photographs of different textures - I think it is 15 a day, but I may be wrong. Large images you must pay for. You can then assemble the images in a graphics app or something like Word to create the size you want, or you can use them as a reference for your painting..
Michael
 Last edit: by Headmaster
Posted

Full Member
Douglas
Last edit: by Chubber
'You may share the labours of the great, but you will not share the spoil…' Aesop's Fables
"Beer is proof that God loves us and wants us to be happy" - Benjamin Franklin
In the land of the slap-dash and implausible, mediocrity is king
"Beer is proof that God loves us and wants us to be happy" - Benjamin Franklin
In the land of the slap-dash and implausible, mediocrity is king
Posted
Inactive Member
Cheers
Evan
Posted
Inactive Member
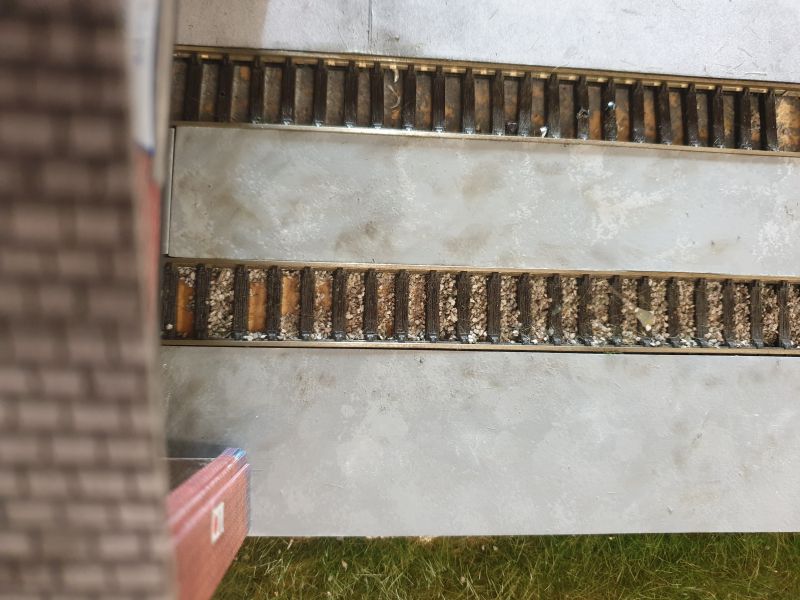
I used 1mm Plastikard as the surface as it seemed to be stiff enough to hold its shape. The plastikard was glued to 2mm cardboard. This gave it enough height for the hardstand to be tucked under the tops of the rail.
For a primer I tried the el cheapo car primer from our local Supercheap store but found it gave quite a rough finish. Eventually I settled on Modelmaster Primer. I found it a lot nicer to work with - went on easily and it was possible to get very fine/thin layers.
For the concrete colour, I picked a fairly neutral grey (I had some Tamiya Sky Grey in the cupboard) as the starting colour and made that the first coat over the primer.
To get the different shades of concrete I then mixed the grey with some white and used a fine sponge to dab the paint on the card. I did this again with an even lighter shade. With any area I wasn't happy with, I mixed some more and dabbed over it.
I am now working on adding small areas of oil and dirt with tamiya weathering master packs
Posted
Full Member
Terry
Posted
Full Member
1 guest and 0 members have just viewed this.