Making trams from card or paper
Posted
Full Member
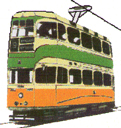
Excellent project, even if it is for use in London, but it's the right colour for Blacpool.
In Glasgow the shipyards used their own locos to haul steel and other heavy goods and their shape was more like this:-
No reason why a 6 wheel chassis could not have been used or square ends. The Blackpool version has a steeper slope to the ends but I don't have a photo.
Regards
Jim
Because, except in some unfortunate circumstances, trains did not run on town centre streets

Posted
Full Member
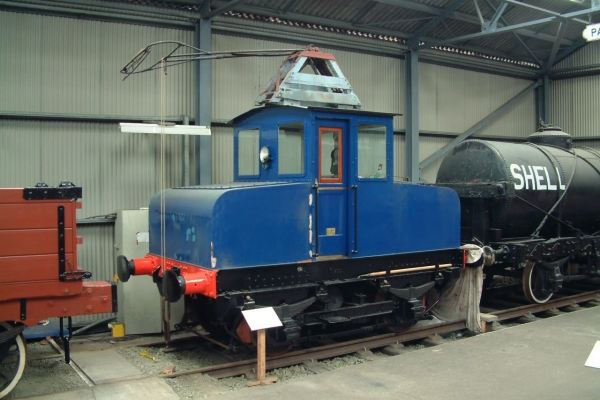
There was at least one of these four wheeled electric shunters operating at the English Electric foundry on Dick Lane. Coke and other detritus came in by rail in those days, late 1960s. I even had a ride on it once. Wooden body as far as I remember. Was not into trains in those days so never photographed it.
David
freelance model railways and tramways
index02
index02
Posted
Full Member
Found this pic of the Blackpool loco at Critch.
Last time I saw it it was in the street and in the green livery.

Still, these things turned up in all sorts of oddball designs, sizes & shapes.
I really fancy the one below for my dockside.

Apparently the prototype was an asylum railway light haulage loco (one or two trucks only) and this one is "Minnie" by Roxey Mouldings.
Regards
Jim
 Last edit: by The Bankie
Because, except in some unfortunate circumstances, trains did not run on town centre streets
Posted
Full Member
Visited the Manchester Science Museum for the Maker Fair on Sunday. Looks like English Electric battery loco outside. Took analogue picture so will have to wait.
Fair interesting. Model rail layout with 3D printed buildings. Also saw a 3D printed model of a small tank loco, including wheels. Freelance and obviously a trial but it clearly shows the way things are going.
Any how, back to the forum heading, card trams. Had the kitchen fitters in the last few weeks so did not get out much. Used time to knock up body for an old Jouef B0-Bo chassis. Freelance of course and no current collection fitted to 'prototype'.
Some pictures.
This is the chassis
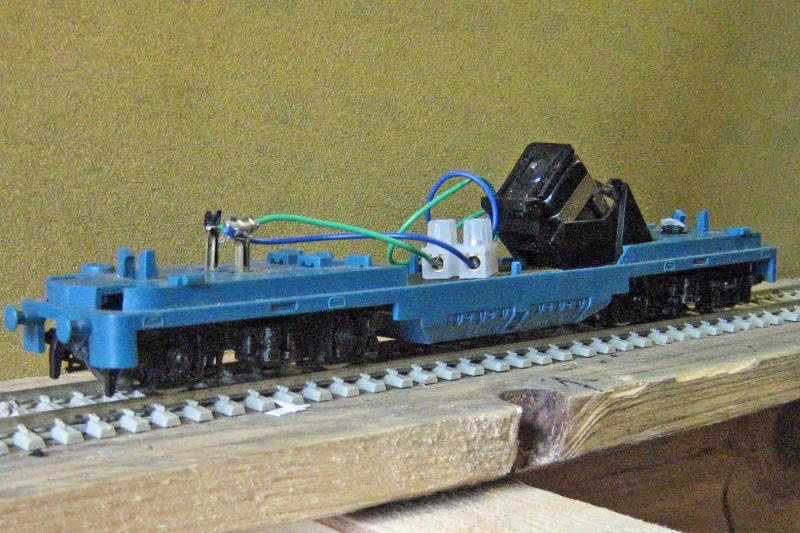
And the body. It is Bristol card about 1.5mm thick with a thing card body glued on top. I must work on reducing seam visibility.
And finally a video of this machine in action. It is on the test track attached to my bench in the garage. Second hand track stuck on old pallet timbers. Reversing by means of a DPDT switch. Working on automating with a timed switch as per Babani book on 555 chip.
Avant d'accéder à YouTube
freelance model railways and tramways
index02
index02
Posted
Full Member
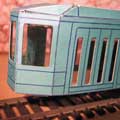
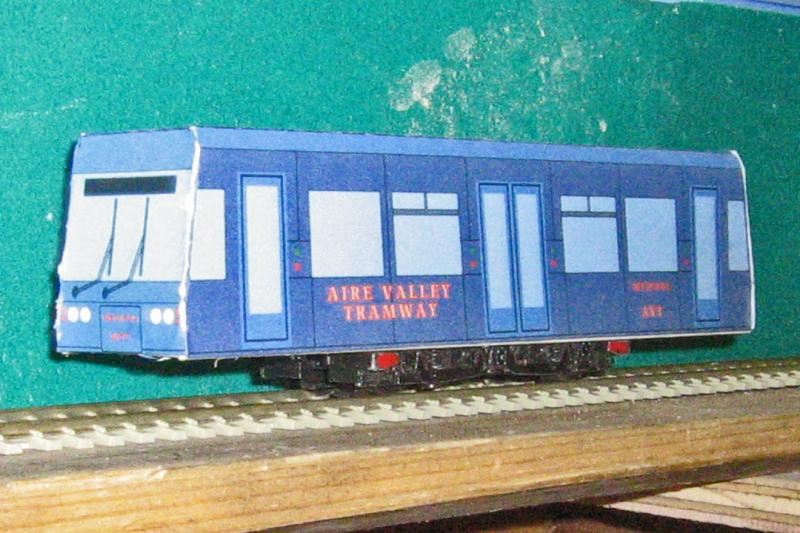
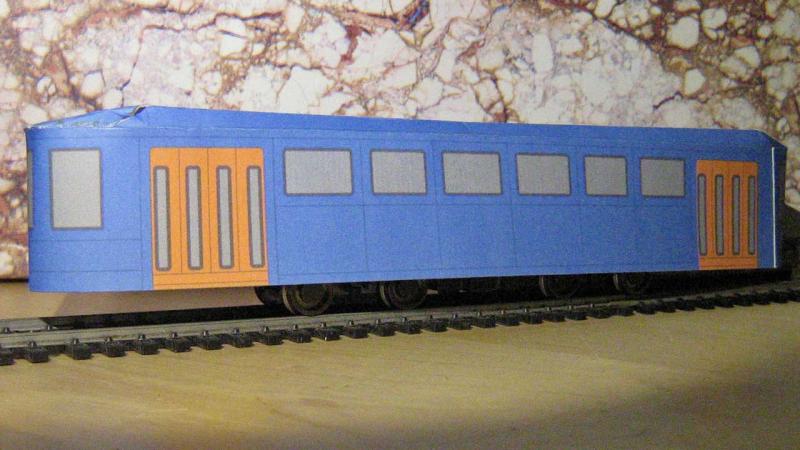
A tram body designed to be maded frm card, hence the rounded ends. Runs on an old Underground Ernie chassis.
I have this old Hornby bogie. It represents a three axle Co bogies but only had a dummy axle and wheels in the middle. Consequently it makes a good basis for a tram or rail car - so long as it is civered or hidden.
This body was not created for this chassis but was available to see what it looked like running. Resembles a railcar rather than a tram. an interesting exercise. No sophisticated noise chip is needed with this old bogie, it sounds a bit like the real thing.
Happy Modelling
David
freelance model railways and tramways
index02
index02
Posted

Inactive Member
Last edit: by 60019Bittern
Posted
Full Member
Off on Jollies until the 12th so no communication till then.
Dave
Regarding joint visibility. Try printing on PAPER with an overlap, then glue onto card and wrap round a la Scalescenes window & doors. Remember to allow for the thickness of the card you are using.
Hi Bittern,
What do you mean "not to scale"?:shock::shock: Even discrete manufacturers built narrow gauge and tram locos to accommodate the bits lying around in the workshops. You can not possibly "get it wrong" regards design and scale.
Enjoy the modelling.:mrgreen:
Regards
Jim
Because, except in some unfortunate circumstances, trains did not run on town centre streets
Posted

Full Member
'Petermac
Posted
Full Member
Thanks for the wrap around tip. I will give it a try.
David
freelance model railways and tramways
index02
index02
Posted
Full Member

'
Posted
Full Member
It is the latest version, although I think the main difference over the previous models is the touch screen control panel.
basically it is a cross bed plotter without pen auto changing facilities. It was the realisation that I could use it as a plotter as well as a cutter that made the decision. I always like the plotters we had at work, much more fun than printers.
What has not changed is the idiosyncratic way plotting software works. It still does the job while leaving an odd line in the middle not done. Then as the last moves draws that line and finishes.
It is very precise with excellent repeatability. While it does not make much sense in practise it will produce 1mm, or even less wide strips of card!
Software with it is adequate. One can cough up for the 'designer' edition which has a few more feature. From a purely practical point of view the basic edition does not use layers to differentiate, something that all CAD systesm seem to use. To differentiate line types for different cuts colours have to be used.
Anyhow watch this space. The Tramcard Factory is getting ready.
David
freelance model railways and tramways
index02
index02
Posted
Full Member
If I send you the .DXF files can you cut them?
This is what I got back when I asked the company if the cutter could cut out my designs.
I will supply the card.
Also 3d plotters are now below £200 (£196.30) from here
Code
http://www.3dstuffmakers.com/shop/Jim
Last edit: by The Bankie
Because, except in some unfortunate circumstances, trains did not run on town centre streets
Posted
Full Member
No problem
Send the .dxf and I will try. It gets a bit tricky for narrow sections. Note that the .dxf will not have the infill colours.
What I do is:
1 create .dxf file on CAD
2 load .dxf into Serif Drawplus 6
3 colour each layer
4 save the coloured image as a .png file
5 export layers with cut lines as a .dxf file
6 On the silouhette software they are line up and printed out with registration marks.
7 Silhouette then cuts out following cut lines and this seems to be accurate around printed image.
If you can send the image to go with the .dxf file as a png or jpeg I should be able to get it to cut.
No guarrantees -I am still learning
Send to tramcard@hotmail.co.uk and I will see what I can do. Plenty of card but colours are not guarranteed, I am using self refilled cartridge.
David
freelance model railways and tramways
index02
index02
Posted
Full Member
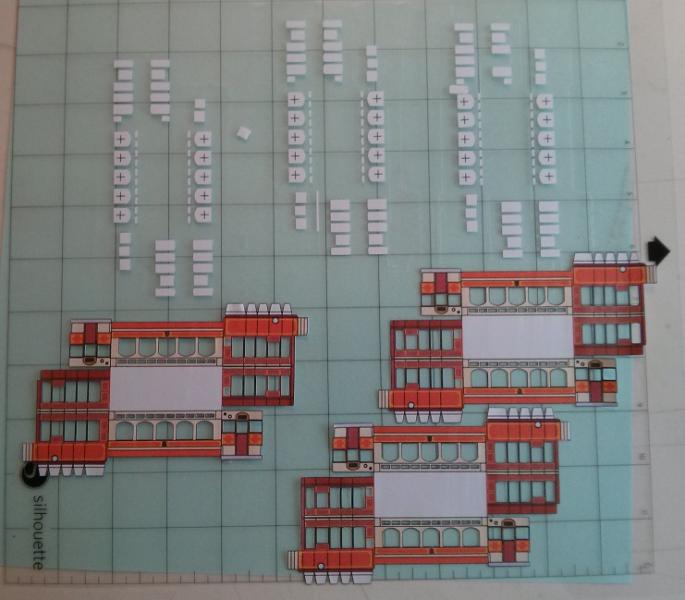
Should be good practice for you. Remember that this is only a practice run so the colours are not mega important. The card I use is 210 GSM from staples so if possible I would like to know if the machine can cut this.
The Pic is what I got back from Craft Robo when I sent them a .DXF so I know it can be done but not in what thickness of card.
How they achieved this I have no idea.
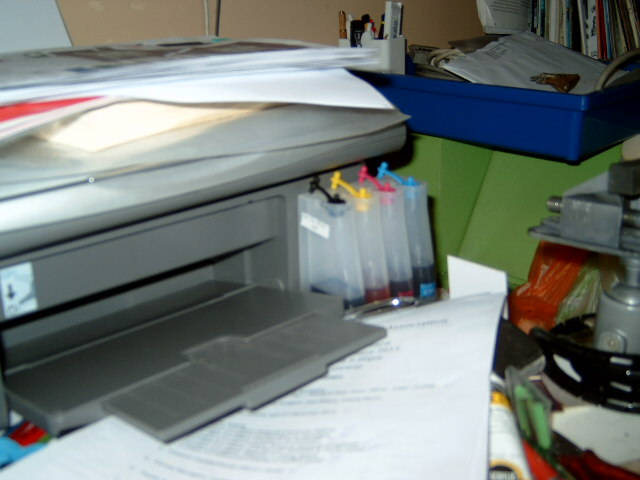
By the way this is my continuous ink system. Cost me £35 but these bottles have been working for 9 months and have saved me at least £100 in ink. Might be worth the investment.
Regards
Jim
Because, except in some unfortunate circumstances, trains did not run on town centre streets
Posted
Full Member
main points are:
1 avoid joints at corners and folds
2 maximise the space between openings. 1mm possible but aim for 3mm
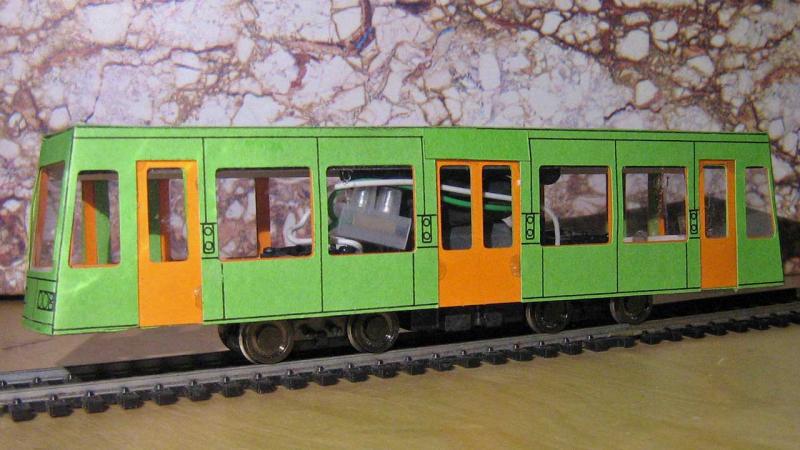
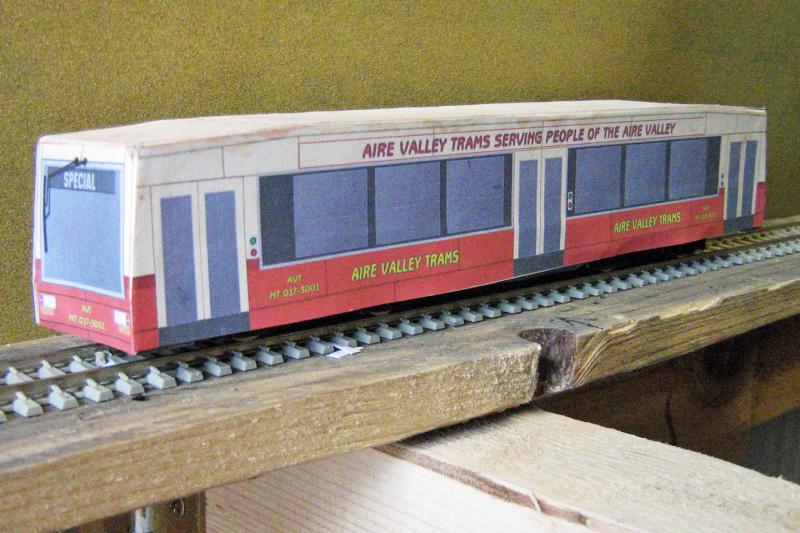
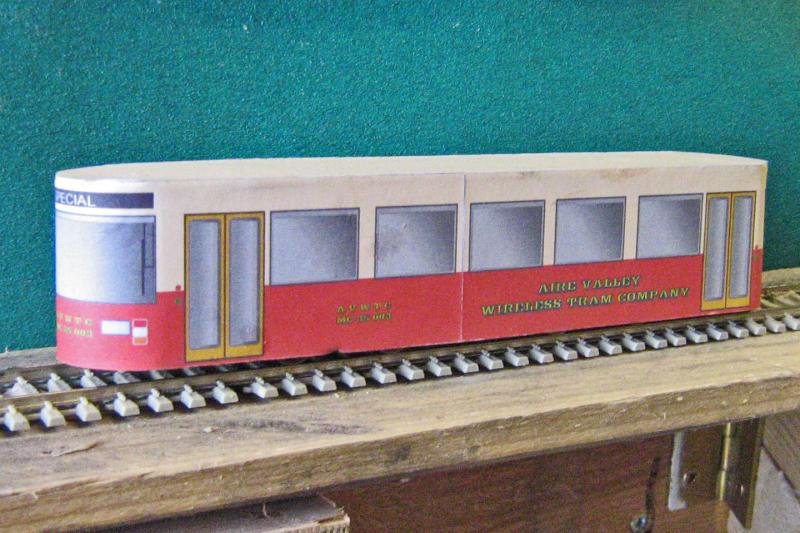
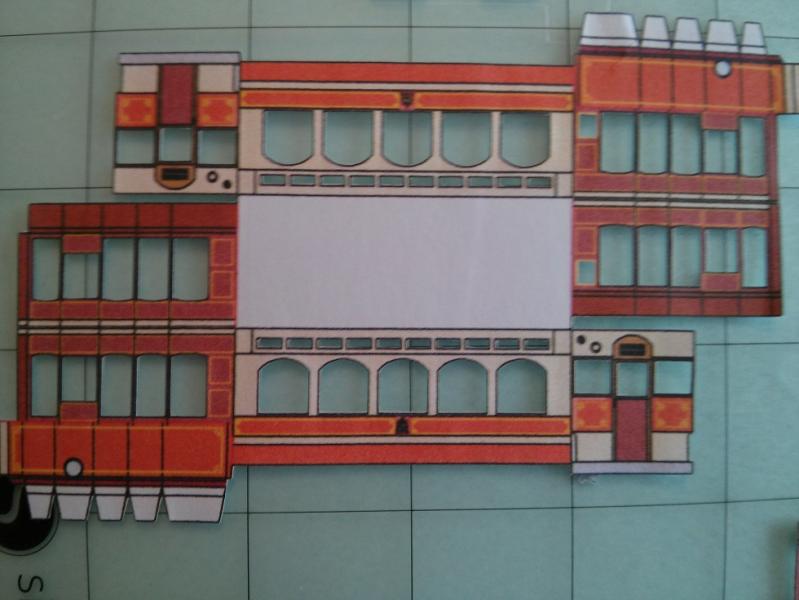
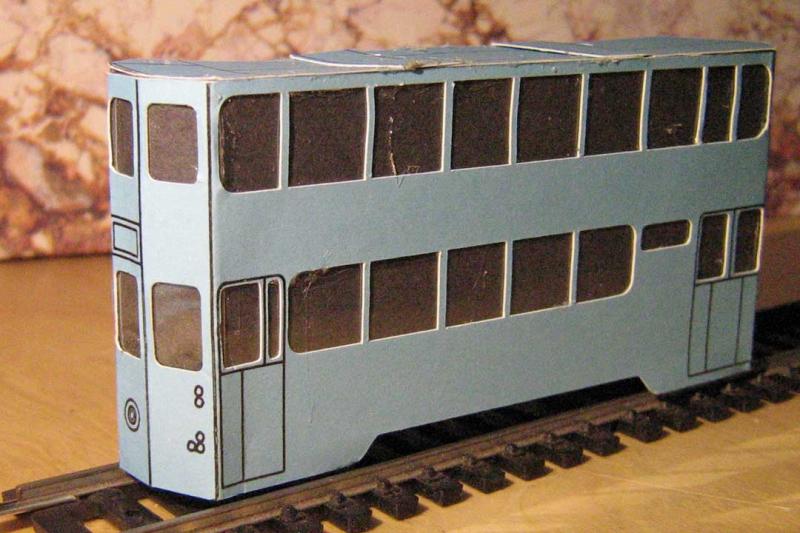
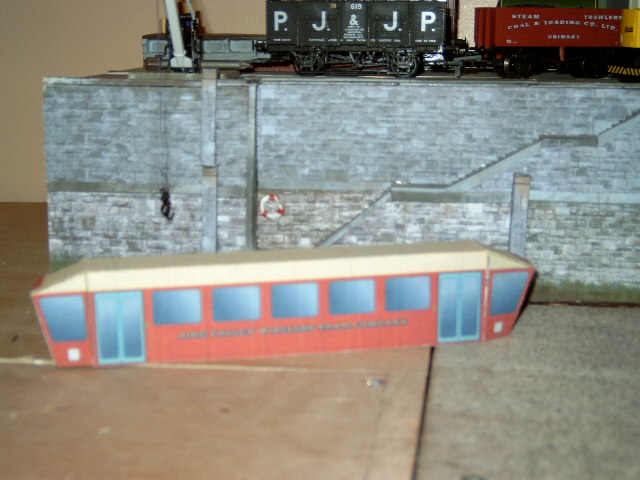
This one is coloured card lined by means of a plotter pend. There is an inner shell between which the acetate is placed. From a construction point of view this probably produces the most realistic result. I have been able to cover the centre join. The doy is made in halves from either end as can be seen in the picture below.
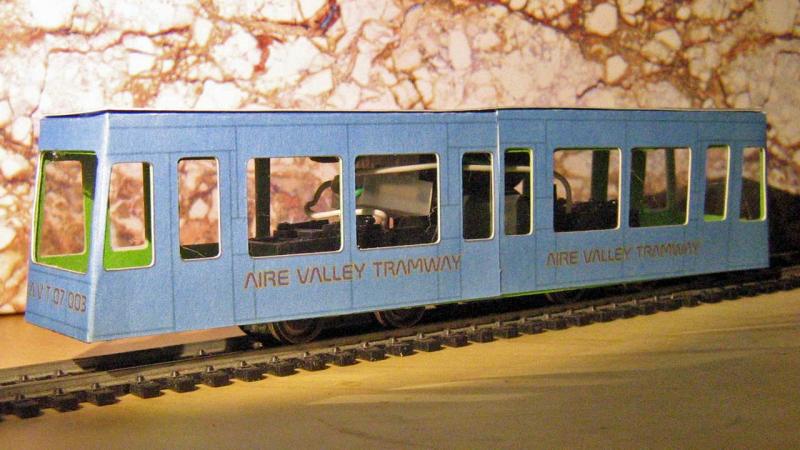
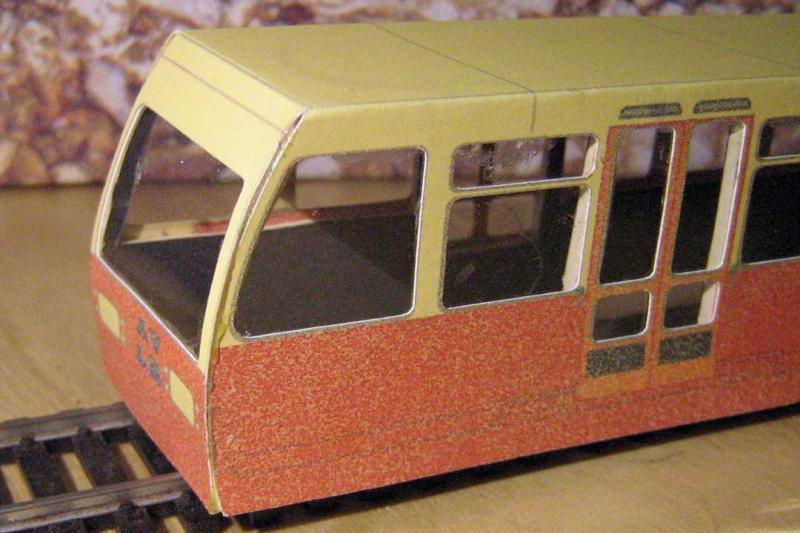
This is the same tram model but with a printed body. This gives a more realistic exterior at the expense of the white from the card at the windows. There is also a cut out interior sandwiching the acetate.
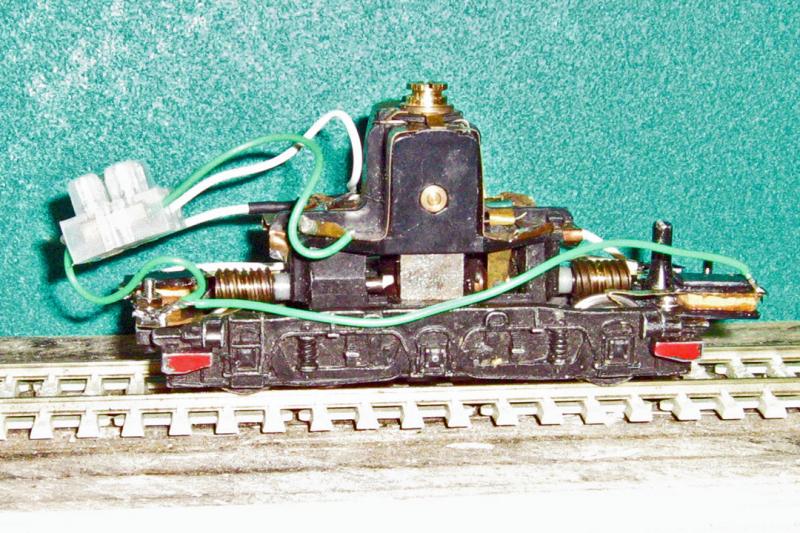
These bodies are just over a bachmann Underground Ernie chassis temporarily for the photo.
How to hide the interior on small scale models is really difficult. Mainline diesel railcars had guards vans, well the older ones.
I am looking at a dark card interior covering the mechanism and/or coloured acetate.
Acetate windows are certainly more realitic looking than printed windows, but then create other problems.
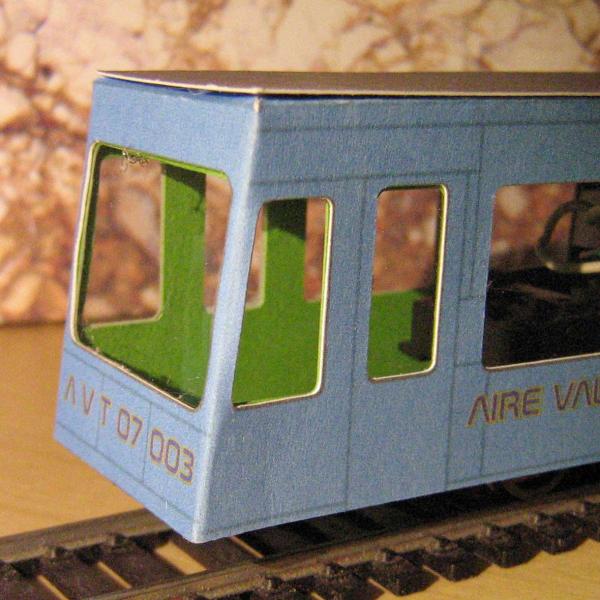
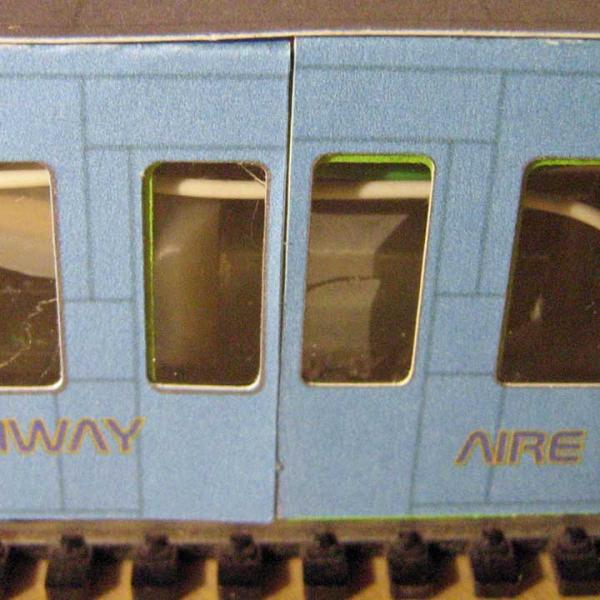
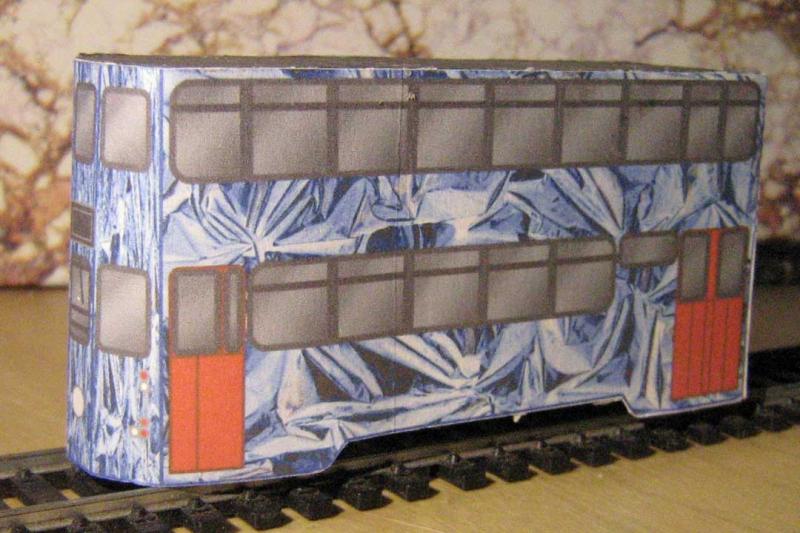
Following are close ups of the above and some other efforts.


freelance model railways and tramways
index02
index02
Posted
Full Member
Nice work and I agree about the windows and printing. This is why I'm trying to save up enough to get one of these cutters.
Now that you are a bit further down the road of design can I offer a few thoughts?
When it comes to eliminating visible joints try and redesign so that your internal detail is between 1/2 and 1 millimeter smaller than the main body shell on the major dimensions so that you get good adhesion points and room to drop glazing acetate between the layers. The internals then act as stiffeners and help to prevent the outer shell buckling.
Also try and use balsa cement as a glue. It does not "soak" the card and weaken it, it grabs in seconds and it is "stiff" when set. Unlike superglue it does not affect the colour when applied inside the joint because it does not soak through.
I'll try and sort out a couple of drawings to show you what I mean.
Hang on in there.
Regards
Jim.
Because, except in some unfortunate circumstances, trains did not run on town centre streets
Posted
Full Member
 thumbs
All too often we see perfect models with no reference to the fact that it took 50 attempts to get to that perfection. All that serves to do is make the rest of us feel inadequate ……….

'Petermac
Posted
Full Member
I understand the reduction in size for interiors, I just did not get around to it for my prototypes, to much of a rush.
Thanks for the balsa cement tip. I will give it a try. I must admit that finding a decent glue is tricky. Not so much the ability to stick but rather the ability to not make to much mess in use.
Having a rest rom trams, now having a go at buildings.
David
freelance model railways and tramways
index02
index02
Posted
Full Member
A couple of posts back David (Wahiba) asked about concealing the joints on card models. His latest posting about the Silhouette cutter shows where he has got to and things seem to be progressing well.
I decided to have a look at what he has got and make up one of his models using different techniques to compare the results.
This is what I found.
A simple cut out and fold model which I could use as an illustration.

So I cut it out and made it up with minimum effort and got the results below.
There are a couple of techniques used here. The right side is simply glued down to the tabs on the original drawing but with the edges sanded down to a feathered edge. The result is the joint by the edge of the door column. The left side has had the tab removed, glued on behind the door column and the drivers cab end glued to it flush with it. The result is a hidden joint. A neater effect could have been achieved if the two raw edges had been coloured before assembly. Since it is difficult to match the printed colours the fact that the joint runs along a seam on the bodywork means that, in both cases the edges could be coloured black to look like the seam and so camouflage the joint. A tip to allow the bending of long straight folds is to use a straight edge to hold one side of the work flat and then bend over the straight edge as below. You can also see the tabs which were cut off and moved to the back of the body with about half their width protruding from behind the door pillar.

David produces models with coloured windows which allows him to use intrusive motors so this is perfectly adequate for this type of model but to progress further there needs to be some form of advance and since his latest work has cut out windows I thought it would be useful to try to upgrade this model.
First an interior will be needed. Then some form of adjustment to allow better attachment of the drivers cab. So the drawing below was produced.
 Inner Outer
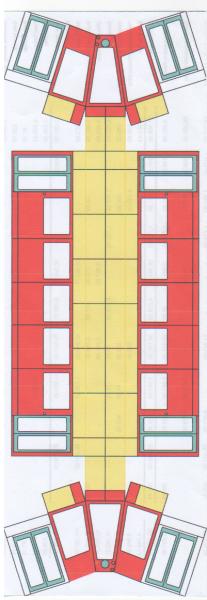
Moving the attachment tabs to the drivers cab allows the lengthening of the tabs to include the doors and give a greater surface area which will be needed to remove tension on the door threshold which is only 2mm thick. It also allows the doors to be recessed into the main body and helps hide the joints. The inner shell is reduced by 0.5mm in length and width to allow it to fit inside the outer shell. Do remember that the inner is assembled with the blank side facing outwards.
Please remember that this is the development model and a major purpose is to find out what modifications need to be made to make an acceptable design. For that reason the doors on the main inner and outer body do not actually need to be printed and were removed before assembly with only the upper and lower cills left. This makes it quite delicate.
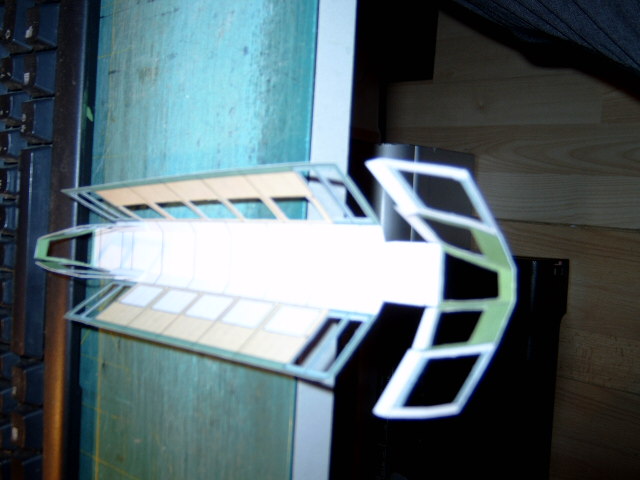
This shows the inner body shell cut out ready to assemble. This being the development model the doors were cut from the drivers cab tabs.
My toolkit may be of interest so this is what I use.
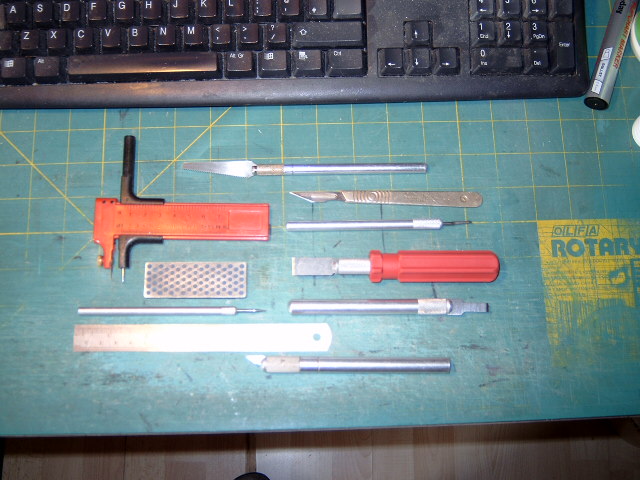
Top to Bottom
Razor saw, Genuine Swann Morton scalpel with no 11 blade, Circle cutter, Chisel blade small Chisel blade wide, chisel blade medium, Scriber point, 6inch steel rule/straight edge, Small cranked blade. The thing with the dots on it is a fine diamond whetstone. I also have a Steel metre stick, a 12 inch steel rule and a rotating multi hole punch.
Tip time again. The window struts on the drivers cab are only 2mm wide so before cutting out they were scored and folded. This prevents the narrow struts buckling when being folded. Also, the solid window model was made from cereal packet but I had to revert to 210gsm card for the see though model as the cereal packet simply delaminated on the sharp corners.
The narrow struts proved to be a problem as the slope of the drivers cab roof vanished and became an overhang when the tension on the strut pulled it back and folded it under the inside of the roof giving the model a vintage, rather than contemporary look.

The final conclusions?
This is a completely acceptable model which only needs a little development work, thicker window struts and a wider body, to become a fully developed and issuable model. The only fault with it is the lack of experience of the designer and since it is clearly labelled as a prototype that is OK.
David I hope the comments help
Regards
Jim
Last edit: by The Bankie
Because, except in some unfortunate circumstances, trains did not run on town centre streets
Posted
Full Member
I found the pillars with the fold a bit narrow for a good fold when I tried this model on the silhouette. I did another printed version of this tram with a wrap around screen and no pillars. I am thinking of re-designing it using acetate sheet window as the main support with coloured/printed card either side.
have you tried the cutter on a label stick on sheet? I have tried this in the past with printed windows and hand cut sticking it onto a card base. Worked reasonably well. So far have not tried it on the cutting machine.
David
freelance model railways and tramways
index02
index02
1 guest and 0 members have just viewed this.