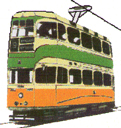
Making trams from card or paper
Posted
Full Member
Never did try the Silhouette on anything but card so no help there.

As far as using acetate as a support I can tell you that, with limitations, it works well. The limitations are getting the damn stuff to stick to the rest of the model. I tried printing the side and end windows of the saloons as a single unit with a wrap round over the ceiling. It was great! It fitted well and held paper out to the correct shape of the saloon body. Then I discovered that It is damn near impossible to glue it together or make it stick to the body or ceiling. The stuff laughs at PVA, sneers at superglue and has hysterical fits at balsa cement. It will have nothing to do with polystyrene (plastic model glue) cement , liquid or paste except to be discoloured with ANY of the adhesives mentioned and impossible to removed.:shock::shock::shock::shock::shock::shock:
You CAN stick it down with silicone based glues or UVA setting acrylic resin but these tend to discolour the printed card.
The only thing I have not tried is resin based adhesives but I think they will discolour the card as well.
At present I try to ensure that any acetate is contained by enclosing it between two sheets of card and allowing an overlap to glue card to card. You should be able to design this sort of thing into the model. I use a printed interior and exterior with the acetate between them.
Something like this:-
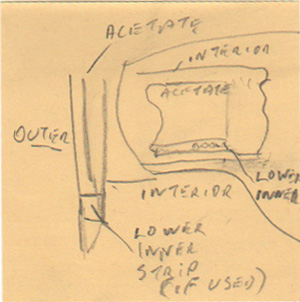
Please excuse the drawing but now you know why I stick to AutoCAD.
A wrap round screen should not present any technical difficulties but your narrow door pillars and window frame might not allow sufficient width to allow fixing the interior with sufficient strength to hold a curved (spring) screen in position. so an extra mm on the door and 2mm on the end frames of the cab window may help and will not look out of place. Widening the body to about 27mm will also help as it reduces the tension in the curve of the windscreen and is what I use for my Standard trams as it is nearer prototype width. If it was good for a "classic" tram I would expect modern ones to be wider.
Regards
Jim
 Last edit: by The Bankie
Because, except in some unfortunate circumstances, trains did not run on town centre streets

Posted
Full Member
Unless the stuff I use is not acetate, it is from a pack of OHP material, Kodak, then it sticks to card OK for me using an assortment of glues. General purpose UHU from Poundland seems to work the best.
I did try cutting it on the machine and at first it was OK. I suspect it blunted the blade slightly. It still cuts card OK and as I do not really need it machine cut I have not repeated the exercise.
I do sandwich it partially and have just checked and it has definitely stuck to the card.
Just dug out box which is labelled Kodak transparency material paper backed. There is a thin paper backing sheet. It is from the last century certainly and has lasted well. Not particularly thick but tough enough.
Fine weather means I have been able to start sorting out garageso card modelling on hold a bit. Still working on my first building.
David
freelance model railways and tramways
index02
index02
Posted
Full Member
Look after the stuff you have as the sheets I have a re a lot more modern and simply labeled inkjet OHP film. The DO stick but after a little while they seem to reject the glue and any flexing causes the film to drop off the card leaving a beastifully smooth coat of glue on the card.
One side may stick as the way this stuff works is by having one side smooth and one side covered in microgrooves otherwise the ink will not stick.
UHU is either a silicon or resin based glue, silicon I think, so it should work.
Keep up the good work.
Regards
Jim
Because, except in some unfortunate circumstances, trains did not run on town centre streets
Posted
Full Member
One of the reasons I bought the larger Cameo was the obvious fact that it should work as a plotter. While the plotter pens sold for it leave a lot to be desired the adaptors sold to allow other pens to be used work a treat. 3 for £1 from Works are far superior to the specailist pltter pens, and last longer.
Only problem is that text is plotted by going around the edge. Not a problem for large letters but in smaller sizes some fonts look a bit off.
I now plot out drawings onto A3 paper. They sort of look more 'technical' that printed drawings. I even managed an old AutoCad isometric that I did over 15 years ago. At least old .dxf files are easy enough to read, and had survived on a CD.
I reckon that it should also do extra long plots but have not tried that yet.
David
freelance model railways and tramways
index02
index02
Posted
Full Member
I would imagine that using the next size font down would solve the letters/numbers problem.
Have fun.
Regards
Jim
Because, except in some unfortunate circumstances, trains did not run on town centre streets
Posted
Full Member
I recieved some .pdfs for cutting out, buildings and trams. I am not sure why but it did not show up immediately suddenly appearing a bit later. I downloaded the attachments but managed to delete the original before I got a chance to reply.
Anyhow whoever it was thanks for the effort. Actually I already have the Bradford trams. I have seen the buildings before but have not tried any.
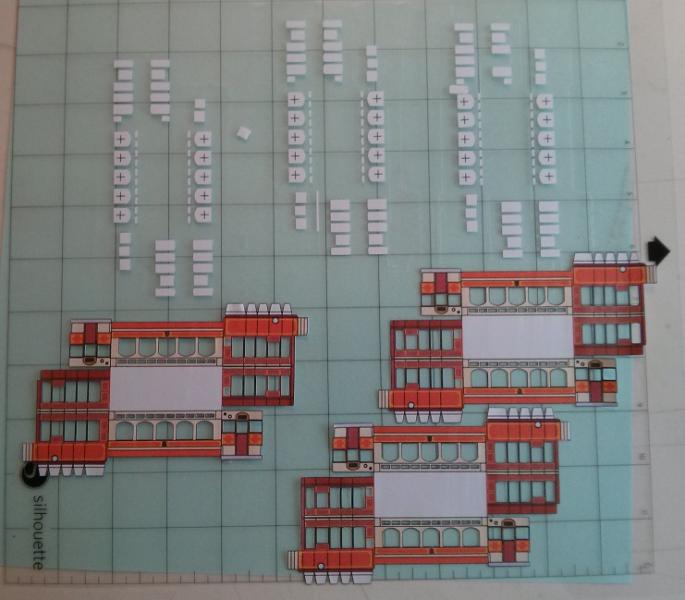
Anyhow it got me going and wondering how easy it would be to get a pre-printed tram cut out on the Cameo. I managed to convert the .pdf to .jpg and then tried various programmed supposedly converting pixel drawings to vectors. I suspect unless the original is high resolution black and white results are a bit strange, to say the least. So I went back to basics and loaded the .jpeg into my CAD programme and traced around the old fashioned way.
A bit tedious but not as bad as I thought. Also it is only the cutting edge that needs to be 'traced'.
Well I finished one and converted my outline to .dxf. I then loaded the .jpg and .dxf into the Cameo software and by eye aligned them up.
Well it looks like it should work. I have yet to get around to setting the cutter up as with room movements it is currently off line. Test print onto paper looks fine along with the registration marks so I see no reason why it will not work.
will updated when cut out.
Thanks again for the attachments.
David
freelance model railways and tramways
index02
index02
Posted
Full Member
I asked Craft Robo if the machine could cut out pre-printed designs and sent them a DXF file. They sent me back this:-
It shows where the file was stuck to the backing and the windows left behind when it was peeled off.
Regarding buildings, you can get them free from lots of sources, Here are a couple of good ones :-
Code
http://www.scalescenes.com/products/R002Code
http://www.scalescenes.com/products/R002b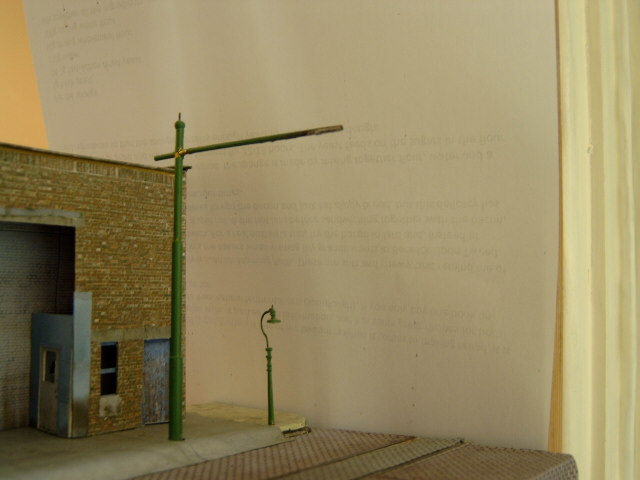
Damn good for a freebie.
Have fun.
Jim
Because, except in some unfortunate circumstances, trains did not run on town centre streets
Posted
Full Member
My experiments have come to a bit of a halt as the printer has thrown a wobbly and decided the black cartridge is a dud. cannot complain too much, I have re-filled it at least so will have to bite the bullet and get a new on.
Using the Cameo to print and then cut around following the printed alignment marks requires the whole printed area to be within the marks which is 7" x 8". This means .pdf need converting to .jpg and then a bit of manipulation before they fit that area and the vector cut lines added. Theoretically this should be possible automatically from software, but in practise does not really work out like that. I might crack it though. Work in progress.
David
freelance model railways and tramways
index02
index02
Posted
Full Member
you said:-
It all depends on what went into the original drawing.Did the .dxf files include the printed data as well?
When I do the drawing I use the AutoCAD colour pallet to put solid hatching on the drawing and I know which colour numbers correspond to the ones I want my printer to produce. AutoCAD also converts to .DXF as an output option. The important part is what the printer reproduces each one seems to have its own idea of what , for example, Green is and that also depends on who the refill, or ink used in the refill, is from.
I have used an earlier Craft Robo by importing .DXF files and the main problem was registering and keeping the card stuck to the cutting mat. Your machine seems to have overcome these problems.
Regarding printers and refilling.
I run an Epson Stylus DX6000 which was seen in a previous post. I have fitted a CISS (Continuous Ink Supply System) unit which was plainly shown. The colours are good and I know which ones to use for the desired hue on a printout. My refills are £2.41 for 4 x 100ml bottles of refill ink. The postage last time was £2.49.
Ink and bulk unit both came from
Code
http://www.cityinkexpress.co.uk/cissCheck out the site
Regards
Jim
Because, except in some unfortunate circumstances, trains did not run on town centre streets
Posted
Full Member
Some of you will have seen me complaining about the non-availability of parts for trams.
Now there are some excellent general bits for overheads and the Mark Hughes bow collectors are superb bits of kit, BUT, if you want something a little different or out of the interest range of the guys who produce these things then you need to be prepared to do it yourself.
Like most railway modellers I want to model the fascinating, or, the familiar. My modelling interest is trams, this means trams from my home town. Since that is Clydebank I am looking at Glasgow trams to start with. Now Clydebank did actually have an indigenous tram fleet made mainly from cut down ex-Paisley trams and one special case adoption “1098 known as Wee Baldyâ€. These ran mainly from the Partick depot to serve Duntocher, a low bridge route, and as extras for peak periods when the shipyards were clocking on or off. I mistakenly thought that finding models of Glasgow trams would be a lot easier than Clydebank/Paisley trams. Well it is, but only marginally, and mainly in paper or card and once again Robert & Elena Hardy at Elron provide excellent kits but like so many model producers they have focused on the specials. Butt & Ben, Mains tester, Cable layer, 1089, Setts car. All excellent models but no bog standard fleet cars. It’s a bit like trying to build up a branch line using the P.W. and Breakdown recovery stock.
So the next move was to see if I could produce my own card models.
I can and doing them in card means I don’t have to paint them.
However this still leaves some awkward items, stairs, lifeguards, seats, trucks or bogies which I can produce but are very difficult to cut out cleanly.
So we move on to looking at stencil cutters which are basically a plotter with a blade instead of a pen or a 3D printer. The 3D plotters have been dropping dramatically in price and can now be imported from Oz at sub £200 but postage and whatever HMRC will tack on is anyone’s guess and the delivery lead time is fairly ferocious and it comes as a kit.
Looking at stencil cutters solves the time and guesswork problem but the cost of a commercial cutter is disproportionate to the use I will get from it unless I can guarantee sales from making other things for other people.
Move to the hobby/crafting market and the machine designed for the hobbyist is the Graphtec Cameo at around £250. Still expensive but designed to cut small and intricate stencils or appliqué designs.
I have already explored etching parts and am quite able to draw the masks for this process but getting the mask on to the brass is unduly complicated and needs some quite expensive materials. You need a photo reactive film, an etch resist film and you need to have a Ultra-Violet light box to develop the photo reactive film. Finally you need to heat attach (iron on) the etch resist film.
Whilst researching the Cameo I came across a video of it being used to etch glass. The idea then occurred that if the material used to make the stencils can resist Hydrofluoric acid then it should be able to resist the etch used in producing etched brass components.
The Cameo uses adhesive backed film to make the stencils for glass etching and the film and, more importantly, the adhesive looked to be acid resistant. In that case they could be resistant to a Ferric Chloride (salty rust) solution as used to etch pcb’s and also used to produce etched brass components.
QED time!
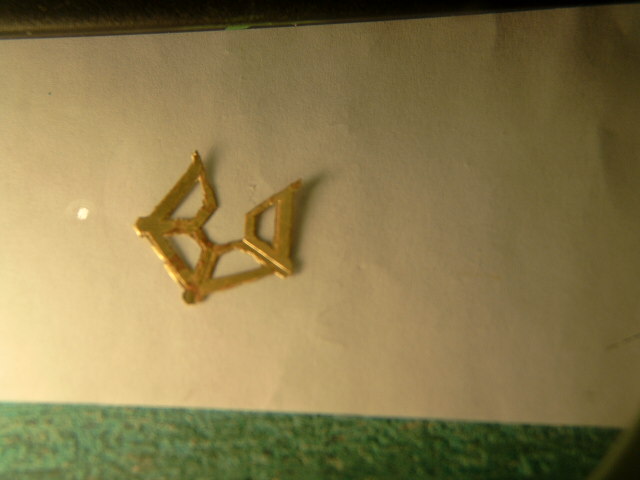
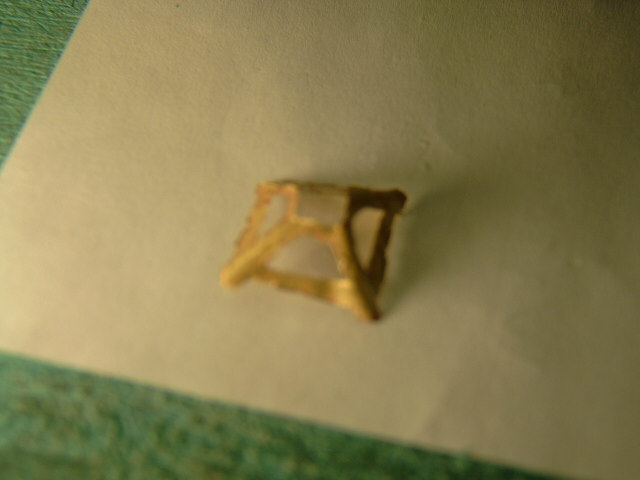
If I want to motorise a version of “Wee Baldie†I need a tower and a bow collector. The bow has some very fine metalwork at the top so manual cutting is not a good idea but the main tower is fairly robust. Robust enough to withstand a bit of faulty cutting. Out with the AutoCAD, design tower fret and print on to some stick on labels (Avery L7165).

Cut out both sides of fret. Very carefully peel off of backing and stick cut outs to a piece of 0.005 inch brass sheet hoping to get front and back in register. Drop into a tray of Ferric Chloride solution and wait nervously for an hour.
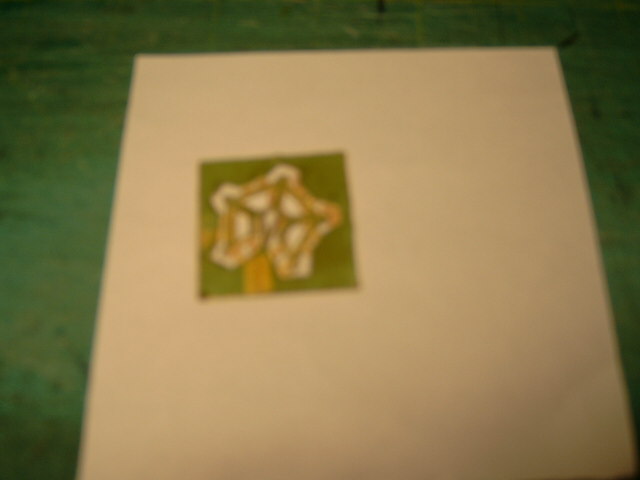
Whaddya know! It worked. Proof of concept. Not good enough for assembly on to a model but now I KNOW I can make all the little nightmare bits I need and using the cutter I can get things properly in register and really fine bars on the frets.
Even better, Graphtec don’t widely publicise it but the Cameo has a kid brother which does everything the Cameo does but on A4 (smaller than the Cameo) and at £150ish it looks like my Christmas Prezzie has been found.
I have put this on the hints and tips page.
Hope this has been informative.
Regards
Jim
Last edit: by The Bankie
Because, except in some unfortunate circumstances, trains did not run on town centre streets
Posted
Full Member
As I have interest in three rail modelling I can now concentrate on the vehicles rather than spending time on wires and collectors!
David
freelance model railways and tramways
index02
index02
Posted
Full Member
You can use three rail as London ran a conduit system.
You would be better off using a dummy conduit since points will become a nightmare but less awkward than wiring a large two rail complex. With three rail you only need to keep the live separate and not switch side when you complete a full loop.
Good luck.
Jim
Because, except in some unfortunate circumstances, trains did not run on town centre streets
Posted
Full Member
"DUCHESS OF SUTHERLAND" of cardboard - Card structure modelling forum - RMweb
i definitely 3 division: conference.
freelance model railways and tramways
index02
index02
Posted
Full Member
Its a great pity you seem to be unable to get large quantities of super glue as, this used as a coating makes the card into a very hard substance and you can drill carve etc etc, any one know if you could get large volumes of super glue???.
Best regards to all………..Tom.:);-):cool:
Posted
Full Member
Mckinell first. Got to the local £ shop. A pack of 4 bottles for a £. Liquid , not silly gel.
Wahiba, 3rd division or conference, who cares? The guys who play in these leagues get more enjoyment out of their game than the Premiership guys. It's a job to them.
Besides, when you get to that level the only way left is D
O
W
N :shock::shock::shock:
Try this website.
Code
http://www.cardfaq.org/faq/#s1.3You might like it.

Jim
Because, except in some unfortunate circumstances, trains did not run on town centre streets
Posted
Full Member
Been off on my hols and did some caravaning around Norfolk and Lincolnshire. Everywhere we went we saw wind pumps and mills.
I reckoned that one of these would make a great model so when I got back I set about producing something resembling the one at Thurne
Code
https://windenergymuseum.wordpress.comLooks like this:-
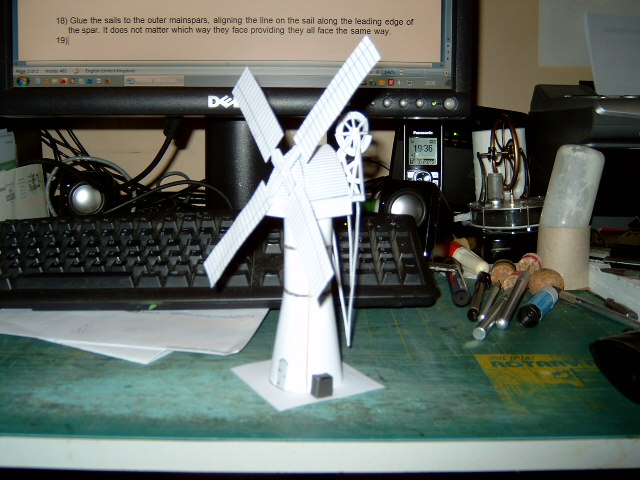
It's white because that's the colour of the original and the brick strips are there to hide joints.
The real snag is that I have produced a pointless model as there is nowhere it will fit on my proposed layout. DOH!:oops::oops::oops:
However if anyone modeling the Broads or the Fens would like a printout I will happily send them one.
Regards
Jim
Last edit: by The Bankie
Because, except in some unfortunate circumstances, trains did not run on town centre streets
Posted
Full Member
Who cares if it fits or not, that's a damn fine model:doublethumb, very well done on a nice looking mill, BTW, is its owner Dusty Miller
 , or J Creak,
 lol:………….
My very best regards…………………………….Tom……..:);-):cool:…
Posted
Full Member
.I plan to put this on the Scenery Building page with instructions and a couple of textures. The mills were often tarred as a waterproofing agent and the more expensive ones made of better quality brick so I can get black or brick patterns which will not need the joint camouflage. I will also try to produce a "scoop wheel" as this predated the turbine or Archimedes screw pumps on these wind pumps.
As far as ownership goes this is a ditch draining mill and the lady who owns it is Sue Age.:roll:
Regards
Jim
Last edit: by The Bankie
Because, except in some unfortunate circumstances, trains did not run on town centre streets
Posted
Full Member
'
Posted
Full Member
You said
Only needs 12 Volts!:mrgreen::mrgreen::mrgreen:Why not connect it to the National Grid and generate your own powe
Jim
Because, except in some unfortunate circumstances, trains did not run on town centre streets
1 guest and 0 members have just viewed this.