American Signals
Posted
#32399
(In Topic #2124)
Guest user
Posted
Guest user
Posted

Legacy Member

Posted
Guest user
 thumbs:thumbs:lol::lol::lol::cool:
Posted
Legacy Member
Some of the links come from the Barchester pages so there is a certain amount of duplication but not much.
Posted

Full Member
Wayne
Posted
Full Member
Here is my method which still needs refinement but here goes
http://www.xdford.digitalzones.com/construction%20of%20a%20model%20railway%20signal.htm
or ground signals whcih are now lighted the same way
http://www.xdford.digitalzones.com/modelrr11.htm
Cheers
Trevor
BTW The Searchlight signals cost about $1.30 Australian… This might even help Bob… (Latin Description by his own account "Titus Officius"… like myself really) make the plunge!!!! Ground signals about 40 cents plus the switches…
 Last edit: by xdford
Posted
Guest user
Good simple signals you have shown :thumbs
Posted
Full Member
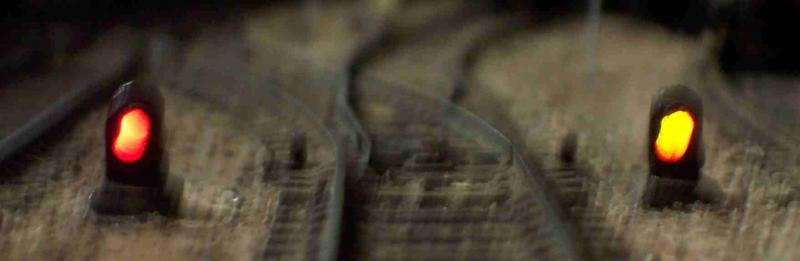
And in a first, a view of the signals which does not appear on my web site yet but you can see what the signals look like.
And as I said Bob, the price is in both our ranges…
Cheers
Trevor

The Signal to the Yard entrance at "Ridgehaven" The bottom one only goes from Red to Yellow which saved a switch
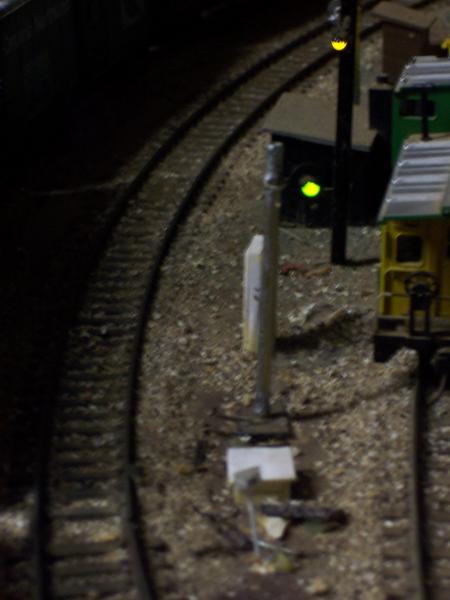
The Single aspect signal governing the exit to the yard
PS Sorry about the blurriness of this one… but you can see the ground signals work! If you check my web site, you will see these were made from some scrap styrene and Kadee coupler pockets. They were dummy signals for years before I drilled and fitted LED's to them… Cheers Trevor
Last edit: by xdford
Posted
Legacy Member
Please let us not have any posts about cheep, cheep, Sylvester, canaries, or any other birds.
Posted
Full Member
Regards
Trevor
Posted
Legacy Member
Posted
Full Member
As for the signal disks check the following method. You will need someone with a lathe if you have not got one yourself. I take a styrene lid from a butter and/or margarine container and drill a series of 3mm holes about 12 mm apart in any direction you can. The holes are cut so that they are very roughly 5 or 6mm square with the hole as close to the middle as possible.
I then have a 3mm thread and a nut which I cram as many of the squares ( don't be too particular about the rough shape) as I possibly can. I usually get about 35-40 on a 1.5 inch long thread. Squeeze them as tightly as you can with the nut which will misshape the outer ones on your thread.
Use the remnant thread and place it in the lathe chuck and turn the mass of styrene to just under 9mm or whatever. The outer ones will misshape a bit but you should have a large number of disks which you can then paint before mounting the LED's on.
Now Bob, you can cut your costs down by .0001 Euro cent or P by squeezing out an extra disk or two per thread… only kidding mate but seriously it is a material we throw away frequently and as modelers we should be able to use it and give it a further life. Check my web page and you can see a styrene track side shed made from a yoghurt container… it looks as though a stick of gelignite has gone off inside it but it showed what could be done! The fact that that batch of MEK was a bit past its use by date might have had a bit to do with it! Anyway, hope this description helps!
Cheers
Trevor
1 guest and 0 members have just viewed this.