The art of compromise.
Posted

Full Member
Finally gettiing out of my system.
Yes indeed - great figures Terry - you should go into business ………………….unless of course, each took 4 hours to paint ! :hmm
'Petermac

Posted
Full Member
Terry
Posted
Full Member

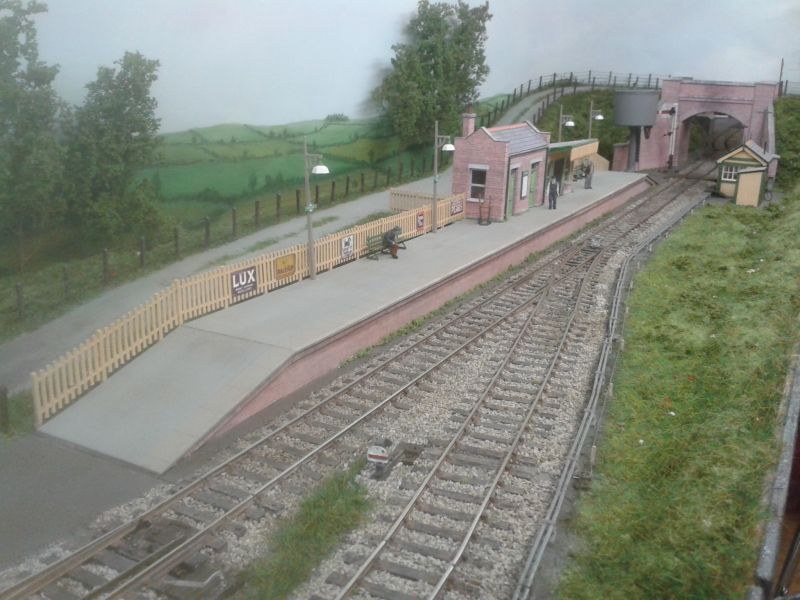
General view of station…
Terry
Posted
Full Member
Posted
Full Member
What make are the little people and are they "as delivered" or did you carry out some surgery on them ?
'Petermac
Posted

Full Member
Staying on the thread Kevin.
Posted
Full Member
Regards
Roger
Roger OO DC Steam
Posted
Full Member
Roger - all easily achievable. This is really the first time that I have made scenery of any substance. If you read this thread from the beginning you will see how easy it really is.
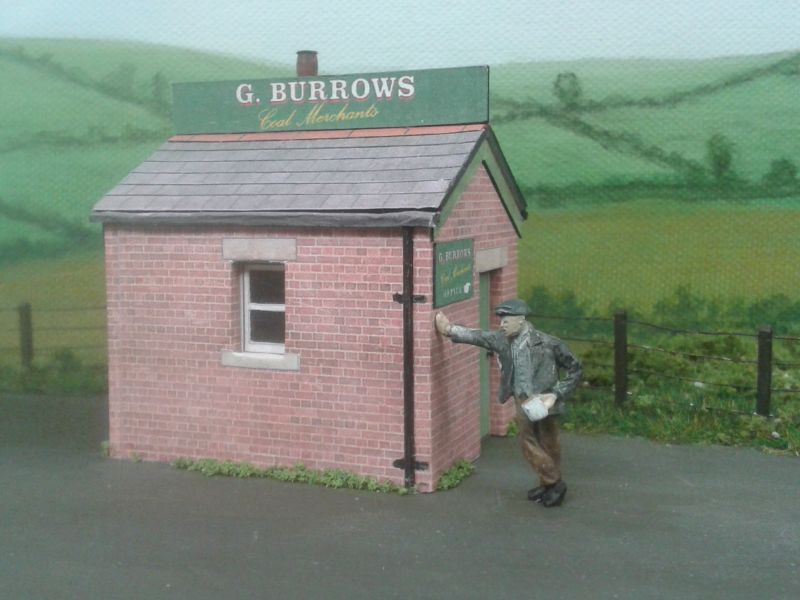
Peter and Kevin - the figures are from the Monty's Models range by Dart Castings. What you see is how they come out of the packet, unpainted of course. The figures come with a short spiggot on one leg so you just drill a hole, dab some glue on to the spiggot and push it into the hole. Painting doesn't take very long. First I scrape a scalpel blade along the mould seams to remove them. A quick spray with Halfords' white primer, dab some 'Revell 'flesh' colour on the faces and hands, followed by some acrylic paint on the clothing and shoes. I tend to keep to just a few colours and nothing 'loud'. A small dab of hair colour above the neck and a very thin wash of black on the face and hands to accentuate the features. I find that by using acrylics I get a nice matt finish. Try to avoid the shiny clothes look - not very realistic, unless your figures are wearing those plastic mini skirts which were popular in the 1960's or those 'wet look' shoes which I seem to remember wearing in the 1970's along with my 'tank-tops' and flared trousers. With hindsight, how stupid we must have looked!
Terry
(Much older and wiser now!)
Posted
Full Member
 Last edit: by Passed Driver
Staying on the thread Kevin.
Posted
Full Member
I must have a look at their range they look great.
'Petermac
Posted

Full Member
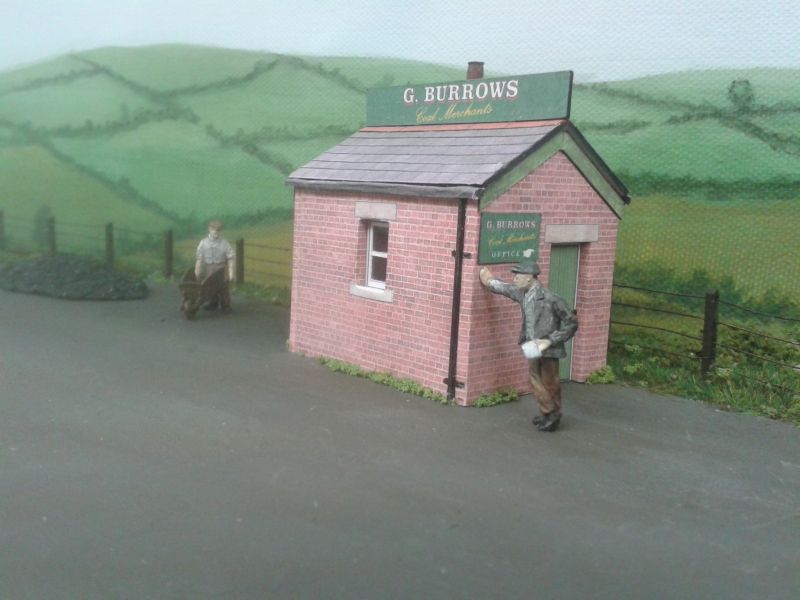
More great figure painting, and I think you downplay your skills which are also in evidence on your backscene. You have definitely got a knack for the realistic clothing colour, superbly applied.
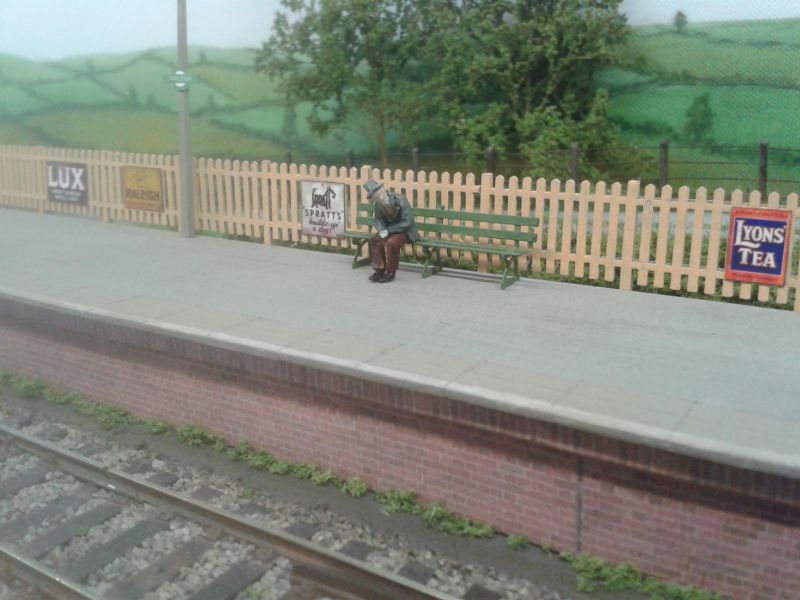
This is a very atmospheric scene and I really like the perspective of the road.
And sometimes, the simplest of scenes stirs memories. How often have I sat on a platform staring down the track, longing for a glimpse of the train. Or maybe that just happens on the Southern!
Michael
Posted
Full Member
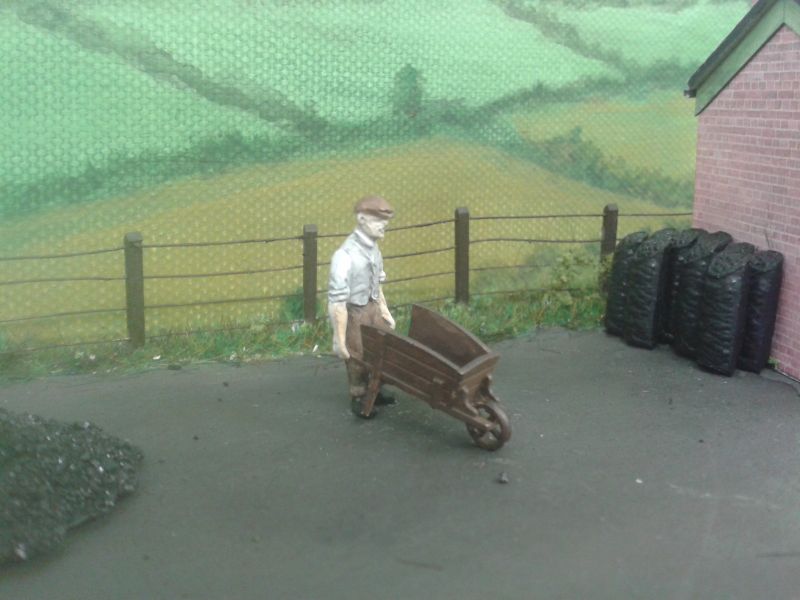
Peter, the mould lines are very fine and just a few passes with the scalpel blade are necessary. However, I appear not to have succeeded too well with this chap as you can see the seam down his sleeve…

Of course, none of this is discernible from the normal viewing distance. I would just add that the lovely old wooden wheelbarrow is a 3D printed plastic item. The figure does come with a white metal wheelbarrow but I was keen to use this rather splendid example.
Question: There is no back panel on the wheelbarrow so what is to stop the contents from falling out of the rear when the barrow is put down?
Terry
Last edit: by col.stephens
Posted
Full Member
Staying on the thread Kevin.
Posted

Full Member
My barrow (ex neighbours) had a shallow housing worked in each elm cheek into which a back-board slid. The wheel was in a poor state, so I made another. 4 felloes, one flat rectangular section spoke running through the square nave, through tenoned by the other. Only the ends of the nave are round, turned up on a Black and Decker drill lathe, the felloes end pegged with short lengths of brass rod. I hammered over the tyre after squeezing the rim with two end-to-end chain wrenches.Thank you Michael, very kind of you. You are quite right, all of the figures are made in white metal.
Peter, the mould lines are very fine and just a few passes with the scalpel blade are necessary. However, I appear not to have succeeded too well with this chap as you can see the seam down his sleeve…Of course, none of this is discernible from the normal viewing distance. I would just add that the lovely old wooden wheelbarrow is a 3D printed plastic item. The figure does come with a white metal wheelbarrow but I was keen to use this rather splendid example.Question: There is no back panel on the wheelbarrow so what is to stop the contents from falling out of the rear when the barrow is put down?Terry
It was still going strong when I moved to France in 2002 and gave it away to an allotment holder.
Doug
'You may share the labours of the great, but you will not share the spoil…' Aesop's Fables
"Beer is proof that God loves us and wants us to be happy" - Benjamin Franklin
In the land of the slap-dash and implausible, mediocrity is king
"Beer is proof that God loves us and wants us to be happy" - Benjamin Franklin
In the land of the slap-dash and implausible, mediocrity is king
Posted
Full Member
Terry
Posted
Full Member
Kevin, I have sent you a PM.Hi Tel. It has been suggested that I should replace my scenic break, with two tunnels for a bridge, just like your bridge . Have you got any advice on this late in the day change. Best wishes Kevin
Terry
Posted
Full Member
Cheers Pete.
Posted

Full Member
Cheers,John.B.:thumbs
Posted
Full Member
Terry
Posted
Full Member
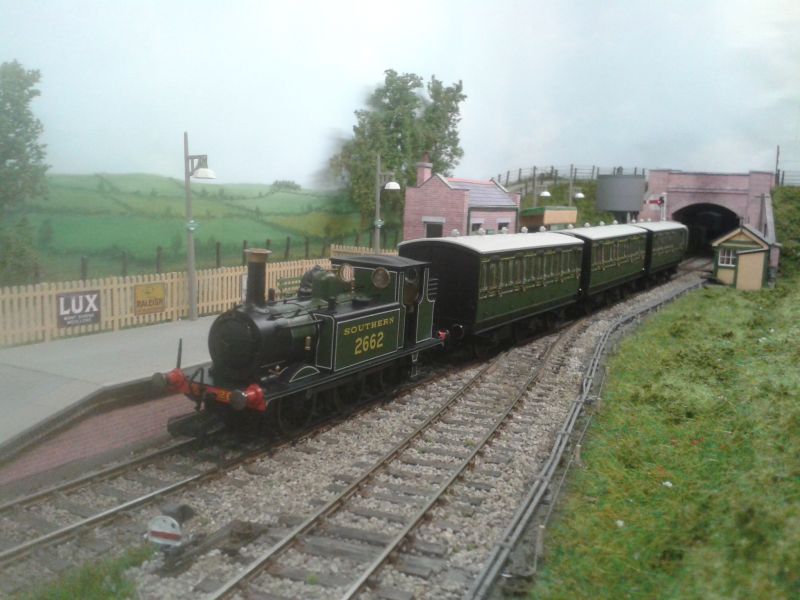
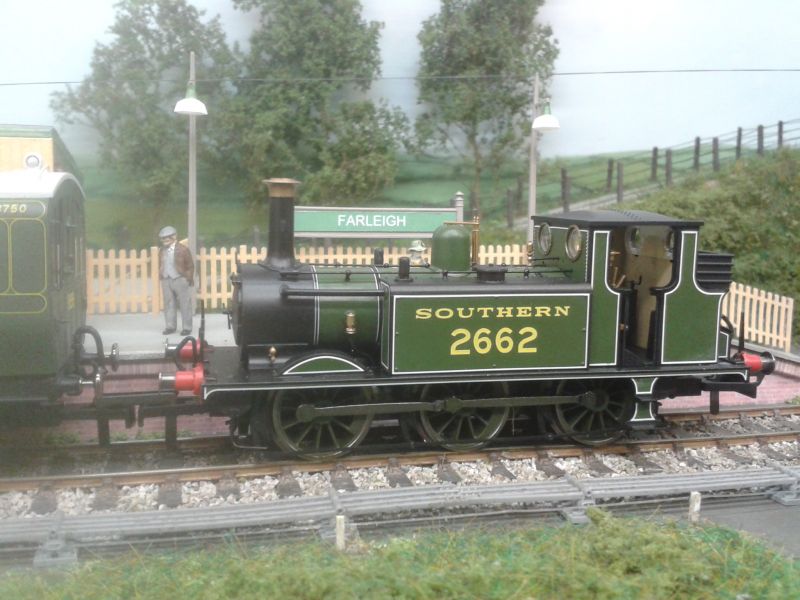
On a positive note, today I took delivery of some Hornby generic six-wheel coaches in Southern Livery. Apparently they are loosely based on Stroudley coaches and look excellent being pulled by my Hornby Terrier. Footboards have yet to be fitted. Here are a few pictures to whet the appetite…

Last edit: by col.stephens
1 guest and 0 members have just viewed this.