The art of compromise.
Posted
Full Member
Finally gettiing out of my system.
Thank you Peter.Terry

Posted

Full Member
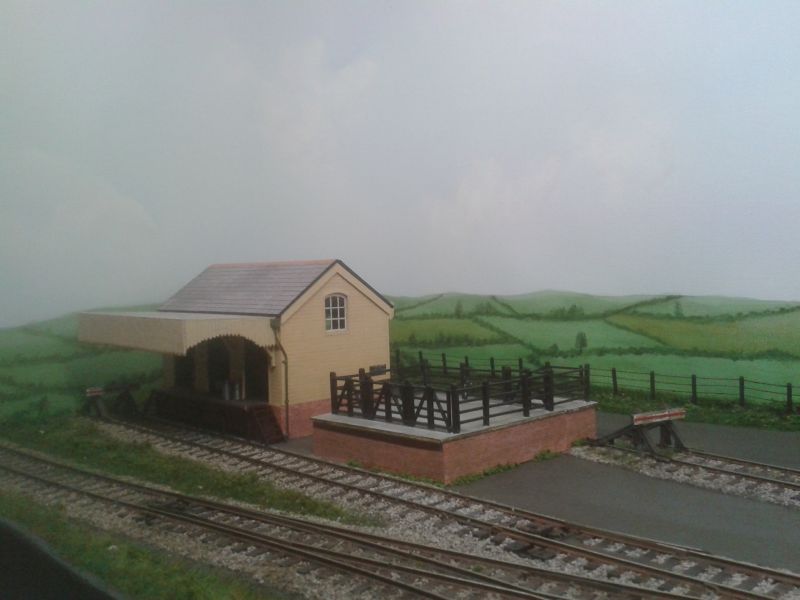
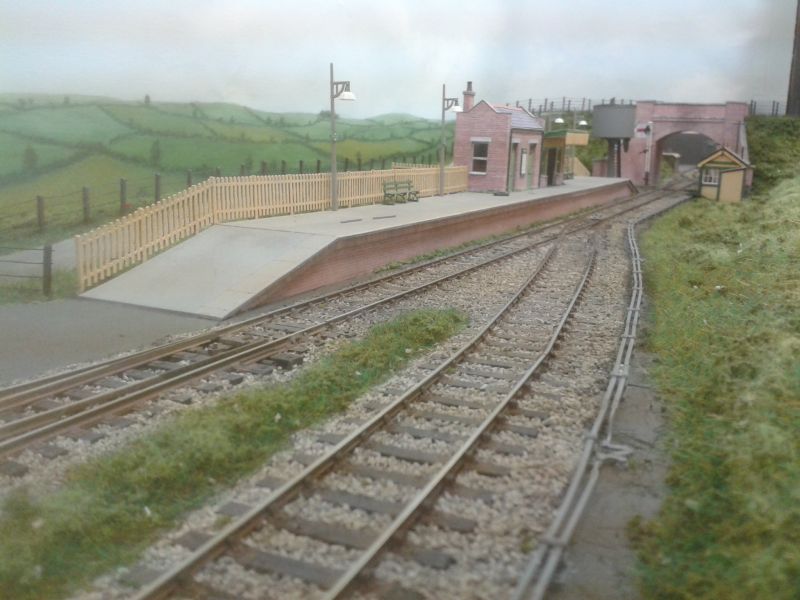
Sheer genius!!!Anyway, back to the goods shed. How to cast a smidgen of light onto the front of the shed? What if I could redirect some of the light coming down from the pelmet? Maybe a small mirror to reflect the light? How would I fix it in position so that it wouldn't be seen? On the rear of a building? The mirror idea was a non-starter simply because of the difficulty in obtaining one so small. In any event, I didn't want a building obscuring the view of the goods shed.
If not a building, what? I needed a small structure which was large enough to hold a small reflective surface of some kind. I was thinking laterally by now and the answer came to me - ballast bin! Would it be possible to make a lineside ballast bin which could hold a small strip of reflective material?
A quick search of the RM Web revealed a thread on 'chippings bins' in which the prototype measurements of a Southern Railway bin were kindly provided. Out came the card and it was a quickly built and given a coat of acrylic paint. And the reflective surface? A strip of very shiny silver plastic from the bag in which the LEDs were packed! Recycle and save the planet!I cut a small gap in the low embankment at the front of the layout, opposite the goods shed and glued the bin in place. A small amount of ballast was glued at the base of the 'mirror' at the front of the bin. Here is the bin in position looking from the rear of the layout…And the contents of the goods shed gently lighted. Not brilliantly lit but just enough to see the goods…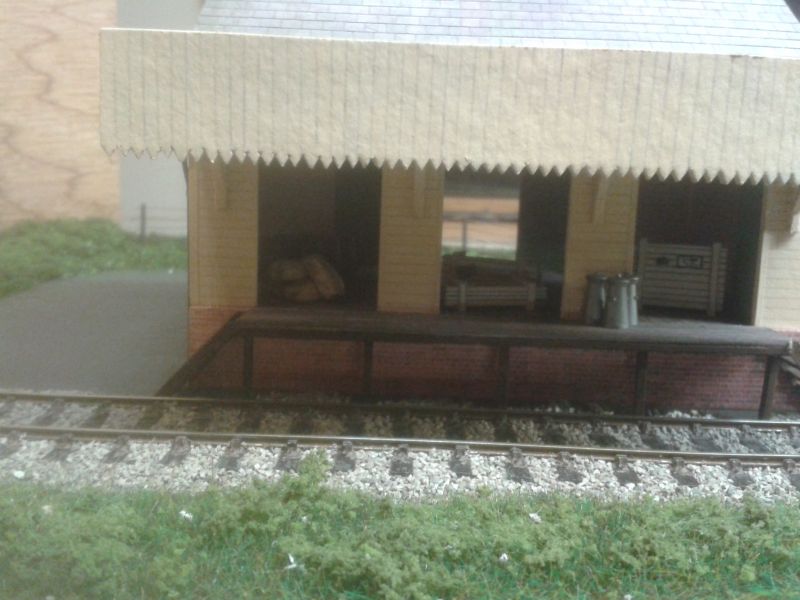 More soon.Terry
Doug
'You may share the labours of the great, but you will not share the spoil…' Aesop's Fables
"Beer is proof that God loves us and wants us to be happy" - Benjamin Franklin
In the land of the slap-dash and implausible, mediocrity is king
"Beer is proof that God loves us and wants us to be happy" - Benjamin Franklin
In the land of the slap-dash and implausible, mediocrity is king
Posted
Full Member
Thanks Doug, much appreciated.
Terry
Posted
Full Member
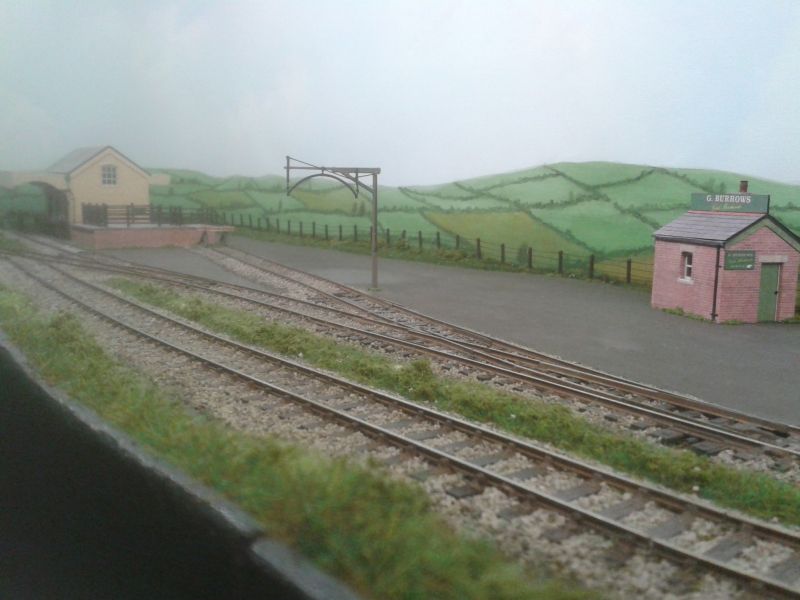
I made the cattle dock from card covered with Scalescenes' papers. The fencing and gates are a commercial item which I had picked-up from a second-hand stall at a show. The fencing adjacent to the ramp at the rear was made from styrene strip with wooden posts, left over from the post and wire fencing previously used on the layout. I must admit, it is all very cramped but then the scenic section is only six feet long, but it will give me an excuse to run some cattle wagons. I am toying with the idea of making a false floor with cattle thereon, which could be placed in position or removed as required when a cattle wagon visits, in a similar way to the coal heaps previously modelled for the coal siding.
Previously, I had only installed uncoupling magnets in front of the goods shed. Now, of course, another set would be required in front of the cattle dock. I retrospectively fitted the magnets as I had done once before much earlier in this thread. So, this is how things were looking…
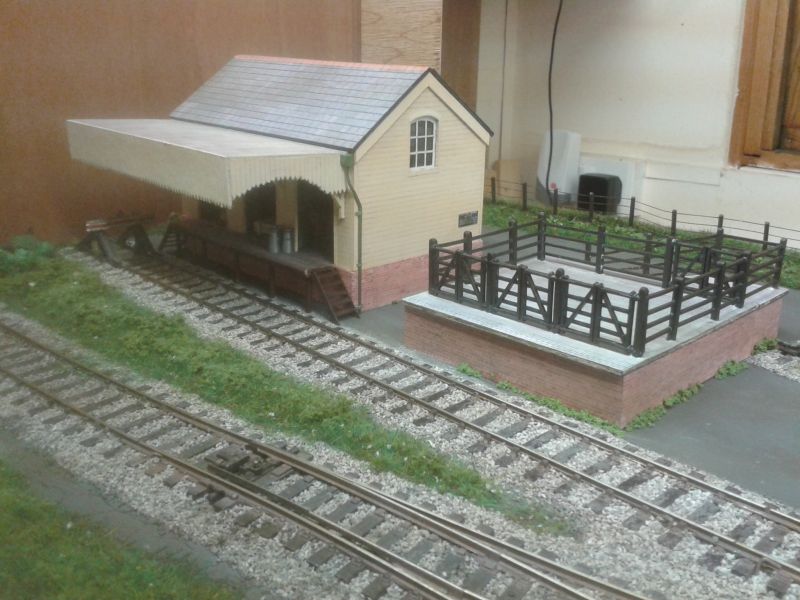
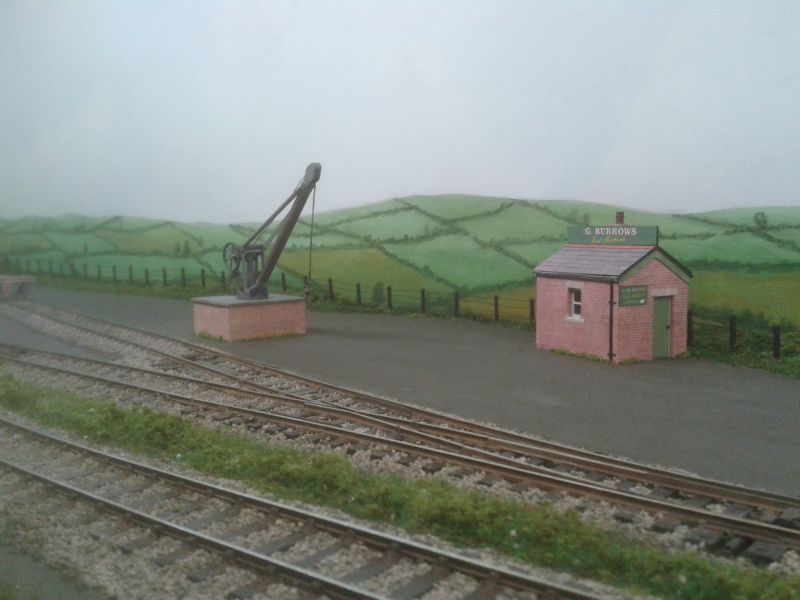
The thought then struck me that I might fit a yard crane somewhere in the goods yard. But where? After pondering the problem I decided that the solution would be to move the coal office to the rear of the layout, ironically it's original intended position, and site the crane in the vacant space.
After a struggle I managed to remove the coal office without causing too much damage. The rear at the foot of the building suffered some damage from the tools employed but it is not visible from the front of the layout. It was glued in place against the rear fence of the yard and I am now thinking that it probably looks better in that position.
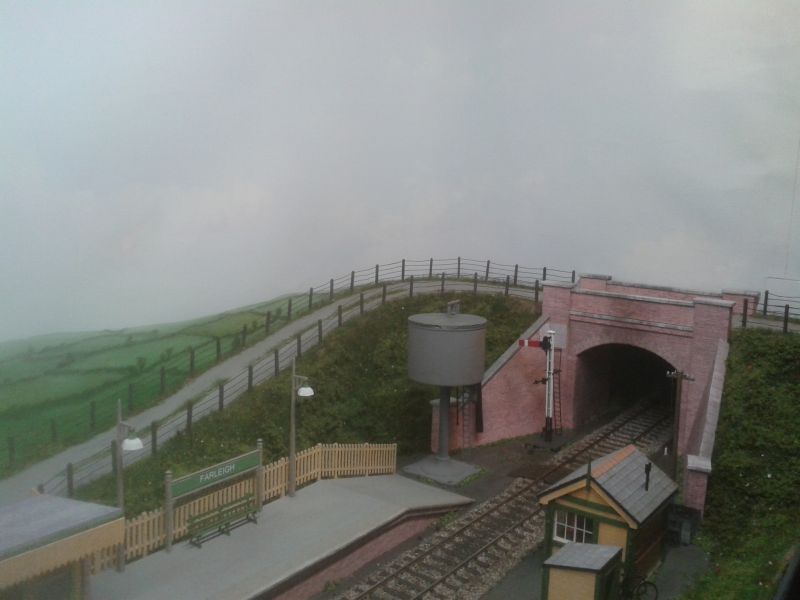
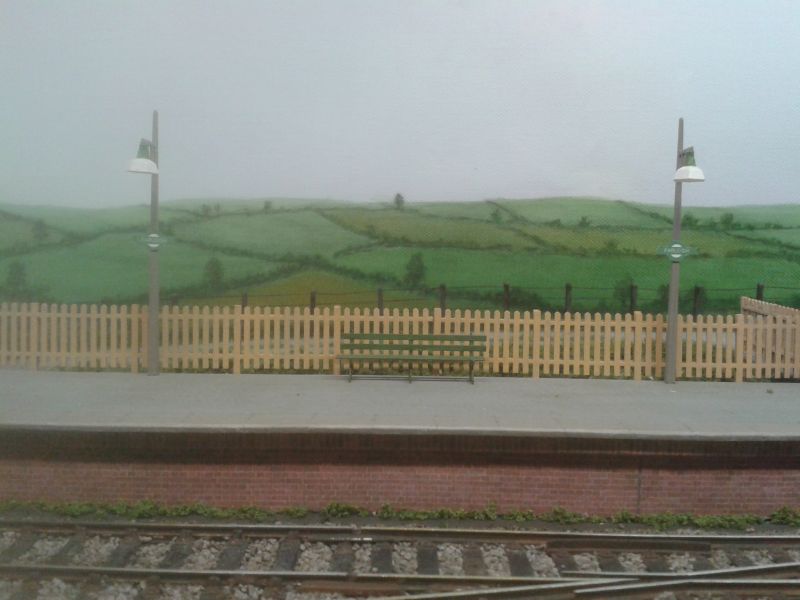
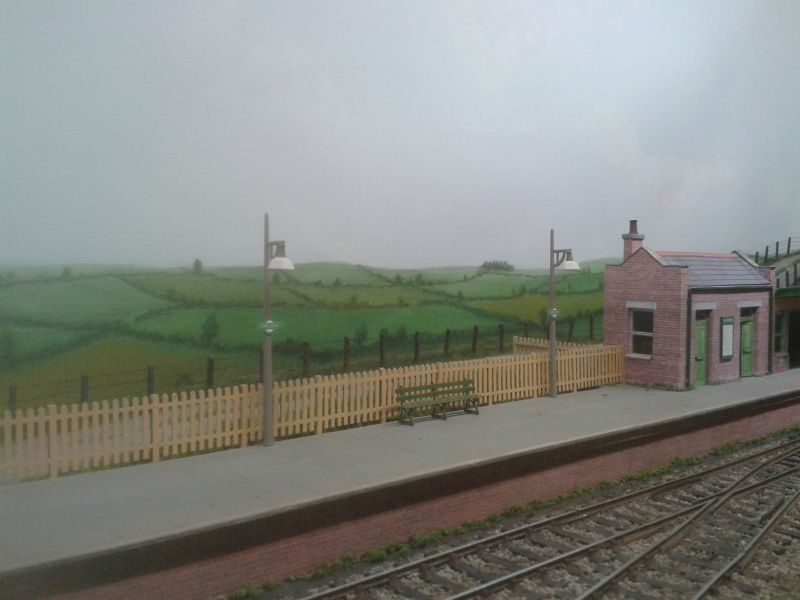
I finally put the finishing touches to the painted backscene. You might remember that I had decided to paint the backscene on a roll of canvas using acrylic paints. Basically, it's a nine foot long scene. This was a first for me and I wasn't too sure how it would all turn out. I gingerly put the completed backscene in place and was disappointed to see that it tended to dominate the layout. I decided to remove it again and cut one inch off the bottom in order to lower the horizon and I feel that this has greatly improved the look of the scene. My intention was to give the feel of the land rising towards gently rolling downs in the mid-distance. Hopefully the backscene gives some impression of this. I must say, if nothing else, it's nice not to keep looking at the shed windows as a backdrop to the layout. The absence of 'corners in the sky' is rather refreshing too. As to holding it in place, I simply resorted to pinning the top edge to the rear boards and secured it to the end boards with small bulldog clips.

More soon.
Terry
 Last edit: by col.stephens
Posted
Full Member
Douglas
'You may share the labours of the great, but you will not share the spoil…' Aesop's Fables
"Beer is proof that God loves us and wants us to be happy" - Benjamin Franklin
In the land of the slap-dash and implausible, mediocrity is king
"Beer is proof that God loves us and wants us to be happy" - Benjamin Franklin
In the land of the slap-dash and implausible, mediocrity is king
Posted
Full Member
My wife says that I belong in a museum!
Terry
Last edit: by col.stephens
Posted

Full Member

Posted
Full Member
Terry
Posted
Full Member
Thoughts being given to the point rodding, etc. next. By rights, being a Southern layout, the rodding should be just that - rods, not the square type (actually inverted u-shaped) seen nowadays. However, the Wills Kits plastic point rodding looks extremely good (if a bit oversized), and I have no wish to drag this layout on for so long that it becomes a lifetime's achievement. I have other fish to fry, as they say. As it happens I have a couple of packs of the said Wills' rodding to hand and I feel inclined to make life easy for myself and push them into action. 'Point Rodding - Prototype & Planning Notes For Modellers' by Laurie Adams of the 2mm Scale Association is the required bedtime reading at present. Oh, and I have a ground signal to make as well.
More soon,
Terry
Last edit: by col.stephens
Posted

Full Member
Cheers,John.B.:thumbs
Posted
Full Member
Terry
Posted

Full Member
Staying on the thread Kevin.
Posted
Full Member
Best wishes,
Terry
Posted
Full Member
Staying on the thread Kevin.
Posted
Full Member
The facing point lock looks so good that I decided to leave the cover off. Shame to cover up all that detail. Whilst I was at it, I removed the spring and plastic cover from this Peco point which I think improves the look of it. I must remove the ends of those ugly fat sleepers and get rid of those holes.
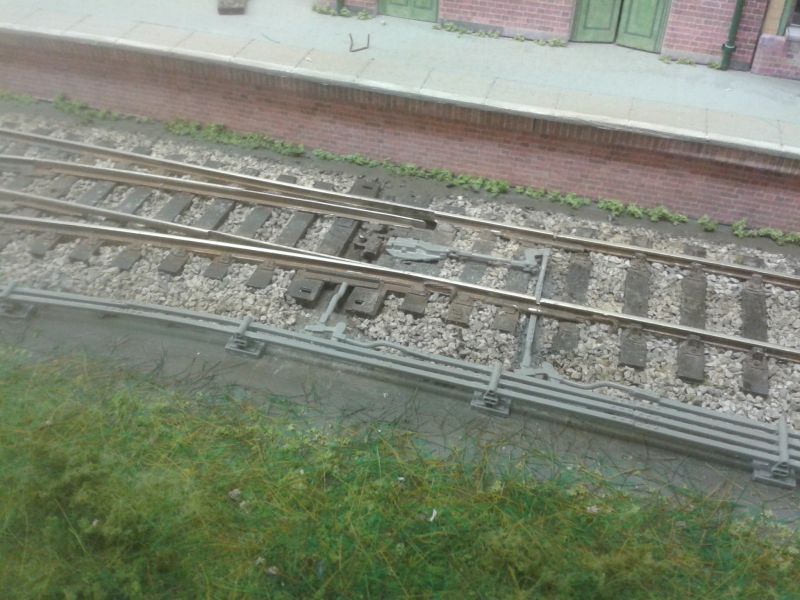
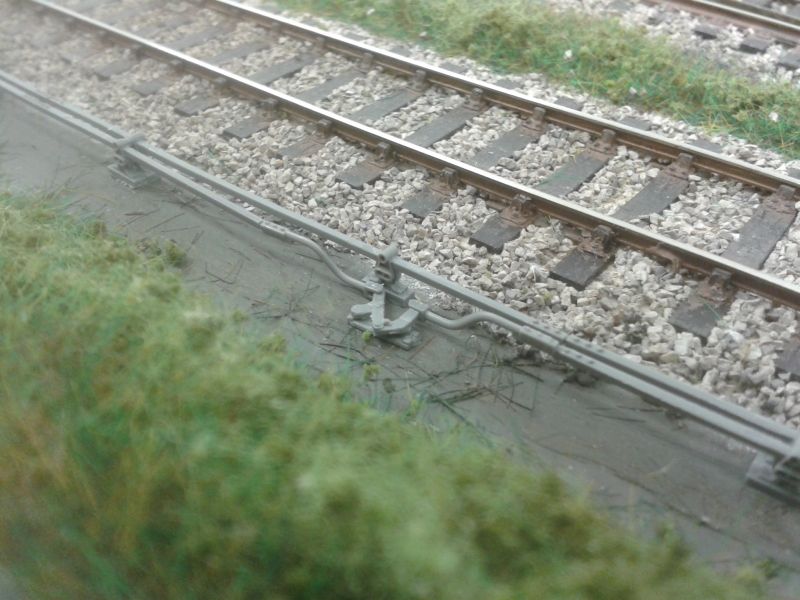
A compensator inserted mid-way along the run of the far rodding.
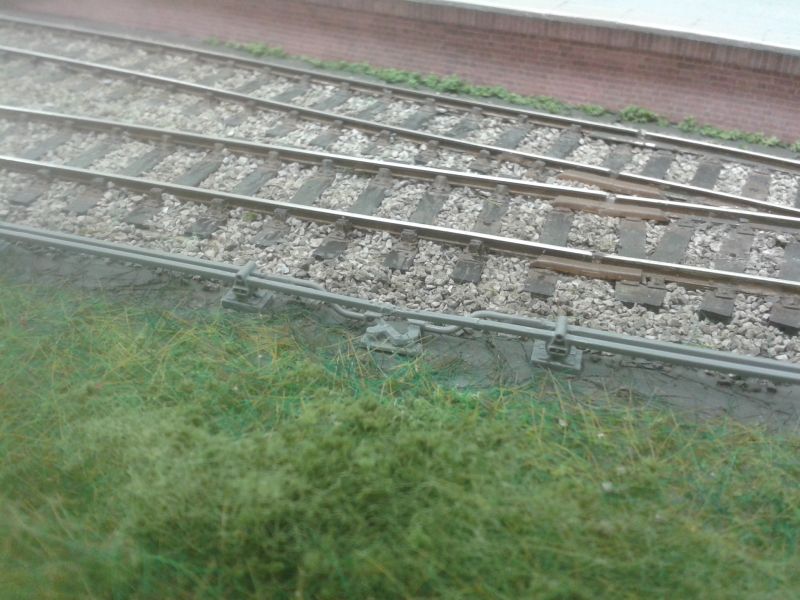
The problem of how to take the rodding across the baseboard joint. I inserted small pieces of styrene beneath the rods and splashed solvent over them. A dab of paint will soon render them invisible, although in real life they are not very noticeable.

The compensator for the nearer rodding.
So as not to have to model the array of cranks in front of the signal box I opted for the dodge of covering the rodding with a walkway. 1mm card painted with brown acrylic paint. Job done!

General view of the point rodding snaking its way along the layout. The sharp bend near the point doesn't look so sharp when viewed from the front.
More soon.
Terry
Last edit: by col.stephens
Posted

Full Member
Wonderful modelling.
Best,
Bill
Last edit: by Longchap
At 6'4'', Bill is a tall chap, then again, when horizontal he is rather long and people often used to trip over him! . . . and so a nickname was born :)
Posted
Full Member
Terry
Posted

Full Member
Posted
Full Member
Staying on the thread Kevin.
Posted
Full Member
Terry
1 guest and 0 members have just viewed this.