The art of compromise.
Posted

Full Member
Finally gettiing out of my system.
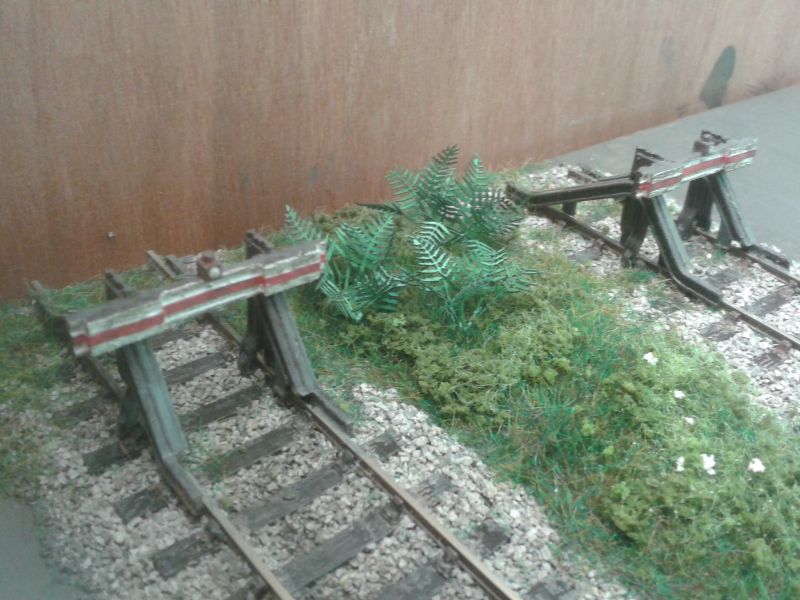
The awning is super and I am impressed that you have stuck to card throughout the build.The bridge scene is great too, all very realistic.
Michael

Posted
Full Member
Regards,
Terry
Posted
Full Member
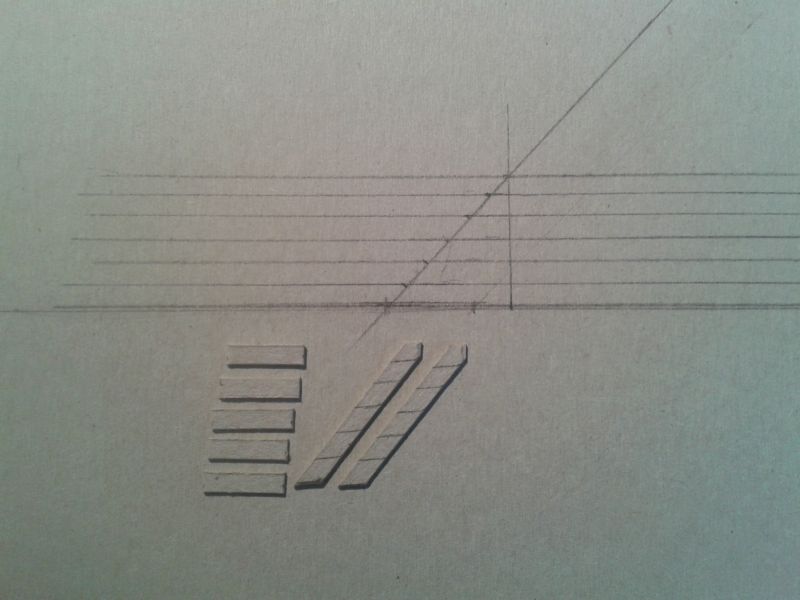
Problem requiring a solution: how to represent the open wooden steps at each end of the wooden platform? I required some thin (but not too thin) card. A discarded tissue box was ideal. Firstly, I took some measurements from the model to work out the length and width and to establish the correct angle of the stairs. The measurements were transferred to the card and a simple diagram was drawn. A strip of the card was cut off and from this two sides and five steps were cut. The sides were offered up to the diagram and the angle of the steps marked thereon. The procedure was repeated for the second set of steps.
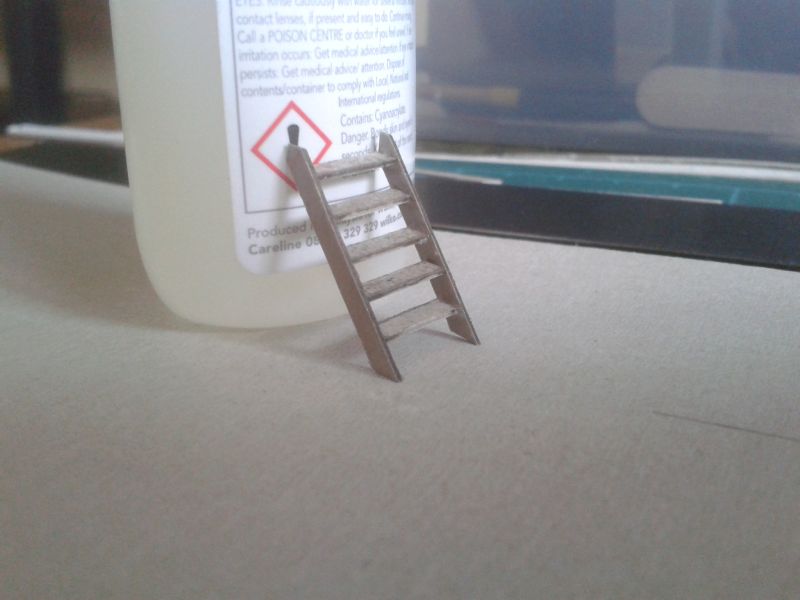

One end of each step was glued to one side on each pencil line and levelled-up by eye. When dry, the other side was glued in place. Once the second side was firmly attached the whole staircase was given a light covering of superglue, using a cocktail stick. This was to harden the card and to firm-up all joints.
Both staircases were given a couple of coats of paint and glued in position on the model. Job done!
More soon.
Terry
 Last edit: by col.stephens
Posted

Full Member
Shed dweller, Softie Southerner and Meglomaniac
Posted

Full Member
The steps are a masterpiece - other then the superglue "tempering", what did you use to stick the card ?
'Petermac
Posted
Full Member
Peter, for card modelling I use a white acrylic adhesive called 'Cosmic Shimmer '. My wife put me onto it. It is much used by the lady crafters when making greetings cards. I like it because it is quite thick and does not run out of control. Also, any excess can easily be removed with a toothpick leaving no residue on the surface of the model.
Regards,
Terry
Last edit: by col.stephens
Posted
Full Member
I quite agree, and your simple description of the process belies the skill and patience required. What could have been a simple little building has turned into a masterclass. Thank you!Excellent result Terry. :thumbs
The steps are a masterpiece
Michael
Posted
Full Member
Best wishes,
Terry
Last edit: by col.stephens
Posted
Full Member
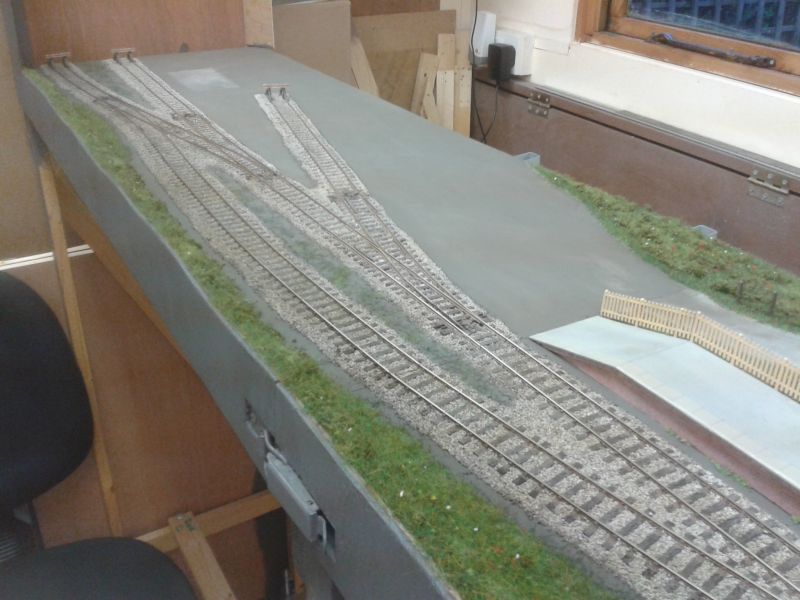
The grass on the embankment has been extended onto the fiddle-yard board to visually bring the two baseboards together.
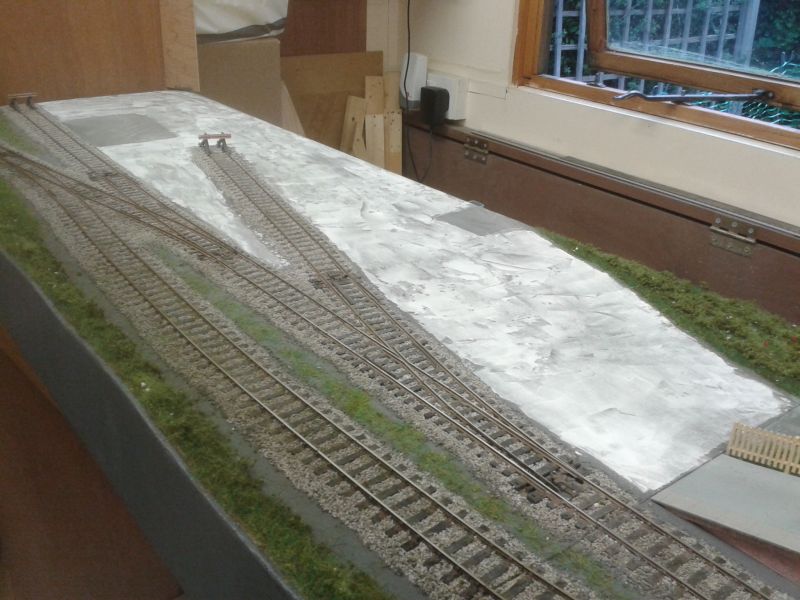
The surface of the goods yard has been bugging me for some time. I had simply painted the baseboard surface and every time I looked at it, I could see the grain of the plywood clearly showing. This afternoon I decided to do something about it. I dug out an old tub of pre-mixed plaster filler and applied it to the baseboard, scraping it over the surface to leave a thin coat. Once dry a quick rub over with sandpaper smoothed out any high spots. I mixed together some grey and brown acrylic paint and it was a quick job to paint the whole area. The shade of paint is a tad more brown than the previous coat so it was necessary to touch-up all the grey areas on the whole layout, which actually didn't take very long. The advantage of a small layout! The plywood grain has now disappeared and I feel much happier to press on and detail the goods yard end of the layout. The small areas between the tracks need to be re-grassed to re-establish the colour after receiving a dab of paint. A quick job for tomorrow.
I really need to finish the goods shed and get it into position in the goods yard.
Terry
Posted
Full Member
It's amazing how little things can really bug, but a sense of achievement when we do something about them. More nice grass work too…
Michael
Posted
Full Member
Terry
Posted
Full Member
At long last the goods shed is finished and is ready to go onto the layout.

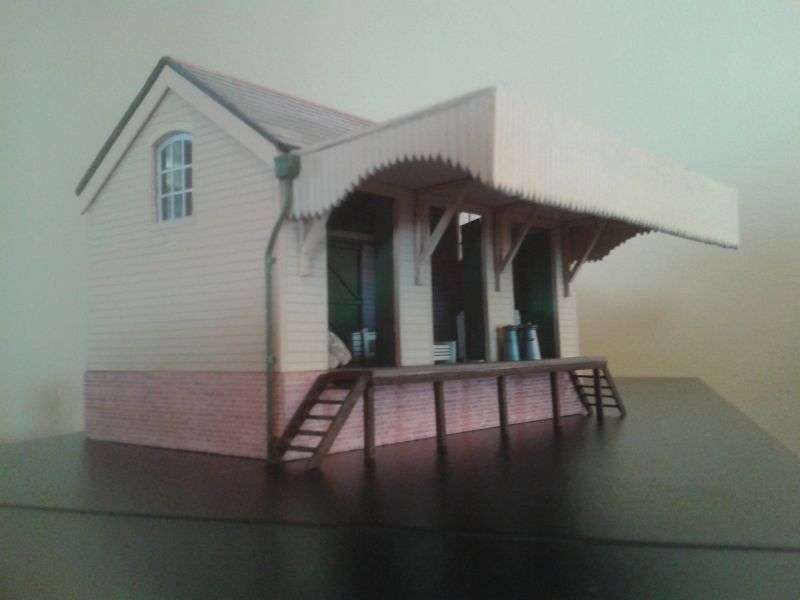

Barrels (rear left) by Base Toys, milk churns by Peco, sacks (front left) made from modelling clay, and the packing cases made from mount board. I'll add some staff at a later date.
And here is some detail added to the layout a few weeks ago…
Terry
Last edit: by col.stephens
Posted
Full Member
Shed dweller, Softie Southerner and Meglomaniac
Posted

Full Member
Bill
At 6'4'', Bill is a tall chap, then again, when horizontal he is rather long and people often used to trip over him! . . . and so a nickname was born :)
Posted

Site staff
Ron
NCE DCC ; 00 scale UK outline.
NCE DCC ; 00 scale UK outline.
Posted

Full Member
Posted
Full Member
Ron, don't forget that you are looking at a close-up picture with the awning nearest and just a few inches from the lens.
In real life the actual shed appears to be more substantial than the awning. You will have to pop over to see it!
Best wishes to all,
Terry
Last edit: by col.stephens
Posted
Full Member
A picture to illustrate my last point…
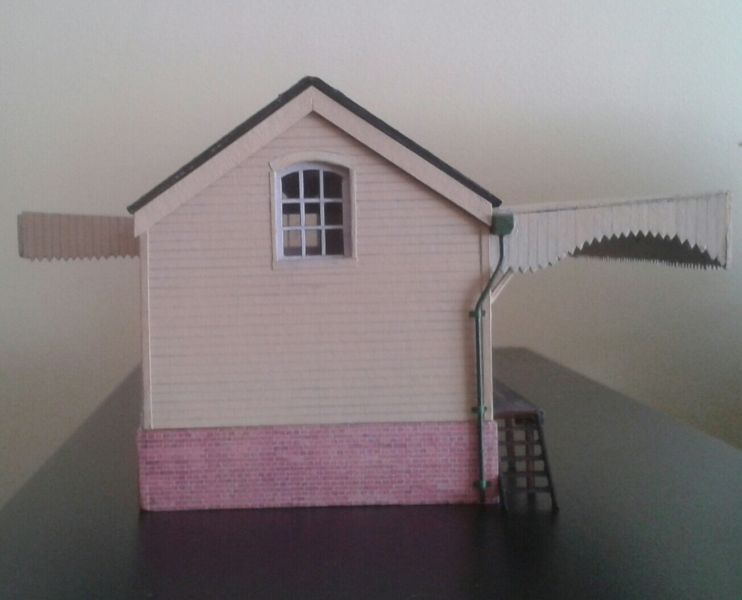
More soon.
Terry
Posted
Full Member
I do understand what Sol means about it looking too big and yes, to a certain extent, it was down to camera lens distortion. However, looking at your latest shot illustrating your point, I do wonder if, in real life, there would have been some kind of stay running from near the front edge of the canopy back to somewhere up near the ridge on the roof. I can't tell what the measurements are but there's an awful lot of weight pulling down on where the canopy is attached to the shed and any supporting beams don't appear to run further than the shed wall so the twisting moments at that point must be enormous……………….particularly when covered in a decent layer of snow. :hmm
To me, a metal (plastic) rod at each side taking some of the weight would look great. :cool wink
'Petermac
Posted
Full Member
Very nice indeed!
Ian
Ian Lancaster
Please visit my OO Gauge 1930's LMS layout "Jencaster"
http://yourmodelrailway.net/view_topic.php?id=14622&forum_id=21&page=1
Please visit my OO Gauge 1930's LMS layout "Jencaster"
http://yourmodelrailway.net/view_topic.php?id=14622&forum_id=21&page=1
1 guest and 0 members have just viewed this.