The art of compromise.

Post

Posted
Rating:
#261568
Avatar
Full Member

Finally gettiing out of my system.

Wash your mouth out - both of you !!   :It's a no no


Have you never heard of the LNER ?   :Happy

'Petermac
Online now: No Back to the top

Post

Posted
Rating:
#261573
Avatar
Full Member
Hi Petermac.   Not really being 100% au fait with my iPad and grammar. Occasionally I find myself dropping right into it, from a great height. Let alone etiquette on the forum. And you have written a message to a mystery person or persons about the LNER, of course One would imagine that any fan of Railway’s real or model should have heard of them.   Best wishes Kevin 

Staying on the thread Kevin.
Online now: No Back to the top

Post

Posted
Rating:
#261574
Avatar
Full Member
If you go back a post Kevin, all will become clear.  :thumbs

'Petermac
Online now: No Back to the top

Post

Posted
Rating:
#261585
Avatar
Full Member
[user=6]Petermac[/user] wrote:
If you go back a post Kevin, all will become clear.  :thumbs
Hi Petermac   Thank you for your reply.  I am perfectly clear of mind , when I see my name I know it that is meant for me. Likewise someone else’s name. Best wishes Kevin 

Staying on the thread Kevin.
Online now: No Back to the top

Post

Posted
Rating:
#263811
Full Member
New wagon for Farleigh.  Whilst perusing the 'Simply Southern' stall at the recent East Grinstead Model Railway Exhibition, I came across a number of these wagons being sold for the extremely attractive price of only £6.00

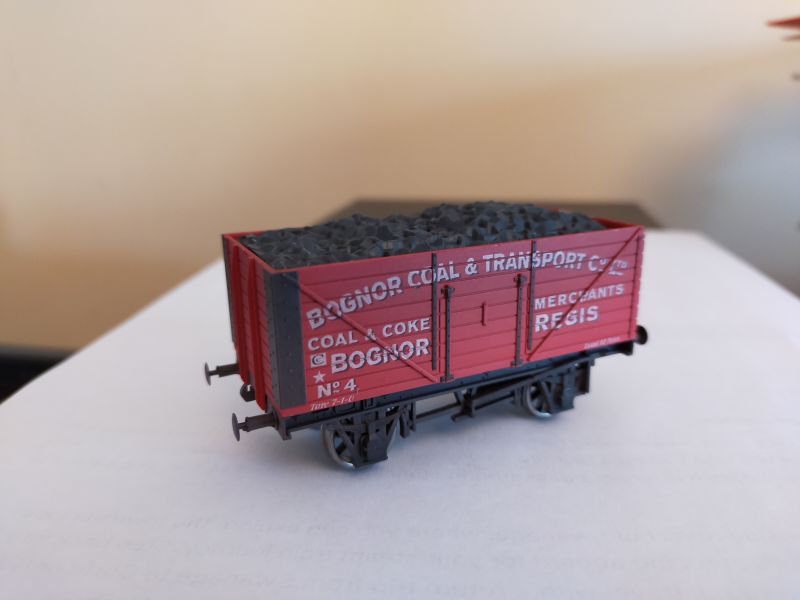
  https://shop.simplysouthern.co.uk/index.php?route=common/home

A basic Dapol wagon especially produced for Simply Southern in this attractive slightly weathered livery, shown here without the customary drooping Dapol couplings.
I bought one with the view that I might try to make it look more realistic and if it didn't work out, well it wasn't the end of the world at that price.


  If nothing else, the wagon could be improved by dispensing with the unrealistic coal load which was held in place by a large screw centrally on the underside of the chassis.  Removing this screw allowed the wagon to be broken down into its component parts of chassis, metal weight, body and coal load.  The interior of the body had been painted red during manufacture which wouldn't have been the case in real life, so this was a good place to start.  I gave it one coat of a matt cream coloured Humbrol enamel paint to represent the unpainted wood.  At this stage, I wasn't sure how high the new load would be so opted to paint the whole depth of the sides and ends.

When dry this was given a wash of thinned black enamel.  The outside of the body was also toned down with thinned black enamel paint.
 
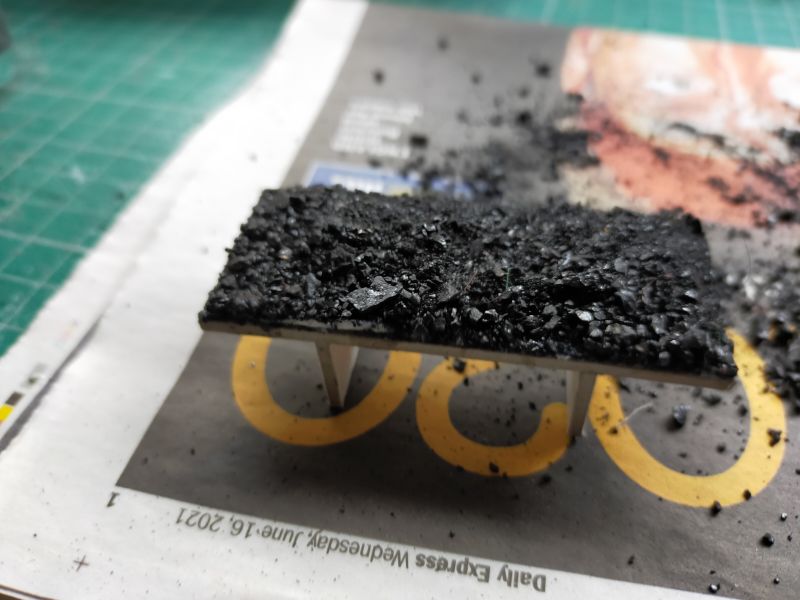
Whilst the interior was drying I decided to make a new coal load.   Three pieces of 2mm thick greyboard were glued together thus…


PVA was brushed on and small pieces of kitchen roll were dabbed on with a PVA laden brush to form some undulations…

And small pieces of real coal were sprinkled on to the wet PVA.  This was then set aside to dry.


Meanwhile attention was turned to the chassis.  The couplings were simply screwed on to two moulded spigots on the underside of the chassis.  They were removed and the spigots were cut off.  At each end of the underside of the chassis I glued on a Parkside Coupling Mounting Block for Bachmann couplings (now sold by Peco ref. PA34).  I attached some short straight Bachmann couplings to replace the original Dapol type.


The height of the bar was checked against my coupling height gauge which was shown way back in this thread…

  As I will be using the Kirby Coupling on my stock to enable automatic uncoupling, I removed the two coupling hooks and soldered the customary steel staple thereon and bent them to shape.  A quick dab of matt black enamel paint soon covered the shiny solder and staples. They are quite unobtrusive once painted. 
 

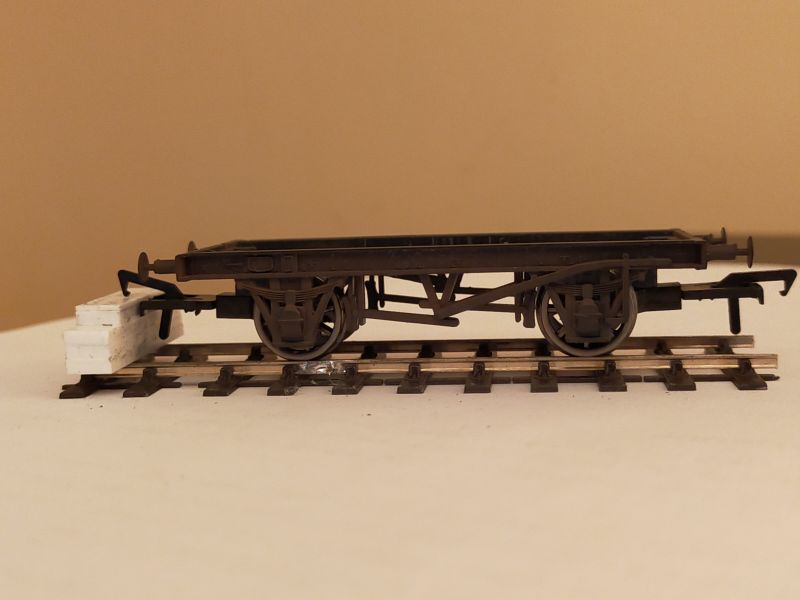
The coal load was now glued inside the wagon body.  The metal weight was positioned on top of the chassis and the body attached with Revell Contacta glue.  I removed the wheelsets and painted the wheel rims with matt black enamel paint.  The wheels were fixed back in position and the chassis and lower body were given a light spray of Humbrol Dark Brown from a rattle can to add a bit of weathering.
 
Ready to take its place in the coal siding…

Thanks for looking
 
Terry


Last edit: by col.stephens

Online now: No Back to the top

Post

Posted
Rating:
#263812
Avatar
Full Member
Super little job Terry.  Dapol wagons are basically OK I find but, as you say, the couplings always have that "droop" which confine them, in my case, to trains that do not require shunting.

Did you consider making the load removable so that the wagon can leave empty whilst showing off that lovely coloured interior?

Barry

Shed dweller, Softie Southerner and Meglomaniac
Online now: No Back to the top

Post

Posted
Rating:
#263815
Avatar
Full Member
Hi Terry.  Excellent coal wagon, especially for that low price. Best wishes Kevin 

Staying on the thread Kevin.
Online now: No Back to the top

Post

Posted
Rating:
#263816
Full Member
Thank you Barry and Kevin.  I briefly considered making the load removable but decided against it as 1) there is a large hole in the floor where the screw passed through to secure the original load, and 2) there is no detail on the inside of the sides and ends (although the floor has the planking thereon.)  I understand that this may be a manufacturing problem getting both exterior and interior detail on the sides and ends.  The recently released Rapido Trains SECR wagons have the same problem.  Apparently it can be done but pushes up the price considerably.

Terry
Online now: No Back to the top

Post

Posted
Rating:
#263817
Avatar
Full Member
Hi Terry

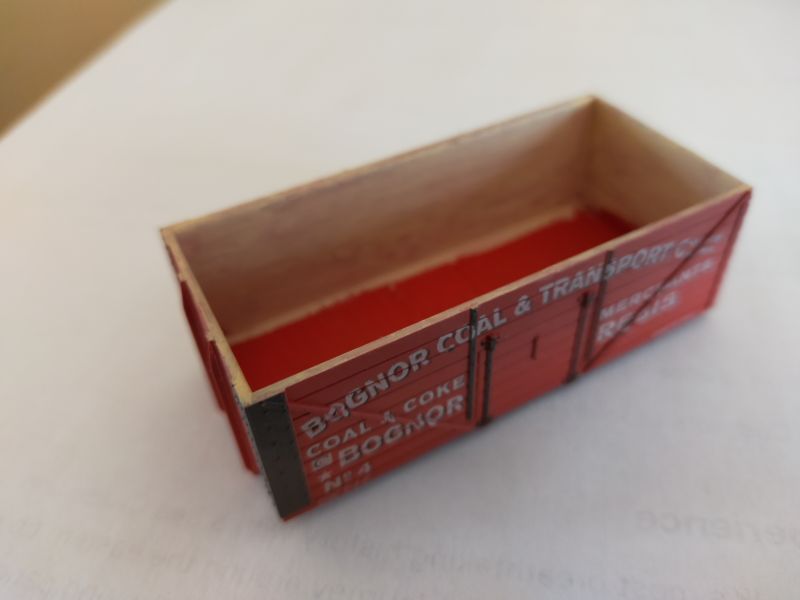
The Dapol wagons with the hole in the floor has been their way for some  years.  I have some very old Dapol RTR wagons and some of their latest  offerings with the same hole.  I have resorted to a bit of filler for  empties.

I guess the "load" question is whether the lack of interior detail when empty is better or worse than having a loaded coal wagon leave a branch line terminus. :hmm

I can't say that one or the other is better - it's individual taste.  I am lucky to have the terminus represented by a traverser so I can just switch loaded and open wagons!  Such a luxury allows me to sit firmly on the fence :lol:

Either way, the little "Bognor Coal and Transport" open is a beauty!

Barry

Shed dweller, Softie Southerner and Meglomaniac
Online now: No Back to the top

Post

Posted
Rating:
#263818
Full Member
On the subject of the Kirby Coupling, I have decided to get on and convert all of the couplings on the stock obtained for the layout so far.  Brian Kirby originally advocated supergluing the staple to the coupling dropper.  I have tried this and have found that a number of staples have come adrift.  Alright, you could just glue the staples back on but who needs the hassle? I decided that soldering was the way forward.  The dropper/hook needs to be unclipped from the rest of the coupling and this is where the fun begins.  Have you ever tried keeping the dropper/hook in one place on the workbench whilst poking it with a soldering iron and trying to keep the staple in position all at the same time?

Step forward my, as yet, unpatented coupling soldering jig, lovingly handcrafted in the UK, although because of costs I am considering moving production to China!


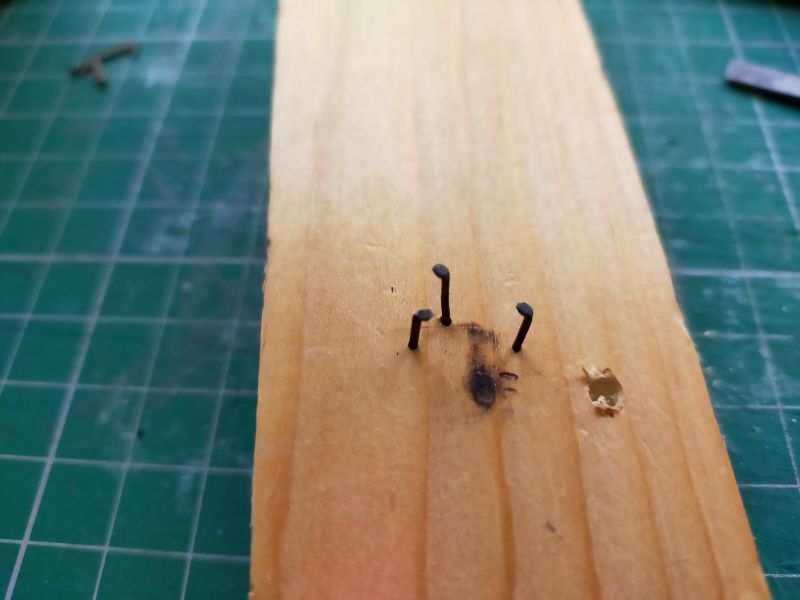
This has been exclusively designed for use with Bachmann couplings.  Note the hole on the right.
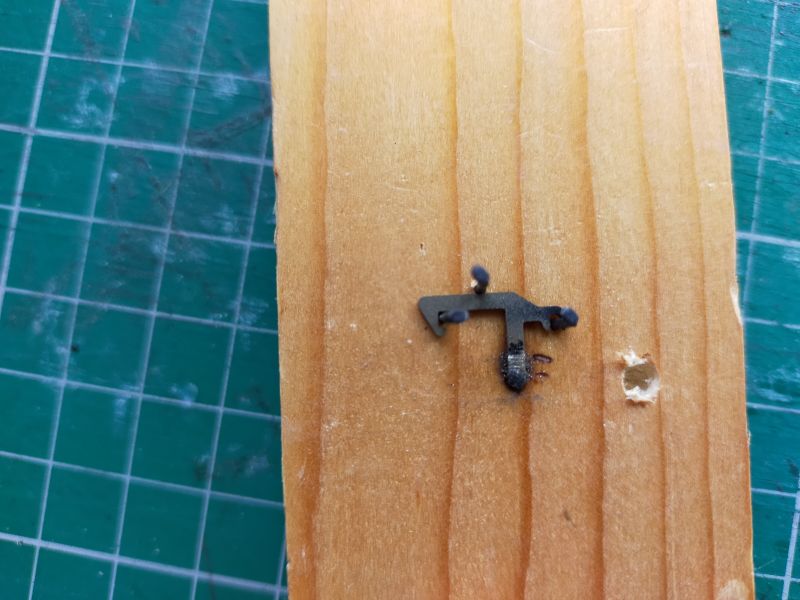
The dropper/hook is placed in the jig and a small area is filed to remove the paint revealing the brass beneath…

A staple is straightened and then, using long-nosed pliers, a small ring is formed at one end…

As an aside, here is my supply of staples.  UK Nationals may feel somewhat nostalgic!

The staple is now placed in position across the revealed brass with the ring facing downwards in the hole…

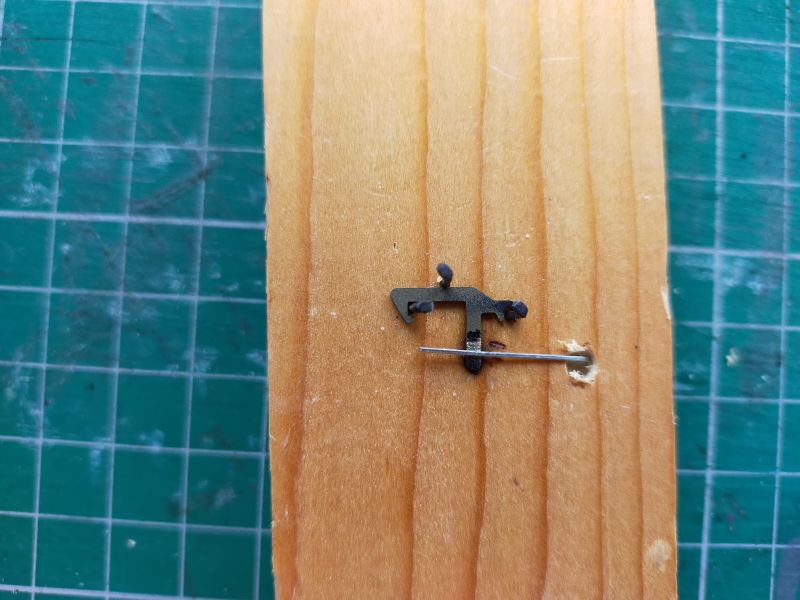
I dab on a brush load of liquid flux, hold the staple in place with something and apply the solder and iron.

The jig is turned over and tapped on the workbench to release the coupling.  The protruding part of the staple under the hook is snipped off and the jobbed lightly filed to clean it up.
A slight upward bend is made in the staple about midway between the dropper and the end ring.


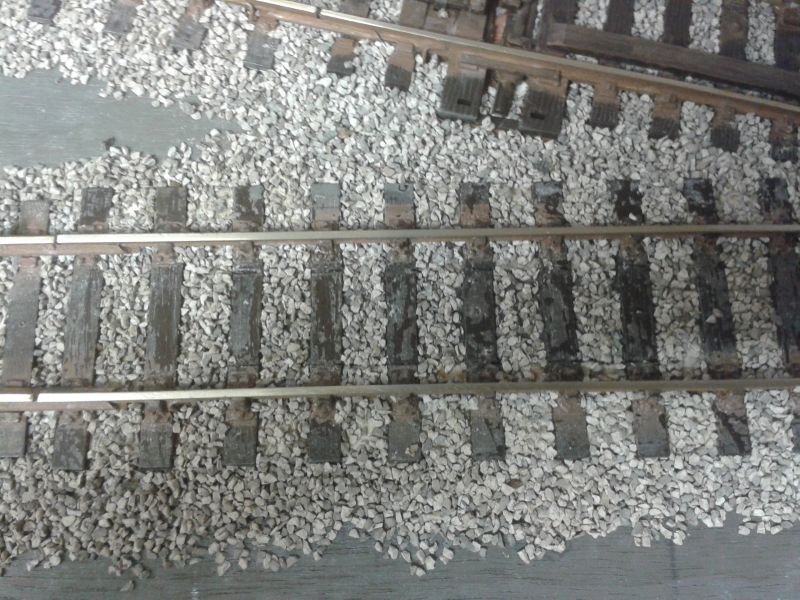
Couplings fitted in place on a wagon awaiting a dab of black paint…

Thanks for looking.
Terry

Last edit: by col.stephens

Online now: No Back to the top

Post

Posted
Rating:
#263820
Avatar
Full Member
A great demonstration of how you do the Kirby coupling.  While I have fitted Kadees to some wagons, I may have to give this a go for stock not so easy to convert.  Wanting to keep my carbon footprint down, hearing that the jig production may be moving to China, I will have to have a go at making my own version - will there be any copyright issues?        :cool wink
Michael
Online now: No Back to the top

Post

Posted
Rating:
#263821
Full Member
No copyright problems Michael.  It's my gift to the world!  :lol:

Terry
Online now: No Back to the top

Post

Posted
Rating:
#263823
Avatar
Full Member
Excuse my ignorance Terry, but I presume that the staple acts on a magnet (momentary or otherwise) to allow vehicles to uncouple?

p.s.  I hear that quality control issues may provide a persuasive arguement for keeping your production out of China and on your own desk :lol: :lol:
 

Last edit: by Barry Miltenburg


Shed dweller, Softie Southerner and Meglomaniac
Online now: No Back to the top

Post

Posted
Rating:
#263827
Sol
Avatar
Site staff
Sol is in the usergroup ‘Super-moderators’
A slight variation

Ron
NCE DCC ; 00 scale UK outline.
Online now: No Back to the top

Post

Posted
Rating:
#263829
Avatar
Full Member
Hi Terry.    I tried that at home , quite some time ago, but every time I put it into operation the hook and the staple came off . At the time I emailed the companies concerned, they sent me replacements, but I abandoned the idea and went for something else. I began a thread on the forum at the time.    Best wishes Kevin 

Last edit: by Passed Driver


Staying on the thread Kevin.
Online now: No Back to the top

Post

Posted
Rating:
#263831
Avatar
Full Member
Very nice refurb Terry - also great to see the couplings are from the same era as the wagon.   :lol:

'Petermac
Online now: No Back to the top

Post

Posted
Rating:
#263833
Full Member
Hello Barry.  Yes, magnets are buried under the sleepers. Earlier in this thread I posted pictures showing how I had retrospectively fitted some magnets.  Obviously it would be better to fit them at the same time as laying the track.  Here are some photos to show the magnets in situ.


May I also add that it is important to use a Bachmann coupling as the hook/dropper is made from brass and cannot be attracted to the magnet leaving only the staple to be pulled downwards.  Hornby and Dapol coupling hooks/droppers are not made from brass and are unsuitable as they are attracted to the magnet which means that the couplings will not lift when required to do so.
Regards,
Terry

Last edit: by col.stephens

Online now: No Back to the top

Post

Posted
Rating:
#263834
Full Member
Thank you Peter.


 Kevin, it is important to ensure that the hooks are firmly clipped in place so that the hook lifts and drops without falling off.  I have never had a problem with Bachmann couplings.  However, I have found that staples glued to the droppers can easily fall off which is why I have resorted to soldering them in place.

Regards,

Terry

Last edit: by col.stephens

Online now: No Back to the top

Post

Posted
Rating:
#263836
Avatar
Full Member
Hi Terry.    Thank you for your reply, among my wagon stock l have at least four different manufacturers, including bachmann, hornby, Dapol, and others. I would have more, but, I haven’t quite got the patience for kit building although I do have several part built kits. This isn’t a boast more a vehicle to shame me into action every time that I read through my thread.  Best wishes Kevin 

Staying on the thread Kevin.
Online now: No Back to the top

Post

Posted
Rating:
#263838
Avatar
Full Member
Are the couplings the latest, narrow type couplings Terry ?  I can't really make out their width from the photos …… :roll:

It certainly seems an ideal alternative to Kadees which, whilst I do like them, aren't particularly unforgiving, especially  if you get the height slightly off.  They can also be quite awkward to fit to older stock.

'Petermac
Online now: No Back to the top
1 guest and 0 members have just viewed this.