First Shelf layout - OO gauge
Posted

Full Member
A shelf layout to fit in the closet
I would have let her buy as many as she wanted! I figured that if she wanted to buy something for the layout then why not 😂But she knew better so didn’t buy anything.
- Darius

Posted
Full Member
Seems to work fine and hopefully it aligns the track accurately!
(Click to enlarge)
- Darius
Posted

Full Member
I may have missed this, what are those hinges for? If they are for location then half hinges are better. as are metal locating studs (as used by cabinet makers). Lee Valley should have both.
Nigel
©Nigel C. Phillips
Posted
Full Member
Forgot to mention: laying track across modules. Check out Gapmaster track joiners to go at the ends of the modules (americantieandtimber). I think they still do HO. I just use 2-3 PCB sleepers epoxy glued and screwed to the baseboard, and solder the rails to them. If you want the tracks to line up, lay first across the join and glue/solder down, cut after. Use a cutting disc or a saw with a fine kerf, not Xurons. Too much torque. You can also use rail joiners and a straight edge to make sure it's a good alignment.
How are going to wire the modules?
Nigel
©Nigel C. Phillips
Posted
Full Member
I don’t have a Dremel to do that technique of aligning rails but it seems like it could be a worthwhile investment…
I am planning on laying the track on a mother layer of foam, so I don’t know if the gapmaster sleepers would be effective as the foam isn’t very rigid. Thoughts?
I was just going to do a simple wiring system with power to each siding individually and probably an on/off switch for the siding with the engine shed. Then just finding some sort of small plug connectors to join the module and the controller.
- Darius
Posted
Full Member
Cut a small rectangle of foam out at the end, glue in a rectangle of wood. When using foam it's a good idea to plan ahead for this sort of thing. Any point motors will need a ply support, either set in the foam or glued to it. if you use solenoid point motors you definitely need support.
Nigel
©Nigel C. Phillips
Posted
Full Member
- Darius
Posted
Full Member
WIT.

Nigel
©Nigel C. Phillips
Posted
Full Member
I think I’m not the only one who would say that..!
Just the past week I have gotten back into things after a rather abrupt halt in the spring. I had an enjoyable summer outdoors though, alas, fall is falling here in Winnipeg. It’s always so early….
I have just finished measuring and cutting my lengths of track and testing to make sure everything works ok.
I didn’t buy and special products but I put screws in under the rails at either edge of the baseboard modules which should help with keeping things stable and potentially wiring as well.
Excited to start soldering everything together and wiring!
Does the kickback siding at the bottom need to be have a dropper wire with a switch, or could I just let the power flow through the points?
I don’t want it to be live all the time so I can park a locomotive in it. Operating in Dc.
Thanks!
Excited to be doing things again
(Click to enlarge)
- Darius
Posted

Full Member
Good to have you back again. I would use a switch and dropper for the siding. That will give you full control of the power and prevent accidental movement if the turnout is changed.
Cheers,
Claus
Cheers,
Claus
www.wct.payne-ellef.dk
www.flickr.com/photos/ellef/
Claus
www.wct.payne-ellef.dk
www.flickr.com/photos/ellef/
Posted
Full Member
I was wondering where I would find just a single on/off switch without having to buy a big package (I’m cheap, and on a budget). Then the switch practically came to my front door:
On my walk to work this morning someone had abandoned a shopping card with an old PC in it right between work and home (it’s only one block away…). On my way home it was still there (highly unusual for a shopping cart to not be taken in 8 hours in this neighborhood) so I figured it was fair game.
The switch was right there! Now I have a switch and all my wiring sorted. Very thankful to the Lord for blessing me in this small and hilarious way. It was an encouragement after a long day.
Yes, we live in the “hood”.. yes, I have street smarts, and in this case wasn’t too concerned about filth or drugs since the cart and computer were actually clean.
(Click to enlarge)
- Darius
Posted
Full Member
- Darius
Posted
Full Member
After considering my plan for wiring the layout, I realized that I had planned to do what many may consider overkill.
I was going to wire a dropper to each individual piece of track and both points, as well as solder all the track together.
I know practice makes perfect, but even so, after my attempts at soldering last night, the thought of soldering a dropper plus three track conections to my three way point makes me nervous.
I will be operating in DC, with mostly short wheelbase locomotives, so I dont want to struggle too much with losing power. I am unsure what a reasonable solution is.
Considering this, as well as the small size of the layout, what would each of you do in my situation?
Droppers to each piece of track (or even just wiring each piece together), or soldering all the track connections, or both? I think I would rather just solder droppers to the track as that seems less risky…
- Darius
Posted
Full Member
Terry
Posted
Full Member
Thanks for the advice. I realized my planning may have been overkill, since this isn’t an exhibition layout! I don’t think there’s anywhere to show it in Winnipeg anyways… 🥴
I may still solder some droppers to a few sidings, but I won’t go all out!
Thanks again,
Darius
- Darius
Posted
Full Member
- Darius
Posted
Full Member
I’m thinking I may give it a shot this time around, especially with the three way point I am a. Bit nervous. Last time I ballasted a point I was so careful but it still didn’t go well.
- Darius
Posted

Site staff
D_Will said
Have any of you tried ballasting points with double sided carpet tape?
I’m thinking I may give it a shot this time around, especially with the three way point I am a. Bit nervous. Last time I ballasted a point I was so careful but it still didn’t go well.
From “Post #292,718”, 22nd October 2025, 2:03 am
I haven't tried it, although I did read somewhere of it being done a long time ago.
I've always had problems with points as well.
Sorry, not a lot of help
Ed
Posted
Full Member
- Darius
Full Member
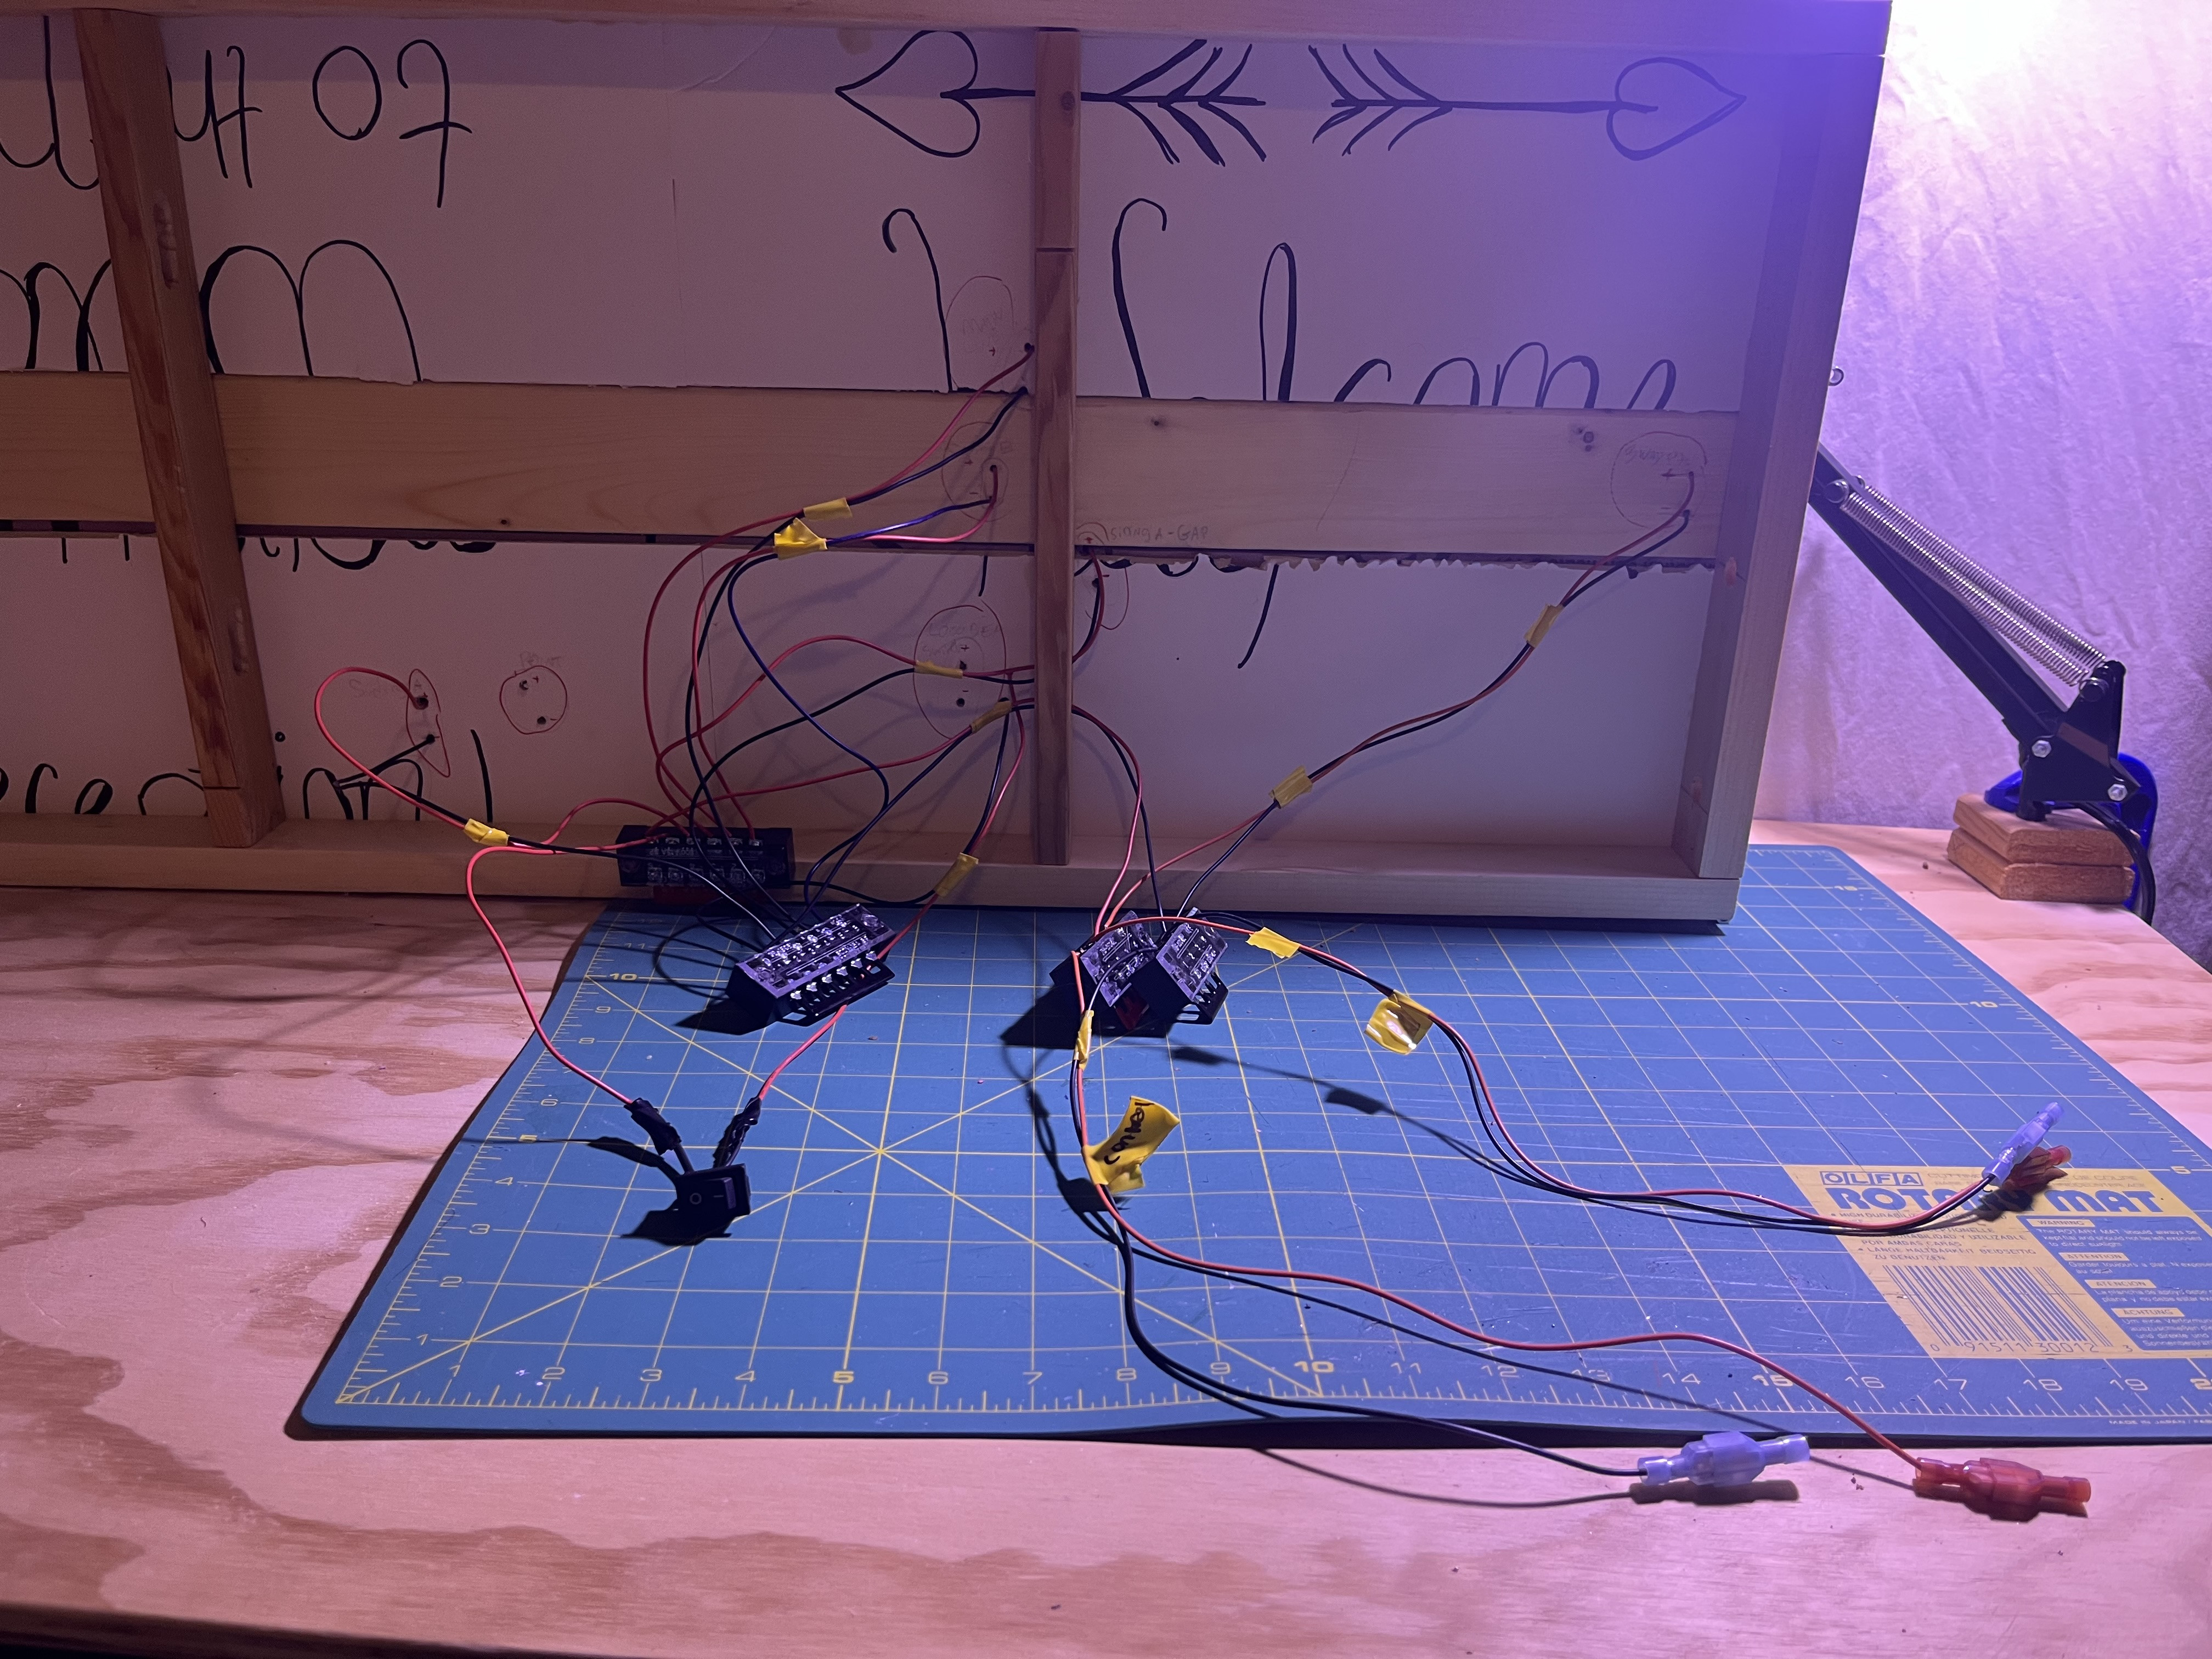 Just last night I was able to finish my wiring! Everything seems to be operating smoothly. It’s a little bit of a mess but I understand where everything is 👍🏻.
 I just have to solder droppers to the headhunt and then put the plugs for that to connect to the rest of the track.
In the end, I decided to solder droppers to each track minus the points. The running so far is quite good!
My soldering skills have definitely improved.
- Darius
1 guest and 0 members have just viewed this.