Login Station
Posted
#197709
(In Topic #10967)

Full Member
Scratch build of station house in 4mm
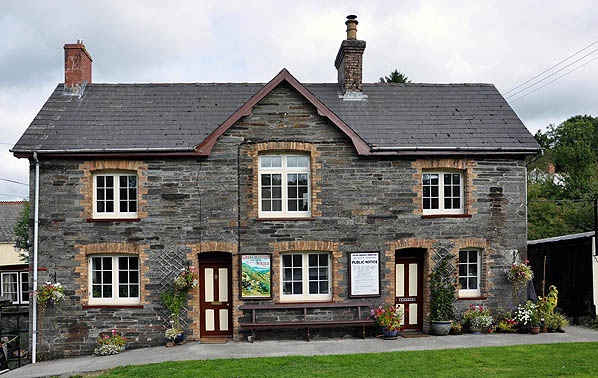
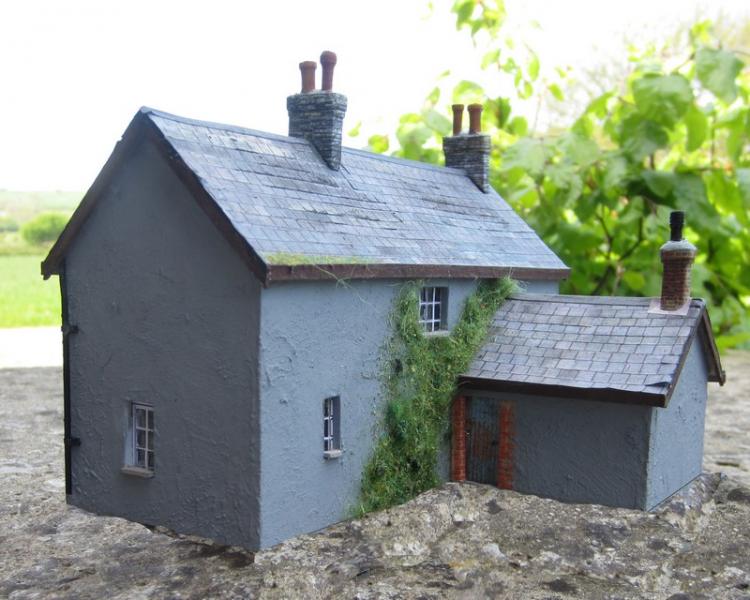
Peter Towns, a member here on YMR is in the process of restoring Login Station, one of the old stations on the old Cardi-bach - GWR Whitland to Cardigan line that closed in 1962. As part of the restoration, a couple of us are building a 4mm layout depicting Login station and environs as they were in their heyday.I elected to tackle the station house. This is the actual house as it is now:
Peter had taken all the relevant measurements so I drew up plans on the computer in Photoshop, printed them out and stuck them onto 2mm greyboard. Cut them out with the trusty Stanley…
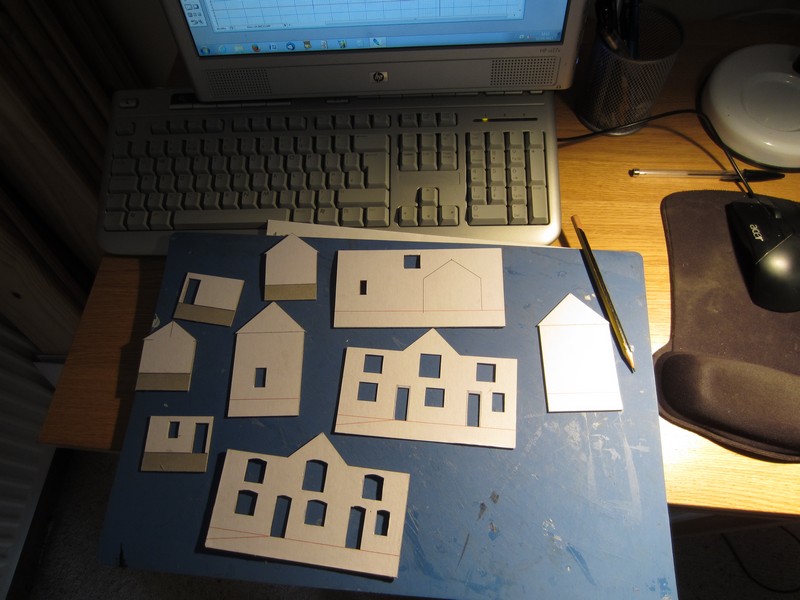
Covered the pieces where needed in slate/stone paper (CG textures Photoshopped) and stuck them together with UHU:
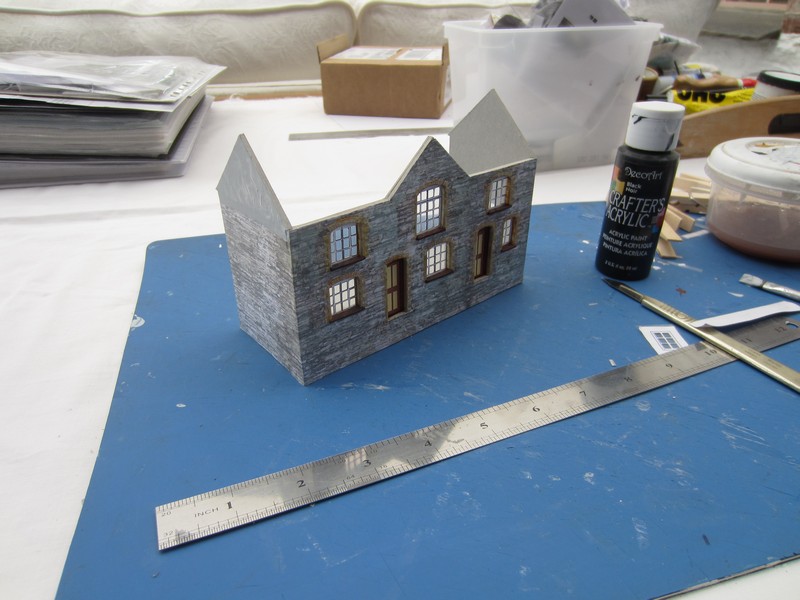
Windows were drawn in P'shop, printed onto sticky-backed photo paper, cut out and stuck onto clear plastic (top of a Tesco cake box).
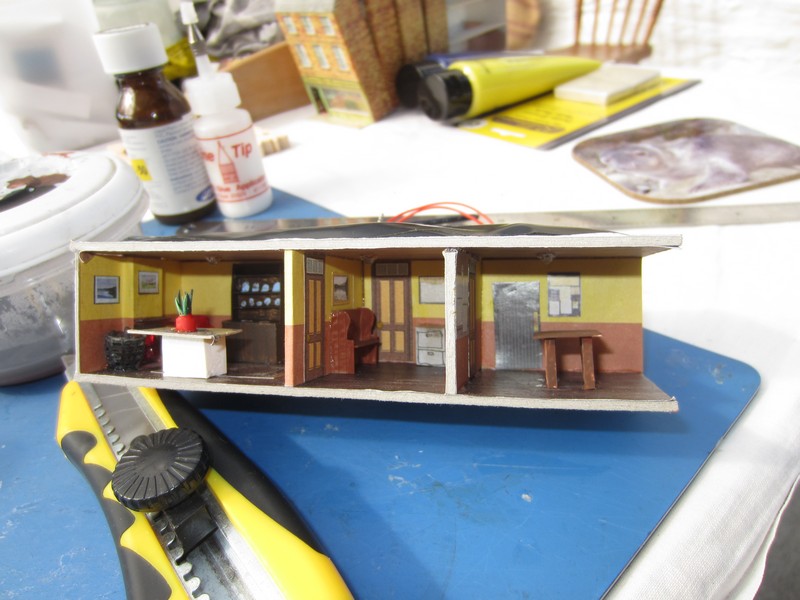
Internals came next, which was a labour of love, as they will never be seen in detail again - but I know they are there. First is the living room:
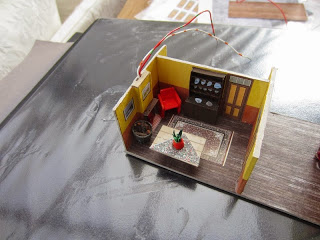
then the Station Masters office and the end room being the ticket office. Two rooms have flickering fires (LEDs from plastic tea-lights) and all three have ceiling lights. All LEDs with resistors and powered from a 6 volt plug-in transformer (50p from a charity shop):
This is the result:
Finally Scalescenes roof tiles were added, together with barge boards, chimneys and pots, and the whole lot protected with a coat of matt varnish.

Rear view, with the bottom 15mm 'shopped' out:
Any queries or criticisms, I'm happy to reply to.
ATB
Shaun.

Posted

Full Member
Well done
Cheers
Ron
 Last edit: by g0ibi
Proper Preparation makes for Perfect Performance!!
http://yourmodelrailway.net/view_topic.php?id=13331&forum_id=21
http://yourmodelrailway.net/view_topic.php?id=13331&forum_id=21
Posted

Inactive Member

You've made a beautiful job of it.

Max
Port Elderley
Port Elderley
Posted
Full Member
And an elephant… my first!
Posted

Full Member
Cheers
Andy
Andy
Posted
Full Member
Pete.
it was already on fire when I got here, honest!
Posted

Full Member
Posted
Full Member
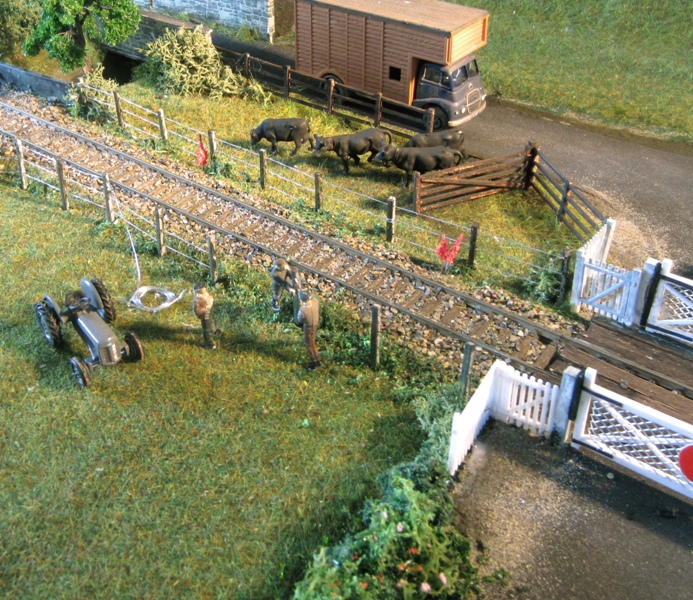
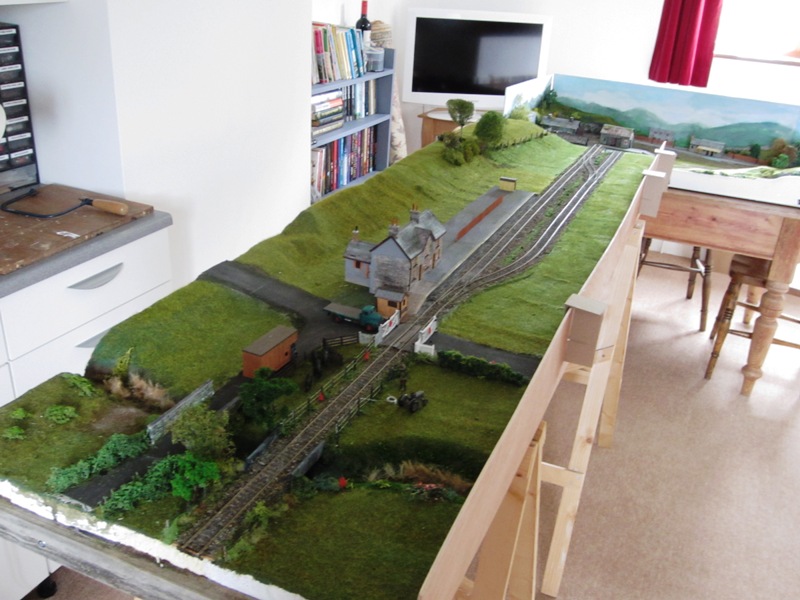
Around that time we started on the Login layout itself - the Station on a 7 x 2 board, with two 4 x 2 boards, one at either end as fiddle yards/potential extensions.
This was the start of the main board, last year when I had lots of 'shed' room:

For the next few months it went on hold, as we concentrated on building the Teifi Gorge layout. and various summer exhibitions.
Winter and the inclement weather got in the way, and then we decided to move, so the Login layout had a temporary home in a store room at Pats.
Finally last month we managed to move the board to the new house at Llechryd, and I started doing a bit more:

That was taken a week ago. Since then things have been slowly progressing:
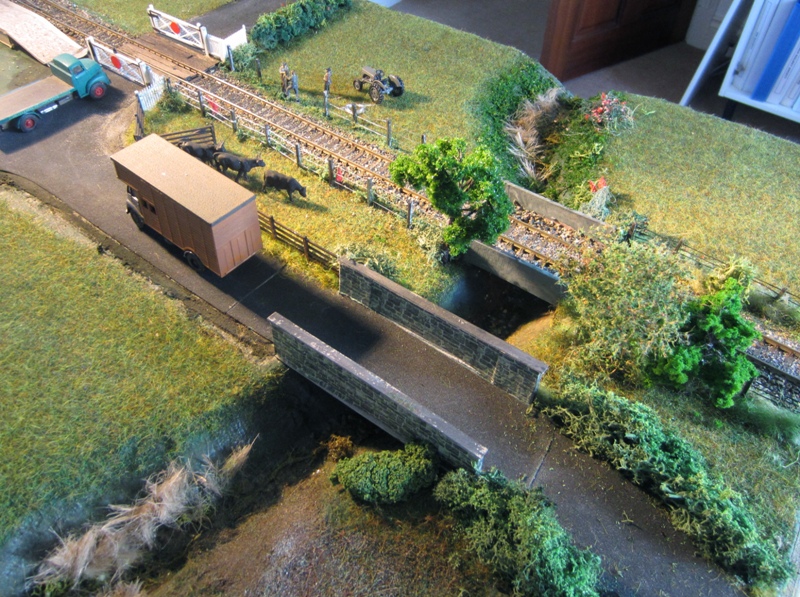
Only small cameo shots, as there is an awful lot of empty board across to the right!
More later,
Shaun.
Posted

Full Member
What did you use for the grass across the board?
Marty
Posted
Full Member
Posted
Full Member
Must have taken a while?
Marty
Posted
Full Member
I've done a bit more to the layout in the last day or two, the picture below shows progress (Sorry about the Teifi Gorge bit in the background - trying to juggle two balls at once…)
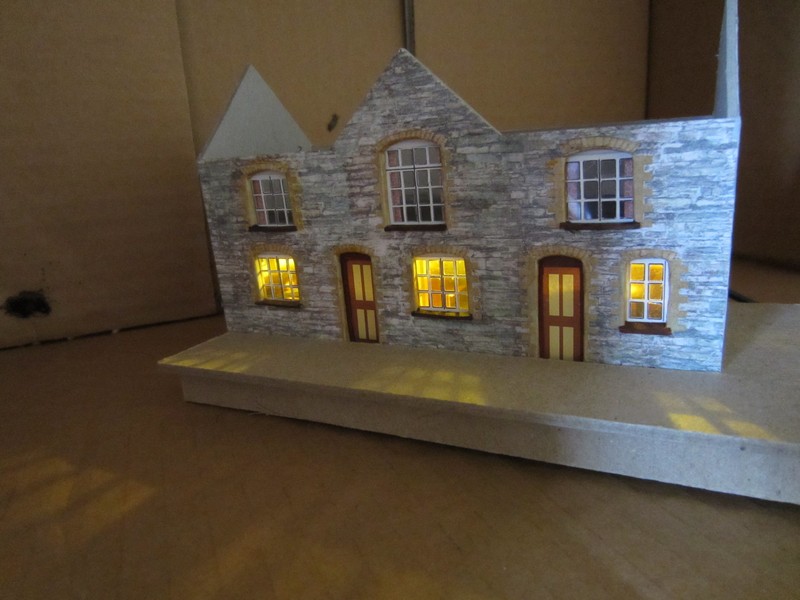
Login station is now stuck in place, but needs the ground to be built up around the sides and back. It's wired for lights, so I took a quick night-time shot:
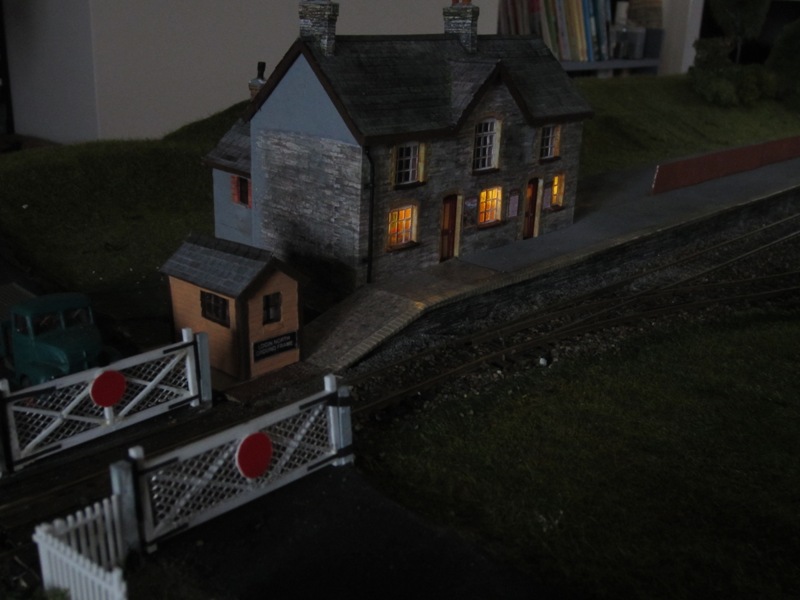
The middle room is the Station Masters office, and is furnished with a settle, filing cabinet, desk and fire - I tried to get a picture, but even set on macro, and with the lense touching the window, this is the best I could get:
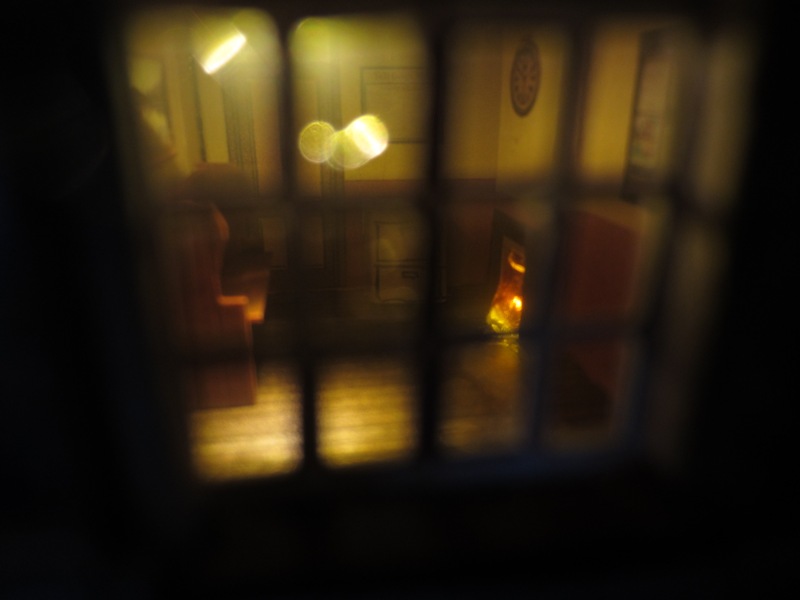
The fire flickers quite realistically, done by using the LED out of one of those imitation night-lights (8 for a pound. From… Poundland!)
Now up to date with Login.
Shaun.
Posted

Full Member
Very nice work, especially the meadows.
Nigel
©Nigel C. Phillips
Posted
Full Member
Oh the things we get pleasure from!
Shaun.
Posted

Full Member
I constantly marvel at the talent that is in our hobby.
Last edit: by amdaley
"The only stupid question is the one you don't ask"
Regards.
Tony.
Regards.
Tony.
Posted
Full Member
Terry
Last edit: by col.stephens
Posted
Full Member
Winsor & Newton matt varnish from their Galeria range. A 75ml bottle costs around a fiver. (Well, it should do - but I liberated mine from my wife's art cupboard)
It dries in minutes, and brushes can be cleaned in water.
Prior to that I used Wilko's matt varnish in a tin. Just as good, but I had to buy it instead of 'acquiring' it…
HTH,
Shaun.
Posted

Full Member
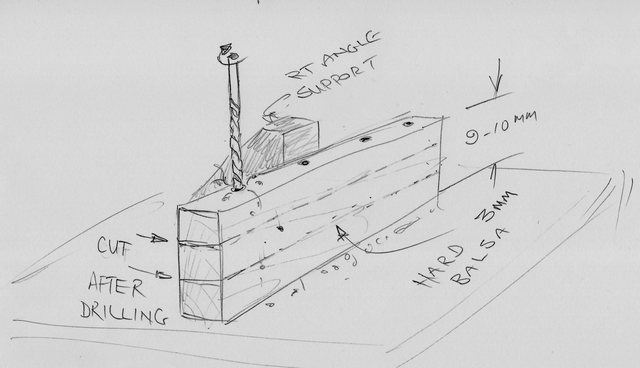
Hi again, Shaun, this scheme could cut down the matchstick drilling by 30%if you have a small pillar drill but you do need to keep 'up and downing' the bit to clear it…
Love the firelight effect etc! Where are the gates from, please?
Doug
Last edit: by Chubber
'You may share the labours of the great, but you will not share the spoil…' Aesop's Fables
"Beer is proof that God loves us and wants us to be happy" - Benjamin Franklin
In the land of the slap-dash and implausible, mediocrity is king
"Beer is proof that God loves us and wants us to be happy" - Benjamin Franklin
In the land of the slap-dash and implausible, mediocrity is king
Posted
Inactive Member
Love the fireplace.
Max
Port Elderley
Port Elderley
Posted
Full Member
I think I'll stick to doing them one by one Doug - I don't think my pillar drill is delicate enough!Hi again, Shaun, this scheme could cut down the matchstick drilling by 30%if you have a small pillar drill but you do need to keep 'up and downing' the bit to clear it…
Love the firelight effect etc! Where are the gates from, please?
Doug
The gates are home made - Drawn to scale on paper, double sided cellotape on top, and then made up from 2mm and 1.5mm square plastic strip stuck with MEK. Bit of gauze from a tea-strainer and red roundels cut from coloured card. You can then carefully peel off the backing paper.
HTH
Shaun.
1 guest and 0 members have just viewed this.