A Village General Shop after John Ahern.
Posted
#231337
(In Topic #12667)
Full Member
Another Ahern classic in card.
Here we go again… another John Ahern building on the way. This time I have decided to make the charming Village General Shop. There is a drawing of the building in the appendix to Miniature Building Construction. I have JA's 4mm scale drawing of the structure and will be working from this. Construction is much the same as my previous builds of John Ahern buildings so I doubt there will be any ground breaking surprises coming up. This is a small building and I anticipate that it will be completed a darn sight sooner than the Small Country Station (one year!)
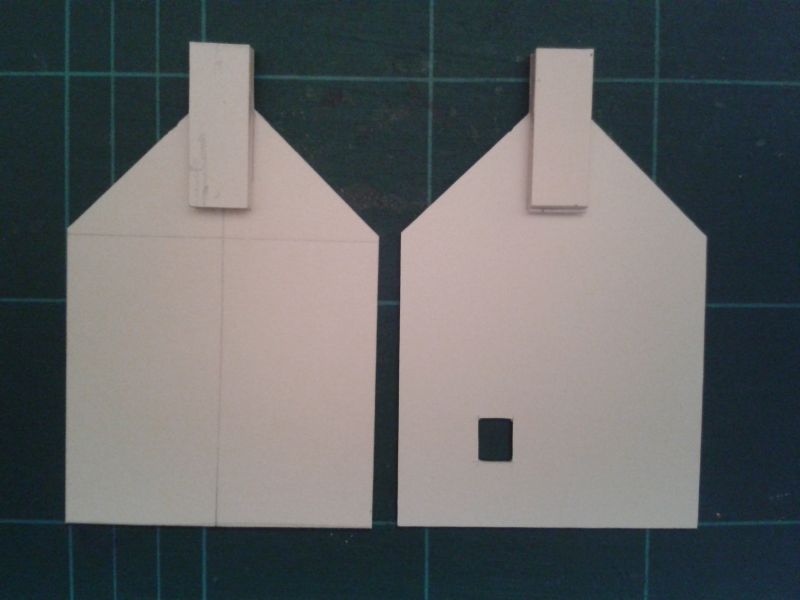
Today, I awoke early, descended the stairs, fed the cats, made a cup of tea and decided to dig out the 1.5mm mounting board. I began by drawing the ends. Contrary to what you see in the following photos, all pencil lines and cut edges are straight and have been drawn using a set square.

The front and rear of the building were drawn and cut out also. All corners of the windows and doors were pricked with a scriber before being cut out.
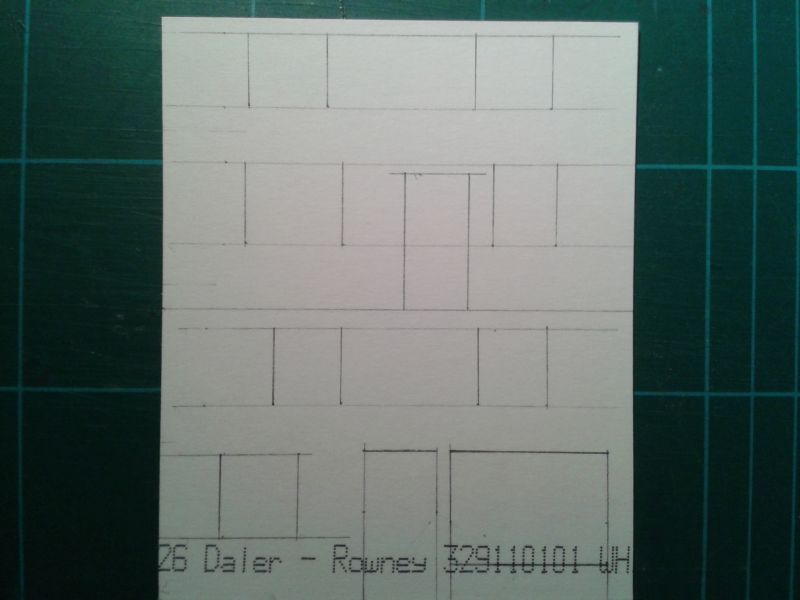

So, all of the cutting out was achieved by breakfast. Off to a good start. This is where we are at present…
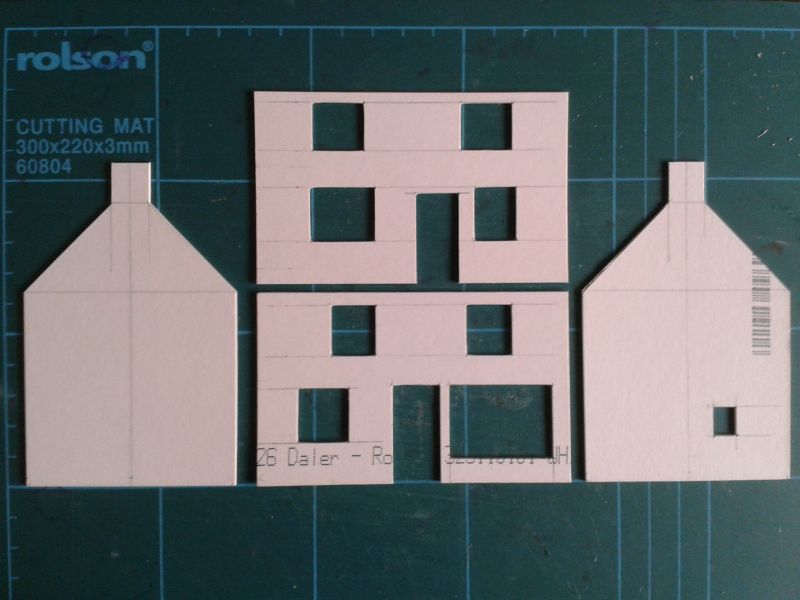
As usual, I will be using Scalescenes papers to cover the model. The rear will be covered with red brick whilst the front and sides will be covered in stucco. The Scalescenes papers are sprayed over with Testors Dullcote, a matt varnish, to protect the inkjet surface.
More soon.
Terry
 Last edit: by col.stephens

Posted
Full Member
Martin
Manifestly it is better to use simple tools expertly than to possess a bewildering assortment of complicated gadgets and either neglect or use them incompetently. ( L.T.C.Rolt)
Posted

Full Member
If I were able to call up the thread I did on a GWR engine shed from my tablet there is a sketch to explain same.
Doug
'You may share the labours of the great, but you will not share the spoil…' Aesop's Fables
"Beer is proof that God loves us and wants us to be happy" - Benjamin Franklin
In the land of the slap-dash and implausible, mediocrity is king
"Beer is proof that God loves us and wants us to be happy" - Benjamin Franklin
In the land of the slap-dash and implausible, mediocrity is king
Posted
Full Member
But a razor blade? There are those who would have the H&E police banging on your door!<G>
Martin
Manifestly it is better to use simple tools expertly than to possess a bewildering assortment of complicated gadgets and either neglect or use them incompetently. ( L.T.C.Rolt)
Posted
Full Member
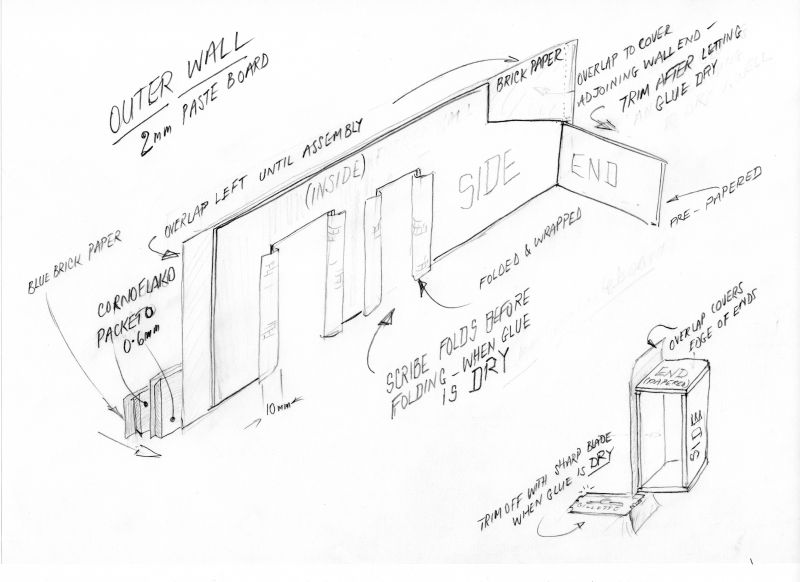
Martin, I simply wrap the brickpaper over the ends of each side and glue behind. Like this…
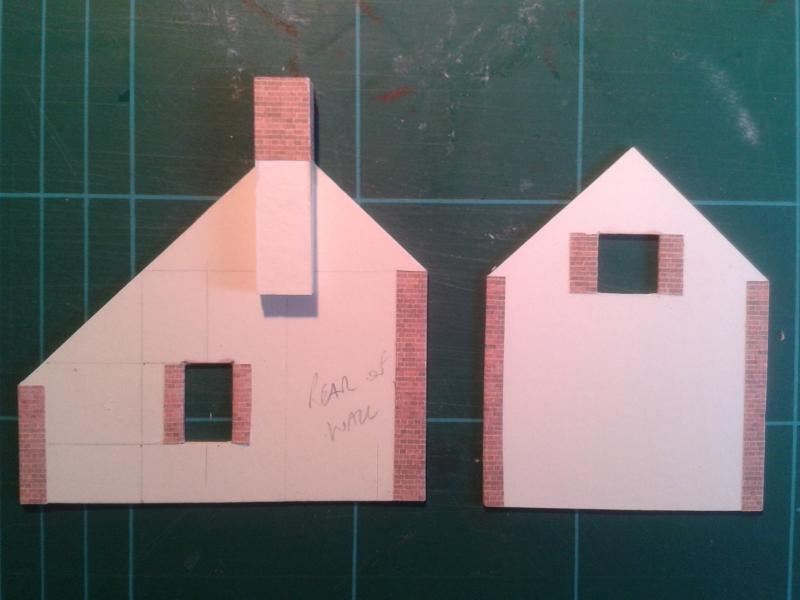
The corners are simply butted together. The join can often be covered with a downpipe. In any event, I always make sure that the brick courses line up. On the building below, the two outer joins are covered by the downpipes. The join in the centre of the photo is visible. I don't think the joins are too noticeable in 4mm scale from normal viewing distances.
Terry
Last edit: by col.stephens
Posted
Full Member
Doug, I shall have to try your method. Thanks for explaining.
Terry
Posted
Full Member
Cheers,
Martin
Manifestly it is better to use simple tools expertly than to possess a bewildering assortment of complicated gadgets and either neglect or use them incompetently. ( L.T.C.Rolt)
Posted
Full Member
I too have the book by George Iliffe Stokes, 'Buildings in Miniature', published by Peco for five shillings. I agree it is not an easy read. I also have 'The Peco Book of Model Buildings' by Mike Gill. I picked up a copy for £1 not long ago at a model railway show. I also have 'Modelling Buildings' by Malcolm J. Smith, a Pendon publication.
Terry
Posted
Full Member
I used to have the Pendon book on cottage building, but it disappeared in a move. Looking at some recent additions to Pendon in MRJ, I am inclined to stick with the George and John show! I wonder what George would have made of Foamex. He's bound to have used it if it were around back then.
I believe my dear bride has got me a book on using brick papers, for Christmas, ut I'm not allowed near it. It will go with another by Gordon Gravett that also turned up and was also hidden away till the 25th. She buys me books and music for Christmas. It stops me screaming abuse at the crap on the telly that she might be watching on the big day
Martin
Manifestly it is better to use simple tools expertly than to possess a bewildering assortment of complicated gadgets and either neglect or use them incompetently. ( L.T.C.Rolt)
Posted
Full Member
Tee-hee!Thanks, Doug. That would be a neat way of doing it, certainly.
But a razor blade? There are those who would have the H&E police banging on your door!<G>
Martin
If it was good enough for Mr Ahearn, s'good enough for me….

Copyright CV Russell and E Fells. Reproduced with their kind permissions.
and here, appropos the razor blade corner method, see lower right corner…
With apologies for semi-hi-jack, Terry,
Doug
Last edit: by Chubber
'You may share the labours of the great, but you will not share the spoil…' Aesop's Fables
"Beer is proof that God loves us and wants us to be happy" - Benjamin Franklin
In the land of the slap-dash and implausible, mediocrity is king
"Beer is proof that God loves us and wants us to be happy" - Benjamin Franklin
In the land of the slap-dash and implausible, mediocrity is king
Posted
Full Member
Posted
Full Member
Martin
Manifestly it is better to use simple tools expertly than to possess a bewildering assortment of complicated gadgets and either neglect or use them incompetently. ( L.T.C.Rolt)
Posted
Full Member
'You may share the labours of the great, but you will not share the spoil…' Aesop's Fables
"Beer is proof that God loves us and wants us to be happy" - Benjamin Franklin
In the land of the slap-dash and implausible, mediocrity is king
"Beer is proof that God loves us and wants us to be happy" - Benjamin Franklin
In the land of the slap-dash and implausible, mediocrity is king
Posted

Full Member
I like the razor blade holder design. I have similar in plastic. I use the blunt end for curving strips of paper (without the blade
 ). Pretty obvious which way the sharp end goes. Just have to remember which end is used for cutting. Is there a left-handed version?
Nigel
©Nigel C. Phillips
Posted
Full Member
Doug, thanks for the drawings. I'm going to give it a try on this current project.
Nigel, personally I always use a scalpel with a 10A blade for all my modelling projects.
Albert, I always use a glue stick. I reproduce here what John Wiffen who produces Scalescenes kits, says on his website on this subject:
Can I use spray glue to mount the prints?
"Having spent over twenty years working as a graphic designer, I really can't say I trust the longevity of spray glue, it does have a tendency to dry out and separate over time. After much experimentation, as unlikely as it seems I have found the best option by far for mounting the sheets on to card is the humble glue stick (I use UHU).
As long the back of the sheet is given a generous but even coat of glue, not only do glue sticks not wrinkle or bubble, but they also have the ability to be repositioned and smoothed for several minutes after application. After running a roller over the sheet, I have found gluestick adhesive to have excellent longevity."
Personally, I always run a small roller over the sheet once it has been applied with the glue stick. The rollers are available from craft shops. I also always construct the model on plate glass to ensure the building sits flat.
Hope this helps.
Terry
Last edit: by col.stephens
Posted
Full Member
Posted

Full Member
Cheap enough anyway, so it's false economy to try and make one last.
HTH
Shaun.
Posted
Full Member
Cheers,
Martin
Manifestly it is better to use simple tools expertly than to possess a bewildering assortment of complicated gadgets and either neglect or use them incompetently. ( L.T.C.Rolt)
Posted
Full Member
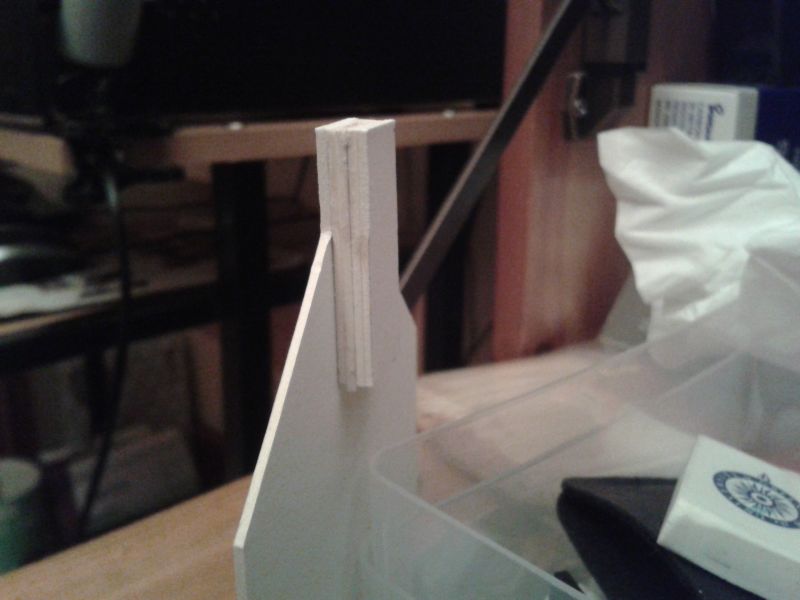
The two chimney stacks were made next by gluing four more pieces of mounting board to each chimney on the ends of the building. This gave the required thickness…
The brick was applied to the rear of the building and the stucco to the front and sides, using a glue stick. Note the 'wings' protruding from the ends, to cover the edges of the front and rear walls, as suggested by Chubber…


The windows will be added next.
More soon.
Terry
Last edit: by col.stephens
Posted

Full Member
Following along Terry, keep it coming.
cheers
Marty
1 guest and 0 members have just viewed this.