Jeff's (SRman) work bench and projects
Posted

Full Member
Staying on the thread Kevin.

Posted

Full Member
Michael
Posted

Full Member
There were some shared routes with Southdown along the coast, so we could see M&D occasionally in Brighton as well.
Jeff Lynn,
Amateur layabout, Professional Lurker, Thread hijacker extraordinaire
Amateur layabout, Professional Lurker, Thread hijacker extraordinaire
Posted
Full Member
As my father had worked at Ashford railway works, we always got a week's free travel on the trains in the summer, which meant a summer holiday of visits to local attractions in Kent, followed by the bus excursions. Happy days!
Neither of my parents drove, so it was public transport all the way, hence my love of trains and buses!
Thank you for rekindling some memories
Michael
Posted
Full Member
Staying on the thread Kevin.
Posted
Full Member
East Kent and Maidstone & District came under one management later on, but retained their separate identities.
Jeff Lynn,
Amateur layabout, Professional Lurker, Thread hijacker extraordinaire
Amateur layabout, Professional Lurker, Thread hijacker extraordinaire
Posted
Full Member
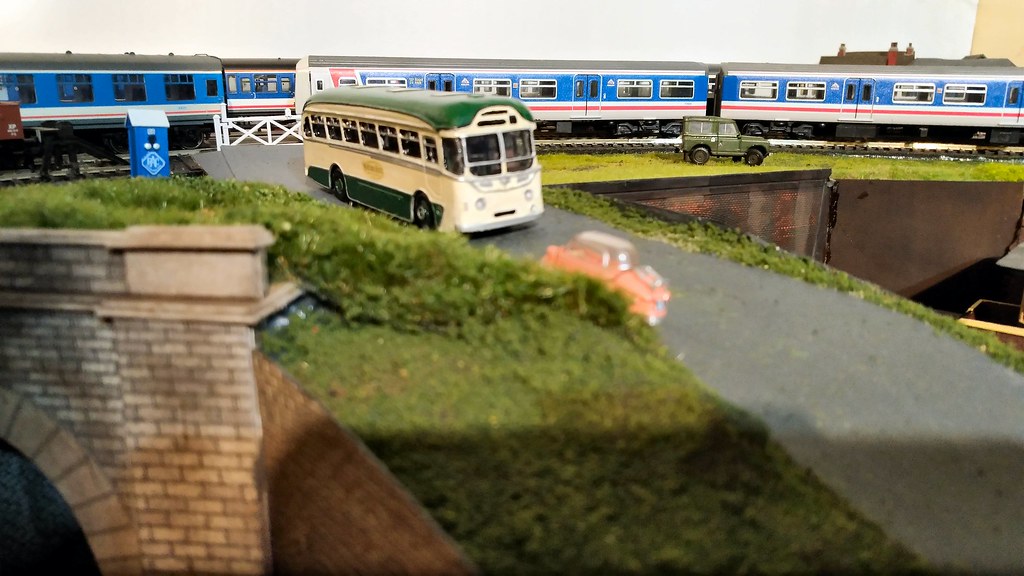
P_20181219_145545_vHDR_On by Jeffrey Lynn, on Flickr
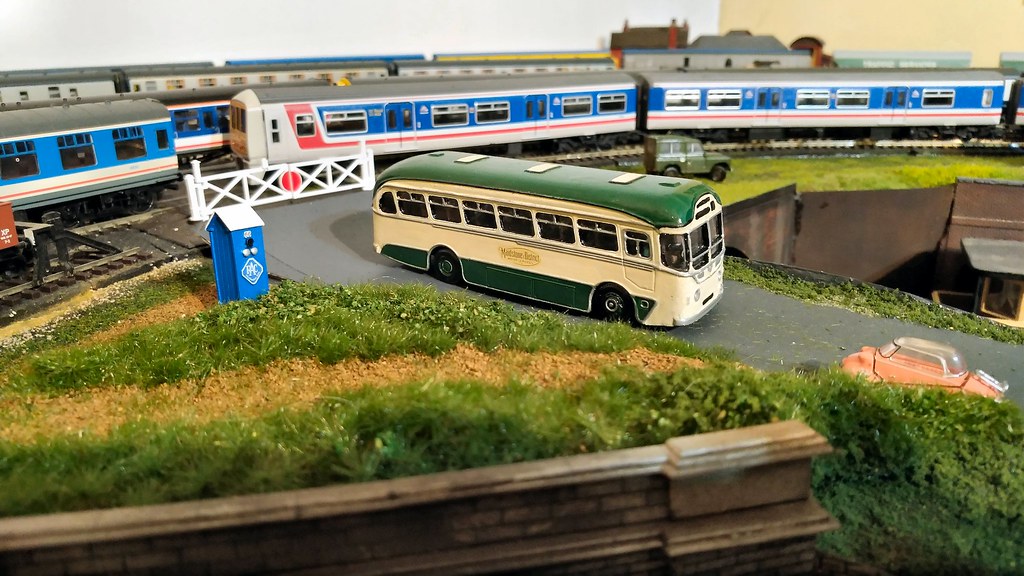
P_20181219_145600_vHDR_On by Jeffrey Lynn, on Flickr
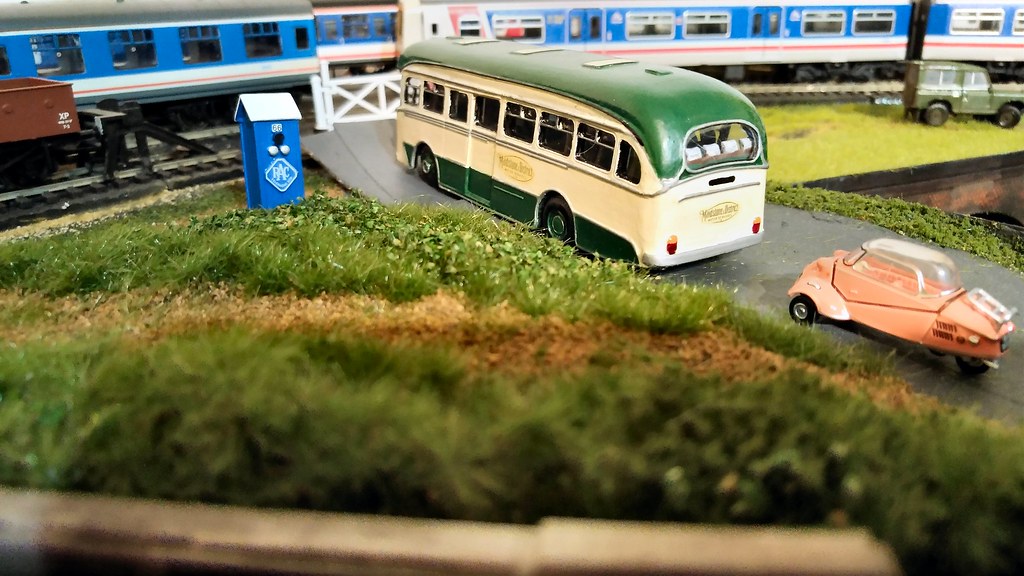
P_20181219_145636_vHDR_On by Jeffrey Lynn, on Flickr
Jeff Lynn,
Amateur layabout, Professional Lurker, Thread hijacker extraordinaire
Amateur layabout, Professional Lurker, Thread hijacker extraordinaire
Posted
Full Member
While my back has been limiting the amount of time I can spend leaning over the layout to do further work on that, I have been working through some of the bus kits I have languishing partly done on the workbench, or still in their boxes.
Yet another 'delayed' bus kit is this original Aubrey white metal kit for a Bedford VAL with Duple Viceroy bodywork. It has been languishing in the 'to do' pile for a good few years. I had glued the body shell together, and started the painting, but that was as far as I had gone.
I am doing it as a Shamrock & Rambler vehicle. It has now had another coat of paint, although there is much tidying up to do. One of the beauties of the white metal is it is much easier to 'polish' up the trim, which is also very convenient in tidying up the paint lines where they join.

P_20181221_182522_vHDR_On cropped by Jeffrey Lynn, on Flickr

P_20181221_182538_vHDR_On cropped by Jeffrey Lynn, on Flickr
Jeff Lynn,
Amateur layabout, Professional Lurker, Thread hijacker extraordinaire
Amateur layabout, Professional Lurker, Thread hijacker extraordinaire
Posted
Full Member
Staying on the thread Kevin.
Posted
Full Member
One uses a plastic Concept Models LT RF body, the other fits into the EFE BET standard buses - I pulled apart several models to allow swapping of bodies for different liveries to be used.
Lightweight bodies are preferable simply because the more weight there is, the quicker the batteries run down.
 Last edit: by SRman
Jeff Lynn,
Amateur layabout, Professional Lurker, Thread hijacker extraordinaire
Amateur layabout, Professional Lurker, Thread hijacker extraordinaire
Posted
Full Member
Staying on the thread Kevin.
Posted
Full Member

P_20190511_214111_vHDR_On by Jeffrey Lynn, on Flickr
The loco actually belongs to my good friend Doug. I gave Doug a Bachmann 36-568 6-pin decoder to use with the loco. The decoder sat rather loosely in the socket, and absolutely refused to be read, either on Doug's Digitrax system or my NCE system. I ended up bringing it home with me after the read failure on the Digitrax system, and swapped a rather anonymous blue shrink-wrapped decoder into it, and it worked first go. The decoder read as a Soundtraxx one, but further digging revealed it was the earlier, less sophisticated Bachmann 36-558 version (36-568 is a rather good Zimo product).
Anyway, Doug has a working locomotive on DCC, and I had a dud decoder. Or was it? I decided to test it in something else before writing it off. A Hatton's P class 0-6-0T was the perfect candidate, particularly as it already had a Bachmann 36-568 decoder in it, so I knew it was a workable combination. The swap was completed, the loco placed on the programming track, and it lived! I have no idea why it resisted all attempts on the J70.

IMG_20180607_204715 by Jeffrey Lynn, on Flickr
Jeff Lynn,
Amateur layabout, Professional Lurker, Thread hijacker extraordinaire
Amateur layabout, Professional Lurker, Thread hijacker extraordinaire
Posted
Full Member
After desoldering and removing all of the other wires, I tested the brushes and pickups to make sure they were not connected electrically in any way. All was going to plan now. The original PCB was discarded.
The next stage was to wire in a decoder. I chose a Lenz Standard+ decoder as being entirely suited to this job. Wiring the red and black wires to the trailing bogie pickups and the black to the small metal plate with that previously mentioned screw on the motor bogie, red to the pickups on the right-hand side (with the motor bogie trailing), completed the first bit. Orange and grey wires were connected to the brush plates on the faceplate circuit board. Another test on the programming track proved it all worked perfectly.
I have left the wires to the directional lights unconnected at present, because I am seriously contemplating replacing them with some bicoloured LEDs. The Lenz decoder has four functions, so can be wired to power the tail lights independently of the headlights.
Anyway, here she is: DB 120-160-7 ready for active service, although she won't meet the lighting standards for safety yet!

P_20190525_164041_vHDR_On by Jeffrey Lynn, on Flickr

P_20190525_164522_vHDR_On by Jeffrey Lynn, on Flickr
Jeff Lynn,
Amateur layabout, Professional Lurker, Thread hijacker extraordinaire
Amateur layabout, Professional Lurker, Thread hijacker extraordinaire
Posted
Full Member
I bought it knowing that one of the side windows was missing (it was accurately portrayed in the photos on eBay), and that the buffer beam cowlings were missing as well. I got it at a bargain price, considering it was sound-fitted, being a code 3 repaint of a factory-fitted Railfreight model. This is the super-detailed model with central can motor and flywheels driving all six axles (which is actually two more driven axles than the real locomotives have!).
The side window was reglazed with a suitable piece of clear plastic, but I will have to restore the handrail bars at some stage.
Initially it refused to run - something was sticking in the motor or transmission, but I got that cleared. Then there was a slight clicking as it ran, but it ran smoothly enough. Subsequently, it would stop occasionally with the driven wheels slipping but two of the axles not being driven. On investigation, I found that the two inner axles (one on each bogie) had so much side-play they were going out of engagement with the rest of the drive train gears. Removing the base plates of each bogie (each has six clips retaining it) showed that for some reason, Hornby have the axle gears near on the centreline, while all of the drive train gears are off-set to one side. When the axles were moving sideways, the gears were moving just enough out of line to lose engagement. The side frames of the bogies help to locate the axles and limit the side-play, but have a tendency to bow outwards slightly towards the ends. The sideframes have spigots that go into hollow posts projecting horizontally out from the inner bogie frame.
After some head scratching, I came up with the idea of trimming the ends off the hollow posts on one side only (the side opposite the sde the gears are on) of the main bogie frame, clipping off approximately 1mm or less from the outer ends to just close up the amount of side-play and forcing the axles over towards the gear train. I used a sprue cutter to do this.
Pushing the sideframes back into the spigots then clipping the base plates back on also locks the sideframes into place. The slight reduction in the width between sideframes has also limited the amount of side-play in the axles and means the loco now behaves properly with no loss of drive to any of the axles.
P_20190522_200045_vHDR_On by Jeffrey Lynn, on Flickr
Jeff Lynn,
Amateur layabout, Professional Lurker, Thread hijacker extraordinaire
Amateur layabout, Professional Lurker, Thread hijacker extraordinaire
Posted
Full Member
I dug out the HMRS pressfix transfers, which were an exact match for the size of numerals. I carefully applied a strip of Tamiya masking tape below the remaining numeral and aligned it very carefully so it was parallel to the footplate. Then, to make sure there were no slight colour differences, started with the '8' from the HMRS sheet, then worked on the numbers on either side.
I am aware that the spacing has gone slightly adrift, but I will fix that before varnishing the cabside again and blending the weathering back in.
The first pic shows the 'before' with the slightly sloping number, the next two show it as it is before I do further fixing up.
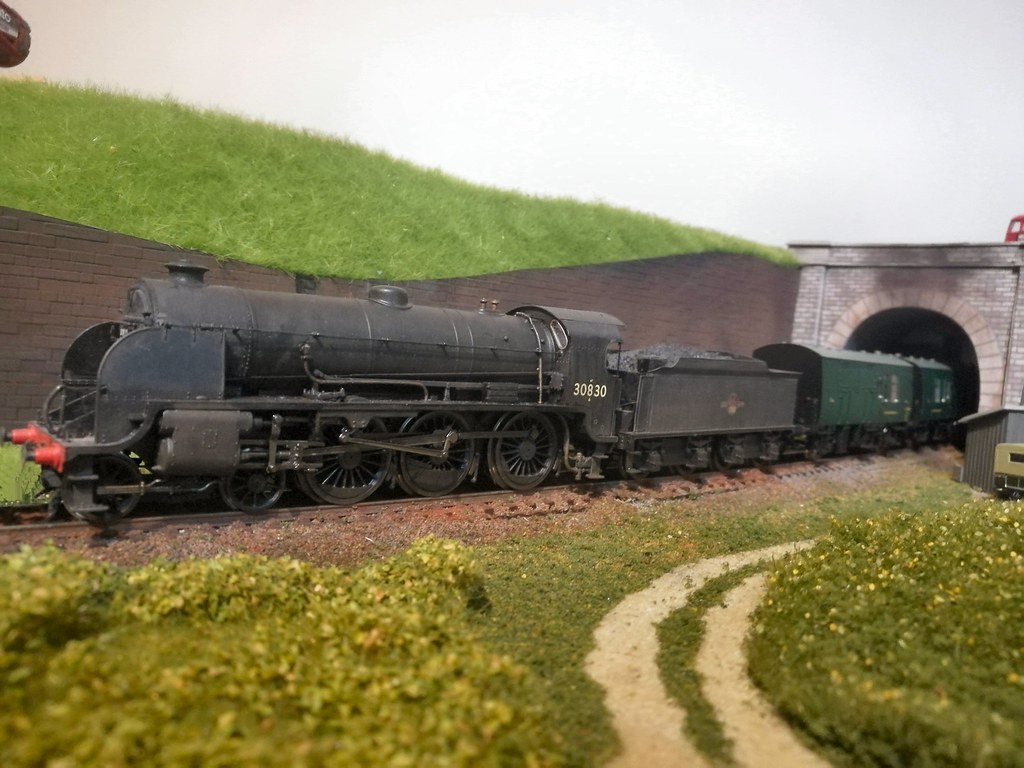
S15 edited by Jeffrey Lynn, on Flickr

P_20190628_210003_vHDR_On by Jeffrey Lynn, on Flickr

P_20190628_210019_vHDR_On by Jeffrey Lynn, on Flickr
Jeff Lynn,
Amateur layabout, Professional Lurker, Thread hijacker extraordinaire
Amateur layabout, Professional Lurker, Thread hijacker extraordinaire
Posted
Full Member
Here is the 'before' for the cab roof shape:

P_20190309_121728_vHDR_On by Jeffrey Lynn, on Flickr
And the 'after', as it stands now. Western Talisman is posed beside Western Explorer to show what I think it should look like once I refine the shape a little further.

P_20190707_162431_vHDR_On by Jeffrey Lynn, on Flickr

P_20190707_162443_vHDR_On by Jeffrey Lynn, on Flickr
Western Talisman also features some home made wire brake rigging and adapted (hacked!) Heljan mouldings for the brake blocks.
Jeff Lynn,
Amateur layabout, Professional Lurker, Thread hijacker extraordinaire
Amateur layabout, Professional Lurker, Thread hijacker extraordinaire
Posted
Full Member
Staying on the thread Kevin.
Posted
Full Member
Of course, much of the time was spent talking to people, seeing as it is really about PR rather than modelling, but I completed the two Metcalfe Models station clocks, seen here upside down or sideways, because one is a roof-mounted clock and the other is wall-mounted, built the Ancorton sleeper-bult hut, and fitted glazing into two Smallbrook Studios LSWR brake vans. I glued the roof onto one, but the other needs a little more fettling before I do so for that one.
One of my fellow BRMA members on the stand very kindly soldered a white metal bus body together for me. This particular bus kit from RTC Models for an Optare Vecta has been giving me trouble for some considerable time, and resulted in being put back into the 'too hard' basket every time I pulled the kit out again! Anyway, I now have no excuses for not completing the model in due course.

P_20190825_093954_vHDR_On by Jeffrey Lynn, on Flickr
Last edit: by SRman
Jeff Lynn,
Amateur layabout, Professional Lurker, Thread hijacker extraordinaire
Amateur layabout, Professional Lurker, Thread hijacker extraordinaire
Posted
Full Member
Staying on the thread Kevin.
Posted
Full Member
Jeff Lynn,
Amateur layabout, Professional Lurker, Thread hijacker extraordinaire
Amateur layabout, Professional Lurker, Thread hijacker extraordinaire
1 guest and 0 members have just viewed this.