Jeff's (SRman) work bench and projects
Posted

Full Member
The floor is also done, using a light earth colour initially, but that also will be darkened and mixed with other effects.
Once I have the basic colours in place, some dry-brushing and weathering powders will also play a part in it.
Kevin: don't be afraid to try painting with a number of different techniques and even different types of materials and textures. If it goes wrong (i.e. you don't like the effect), start again. If your coats of paint are reasonably thin and smoothly applied, just paint over it all with a suitable base colour and start from there. If the paint is too roughly applied, use a suitable paint stripper, then start at square one again.
 Cambrian Kits Sturgeon A Painting Progress - 1 cropped by Jeffrey Lynn, on Flickr
 Cambrian Kits Sturgeon A Painting Progress - 2 cropped by Jeffrey Lynn, on Flickr
Note that the photos show the wagon in the very early stages of finishing, so the edges are quite crudely done at this point.
The photos also showed me that one of the door bumpers has dropped off, so I'll have to find a spare and glue it in place.
 Last edit: by SRman
Jeff Lynn,
Amateur layabout, Professional Lurker, Thread hijacker extraordinaire
Amateur layabout, Professional Lurker, Thread hijacker extraordinaire

Posted

Full Member
Staying on the thread Kevin.
Posted
Full Member
That's the stage it is at now, but there is more work to do, including brushing some weathering powders of various browns and blacks in. The idea is to simulate a well-used wagon, based on some photos of the real ones, where most of the woodwork is distinctly grey in colour, although the whole wagon was originally black. Later liveries include olive green and engineer's 'Dutch' livery (grey and yellow).
 Cambrian Kits Sturgeon A Painting Progress - 3 cropped by Jeffrey Lynn, on Flickr
 Cambrian Kits Sturgeon A Painting Progress - 4 cropped by Jeffrey Lynn, on Flickr
For both of my Sturgeon A wagons, I made up some 'old' rail loads. The rails were sprayed with red oxide undercoat then partly overpainted with darker 'rust' colours - it doesn't matter if the rails change colour over their length, it adds to the effect. The rails were glued to some strips of plastic card, representing wooden battens. These were painted a dark brown colour, but they are barely visible most of the time anyway. The photo shows the rail load before I had cleaned up some sheets of surplus glue.
 Cambrian Kits Sturgeon A Rail Load cropped by Jeffrey Lynn, on Flickr
Jeff Lynn,
Amateur layabout, Professional Lurker, Thread hijacker extraordinaire
Amateur layabout, Professional Lurker, Thread hijacker extraordinaire
Posted
Full Member
Last edit: by Passed Driver
Staying on the thread Kevin.
Posted

Full Member

Posted
Full Member
I am still working on the paint and weathering. A brush-over with some mid-earth coloured then some dirty black powders has toned things down a bit, although I think the blacks on the wagon are a little too bold, still, and need to be faded down a spot more. I have set it up in a short train with the previously done Sturgeon A for comparison.
 Cambrian Kits Sturgeon A Painting Progress - 5 by Jeffrey Lynn, on Flickr
 Cambrian Kits Sturgeon A Painting Progress - 6 by Jeffrey Lynn, on Flickr
Jeff Lynn,
Amateur layabout, Professional Lurker, Thread hijacker extraordinaire
Amateur layabout, Professional Lurker, Thread hijacker extraordinaire
Posted
Full Member
Best wishes. Kevin
Staying on the thread Kevin.
Posted
Full Member
Hi Jeff. Now that you have nearly completed the “ Sturgeon “ , are there anymore Sea Creature wagons that you have to do? ie the Whale Walrus, Mermaid etc.
Best wishes. Kevin
I have a predecessor for the Seacow/Sealion types, a Southern Railway 47 ton ballast hopper still under construction. It's not an easy kit to build, so it is sort of on hold for now! I don't think these received a fishy name, but they probably should have.
The ballast brake in the photos is a Cambrian Kit converted from an SECR 'dance hall' brake van (Cambrian provide the extra bits and instructions in the kit).
In the past, I built a shark ballast plough brake van, and a grampus wagon (both Parkside kits).
I think the rest of the 'fish-kind' wagons I own are ready to run examples: sealions and seacows from Lima, Bachmann and Hornby, dogfish from Heljan, and more sharks from Hornby, plus Hornby's rudd and tope wagons.
Of course, I have also built a few other animal types too: GWR minks A & D, an iron mink (rebuilt and tarted up from a Ratio kit I built many years ago) and the more recent beetle.
I suppose I could consider a salmon rail wagon …
Jeff Lynn,
Amateur layabout, Professional Lurker, Thread hijacker extraordinaire
Amateur layabout, Professional Lurker, Thread hijacker extraordinaire
Posted
Full Member
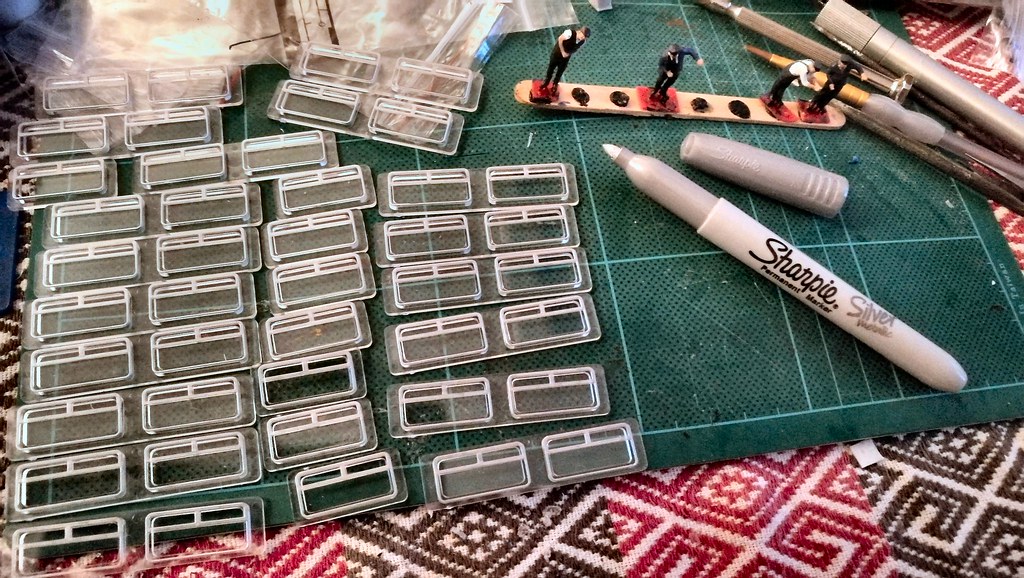
Painting the Window Frames - 1 by Jeffrey Lynn, on Flickr
Jeff Lynn,
Amateur layabout, Professional Lurker, Thread hijacker extraordinaire
Amateur layabout, Professional Lurker, Thread hijacker extraordinaire
Posted
Full Member
Staying on the thread Kevin.
Posted
Full Member
Anyway, I have inserted the windows in the first coach, a TSO, and no problems have shown up at all. As always, I have used Krystal Klear as the glue for the windows.
Fitting the Windows - 2 by Jeffrey Lynn, on Flickr
​Fitting the Windows - 1 by Jeffrey Lynn, on Flickr
Jeff Lynn,
Amateur layabout, Professional Lurker, Thread hijacker extraordinaire
Amateur layabout, Professional Lurker, Thread hijacker extraordinaire
Posted
Full Member
Staying on the thread Kevin.
Posted
Full Member
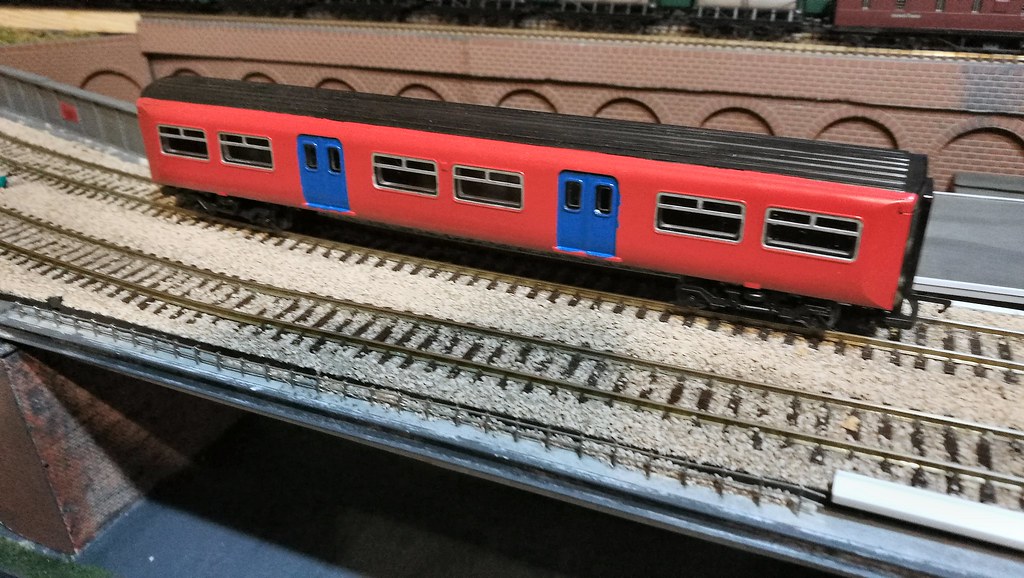
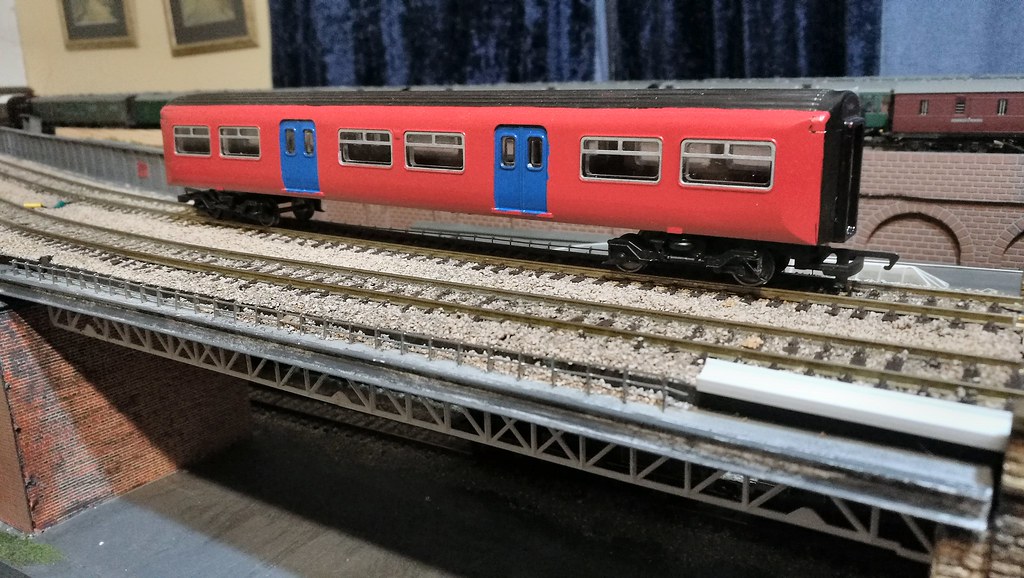
The front end painting is still very rough, and can't really be completed properly until the vinyls arrive and I can match the colours to the vinyls.
Fitting the Windows - 5 cropped by Jeffrey Lynn, on Flickr
Fitting the Windows - 4 by Jeffrey Lynn, on Flickr
Jeff Lynn,
Amateur layabout, Professional Lurker, Thread hijacker extraordinaire
Amateur layabout, Professional Lurker, Thread hijacker extraordinaire
Posted
Full Member
Staying on the thread Kevin.
Posted
Full Member
Jeff Lynn,
Amateur layabout, Professional Lurker, Thread hijacker extraordinaire
Amateur layabout, Professional Lurker, Thread hijacker extraordinaire
Posted
Full Member
Posted
Full Member
Yes, all those 'fish-kind' names used for telegraphic codes might have something to do with it! ;)Something's fishy about those wagons
I also have shark, rudd, tope, seacow and sealion types in the stock drawers.
Not to mention the rest of the menagerie, with a beetle, some minks and a toad!

Jeff Lynn,
Amateur layabout, Professional Lurker, Thread hijacker extraordinaire
Amateur layabout, Professional Lurker, Thread hijacker extraordinaire
Posted
Full Member
Posted
Full Member
Hi Jeff. Thank you for your reply. I didn’t mean removing the window , but just carefully painting.a silver colour to represent the top of the window. Best wishes. KevinHi Kevin, I have done so in the past, but that tends to let dust into the insides of the coaches after a while, so I tend not to do that nowadays.
Staying on the thread Kevin.
Posted
Full Member
Hi Jeff. Thank you for your reply. I didn’t mean removing the window , but just carefully painting.a silver colour to represent the top of the window. Best wishes. Kevin
I have done that too, Kevin, but it isn't always convenient on some models - it depends on their construction.
I had to replace a missing window once on a Hornby 08 shunter bought cheaply off eBay because of that and a damaged handrail: I simply cut some clear plastic to fit half the window and painted the silver top bar before gluing it in.
Jeff Lynn,
Amateur layabout, Professional Lurker, Thread hijacker extraordinaire
Amateur layabout, Professional Lurker, Thread hijacker extraordinaire
1 guest and 0 members have just viewed this.