Jeff's (SRman) work bench and projects
Posted

Full Member
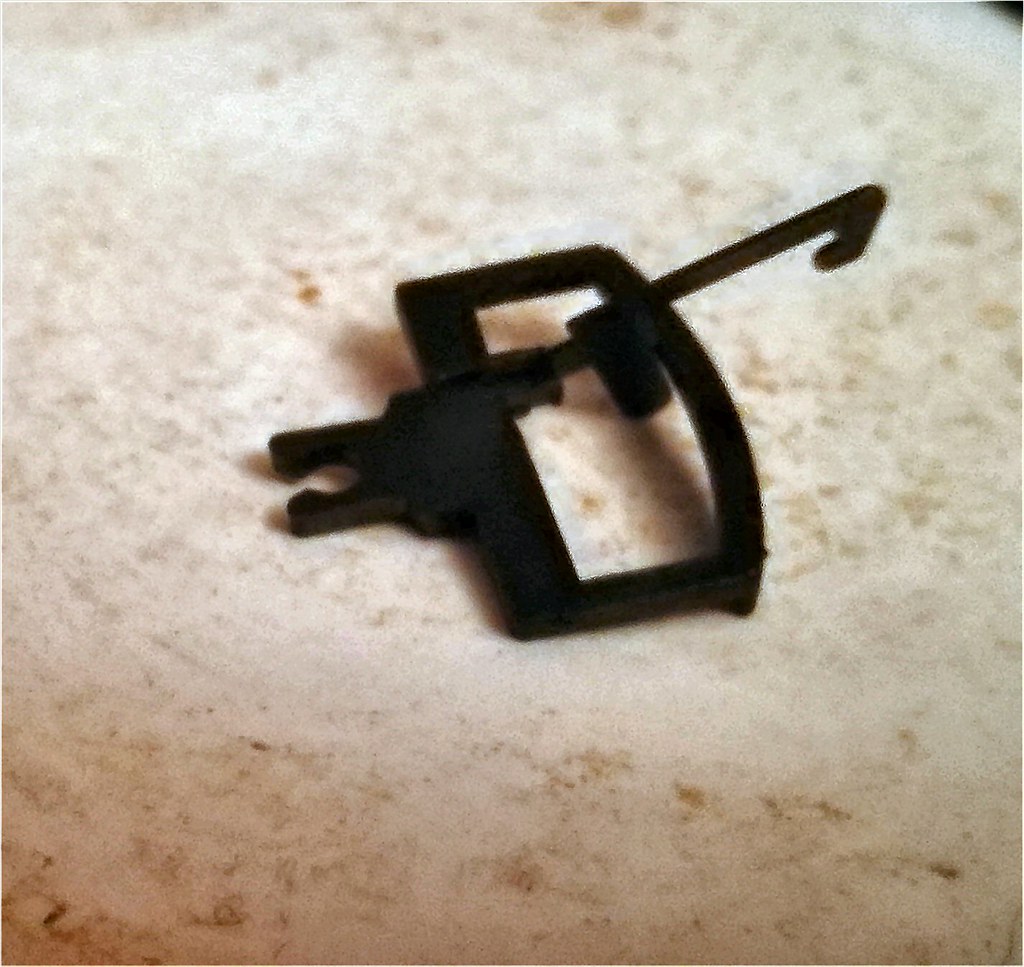
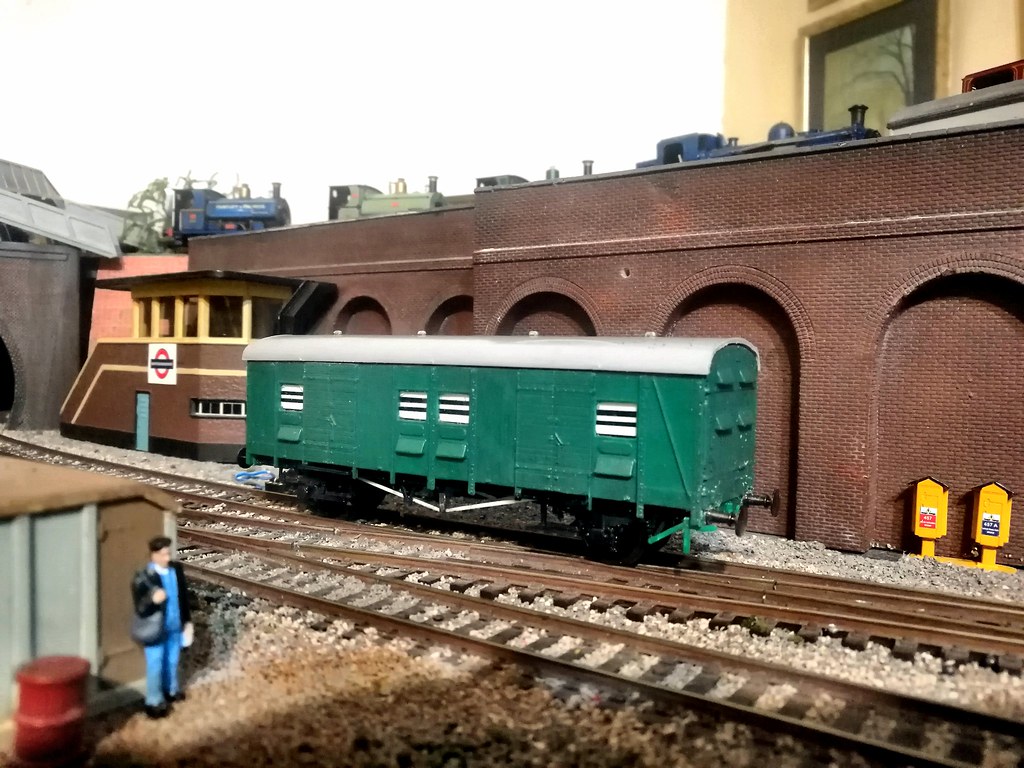
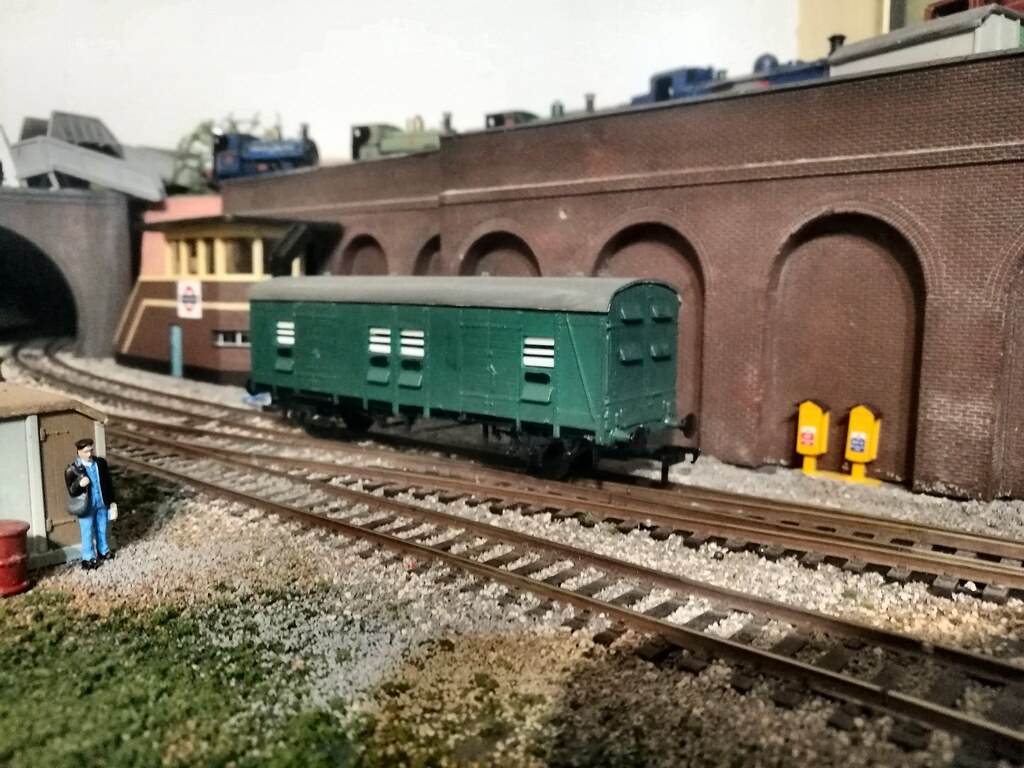
The original coupling type, removed from the wagon:
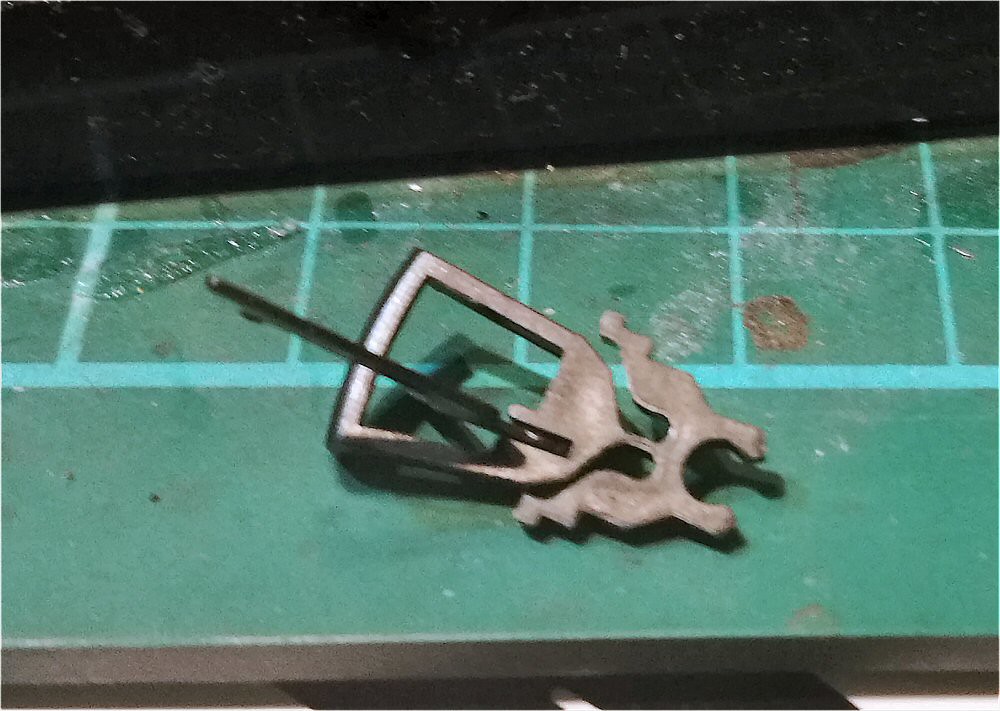
The replacement ex-Pullman coupling:
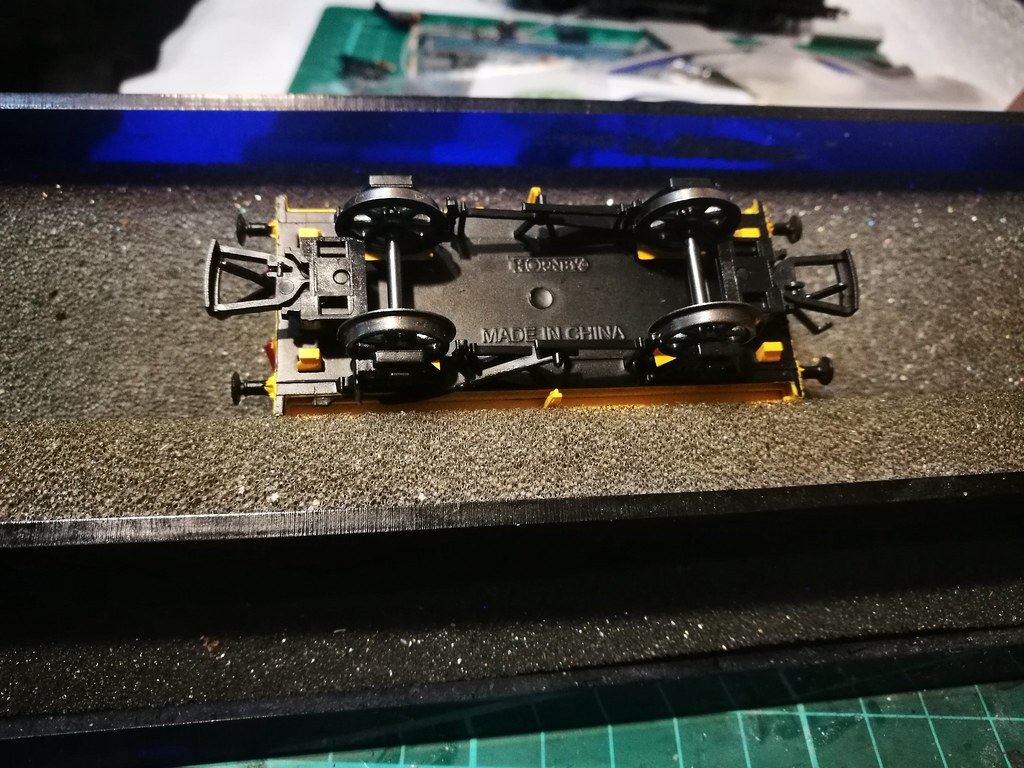
The underside of the wagon with the replacement couplings in place.
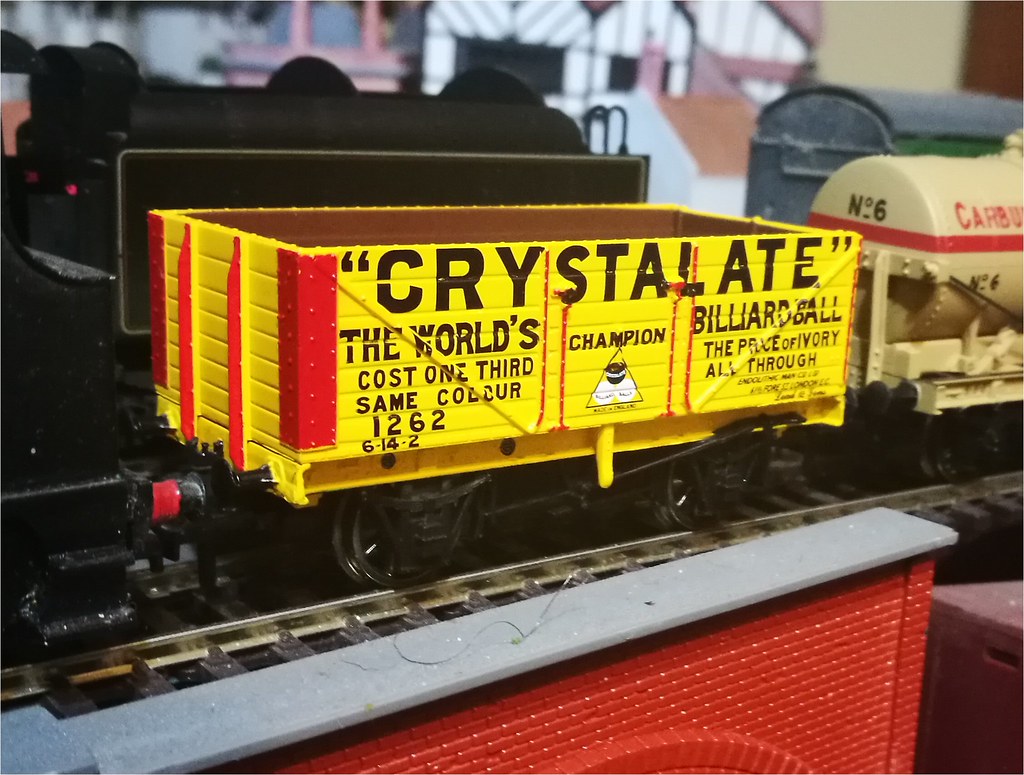
And the wagon as it is now. I'm much happier with it with the finer couplings. Perhaps it could do with a little weathering, but then again, a lot of my other P. O. and railway company wagons also need that.
Jeff Lynn,
Amateur layabout, Professional Lurker, Thread hijacker extraordinaire
Amateur layabout, Professional Lurker, Thread hijacker extraordinaire

Posted
Full Member
I am extremely proud to announce I got it to work.
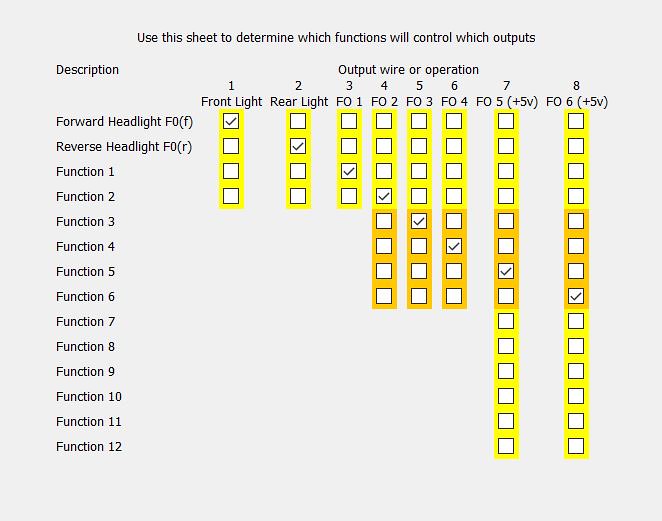
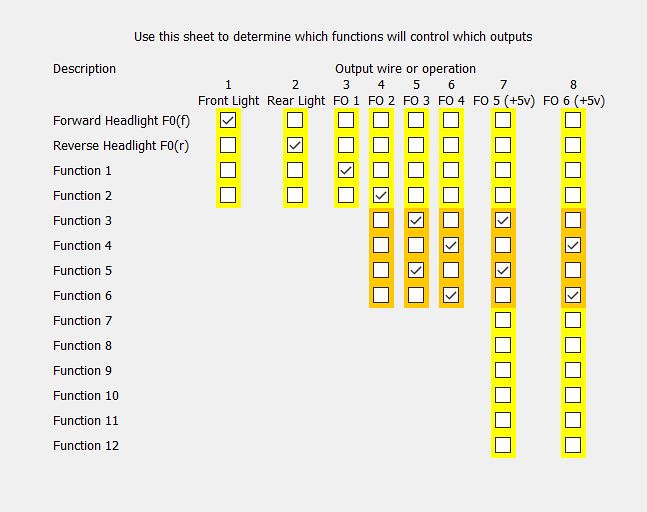
I started by programming a value of 3 into CV8, then 3 into CV 124 (actually already in there but I wanted to be sure). Then I moved to JMRI Decoder Pro to read the functions, and changed a few checkboxes. The screen shots below were actually a dummy run to duplicate the settings as I didn't take screen shots while I was actually doing the programming. The first shot is the "before" and the second is the "after" - the area with the orange highlight is the section I was playing with.
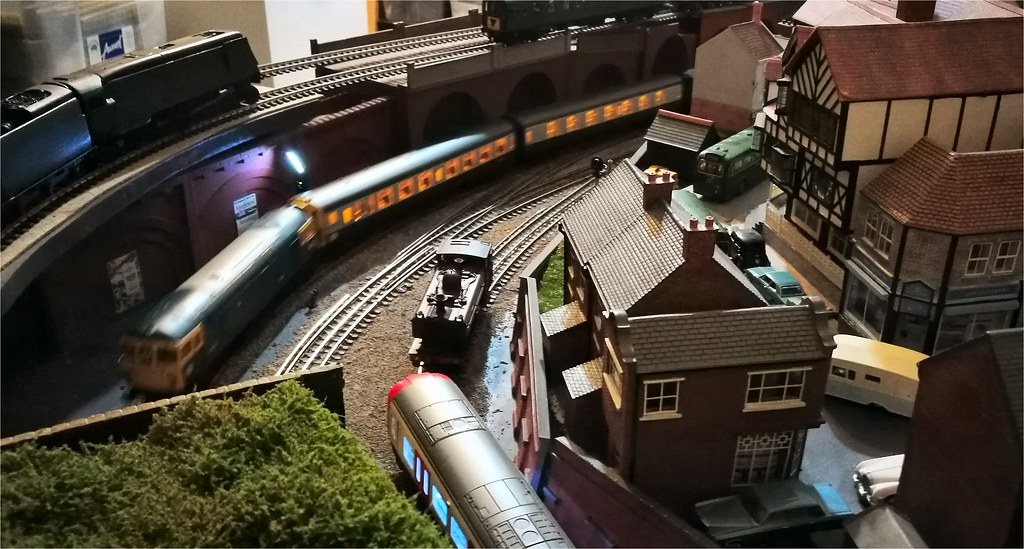
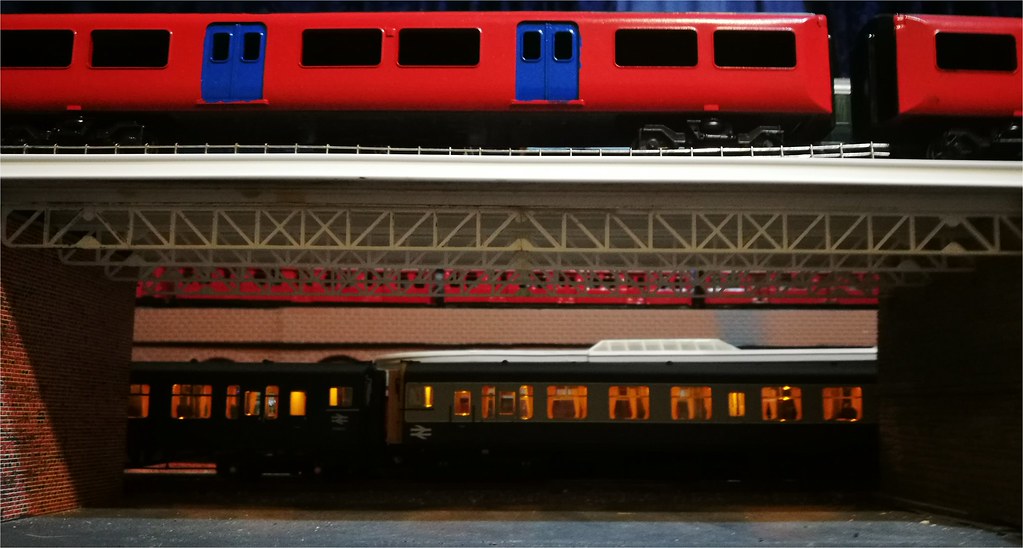
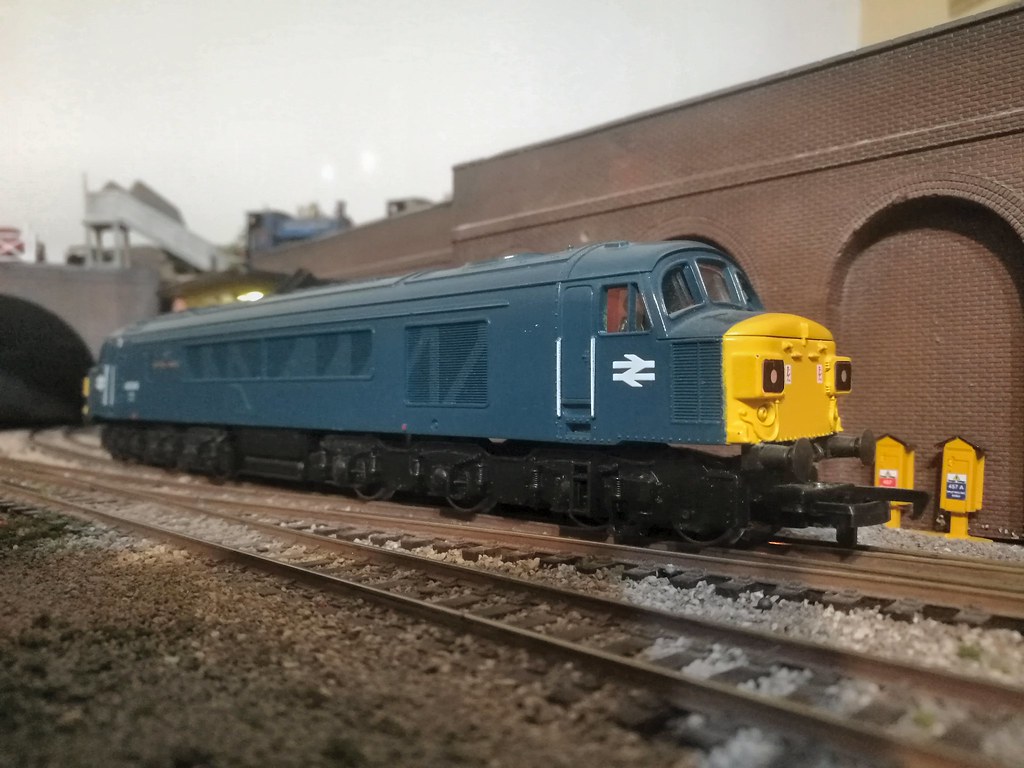
The upshot of all this is that both units now have operable interior lights. The following shots and video show the combined train in action, with blue unit 416 (with Lenz Silver 21 decoder) leading blue/grey unit 404 (with the Zimo decoder), propelled by Heljan 33/1 D6520 with legomanbiffo sound (ESU LokSound). The video also shows bif's drive lock feature in action; the speed is held while the engine has been ramped up to full thrash. The interior lights on the Lenz decoder work on F5, while the Zimo one works them on F3. I didn't want to tempt fate by fiddling further to try to get them on the same F keys!
[yt]sAeQqLp4E-A[/yt]
Jeff Lynn,
Amateur layabout, Professional Lurker, Thread hijacker extraordinaire
Amateur layabout, Professional Lurker, Thread hijacker extraordinaire
Posted

Full Member
Staying on the thread Kevin.
Posted
Full Member
This gives me yet another minor variation on the SECR/SR style CCTs and PMVs.
Jeff Lynn,
Amateur layabout, Professional Lurker, Thread hijacker extraordinaire
Amateur layabout, Professional Lurker, Thread hijacker extraordinaire
Posted
Full Member
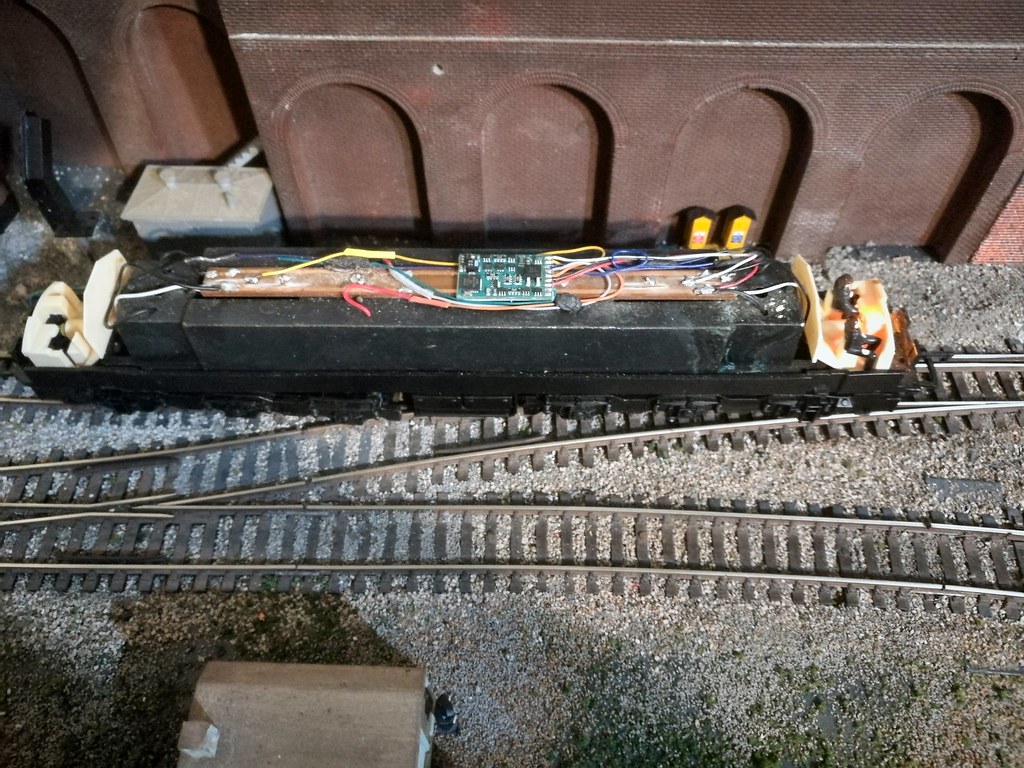
I needed a fairly thin decoder but the footprint was unimportant as there is lots of room in that regard; a Lenz Standard+ decoder with the 8-pin plug cut off was what was required. I analysed the fairly simple PCB and wiring to see what was needed. The brush wires were easily identified and desoldered, then the orange and grey wires were soldered to those. The track feed wires were soldered to the PCB bus tracks at each end, again easily identified and left alone. The red and black decoder wires were soldered to the relevant PCB tracks (red to the right).
The trickiest bits were isolating the headlights, which had a small side track on the PCB and what I thought were resistor in line, but were more probably diodes. I cut the side tracks with a slitting disc in the Dremel, then soldered the white wire to the point where the diode connected to the headlight wire, and did the same with the yellow wire at the other end. The blue common return was connected to both ends, to the desoldered return wires for the headlight bulbs.
A test showed that the motor worked on DCC, but the wheels desperately needed cleaning. That task accomplished, I then tried out the directional headlights; forwards worked but reverse did not. At that point I decided that I had done enough for the night, so ran the loco back and forth a few times on the main lines, then took the photos. For some reason all of the photos came out slightly fuzzy, but they'll do for now. I'll deal with the non-working light tomorrow.
After this, I need to cut off the body-mounted buffer beams and put them where they should be, on the bogies. I'll see if I can eliminate that bogus gutter line too.
Jeff Lynn,
Amateur layabout, Professional Lurker, Thread hijacker extraordinaire
Amateur layabout, Professional Lurker, Thread hijacker extraordinaire
Posted
Full Member
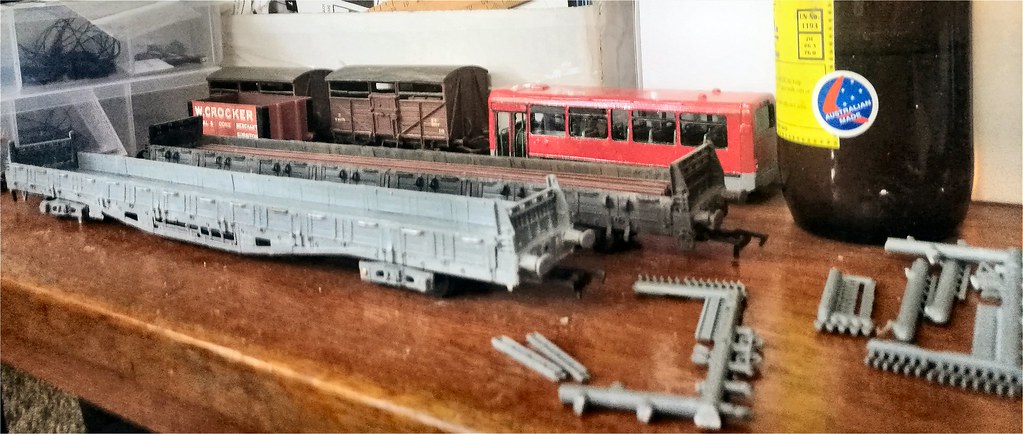
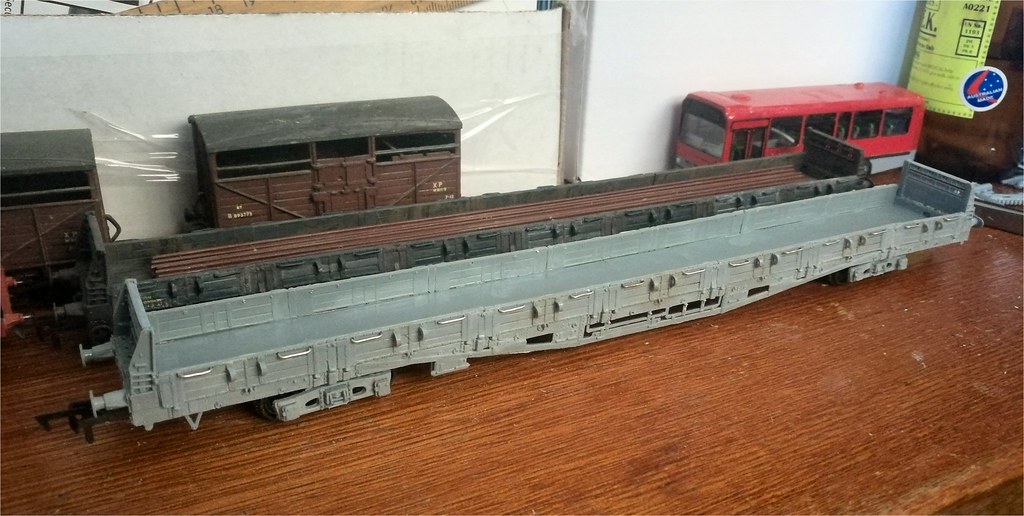
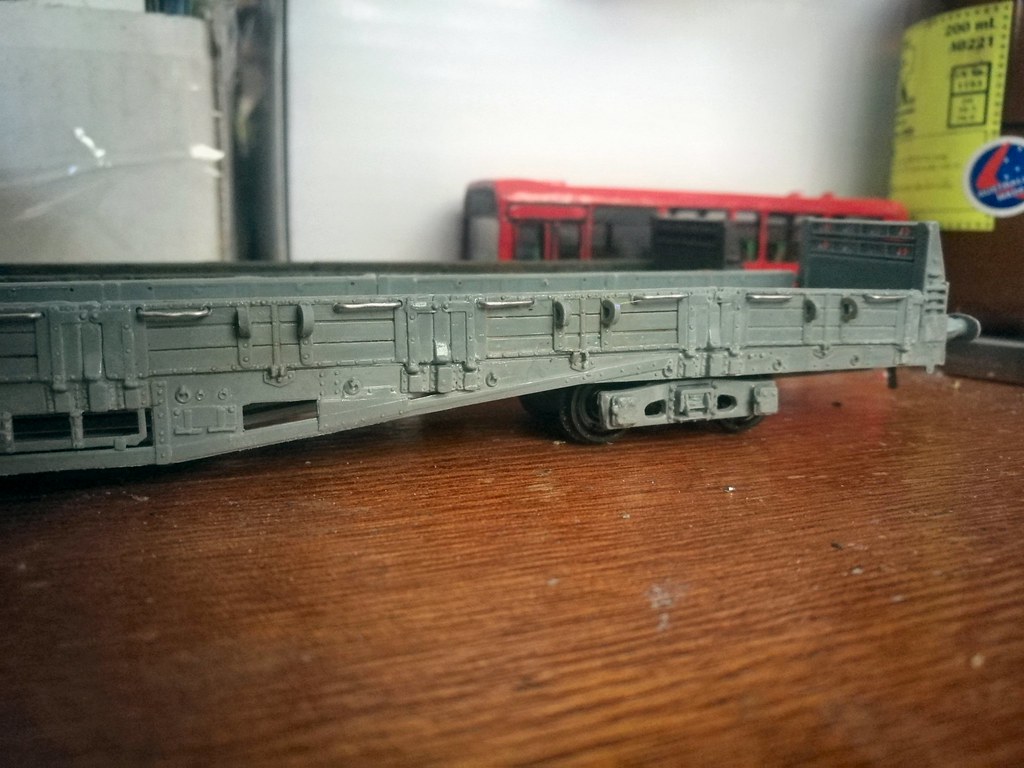
the third wagon has been sitting around for a little longer, but I chose to do it last night as a 'quickie' job. I'm still painting the underframe bits, but it is coming along rapidly. All that remains to do is a little retouching of the ironwork on the wooden underframe, and the fitting of Parkside NEM coupling adapters and some suitable Bachmann or Hornby couplings.
Jeff Lynn,
Amateur layabout, Professional Lurker, Thread hijacker extraordinaire
Amateur layabout, Professional Lurker, Thread hijacker extraordinaire
Posted
Full Member
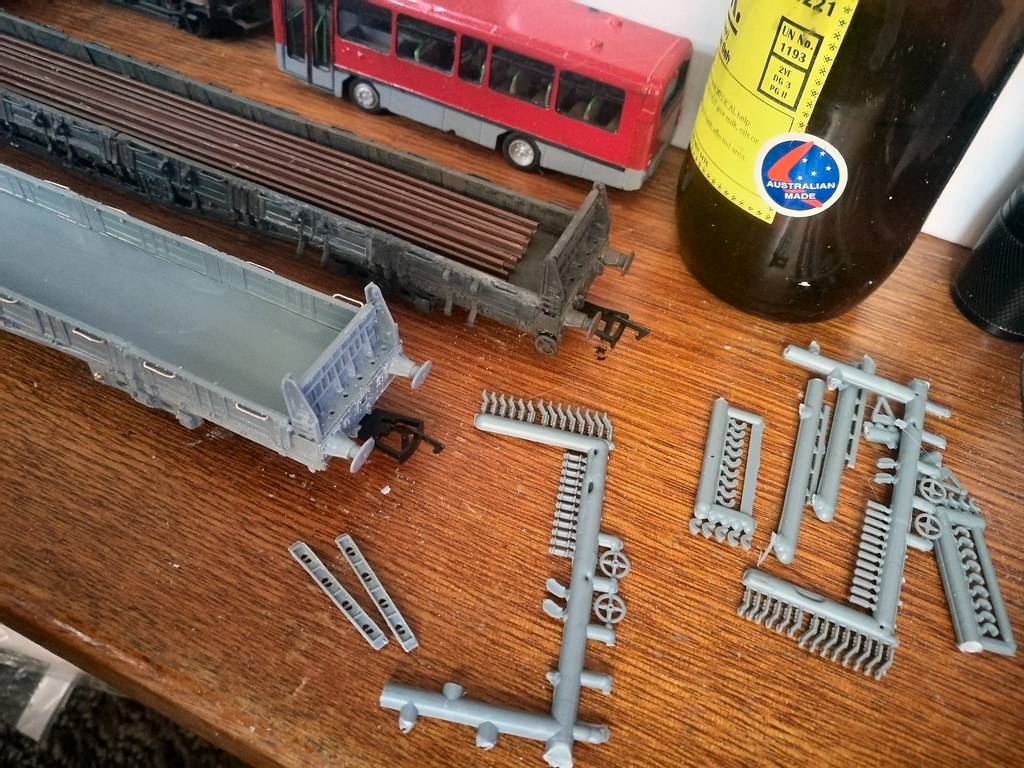
In the meantime, we have just had an air conditioner installed, which has meant I could do some indoor modelling in the cooler environment (over 40 degrees C outside). I started tackling the second of the two Cambrian Kits Sturgeon A wagons I bought over a year ago (maybe even longer). While not a difficult kit, it does have some fiddly and repetitive stuff to do - 28 handrails to be bent and fitted, 28 door bumpers and 28 door stop springs at solebar level. The first wagon took me ages to do these, but this one has progressed quite quickly, with some swearing when bits pinged off into the carpet, or failed to stick after several attempts at gluing while holding them in position. The First wagon was posed behind it, more because I was using that to see what I had done before where the instructions were a little unclear.
Anyway, the first three pics show the wagon under construction with the sides and handrails fitted, and some of the parts still on sprues, while the last two also show the door bumpers in place and a close-up of the detail in the mouldings (also showing my less than perfect fitting of the parts!).
Jeff Lynn,
Amateur layabout, Professional Lurker, Thread hijacker extraordinaire
Amateur layabout, Professional Lurker, Thread hijacker extraordinaire
Posted
Full Member
There is a small amount of brake rodding still to apply, and, of course, the window glazing, which has to wait for the painting to be completed first.
 exGWR Beetle - 1 by Jeffrey Lynn, on Flickr
 exGWR Beetle - 2 by Jeffrey Lynn, on Flickr
Jeff Lynn,
Amateur layabout, Professional Lurker, Thread hijacker extraordinaire
Amateur layabout, Professional Lurker, Thread hijacker extraordinaire
Posted
Full Member
Staying on the thread Kevin.
Posted
Full Member
With the Beetle, I found the brake shoes were annoyingly fragile, and I broke several of them getting them off the sprues. Fortunately, I didn't lose any bits, unlike with the earlier LNER horse box, where one of the door opening dampers sprang off into the wild blue (well, motley brown) yonder of the carpet! I never found that bit again, and carved a replacement out of some 20 thou plastic card, using the remaining kit one as a template.
 Last edit: by SRman
Jeff Lynn,
Amateur layabout, Professional Lurker, Thread hijacker extraordinaire
Amateur layabout, Professional Lurker, Thread hijacker extraordinaire
Posted
Full Member
Staying on the thread Kevin.
Posted

Full Member
Happy kit building and I'm looking frward to the many Parkside builds waiting for me.
The race train looks just great Jeff.
Best,
Bill
At 6'4'', Bill is a tall chap, then again, when horizontal he is rather long and people often used to trip over him! . . . and so a nickname was born :)
Posted
Full Member
:cheers
I wish Parkside and Cambrian would include a few extras of the small, delicate bits. Things like torpedo vents for the roofs are also easily lost, although i do have spares for them. The Sturgeon A was another case in point; the 28 door bumpers and springs have a habit of flying off too. I had to make a few bits up from plastic card of various thicknesses.
Last edit: by SRman
Jeff Lynn,
Amateur layabout, Professional Lurker, Thread hijacker extraordinaire
Amateur layabout, Professional Lurker, Thread hijacker extraordinaire
Posted
Full Member
Staying on the thread Kevin.
Posted
Full Member
I was fitting emergency braking rods to the Shirescenes etched brass coach ends to fit the Ratio 4 wheelers, as part of my Clifton Downs autocar bash.
Cheers,
Bill
At 6'4'', Bill is a tall chap, then again, when horizontal he is rather long and people often used to trip over him! . . . and so a nickname was born :)
Posted
Full Member
Best wishes. Kevin
Staying on the thread Kevin.
Posted
Full Member
 exGWR Beetle - 4 by Jeffrey Lynn, on Flickr
 exGWR Beetle - 5 by Jeffrey Lynn, on Flickr
The Cambrian Sturgeon A has also had coats of grey undercoat and semi-matt black, with more hand-painting to go.
Jeff Lynn,
Amateur layabout, Professional Lurker, Thread hijacker extraordinaire
Amateur layabout, Professional Lurker, Thread hijacker extraordinaire
Posted
Full Member
Staying on the thread Kevin.
Posted
Full Member
The Beetle only had adapters for the older style tension lock couplings, and no couplings actually supplied. I used Parkside's own NEM fishtail adapters and Bachmann couplings in the NEM pockets. The LNER horse box actually had the NEM adapters included in the kit, but otherwise the same thing applied.
One thing to note, though, is that the Parkside NEM pocket adapters are designed to be used with the Bachmann cranked couplings, a policy I disagree with entirely. I use bits of sheet plastic card to pack the coupling height using standard straight couplings, which means that if I ever require it, I can change to any other fishtail style NEM couplings, such as the Kadee #17 - 20 types later on.
Jeff Lynn,
Amateur layabout, Professional Lurker, Thread hijacker extraordinaire
Amateur layabout, Professional Lurker, Thread hijacker extraordinaire
Posted
Full Member
Staying on the thread Kevin.
1 guest and 0 members have just viewed this.