Brendan's Workbench.
Posted

Full Member
Some sand houses instead used shrouded conveyor belts fitted with pockets, which is what the plans I'm working to call for both for conveying the dry sand to a loco's sand dome and for bringing sand in from the outside bunker.


Posted

Full Member
Sounds intriguing. Post some pictures as it develops.
Nigel
©Nigel C. Phillips
Posted
Full Member

I got the clapboards finished…
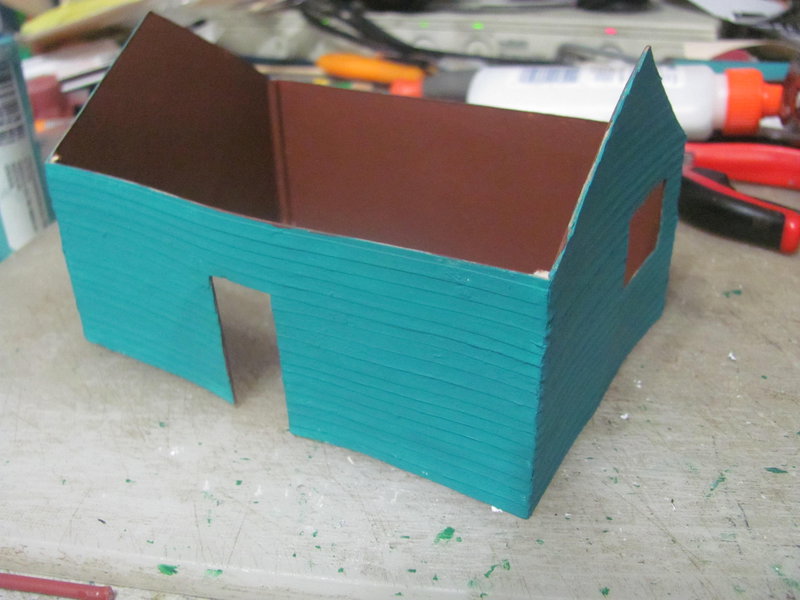
And the house painted. I chose seafoam green like the water tank for the exterior.
 Last edit: by ZeldaTheSwordsman
Posted
Full Member

Got back to working on the scratchbuilt tender finally. One bogie well underway.
Posted
Full Member

So, I got started on drilling holes for the rivet detail in the tender. A bit tedious, especially since I'm having to use a pushpin to drill.
I've got one side done so far. It's kinda messy, but eh. So be it.
Posted
Full Member
More patience than I have. Good work. One "tool" that I found useful for doing this sort of thing is a blunt dart tip ("arrows", beloved of pubs). Take the dart, remove flights, round-off tip with a file or emery (or even better a bench grinder). The tips are made from hardened steel to withstand bouncing off the wire in dartboards (and the pub walls and floors). Rivet makers depend on a hard tip (harder than tin, regular steel or brass) and a depression for the "rivet" head to go into. Plus some means of aligning the metal being "riveted". Piece of cork works well with the dart tip. I used a small hammer, the amount of bang required is not a lot.
My Metalsmith riveter is a precision piece of gear, with machined heads for HO/OO, S and O, and corresponding depressions in what must be R65+ steel dies that ensures even rivet spacing as the work progresses, plus adjustment for pressure applied. Cheap it wasn't, and fiddly to use, but it works well with styrene and brass/ nickel silver. It will not work with strips, they curl as they go through the process. I still use it for odd shapes. Decals take 5-10% of the time. I'm normally finished in the time it takes to set the riveting pressure pressure and die head position for the rivet spacing. Method of choice these days.
Nigel
©Nigel C. Phillips
Posted
Full Member
I've done the other side now, so I'm almost done poking these holes. I'm happy about that, my thumb is going to be sore for a week from doing this. I wish I had a proper riveting tool, even if it was of a lesser caliber than yours.
Posted
Full Member
First, I've filled in all those rivet holes with rivets. I glued snippets of brass wire into the holes, one by one, then ground them all down when I was done. I've also almost got the coal retainer walls on (the right-hand side is being a nuisance)
The pilot is also progressing again. I've made inroads on building the steam chest, and on the separate cowcatcher section.
Posted

Full Member
Cheers
Andy
Andy
Posted
Full Member
Posted
Full Member
Great progress. Thimble would have helped a lot.
Nigel
©Nigel C. Phillips
Posted
Full Member
Posted
Full Member
Forgot to mention it - that pilot is coming along nicely. Looking forward to the cowcatcher.
Nigel
©Nigel C. Phillips
Posted
Full Member
EDIT: Time for it for real this time. I hope.
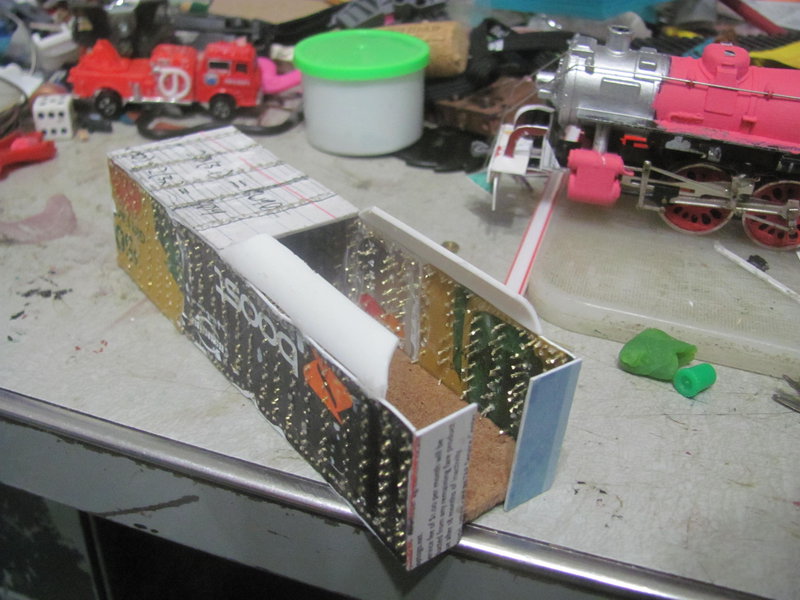
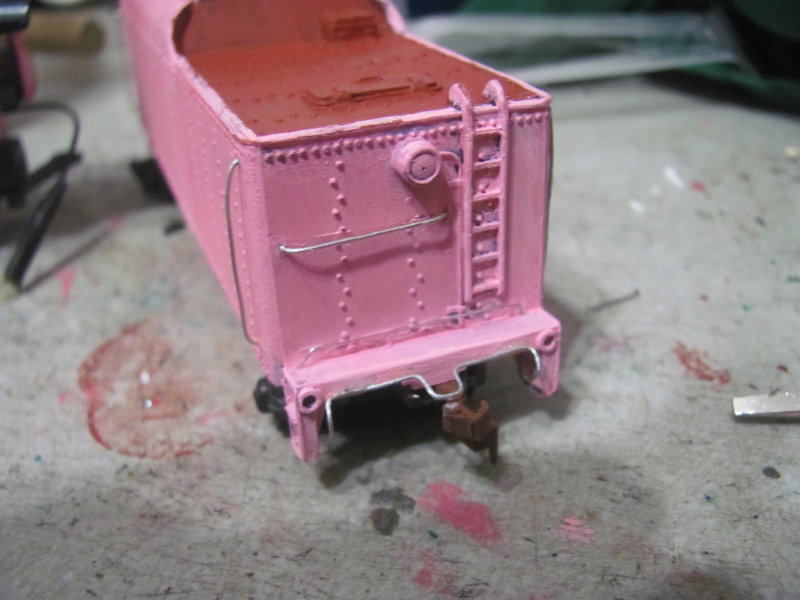
First off, here's the scratchbuilt tender:
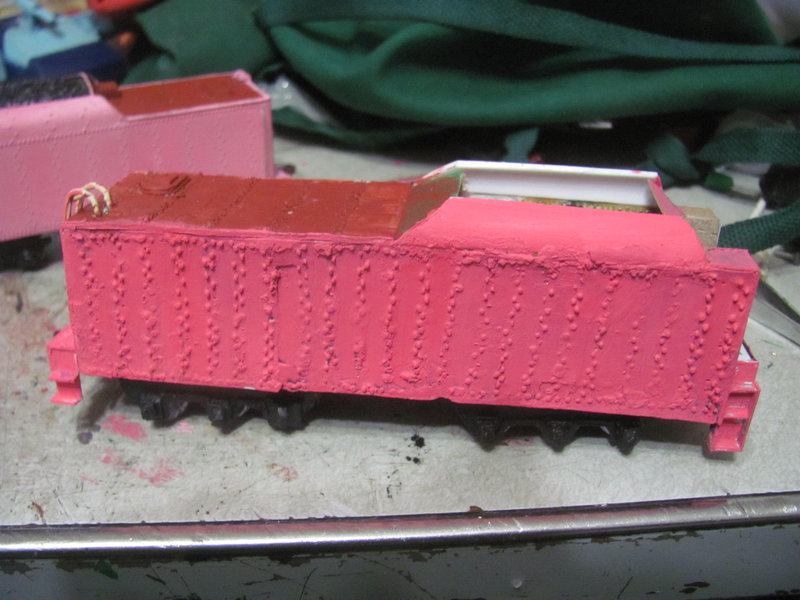
A side-on view to give a general look. Partially painted (I ran out while working on it, and since my original shade was too dark anyway I mixed up a new, bigger, lighter batch and redid the loco's paint), it looks at least halfway decent, although it's been sidelined for now (You can see why in the background) - I will definitely build or buy a loco to go with it, not discarding it after the work I put in. Haven't built a coal load yet, but I intend that it be removable to allow interior access
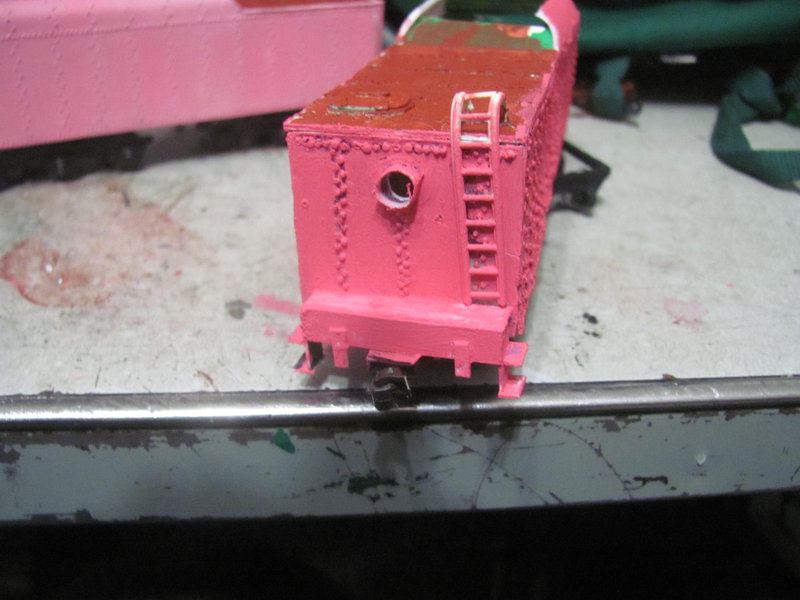
A view of the back, showing the hole I drilled to allow me to insert an LED to serve as a backup light.
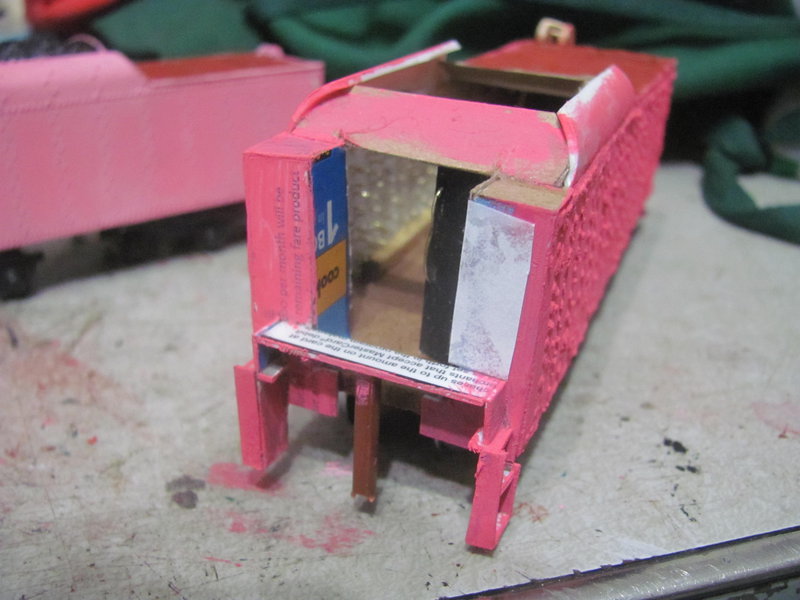
A view of the front, showing the hitching spike that would go through the receiving hole on a drawbar (a design I cribbed off of Bachmann's Thomas range). Also showing that only one of the doors to the coal bay is currently installed.
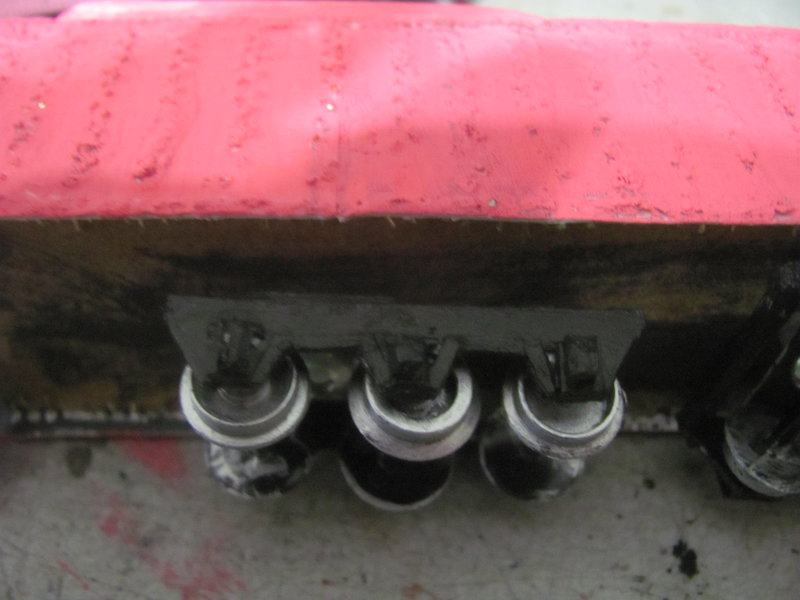
Here's a closeup of one of the trucks. The frames are crude but serve well enough - I do need some springs for them though so that the trucks don't snag on the tender sides. I abandoned scratchbuilding wheels for now, and instead am using some wheelsets that JNXT over on the Tyco forums gave me. For mounting lugs on the tender chassis, I used a couple of small nuts.
And now for the main event:
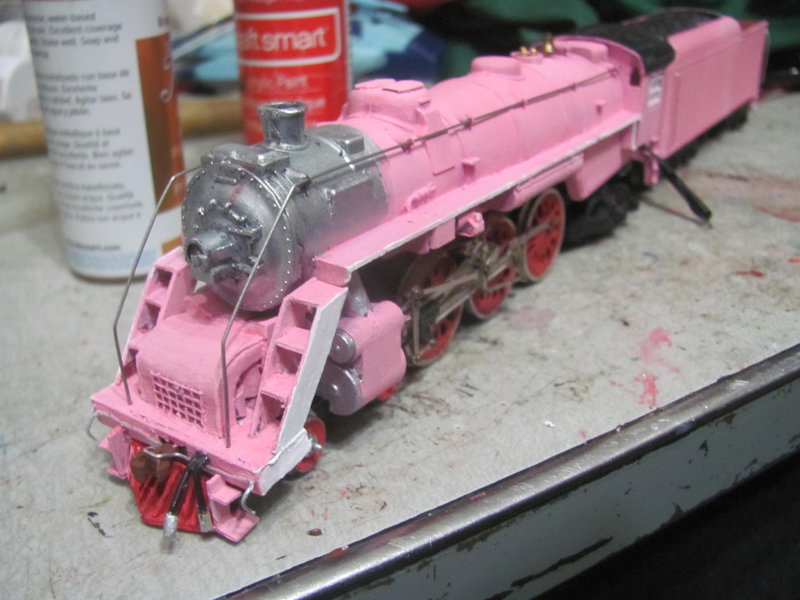
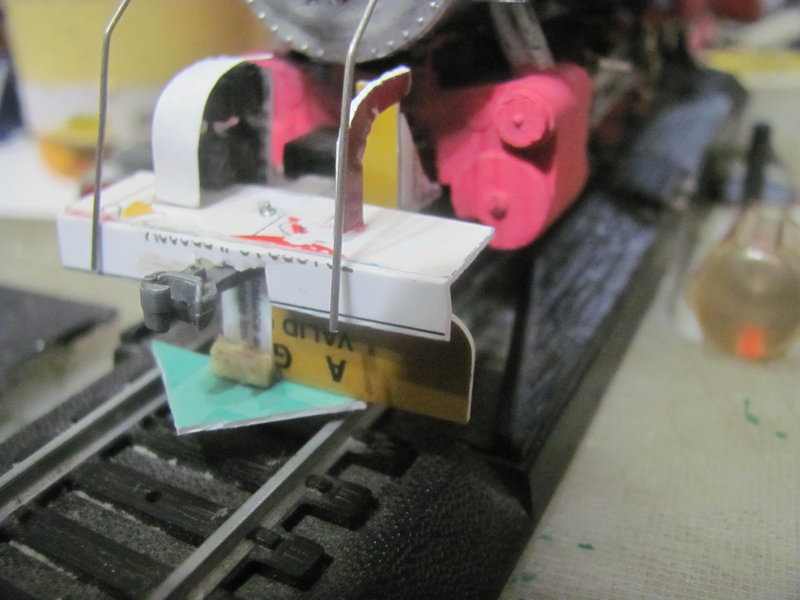
Here's an angled view of the loco. There's still a little cleanup to do, and detail work as well (things like a cab interior and a frame for the bell, not to mention decals once I get some inkjet decal paper), but she's looking pretty good.
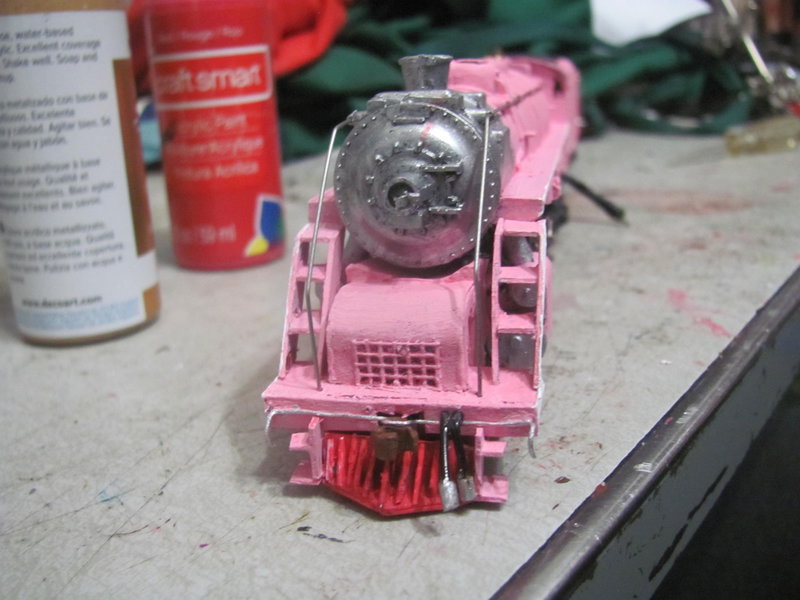
Here's a shot of the front, so you can get a good look at the pilot. The current coupler is a dummy, but things are set up to make swapping out easy should I decide I want to change that.
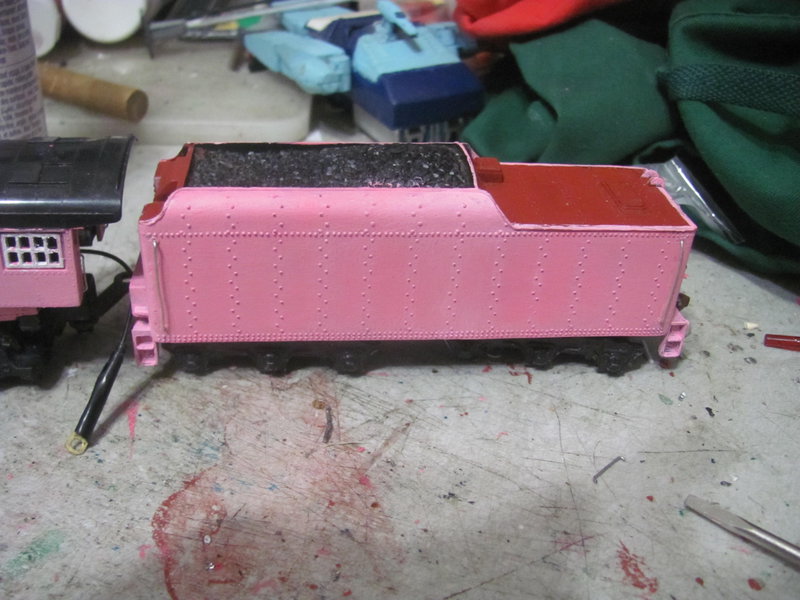
This shot focuses on the tender. Someone else on the Tyco forums, screenname of toptrain, sent me a big box full of old cars and parts and stuff. To my surprise and delight, there was an actual Mantua long haul tender in there. I decided to use that for this instead; I was having to repaint anyway, it already rode properly, it's set up to pick up power, and it goes nicely with the engine. But like I said, I will find a use for the scratchbuilt. I carefully sliced off the molded grab irons and drilled holes at their endpoints before painting, letting me easily fit separate, wire grab irons afterward.
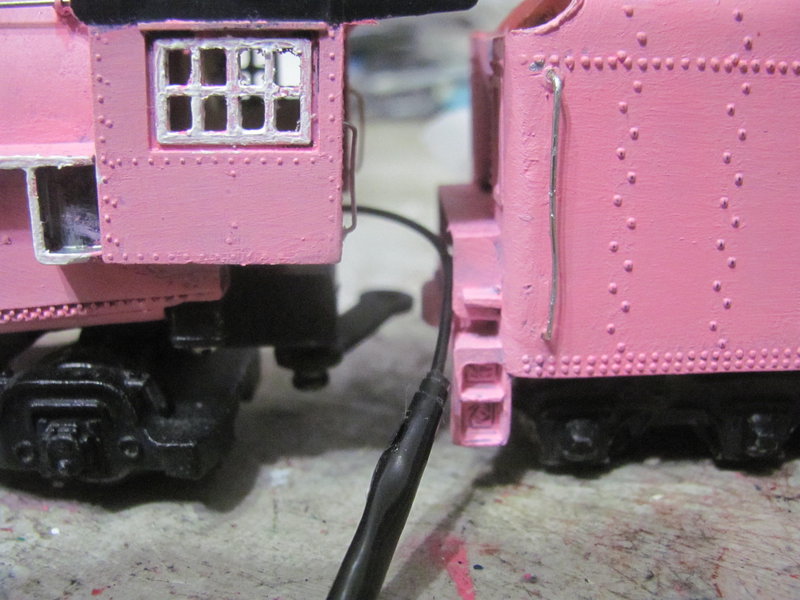
A close-up of the gap between the cab and tender, showing the grab irons on the back of the cab as well as some of the cleanup I was talking about.
A view of the back of the tender, showing the separate grab irons I fitted there as well as the coupler cut bar. I haven't drilled out the lens in the backup light yet, need to dig out a small enough bit.

And a side view to close things out.
Last edit: by ZeldaTheSwordsman
Posted
Full Member
Posted
Full Member
Pictured are:
1 of my two Penn Line shorty full-domes
Roundhouse Pullman Palace series combine (Going to do it as either a buffet car or a club car)
Roundhouse Pullman Palace series diner
Gloor Craft Models tri-level open autorack craftsman kit
WIP semaphore signal, some parts taken from Bachmann dummy color-light signals, others from a used-up ink pen.
Posted
Full Member
Nice cowcatcher, although they're colorblind and would miss the red color. The rebuild of the front end looks to have been successful. The locomotive looks the part with that new tender as well.
New projects look interesting.
Nigel
©Nigel C. Phillips
Posted
Full Member
Also, the red on the cowcatcher might be lost on the cows… but it certainly wouldn't be lost on the customers.
Posted
Full Member
I'd like to point out something about the Roundhouse Pullman Palace car trucks that I forgot to when showing work on the sleeping car earlier: According to the instructions, the trucks should have a molded-on tongue protruding from the bolster that keeps the centering spring aligned and in place. But this tongue is missing on the final product, meaning you have to glue the back of the centering spring to the bolster in order for the darn thing to work.
Posted
Full Member


I think I used the wrong gauge of wire for that handrail. It said to use the #26 wire, and I didn't have a wire gauge so I tried to guess via comparing to a ruler. Is that #26 or is #26 thicker?
1 guest and 0 members have just viewed this.