7mm Narrow Gauge O-16.5
Posted

Site staff
Dabbling in a larger (for me) scale
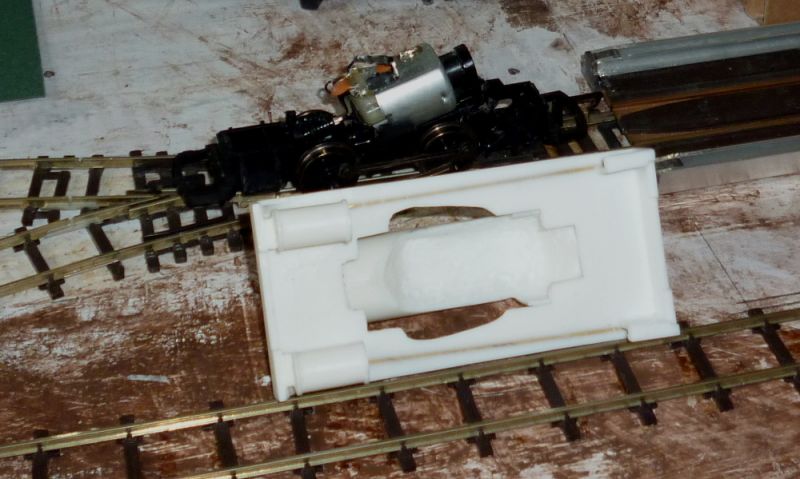
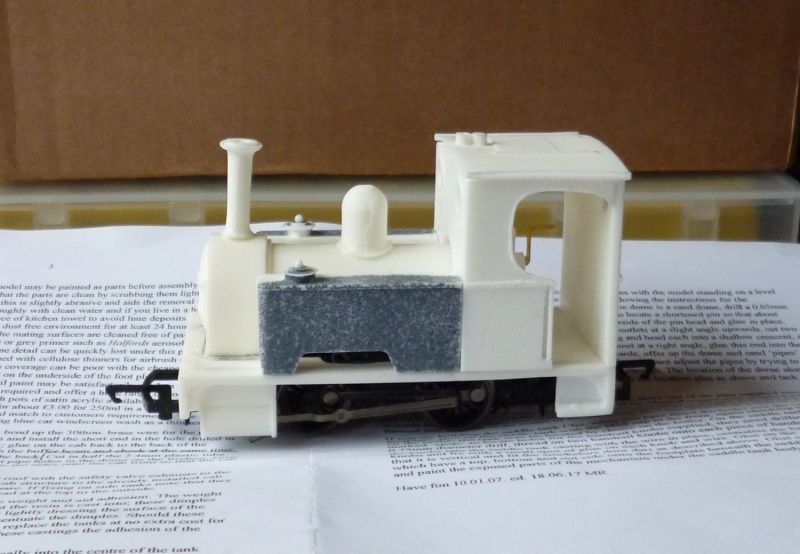
I've started the 'ECHO' kit and it just about fits on the cassette.
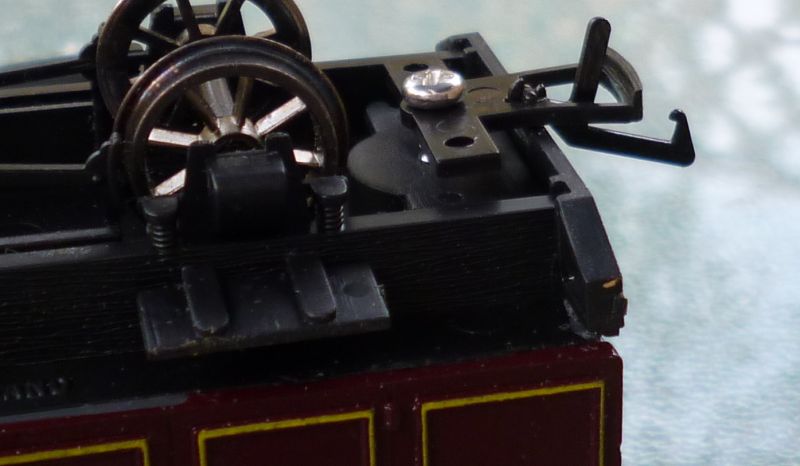
Footplate isn't quite flat on the chassis for some reason and that large T/L coupling has got to come off.
I've replaced the couplings on the first loco with a wire loop, but I'm not really happy with it, so some more surgery required on both loco chassis to see what I can get to fit.
Ed

Posted
Site staff
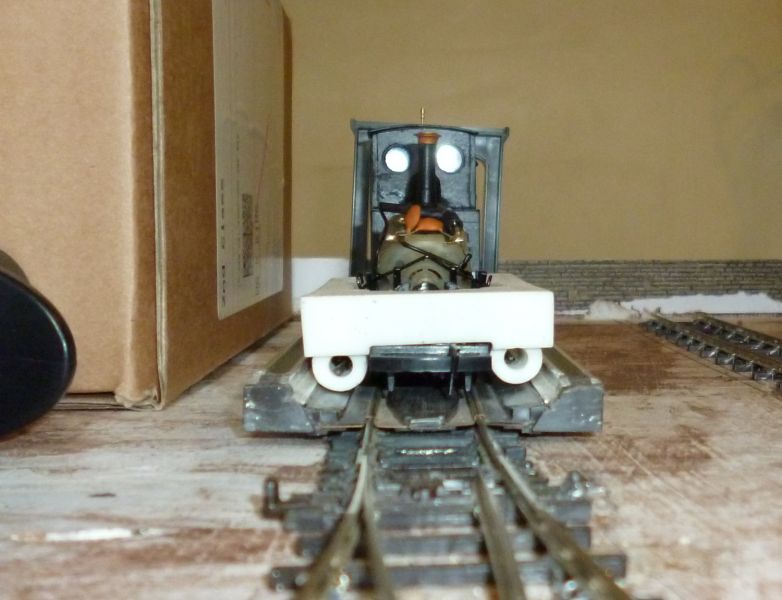
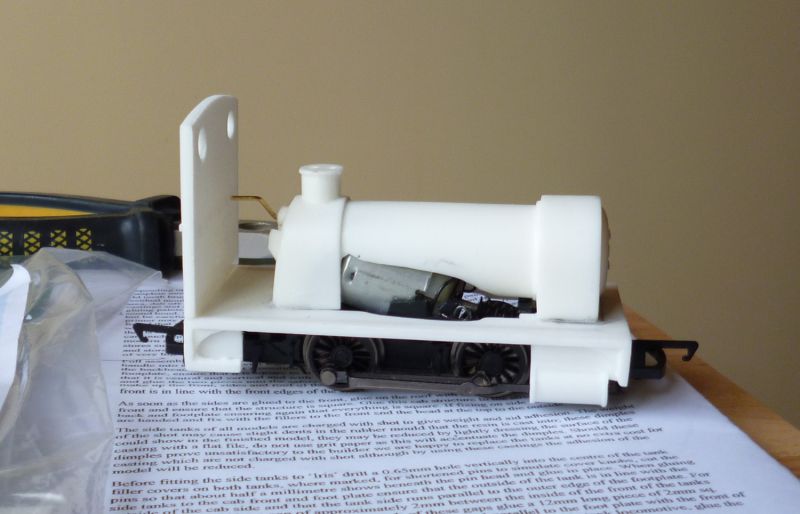
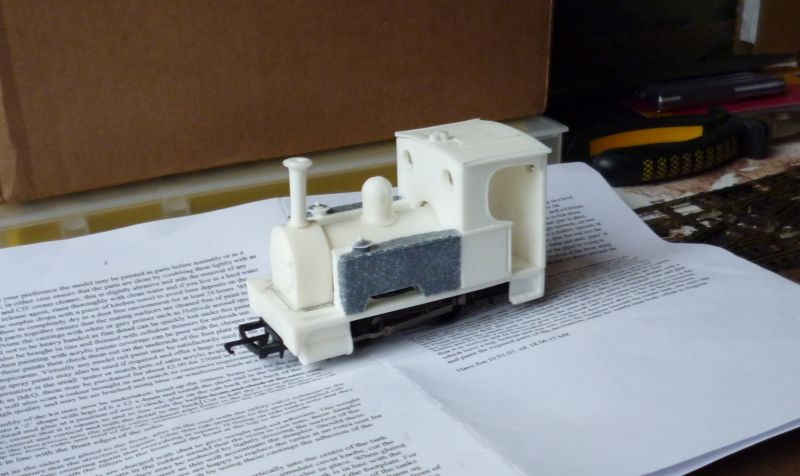
It says in the instructions that "If fouling occurs, pare carefully away at the underside of the backhead on the inside edge to gain clearance", and check that the capacitor/suppressors and resistors are not on top of the motor, but in front of the motor and behind the worm gear or to the side.
Bearing in mind these 0-4-0 chassis have changed a bit over the years, I found that the rear of the motor and it's plastic mounting didn't require much 'paring' to fit, it was the capacitors and motor connections themselves that needed quite a bit of sanding to the inside of the boiler to allow it to sit down on the footplate. Moving the caps forward just made them droop so that they were almost touching the worm.
I've tried to dim the picture a bit to show the basic shape inside the boiler casting.
On reflection, it would have been easier to fit a decoder which normally means turning the motor upside down anyway.
Food for thought :hmm
Now working on the cab and have fitted the regulator.
Ed
Posted

Site staff
On Buffers, A couple of bad photos but they show a type of buffer used on some light engines and a dumb buffer used on some Tank engines that I'm thinking of scratch building as a better option

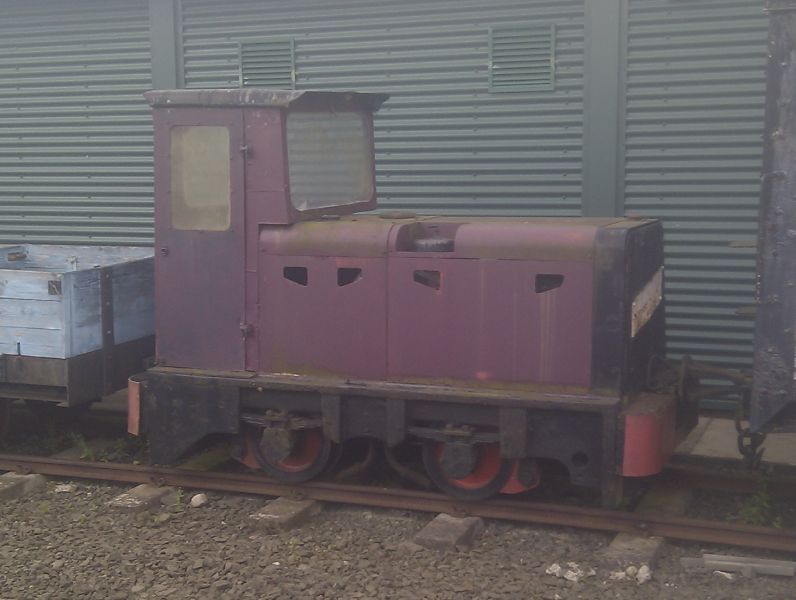
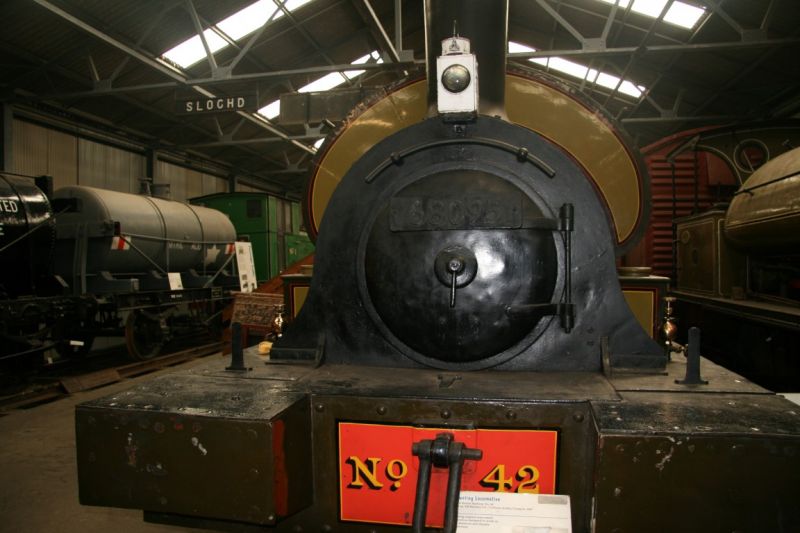
Not sure if these help :) Looking forward to more !
Cheers
Matt
Wasnie me, a big boy did it and ran away
"Why did you volunteer ? I didn't Sir, the other three stepped backwards"
"Why did you volunteer ? I didn't Sir, the other three stepped backwards"
Posted

Full Member
That's coming along nicely. You could always drill out the boiler and smoke box (separate them first), or mill out a section in one of the tanks, or scratch build a bunker to put a Z/N scale decoder in (I've done all three in the past). A chassis etch and proper sized wheels from Branchlines in Westbury (if they are still in business) is another alternative. Comes with proper connecting and motion rods, and uses just the metal frame from the Hornby. Smaller wheels and motor and a high ration (1:50) gearbox leaves plenty of room for a decoder, as well as good slow running. The other thing I found is that the older metal chassis Hornby 0-4-0 works better than the modern plastic one with the Smallbrook Studio kits.
Nigel
©Nigel C. Phillips
Posted
Site staff

If I'd flipped the motor I could have moved the decoder down so that it over hanged the worm a bit, or a Z scale decoder would be a bit smaller.
I decided to go without buffers and just have a central buffer/coupling. I believe the prototype is a Norwegian/Chopper coupling.
Lot of people use Kadees, but I think they just look right on UK four wheeled wagons, so I'm trying to stick with the Bachmann mini type tension locks. Not a million miles away from a central buffer/coupling.
I have looked at some others including scale chopper couplings here but they're a bit expensive and require a fair bit of work.
Hi Nigel
Interesting that you mention the old Hornby chassis as Smallbrook recommend the newer China produced ones as better runners.
Take your point though if you change the wheels and gearing, but I think that may be a bit beyond me with only a few hand tools and the dining table as a work bench.
However, I think Branchlines are still going, there's a thread on RMweb and somebody bought something in January.
I'm assuming it's the same Branchlines that make the chassis for the Peco O-16.5 loco kits, tempting as a third loco if a little more expensive, and I've never made a white metal kit.
Ed
Posted
Site staff
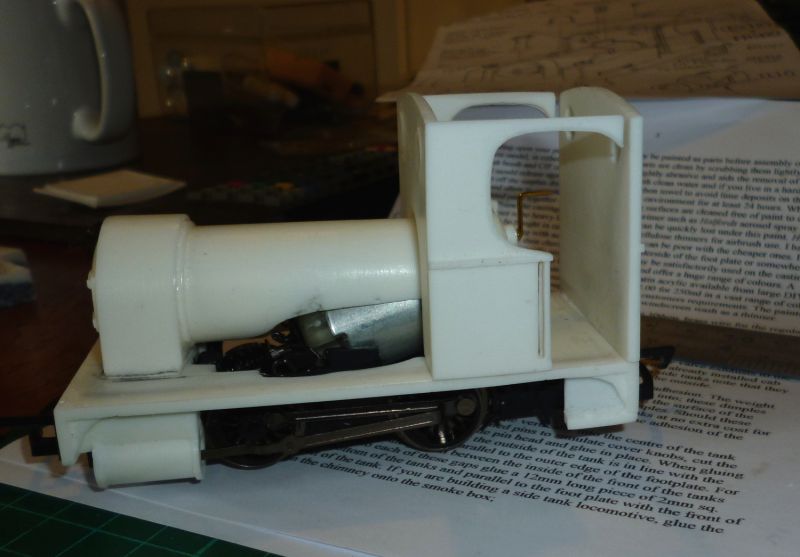

you can end up with a bit of a gap.
Some filing of the rear boiler band solved the problem.
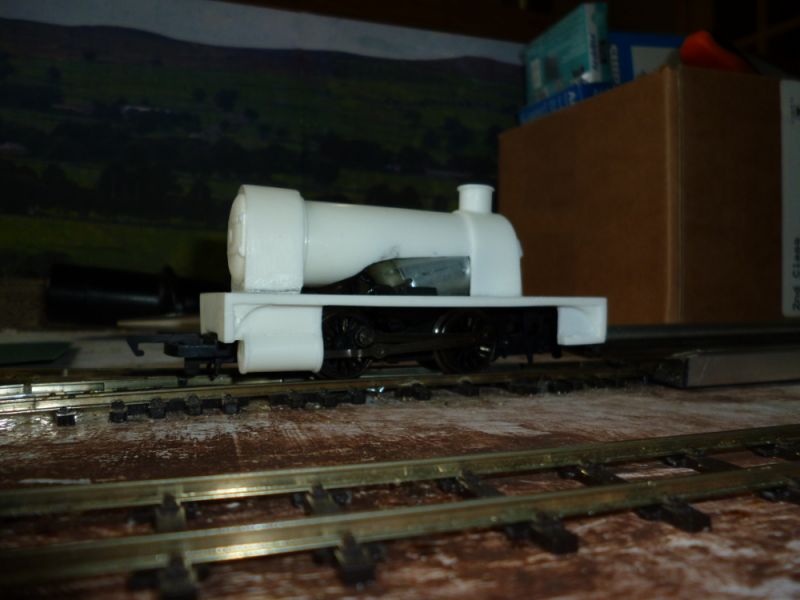
The side tanks are glued in line with the cab sides, running parallel to the outer edge of the footplate.
This should leave a gap of about 2mm between the inside of the front of the tanks and outside of the smoke box.
Mine isn't, so despite all my efforts I didn't quite get the boiler in right in the middle of the footplate :oops:
Not going to show you a picture of that though, too late now anyway

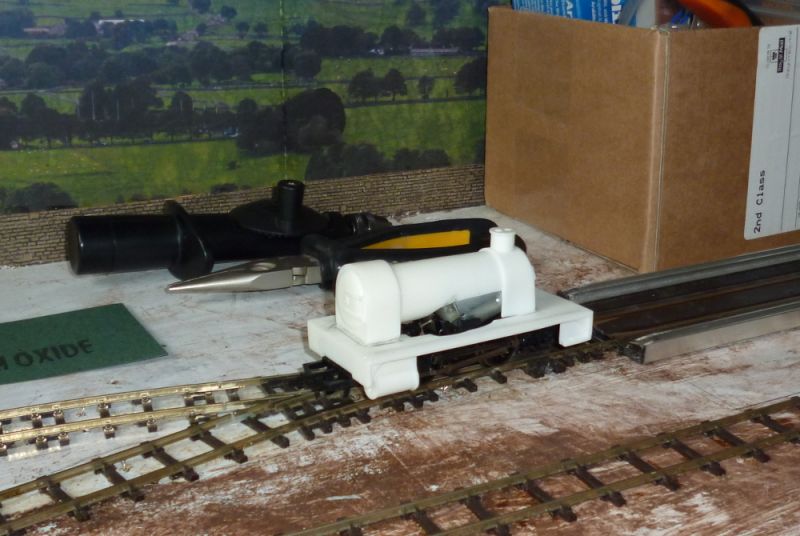
Just about had time yesterday to give it a quick spray with grey primer.
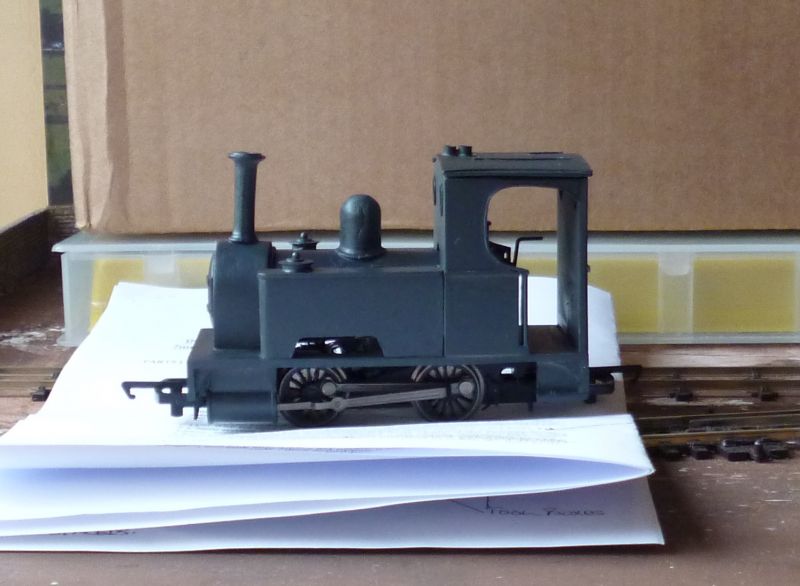
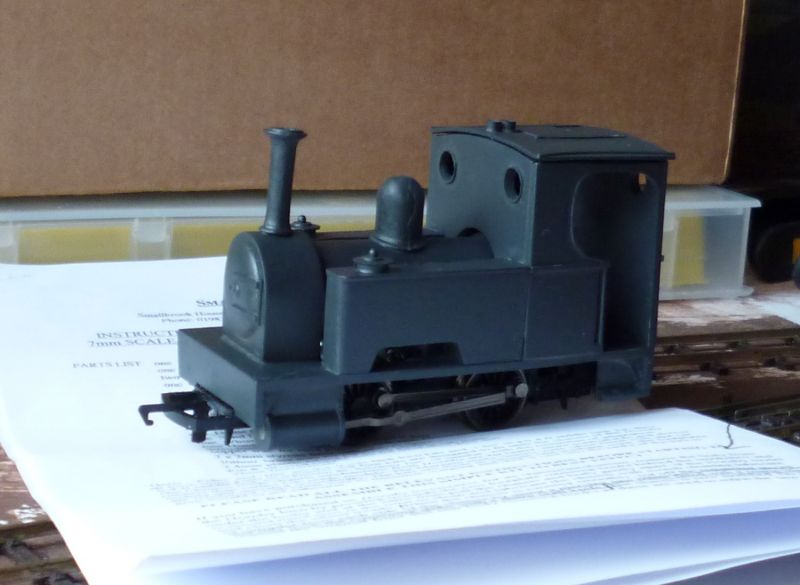
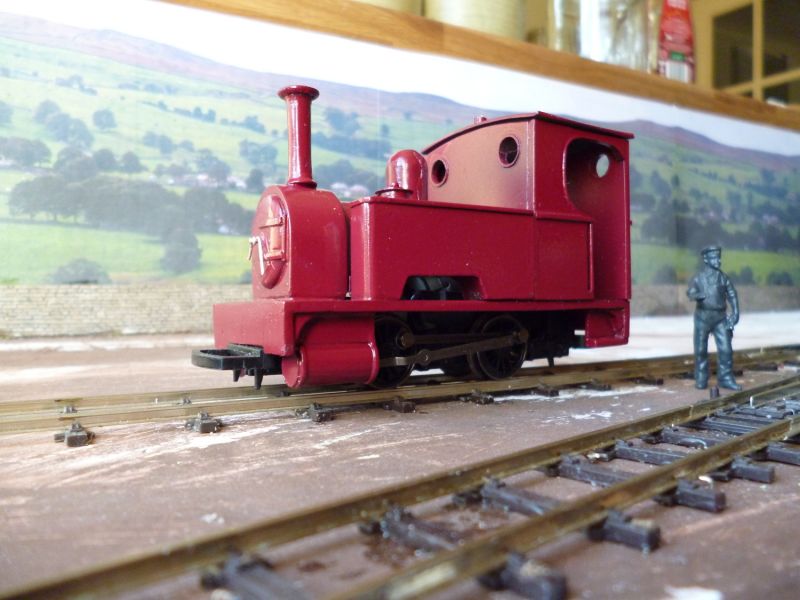
Chimney looks a bit sloped in the pictures, but it looks ok when I'm looking at it.
Cab roof isn't fixed either as I want to paint the inside of the cab and add a driver.
I rather fancy painting it red, don't know why, just think a red narrow gauge locomotive would look good.
Still have the smoke box door darts to fit and a whistle once painted.
As I was putting the body back on the capacitor connection to one of the motor terminals broke away, so out with the soldering iron next.
Ed
Posted
Site staff

Not re-solderable and I found a Gaugemaster DCC26 which I'd bought for an old Hornby B12, so chipping it was going to be easier.
I tried turning the motor to give a bit more room, but the motor terminals were fouling on the chassis. The DCC26 is a pretty small decoder and fits ok on top anyway, so I left the motor the right way up.

According to Gaugemaster, "DC Running: Allows running on both DC and DCC layouts with no adjustment, if your controller has a smooth DC output then your locomotive will run better than before!", so it should be ok on the micro layout on DC.
Ed
Posted
Site staff
Cheers
Matt
Wasnie me, a big boy did it and ran away
"Why did you volunteer ? I didn't Sir, the other three stepped backwards"
"Why did you volunteer ? I didn't Sir, the other three stepped backwards"
Posted
Site staff
I've got some 'Ford Burgundy Red' paint on the way though
Ed
Posted

Full Member

Posted
Site staff
The smokebox dart isn't right so I need to revisit it, or find an alternative and it all looks more like pink in the pictures which I'm sure is down to the camera.

Ed
 Last edit: by Ed
Posted
Site staff

It would have looked very odd without passengers, so as you can see I've stuck some in after making some benches out of lolly sticks.
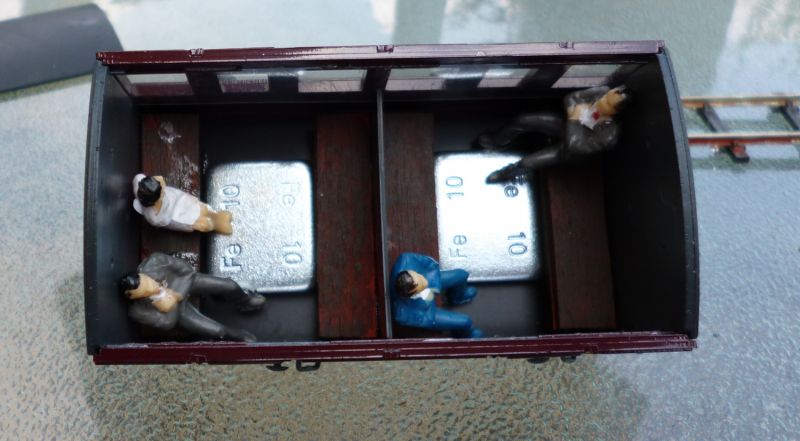
They're not quite the right scale, but I think it looks ok if you don't look too closely.
The couplings have turned out a bit too low.
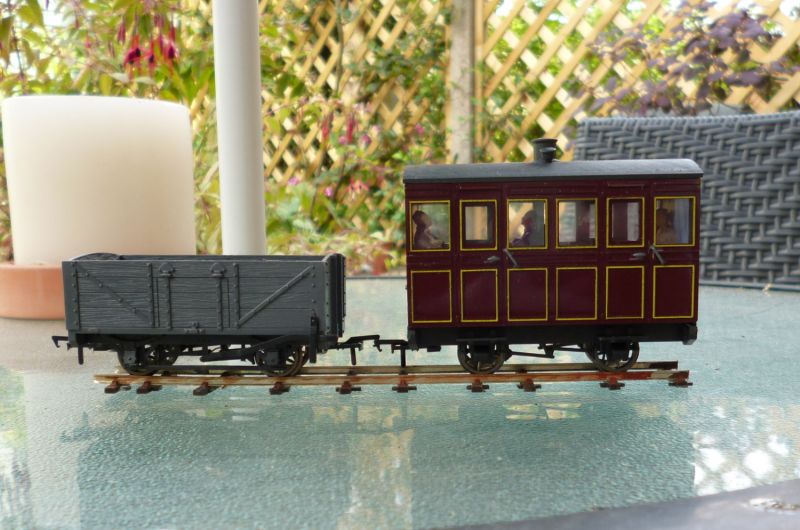
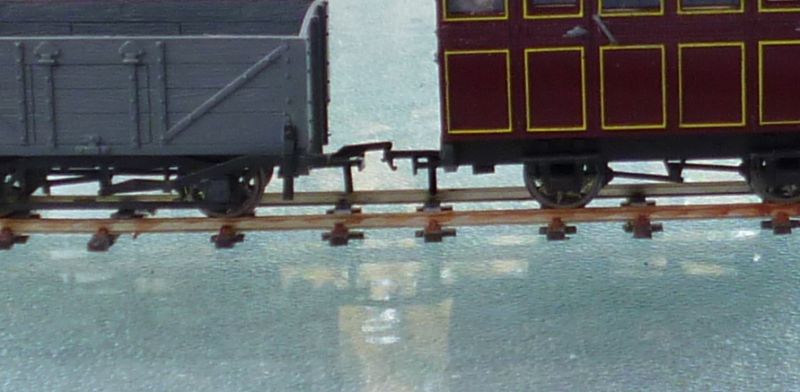
So I'll have to file the buffer beams down a bit and pack it out with styrene.

Not much done really, but it's something.
Ed
Posted
Site staff
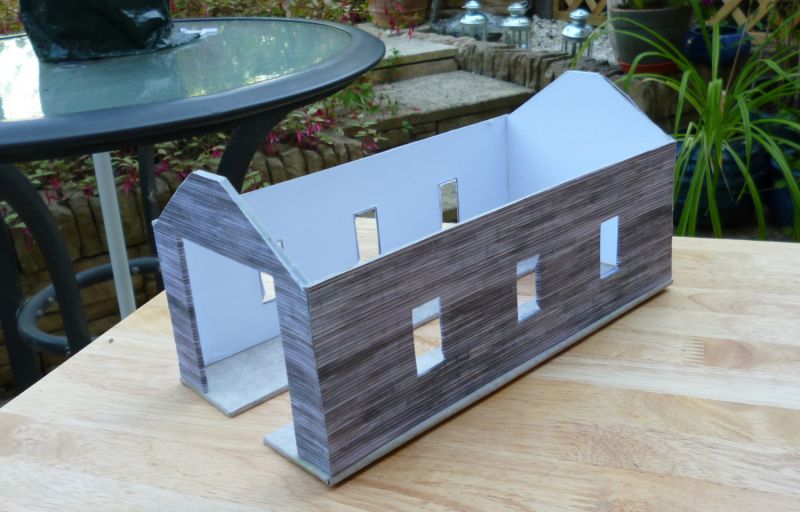
Never having built anything from scratch before, and me being me and not starting simple, I've been working on a totally non-prototypical engine shed.
I've drawn some plans in LibreOffice Draw, but these may change as I go along.
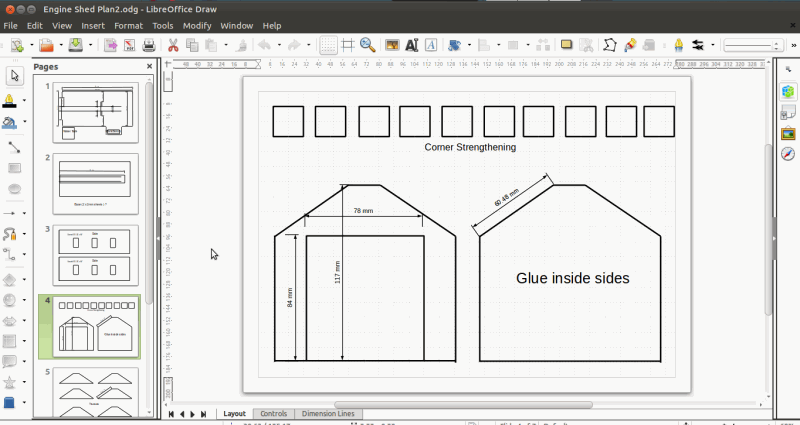
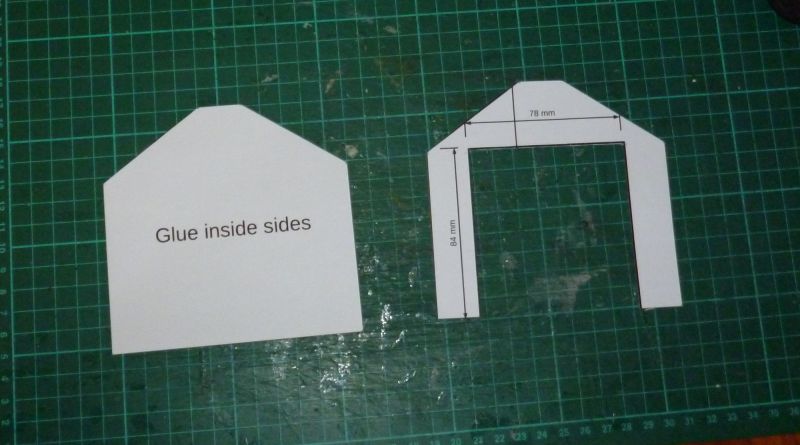
Printed and stuck to 2mm card.

Then cut out.

Glued using a bit of Lego to try and get square corners.
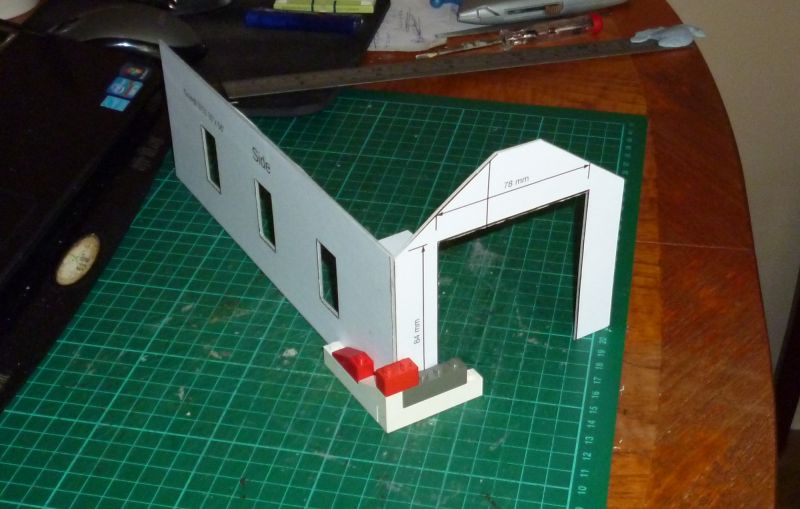
However, using small square bracing pieces inside the walls to try and keep everything square didn't look right, so I removed them and just doubled up the end walls, laminating them together.
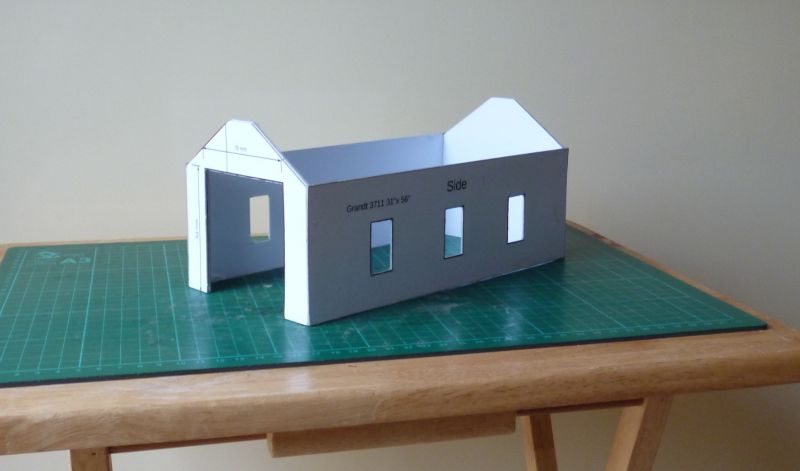
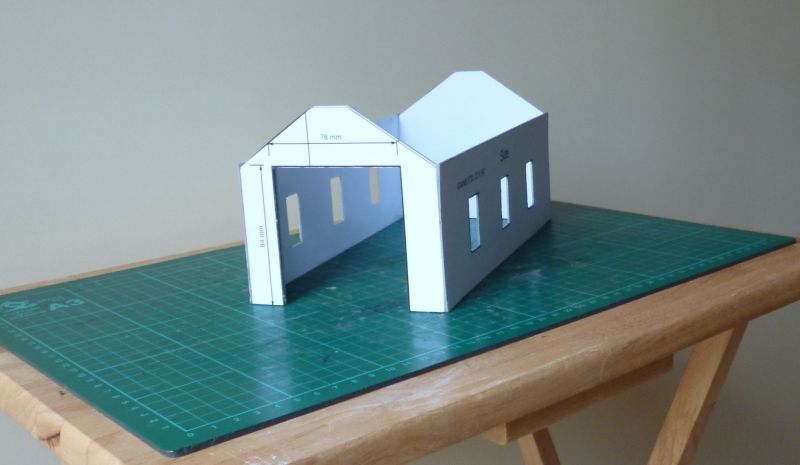

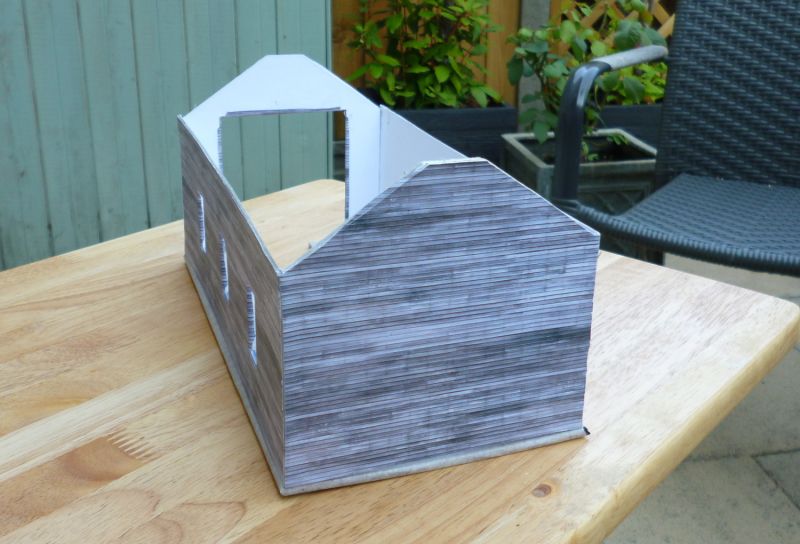
It appears to be square, so I'm now looking at wall coverings.
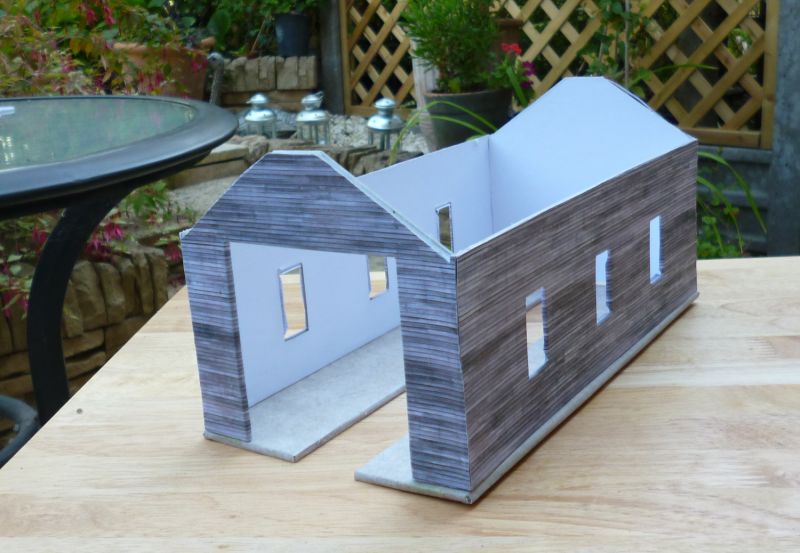
I'm really tempted by the Slaters planking for the walls and corrugations for the roof, but this would turn out a bit expensive for something that might end up in the bin.
I've tried scaling up some Scalescenes Plain Clapboard for the walls, but it doesn't look right, so it might be brick paper.
Ed
Last edit: by Ed
Posted
Site staff
Ed
Posted
Site staff


Ed
Posted

Full Member
Posted
Site staff
(That's the 3 foot rule I used in OO scaled up by 1.75%
)Why don't you give it a go, but buildings do come out a bit big.
This engine shed is only just over a scale 16 1/2 feet high at 117mm, but a two storey building is going to be around 200mm high (eight inches in old money).
Ed
Last edit: by Ed
Posted
Full Member
Posted
Site staff
Ed
Posted

Full Member
1 guest and 0 members have just viewed this.