New part work
Posted
![Avatar](https://yourmodelrailway.net//uploads/cns_avatars/1235.jpg)
Inactive Member
Posted
![Avatar](https://yourmodelrailway.net//uploads/cns_avatars/1235.jpg)
Inactive Member
Posted
![Avatar](https://yourmodelrailway.net//uploads/cns_avatars/1235.jpg)
Inactive Member
Last edit: by 60019Bittern
Posted
![Avatar](https://yourmodelrailway.net//uploads/cns_avatars/1766.jpg)
Full Member
it was already on fire when I got here, honest!
Posted
![Avatar](https://yourmodelrailway.net//uploads/cns_avatars/1235.jpg)
Inactive Member
Posted
![Avatar](https://yourmodelrailway.net//uploads/cns_avatars/1235.jpg)
Inactive Member
Posted
![Avatar](https://yourmodelrailway.net//uploads/cns_avatars/1235.jpg)
Inactive Member
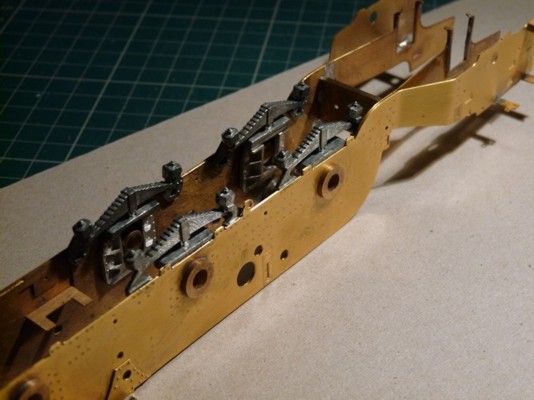
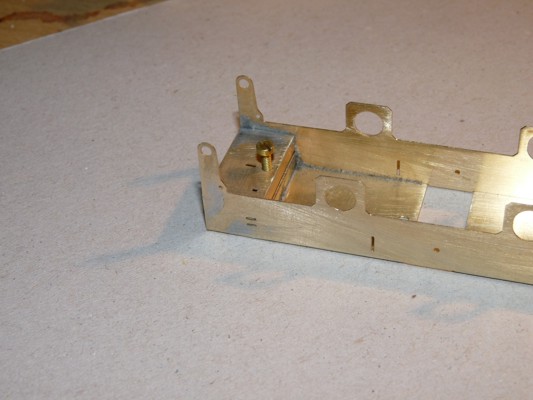
Main Chassis: Fitting of rear and centre springs and rear and center horn blocks and repaired a broken solder joint on the rear chassis inner bit.
Tender Chassis: Fitting front and end spacers and soldeing it all up. The trickiest bit was soldering the nut onto one of the spacers without soldering up the thread as well. I did but was able to re-thread it with a set of taps and dies.
The springs and hornblocks in place
![](https://yourmodelrailway.net/gallery/1235/1235_051641_240000000.jpg)
![](https://yourmodelrailway.net/gallery/1235/1235_051642_190000000.jpg)
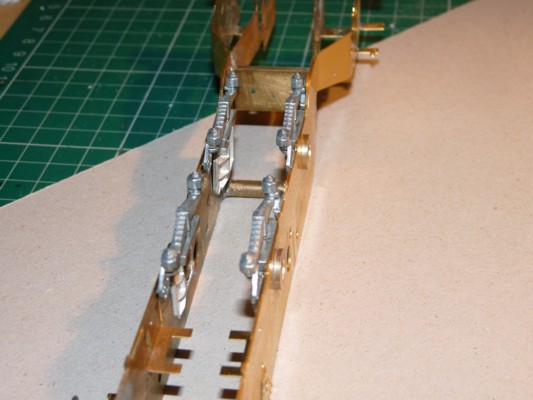
Tender innder chassis spacers in place.
![](https://yourmodelrailway.net/gallery/1235/1235_051643_450000000.jpg)
![](https://yourmodelrailway.net/gallery/1235/1235_051646_590000000.jpg)
That's it for now folks. Come back soon for another thrilling instalment.
Posted
Full Member
Terry
Posted
![Avatar](https://yourmodelrailway.net//uploads/cns_avatars/1235.jpg)
Inactive Member
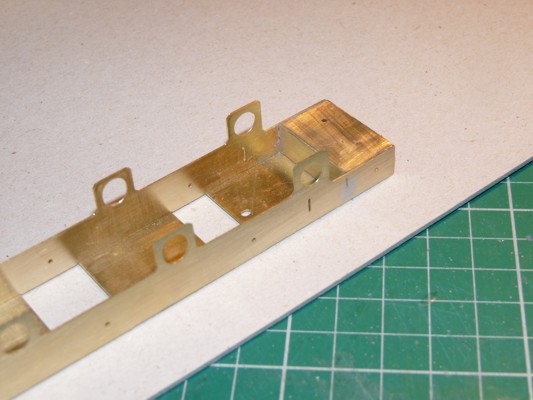
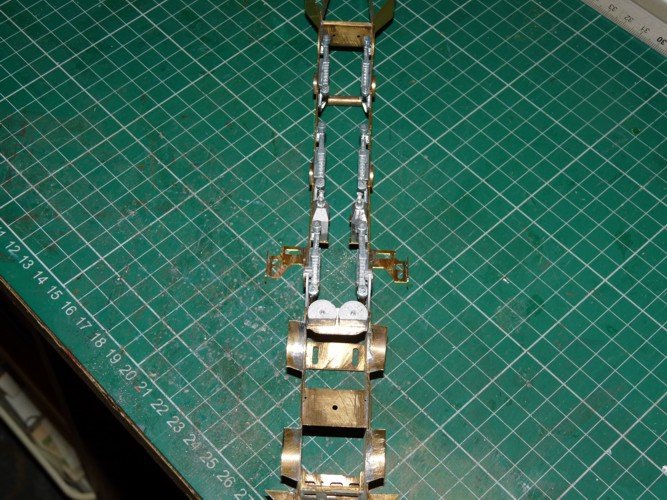
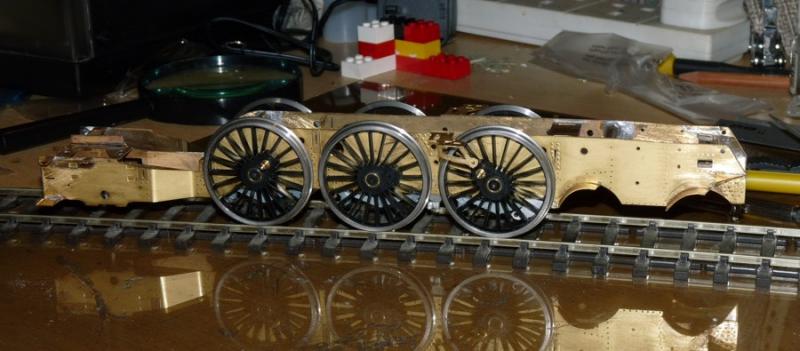
Chassis from the front and downside up, showing all the hornblocks, springs etc.
![](https://yourmodelrailway.net/gallery/1235/1235_271606_270000000.jpg)
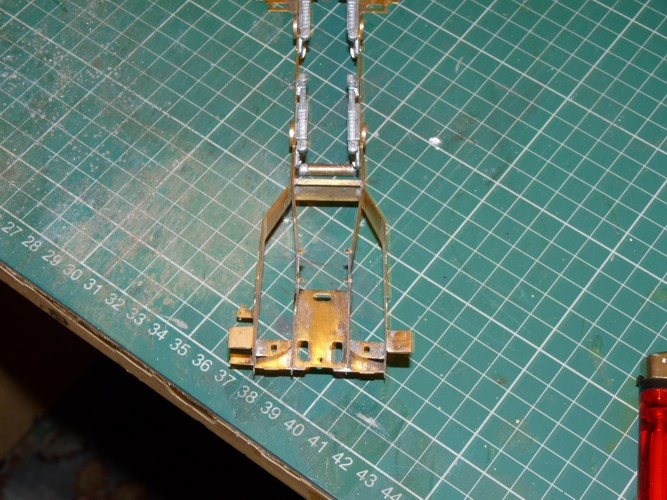
The rear spacer in position.
![](https://yourmodelrailway.net/gallery/1235/1235_271607_260000000.jpg)
Next wet day (I'm out with camera on dry ones), I will carry on with the tender inner chassis. Will keep you all informed.
Last edit: by 60019Bittern
Posted
![Avatar](https://yourmodelrailway.net//uploads/cns_avatars/1235.jpg)
Inactive Member
Herewith the results. They still have to be cleaned up yet but next week there are more bits to add for the brake gear so will leave the cleaning till then.
![](https://yourmodelrailway.net/gallery/1235/1235_011842_030000000.jpg)
![](https://yourmodelrailway.net/gallery/1235/1235_011842_260000000.jpg)
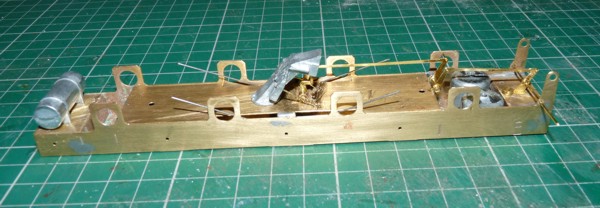
The bits of wire pointing skywards near the centre axle bearing holes is a rudimentary springing system when the wheel bearings and wheels are fitted.
More later.
Last edit: by 60019Bittern
Posted
![Avatar](https://yourmodelrailway.net//uploads/cns_avatars/1338.jpg)
Site staff
![Ed is in the usergroup ‘Super-moderators’ Ed is in the usergroup ‘Super-moderators’](https://yourmodelrailway.net//themes/default/images/cns_rank_images/mod.png)
You've mentioned you super glued the brake cylinders and air tank, any reason why you didn't solder these?
Ed
Posted
![Avatar](https://yourmodelrailway.net//uploads/cns_avatars/1235.jpg)
Inactive Member
Last edit: by 60019Bittern
Posted
![Avatar](https://yourmodelrailway.net//uploads/cns_avatars/1235.jpg)
Inactive Member
Posted
![Avatar](https://yourmodelrailway.net//uploads/cns_avatars/1235.jpg)
Inactive Member
The body so far, resting on the chassis
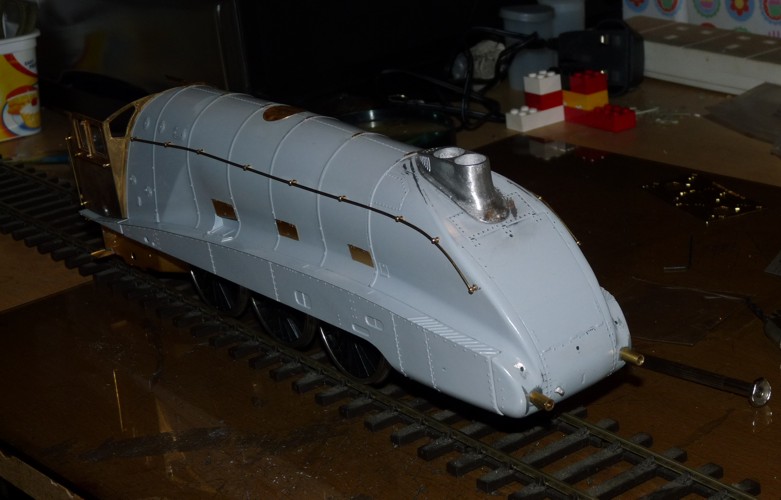
![](https://yourmodelrailway.net/gallery/1235/1235_042010_250000000.jpg)
Side shot of body
![](https://yourmodelrailway.net/gallery/1235/1235_042011_200000000.jpg)
The chassis so far
![](https://yourmodelrailway.net/gallery/1235/1235_042011_460000000.jpg)
More later.
Posted
![Avatar](https://yourmodelrailway.net//uploads/cns_avatars/1235.jpg)
Inactive Member
Last edit: by 60019Bittern
Posted
![Avatar](https://yourmodelrailway.net//uploads/cns_avatars/1766.jpg)
Full Member
Keep up the good work! Cheers, Pete.
it was already on fire when I got here, honest!
Posted
![Avatar](https://yourmodelrailway.net//uploads/cns_avatars/1235.jpg)
Inactive Member
1 guest and 0 members have just viewed this.