N Gauge - Marty�s Project � Pentrecourt Halt
Posted
Guest user
i can already see this is going to be a superb diorama i can picture in my mind the finished product already and it will be stunning.
cheers Brian.W
Posted

Full Member
I'll do my best.


Posted

Full Member
You're dead right about the dust from MDF - the resins used to be carcinogenous but I think they've changed them now. Woodyards can only cut it if they have apporved dust extraction facilities and is was(maybe still is) banned in the US.
Petermac
'Petermac
Posted
Full Member
Mask and vacuum cleaner… good friends. Thanks PM
Posted
Full Member
Some more trees are under construction for the area behind the station.
My usual method, twisted fine gauge wire and several coatings of bark mix.
A couple have been painted, others yet to be done, then some foliage.
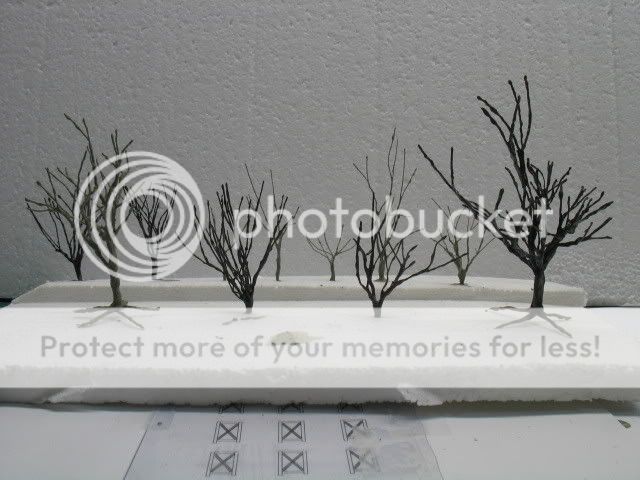
A closer shot of the tree farm with the telegraph pole for scale.

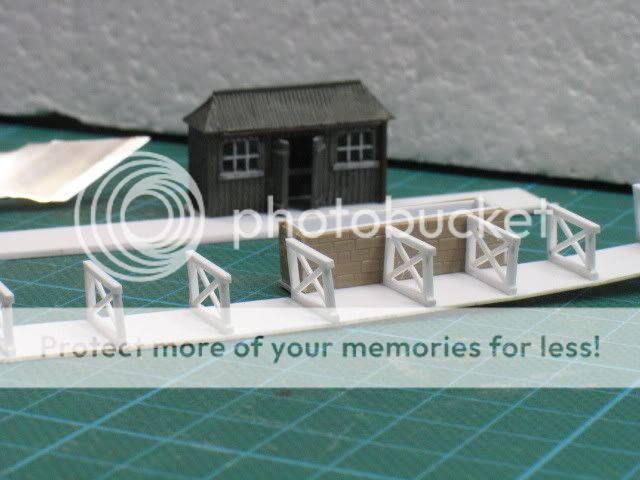
The halt platform is under construction too.
Based on the original GWR drawings in Vaughans pictorial record of GWR Architecture I've made a start on the under platform supports.
I'll make a thread in the scratchbuilding section and just put major updates in here.

Posted
Inactive Member
Les
Devon Junction
Kernow Junction
Kernow Junction
Posted
Guest user
Mike
Posted
Full Member

But progress is being made.
Posted
Full Member
The carboard mock-up has gone… hooray, starting to get somewhere.
The base for the Altycefan Bridge is MDF, the other end of the diorama is 9mm ply, the front facia and rear backboard 4mm masonite.
Screwed and glued to the internal framework and contoured to the surrounding terrain.
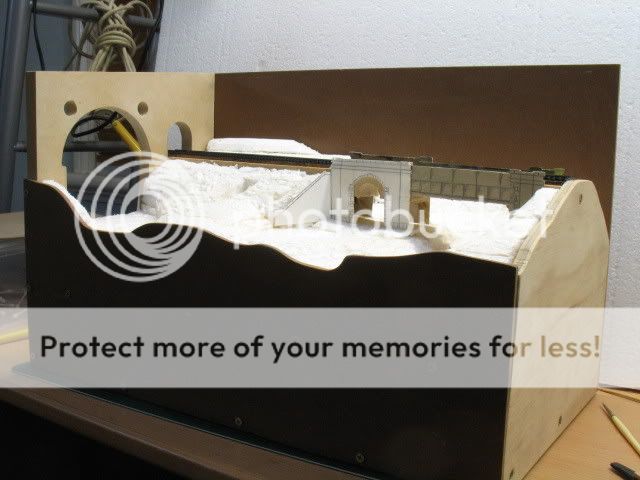
The Halt platform is under construction and details can be found in the scratchbuilding section but this is the progress so far…
Posted

Full Member
I am really enjoying this project and it is amazing what you have achieved with the materials you are using. It is hard to believe you are doing all this in N gauge too.
Bob(K)
Posted
Guest user
Posted
Full Member
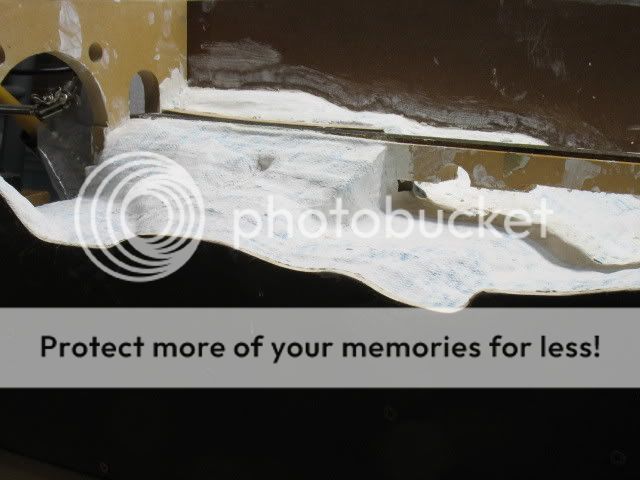
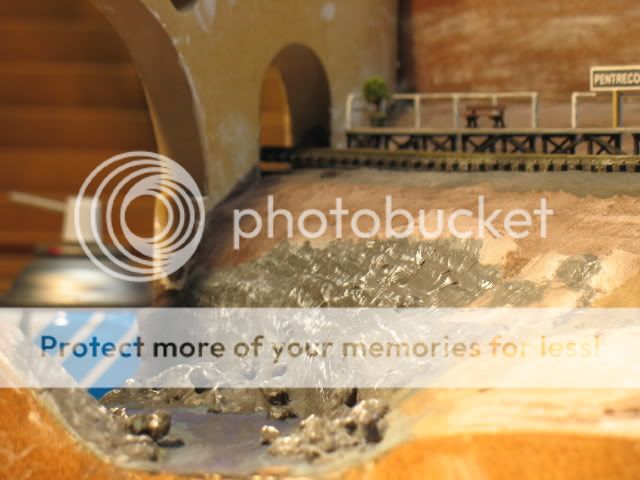
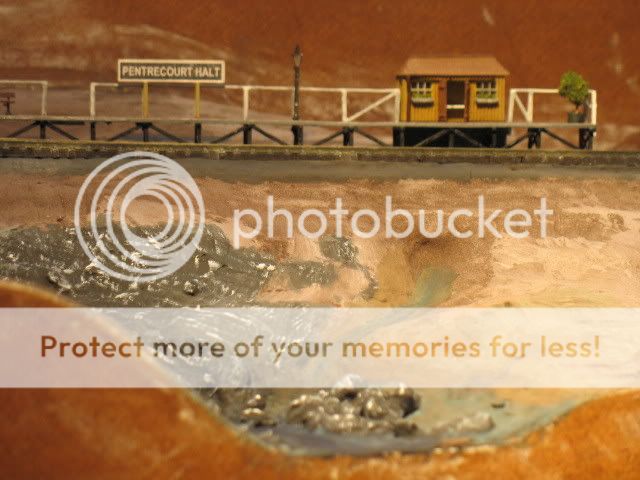
This first hardshell layer of "chuxs" woven dishcloths soaked in polyfiller took two weeks to finally dry and it started cracking in the process, 'cause I didn't read the instructions.
The diorama is now ready for the top layer of earth coloured plaster.
I've pulled up the rails to keep the plaster off them and the carboard bridges have gone in preparation for scratchbuilding the plasticard ones.
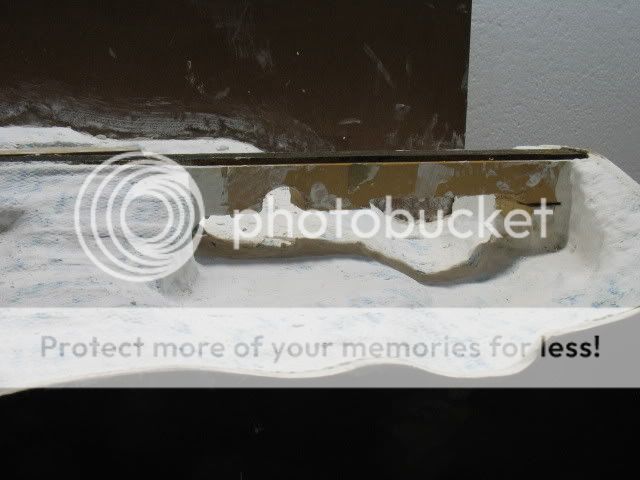
… and looking along the formation (have a look at the initial sketch at the start of the thread) :D

The halt hardstand is visible at the rear right for the scratchbuilt halt.

Slowly but surely…
Posted
Guest user
Posted
Full Member
This is just so much fun :P :!:
I've managed to get a steady run at the diorama over the last couple of weeks and after the flurry of posts on others personal layouts over the weekend thought I'd better get something on the forum to show that progress is being made on Pentrecourt Halt too.
A thoroughly enjoyable Sunday afternoon a couple of weeks ago was spent creating a mix of polyfiller, burnt sienna acrylic paint, iron oxide "chocolate" plaster additive and water.
A "ground goop" that was then slopped onto the diorama with a cheap old paint brush, shaped and smoothed as it went.
A handful of gravel was thrown into the remaining mix in the mad rush before the goop set and this remainder was randomly plopped into the river beds.
Having followed the instructions this time :roll:, the whole lot was dry enough to work with in a couple of days. (It probably would have been quicker but we have had a couple of 0.7 degree C nights here in Perth :!: )
Tamiya Acrylic paints and some artists acrylics have been "experimented" with to see what colours and shades can be created as a base coat.
An Evergreen plasticard girder bridge as been scratchbuilt and painted too.
Progress so far…
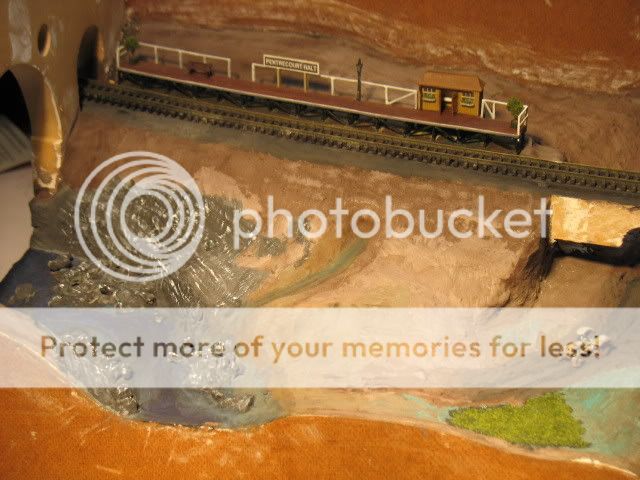
Aerial view of the Newcastle Emlyn end (taken under a 150watt spotlight)
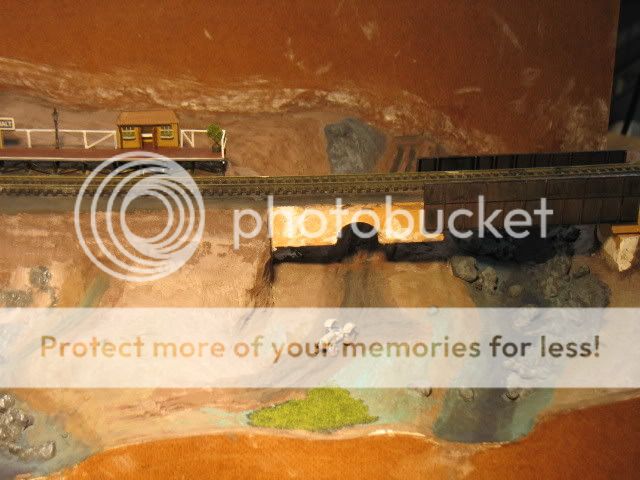
… and the Pencader end
The granite outcrop into the river and under the Altycefan Bridge…
The Girder bridge at the other end…

The tractor has been working hard (Fluoro lighting only)

The spring
Along the line.
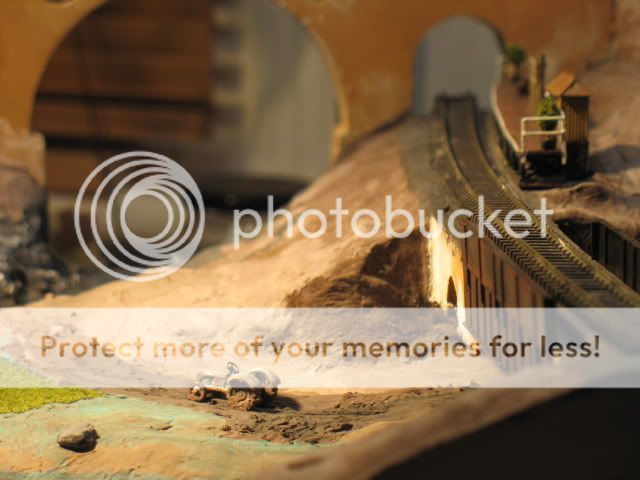
Thankfully I'll be able to cover the emerald green with ground scatter, I could paint over it but can't see the point.
The artists acrylics are really dark when wet but once the water has dried off the pigment comes back gangbusters :shock: I've learnt how to tame them by mixing according to the gospel of MikeC but they are tricky little s**#ers.
The rivers will have sand, weeds and branches added before the epoxy, varnish or pva is added.
I'm pretty happy with the granite outcrop and the girder bridge but there's a long way to go yet.
Constructive comments welcome as always.
Posted
Guest user
Rocks look good, too. Really looking forward to seeing the river being made. Some of my favourite things [real rivers]
The burnt sienna is working well. Looks like a nice stain.
Do we receive the ground goop recipe?
Mike
Posted
Guest user
When I see such interesting scenic features I want them all
Mike
Posted
Full Member
Ground Goop was a sloppy polyfiller mix, 2 parts water to 2.5 parts filler (or thereabouts, adjust to suit), maybe 30 mils of acrylic paint and about a tablespoon of oxide.
I'll post a photo of the oxide soon, I found it on special at Bunnings in the cement section.
No photo as yet… :oops: Just having a bit of a play with the artists acrylics.
Black, burnt sienna, emerald, dark blue and a touch of yellow, roughly mixed and slapped about.
Let it dry, wet black wash to give shadows.
EDIT: actually a couple of black washes to hide some of the Blue and emerald that wouldn't tone down. :?
Let that dry and then dry brush with white.
I used neat white and was worried that I'd spoilt it by being too bright but it seems to have come out in the photo OK.
Reference photos out this evening.
8)
Posted

Full Member
looking good mate.Some good base work for the scenery to develop on,and I'm loving that rusty bridge.literally can't wait to see this develop,(but don't you go rushing it on anyone's account!!!),it's going to be absolutely awesome.
When its completed,are you going to connect it to the main layout and run some trains through it? That will be one magic moment…..the first train through,and I think you should capture the moment for us on a little video clip.
(A bottle of bubbly wouldn't go amiss either!!!)
:D
Cheers,John.B.
Posted
Full Member
Thanks mate, I'm really pleased with the bridge, got to get the stone abutments done now :)
Although this diorama represents an area that I intend to reproduce on the layout, the diorama itself will be stand alone and I don't plan to power the track at all.
Mainly because I didn't want to do the rail alignment at the board joints. I've done a couple already on the main layout at other board joins and I'm still learning and not happy enough with my skills yet.
This diorama is great for practicing scenery techniques that I'd read about but never used and for convincing myself and T that I can actually do it.
In the end it will also allow casual visitors to the layout room to see that the miles of wiring, framework and track that I've been working on for the past 4 years will actually look like someting, oneday… in the distant future… :roll:
I will probably still crack that bottle of bubbly when the diorama is finished though
Posted
Full Member
Sorry,I thought the diorama was going to be a part of the layout!!! :?
I still think you should stick a couple of wires to one end of the track and run a train through it!
you could add a fiddle yard at either one or both ends and you've got yourself a nice portable little layout you could exhibit!
COME ON,YOU KNOW YOU WANT TO!!! :twisted: :twisted:
(I just want to see them trains runnin' through).I just think you've put so much quality work into it,it'd be a shame not to put it to better use.You can still use it as a photographic backdrop as well!
Come on,Marty……….What do the rest of you all think???
cheers,John.B.
1 guest and 0 members have just viewed this.