My Scratchbuilt Catenary
Posted

Site staff
OO gauge OLE
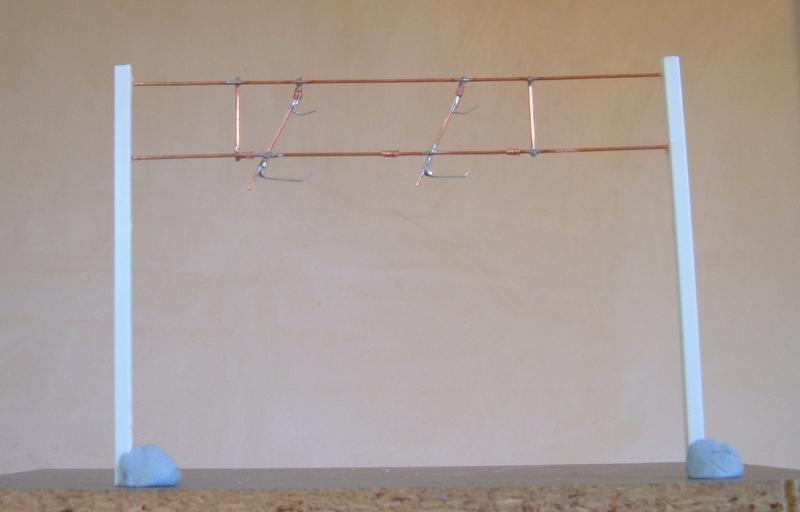
Didn't get anywhere with the portal yesterday due to domestic commitments, but I did a quick mock up to check pantograph height using the older more chunky catenary and two bits of 70mm wood.

Reckon this will look OK.
Ed

Posted

Legacy Member
:thumbs;-):cool:
Owen
web-cam 2.2.74.174:8081
if the lights are off no cam
if the lights are off no cam
Posted
Site staff
Real test will be when I have some OHLE on the layout and actually run a train under it.
Ed
Posted
Site staff
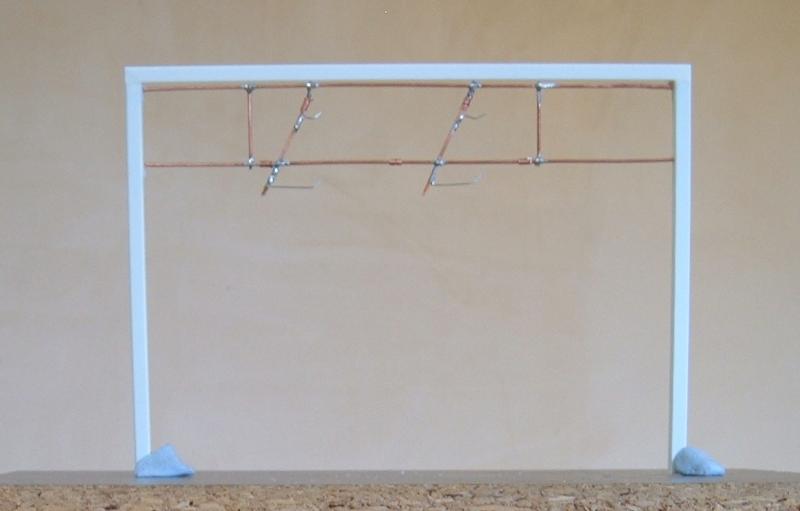
Can see now why people use a brass (or similar) type portal, as then everything solders together.
So portal mark 2, more like a headspan.

This is going to be a bit 'chunky' like the first masts, but if I use 1/0.6 equipment wire same as the contact and catenary wires, it will be too flimsy.
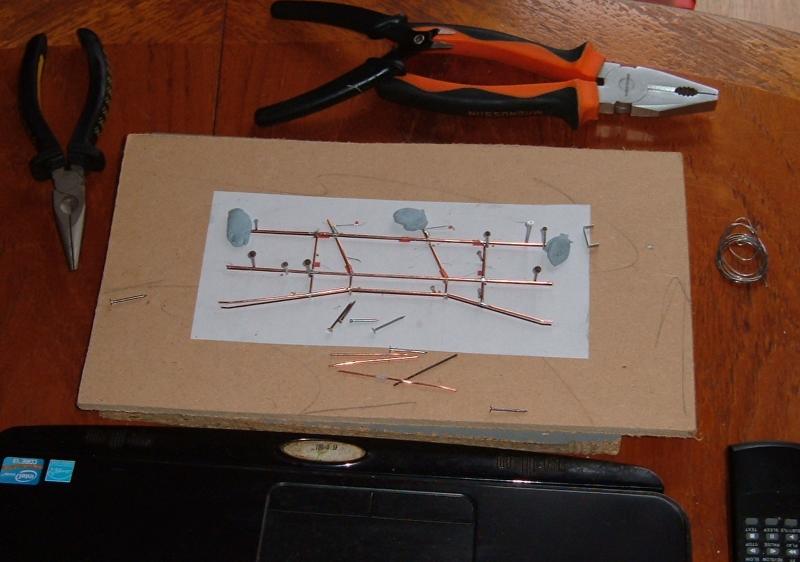
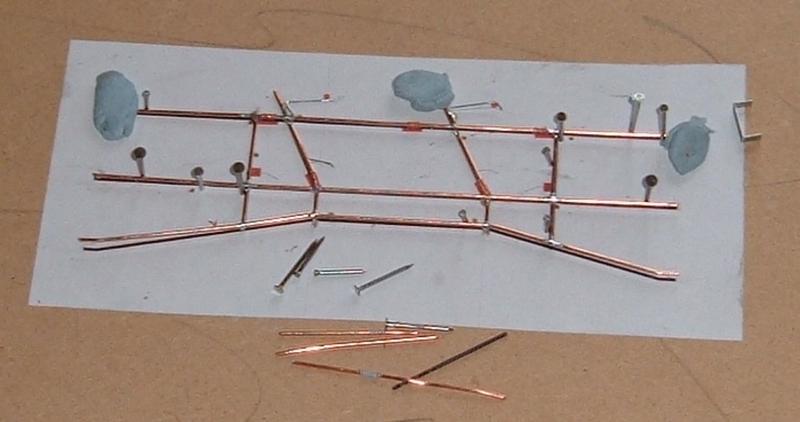
Haven't cut the posts yet, so they're 250mm instead of 150mm.
Looks like I've managed to create a bow in the middle wire, but it was the first attempt.
I've at least one more to do as I need two for the station area, so if it turns out better I'll do a third and discard this one.
Hence, it's not painted.
I've also decided not to have a parallel return wire running along the masts as it would make things too much like a birds nest and extremely difficult to clean the track etc.
This is after all just a representation of OLE, so that the AC locos don't look too daft on the layout

Ed
Posted
Legacy Member
:thumbs;-):cool:
Owen
web-cam 2.2.74.174:8081
if the lights are off no cam
if the lights are off no cam
Posted
Site staff
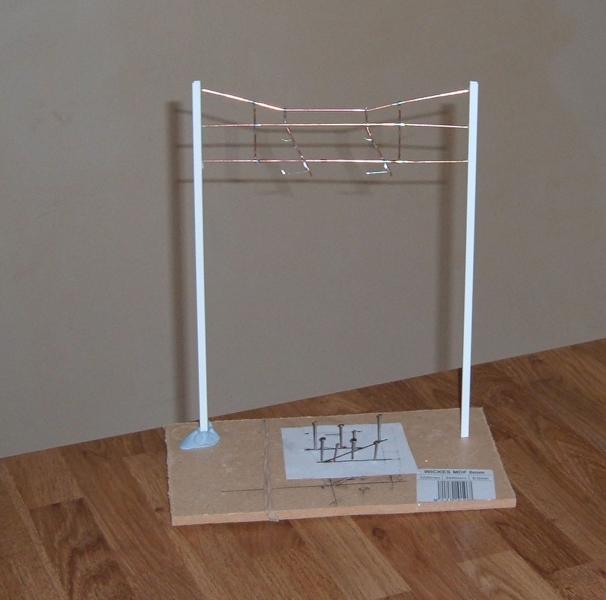
Slow progress, but at least I can do this indoors.
Too cold, dark, damp and 'orrible to do track laying in the garage

Ed
Posted

Inactive Member
I think you are wise to build your own, because the other day I came across a plastic cantenary mixed in with some stuff I had acquired.
It`s extremely fragile and I don`t exaggerate ………I could imagine it set up and one little knock and it`s busted.
Your method, although time consuming, will stand up to minor knocks and bumps because it`s obviously a much more robust system. So it`s worth the effort you`re putting into it.
Carry on old chap and stay warm.
 thumbsthumbs
:cheers Gormo
"Anyone who claims to have never made a mistake, never made anything!!"
https://sites.google.com/site/greatchesterfordmodelrailway/home
https://sites.google.com/site/greatchesterfordmodelrailway/home
Posted

Inactive Member
It must be a challenge to get the curves caused by gravity looking right.
Max
Port Elderley
Port Elderley
Posted

Site staff
see page 4
Ron
NCE DCC ; 00 scale UK outline.
NCE DCC ; 00 scale UK outline.
Posted
Site staff
The curves on the catenary wire just have to look right Max and as mine isn't under tension it's just a case of soldering up a section of catenary that 'look right'. No idea how you get a decent curve if you actually have the wires under tension.
Headspans are all tensioned wires with no curves (unless you manage to create a bow when attaching the headspan to a plastic mast
).From what I've read, I'm sure Peco announced their intention to produce a catenary system many years ago before Dapol even brought theirs out Sol, which I think was 2010. They've only now brought out some wires to go with them, so I wouldn't expect a Peco system soon.
The problem with the Dapol (and I suspect the proposed Peco system) is they only produce plain masts. No headspans, portals or twin arm masts for points, cross overs etc.
If you don't mind your catenary a bit more European looking, then commercially available systems such as Sommerfeldt do all the various parts for OLE, but they ain't cheap.
Ed
Posted

Banned
Cheers, Gary.
Posted
Site staff
Think (hope) it'll look ok once it's all painted and on the layout.
If the headspans do look too chunky compared with the mast arms and wires, I have a plan B
Ed
Posted
Full Member
Cheers, Pete.
it was already on fire when I got here, honest!
Posted
Site staff
Glad I'm not trying this in N gauge
Ed
Posted
Site staff
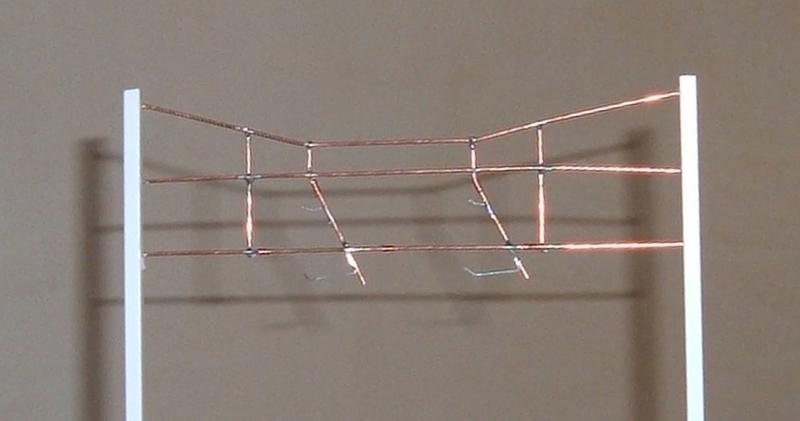
It not only really did look too thick, it was making the whole system higher and more likely to get snagged when reaching across the board.
I the tried cutting a slot in a piece strip of square tube and slotting it over the top wire, but it didn't work to well.
So I'm now just cutting another piece of tube and sticking it just above the wire.
I know the wire looks a bit bowed, but it's the camera angle.
Once painted and viewed from normal operating position I doubt I'll be able to see the top wire, especially after applying my three (five) foot rule.
Ed
Posted

Full Member

Posted
Legacy Member
:thumbs;-):cool:
OWEN
web-cam 2.2.74.174:8081
if the lights are off no cam
if the lights are off no cam
Posted
Site staff
Know what you mean Owen, I bought some 2mm round styrene tube to try and make better looking insulators, as I'd seen done on 'that other forum'.
Started messing about cutting and filing the styrene, and then suddenly thought why am I doing this :roll:. The wrapped wire around the arms version will look fine when painted.
Ed
Posted

Full Member
… and then you realise…. it's like detailing the interior of an N Scale house with slit windows sitting at the back of the layout surrounded by trees.
(I've stopped doing that BTW)Looking good to me Ed… at least the soldering iron will be providing some heat.
cheers
Marty
Posted
Site staff
http://www.ehattons.com/189839/Peco_Products_LC_100_Start_up_pack_12_masts_12_registration_arms_2_jigs_and_16_page_Shows_You_How_Gui/StockDetail.aspx
It's like buses, none for ages and then two come along at once :thud
Meanwhile, back at Latton Fields…..

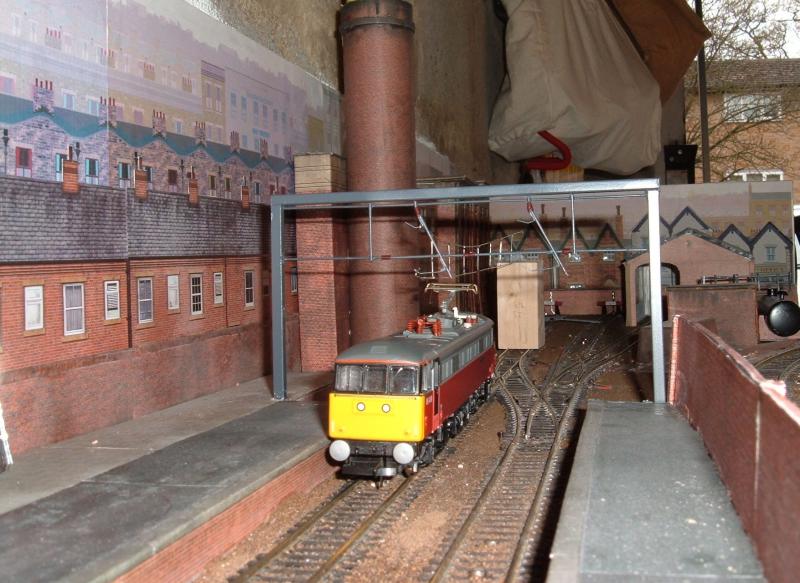
Well it's a start, and mine is considerably cheaper
Haven't quite got the pantograph height 'just right' yet, but I'll get there.
Ed
1 guest and 0 members have just viewed this.