Weybourne
Posted
Guest user
Station set on the North Norfolk coast.
Sounds like a good idea Ron.I'll look forward to the photos
Toto
Posted

Full Member
Proper Preparation makes for Perfect Performance!!
http://yourmodelrailway.net/view_topic.php?id=13331&forum_id=21
http://yourmodelrailway.net/view_topic.php?id=13331&forum_id=21

Posted
Guest user
What livery is the grampus wagon ?
The girder bridge is an ideal solution as well. A great work around.:thumbs
Cheers
Toto
Posted
Full Member

Increased Weybourne's population as well!!
Cheers
Ron
Proper Preparation makes for Perfect Performance!!
http://yourmodelrailway.net/view_topic.php?id=13331&forum_id=21
http://yourmodelrailway.net/view_topic.php?id=13331&forum_id=21
Posted
Guest user
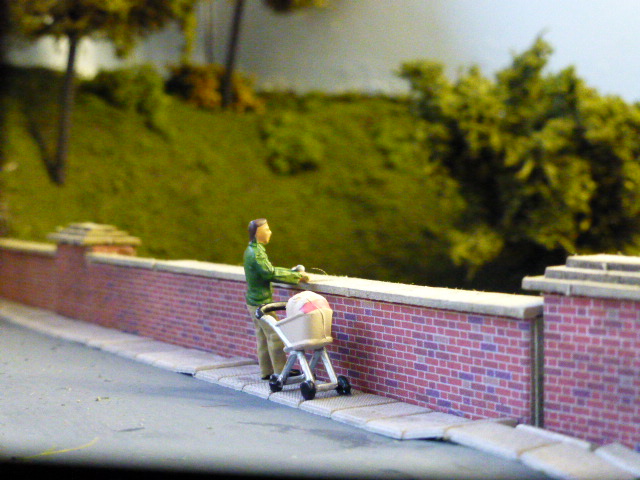
The little people have invaded Weybourne. Like the geezer with the pram looking over the bridge. Great little detail.
cheers
Toto
Posted
Full Member
Cheers
Ron
Proper Preparation makes for Perfect Performance!!
http://yourmodelrailway.net/view_topic.php?id=13331&forum_id=21
http://yourmodelrailway.net/view_topic.php?id=13331&forum_id=21
Posted
Guest user
nice one
cheers Matt
Posted
Full Member
Cheers
Ron
Proper Preparation makes for Perfect Performance!!
http://yourmodelrailway.net/view_topic.php?id=13331&forum_id=21
http://yourmodelrailway.net/view_topic.php?id=13331&forum_id=21
Posted
Guest user
Posted
Full Member
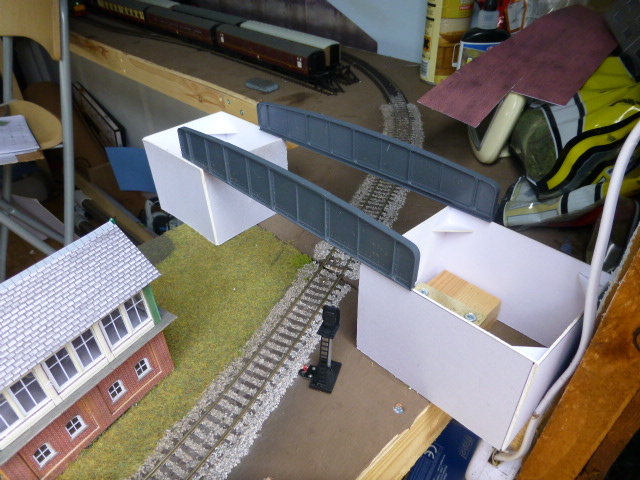
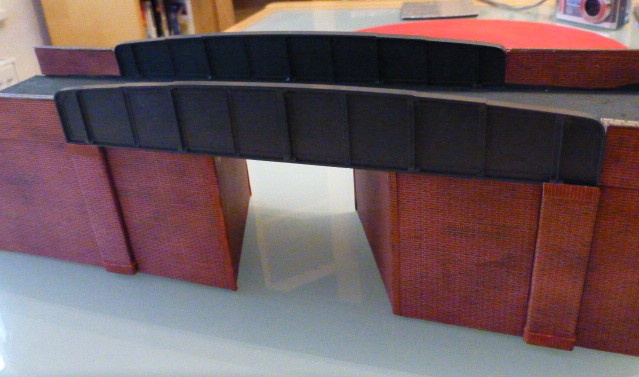
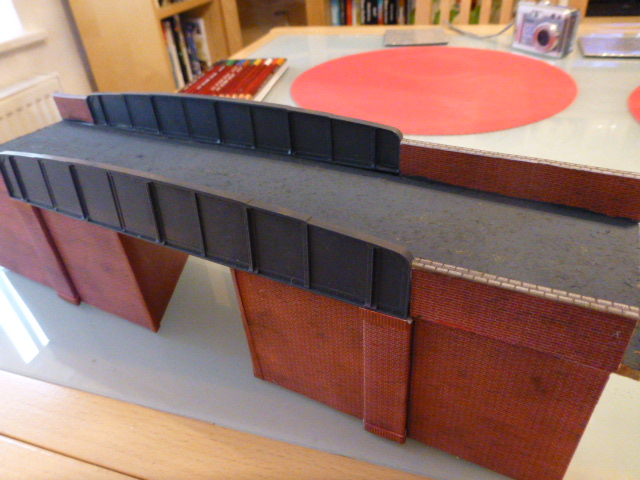
- Basic structure is finished and left to set hard overnight..

Cheers
Ron
Proper Preparation makes for Perfect Performance!!
http://yourmodelrailway.net/view_topic.php?id=13331&forum_id=21
http://yourmodelrailway.net/view_topic.php?id=13331&forum_id=21
Posted
Legacy Member
:thumbs;-):cool:
my webcam link 6.19.184.67:8080
Posted

Banned
Are you going to fit the wing walls to the bridge ? Something like this :
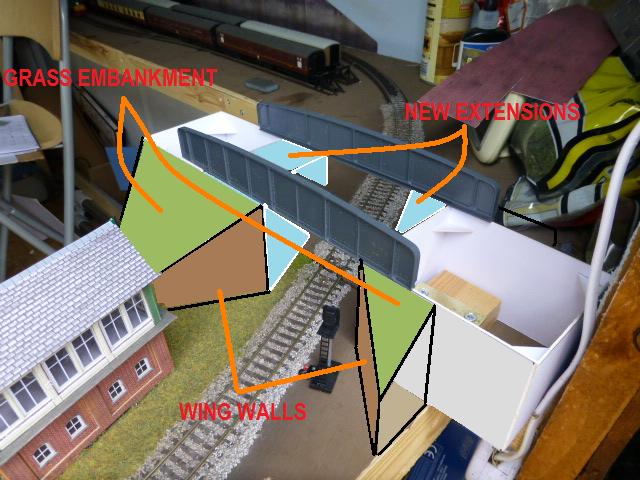
Ofcourse these wing walls would be on each side of the bridge. ;-) But that depends if the rest of the layout behind the bridge will be hidden or on show. The wing walls can be made from card/styrene as you have with the piers. The grassed area (embankment) could be as simple as a paper mache infill with grass flock over the top, to keep the weight down.
Cheers, Gary.
Posted
Full Member
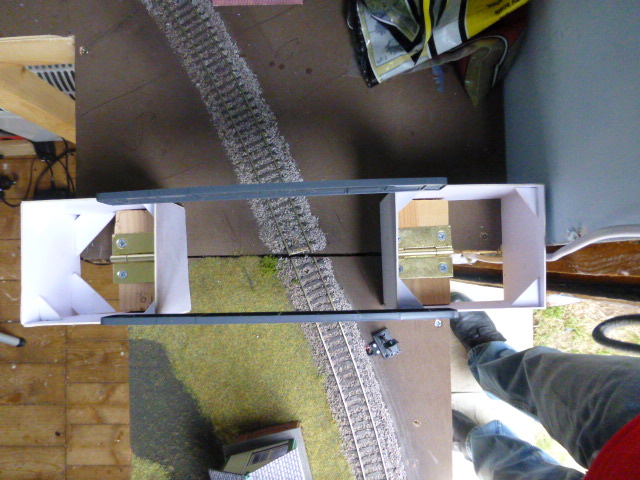
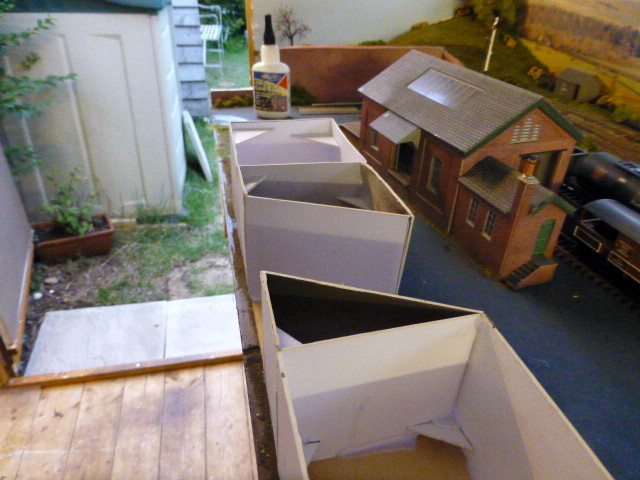
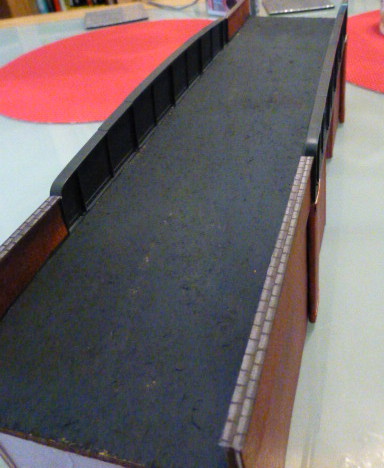
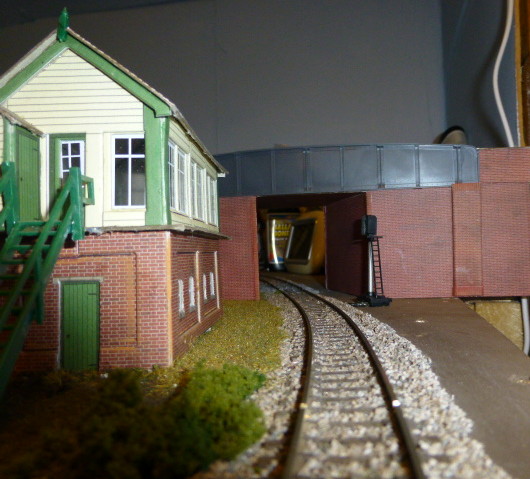
Anyway, basic shell now covered and set to try in, lots to do yet though!!

and!
Cheers
Ron
 Last edit: by g0ibi
Proper Preparation makes for Perfect Performance!!
http://yourmodelrailway.net/view_topic.php?id=13331&forum_id=21
http://yourmodelrailway.net/view_topic.php?id=13331&forum_id=21
Posted
Guest user
Nice little video. The bridge is looking good.:thumbs
Cheers
Toto
Posted
Legacy Member
:thumbs;-):cool:
my webcam link 6.19.184.67:8080
Posted
Full Member
Any comments please?
Cheers
Ron
Last edit: by g0ibi
Proper Preparation makes for Perfect Performance!!
http://yourmodelrailway.net/view_topic.php?id=13331&forum_id=21
http://yourmodelrailway.net/view_topic.php?id=13331&forum_id=21
Posted

Full Member
- Darius
Posted
Guest user

Well done Ron :thumbs
Toto
Posted
Full Member


Thanks Tom!
Cheers
Ron
Proper Preparation makes for Perfect Performance!!
http://yourmodelrailway.net/view_topic.php?id=13331&forum_id=21
http://yourmodelrailway.net/view_topic.php?id=13331&forum_id=21
Posted
Guest user
:thumbs
Toto
1 guest and 0 members have just viewed this.