Weybourne
Posted

Full Member
Station set on the North Norfolk coast.
The Dapol kits are from the old Airfix range and donkey's years old. They are certainly getting their money's worth out of the moulds but it must be costing a pretty penny in waste styrene with all that flash that has to be cleaned off …………..I bought a couple of their brake van kits and I'm not too unhappy with them. Far from perfect by today's standards but much cheaper than the RTR offerings which seem to have gone sky high for some reason.
I haven't bought any other Dapol (ex Airfix) kits so can't comment but the instructions do warn that they might not be the best kits on the market …………..
'Petermac

Posted

Legacy Member
that is just a cop out,if they know the goods aren`t up to standard why don`t they put them right ?
:thumbs;-):cool:
my webcam link 6.19.184.67:8080
Posted
Full Member
They bought the old moulds from Airfix - or their successors - and just continued selling the models. The cost of producing new moulds would probably be more than the income the kits would generate today. With the vast improvement in RTR models, their market must be well below what it was in Airfix days so I'd guess they take the view that, for those who want cheap kits, they serve a purpose.
Most of the kits from that era have disappeared from the market, presumably because of lack of demand in spite of the fact that many were far better than the Airfix range.
'Petermac
Posted

Site staff

I bought two platform kits and in both some bits were a bit warped.
Just did a 'best fit' to get them together and then read (I think it was someone on here) that you can straighten the bent bits using hot water :thud
Ed
Posted

Full Member
Cheers
Ron
Proper Preparation makes for Perfect Performance!!
http://yourmodelrailway.net/view_topic.php?id=13331&forum_id=21
http://yourmodelrailway.net/view_topic.php?id=13331&forum_id=21
Posted
Full Member
Proper Preparation makes for Perfect Performance!!
http://yourmodelrailway.net/view_topic.php?id=13331&forum_id=21
http://yourmodelrailway.net/view_topic.php?id=13331&forum_id=21
Posted
Site staff
Ed
Posted
Full Member
Been sowing some grass tonight!
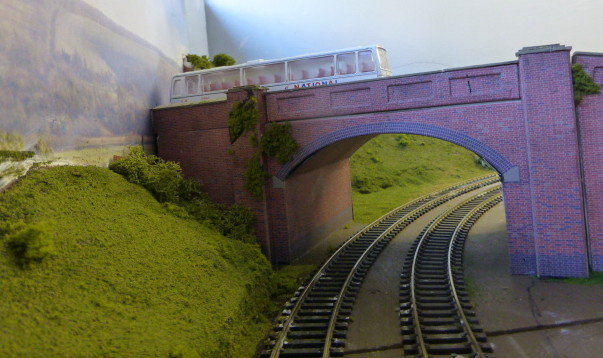
Still a lot to do, let alone the ballasting!!
Cheers
Ron
Proper Preparation makes for Perfect Performance!!
http://yourmodelrailway.net/view_topic.php?id=13331&forum_id=21
http://yourmodelrailway.net/view_topic.php?id=13331&forum_id=21
Posted
Guest user
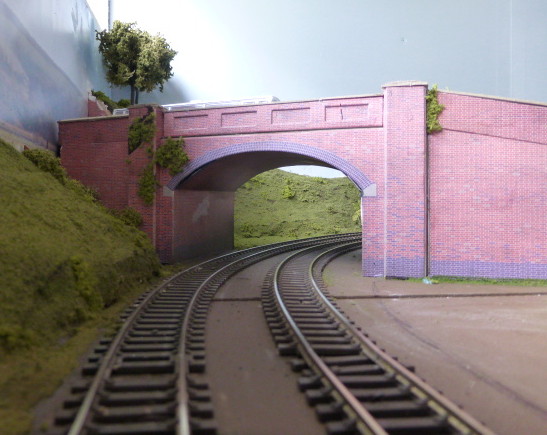
The grass is coming on a treat. Great photographs showing off your bridge. The ballast will be the icing on the cake. Really first class.
Cheers
Toto
Posted

Full Member
Posted
Full Member
Cheers
Ron
Proper Preparation makes for Perfect Performance!!
http://yourmodelrailway.net/view_topic.php?id=13331&forum_id=21
http://yourmodelrailway.net/view_topic.php?id=13331&forum_id=21
Posted
Inactive Member
Great to see you still making rapid progress and leaving me trailing in your wake.
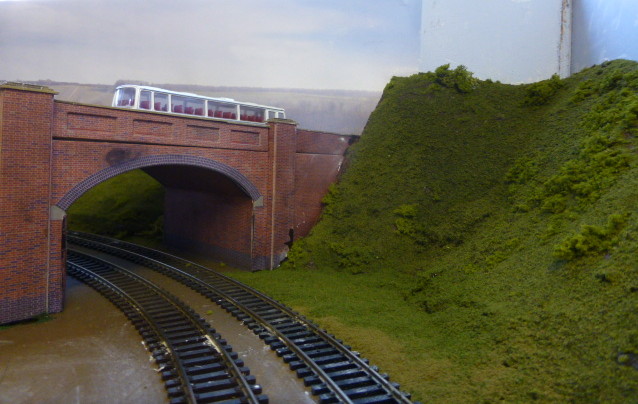
Like you I love the scenic side of things and spend ages trying to get it just right, the corner under the bridge is looking good and I can imagine the trains appearing from under it.
But that brings me to the one thing I would have done differently - I hope you don't mind me saying it - but when the road slopes down from the bridge I would have had the strengthening columns upright but the brick panels either straight or following the slope. I just can't imagine a bricky building a support column at an angle. Just my thought as it stuck out to me.
Of course someone will pop up a picture and go here's one.
Anyway I am enjoying the journey so far so keep up the good work.
Jim
My layout thread http://yourmodelrailway.net/view_topic.php?id=10930&forum_id=21
Buildings for Hemyock http://yourmodelrailway.net/view_topic.php?id=10931&forum_id=14
Buildings for Hemyock http://yourmodelrailway.net/view_topic.php?id=10931&forum_id=14
Posted
Full Member
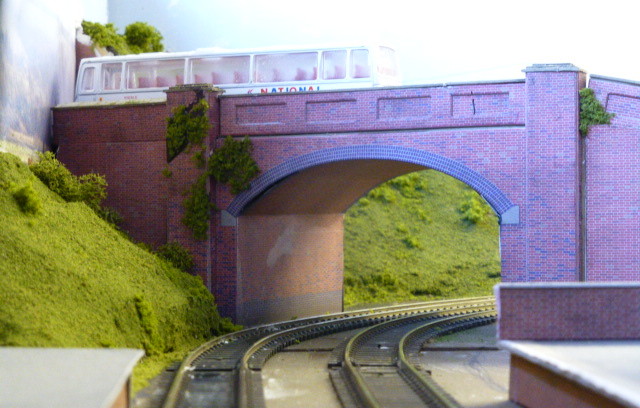
I can live with it although I might hide them under some more foliage!!
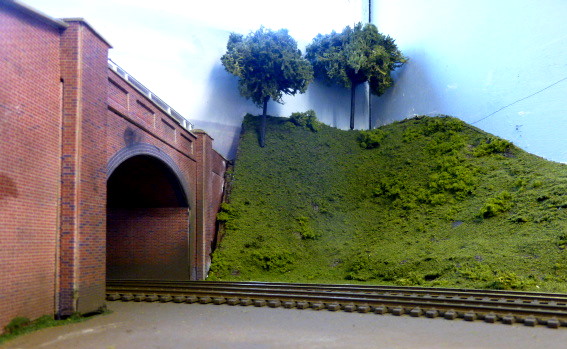
Did a couple more tree's today, the first of many for Weybourne as it has woods all around it (in real life!)
Cheers
Ron
 Last edit: by g0ibi
Proper Preparation makes for Perfect Performance!!
http://yourmodelrailway.net/view_topic.php?id=13331&forum_id=21
http://yourmodelrailway.net/view_topic.php?id=13331&forum_id=21
Posted

Full Member
Cheers
Andy
Andy
Posted

Banned
Just did a 'best fit' to get them together and then read (I think it was someone on here) that you can straighten the bent bits using hot water :thud
Ed
I had to do the same with the water tank I used on my son's layout, Drop into boiled water for about 10-15 seconds then place out onto glass. That fixes them.
Ron,
The scenics are certainly coming on. It must be spring in your part of the world ! ;-) Looking very green. :thumbs
Cheers, Gary.
Posted
Full Member
Andy, I have ordered some Gorse bushes, I tried making some and they looked 'naff' :Red Card
Cheers
Ron
Proper Preparation makes for Perfect Performance!!
http://yourmodelrailway.net/view_topic.php?id=13331&forum_id=21
http://yourmodelrailway.net/view_topic.php?id=13331&forum_id=21
Posted
Full Member
Cheers
Ron
Proper Preparation makes for Perfect Performance!!
http://yourmodelrailway.net/view_topic.php?id=13331&forum_id=21
http://yourmodelrailway.net/view_topic.php?id=13331&forum_id=21
Posted
Guest user
Really good
Toto
Posted
Inactive Member
I hope my last comment didn't make you keep looking at it so much that it annoyed you to see it, I know occasionally when I have photographed something and see a glaring error that I had not seen before I just can't live with it and have to redo it.
I was looking through some old pictures yesterday and spotted a couple of things that I thought were wrong but have otherwise lived with for months.
Funnily enough it's mostly with the scenery as I don't seem to worry about the stock too much.
Keep up the good work as it's encouraging me to get all my station track laid this weekend.
Jim
My layout thread http://yourmodelrailway.net/view_topic.php?id=10930&forum_id=21
Buildings for Hemyock http://yourmodelrailway.net/view_topic.php?id=10931&forum_id=14
Buildings for Hemyock http://yourmodelrailway.net/view_topic.php?id=10931&forum_id=14
Posted
Banned
See here : http://yourmodelrailway.net/view_topic.php?id=4708&forum_id=21&page=9#p152215
Cheers, Gary.
1 guest and 0 members have just viewed this.