Waddlemarsh
Posted
Full Member
Somewhere SW of London. Somewhen before today
Thanks for that, Rick. I think my hands shake too much nowadays to do that.
Cheers Pete.

Posted

Site staff
Gwiwer said
I was hoping to show more progress from the clubroom this week. Unfortunately I was taken ill more or less as I arrived and did nothing of note.
/snapback]
Hope you've recovered Rick, lamps look good

Posted

Full Member
Ed said
Gwiwer said
I was hoping to show more progress from the clubroom this week. Unfortunately I was taken ill more or less as I arrived and did nothing of note.
/snapback]
Hope you've recovered Rick, lamps look good
From “Post #292,786”, 10th November 2025, 7:00 am
Ah yes, thank you. It seems to have been a bug going around though I thought differently at the time. Being taken ill very suddenly (within a few minutes) and with violent stomach cramps I thought something I ate might be the problem. I spent 90 minutes shivering and shaking right up against the heater unable to get warm. unfortunately our club first aid kit does not include a thermometer; I could have done with one as I thought for a time it might be sepsis returning in which case a blue-light run to hospital would have been the only option.
After around 90 minutes I slowly felt better, the shivers stopped and I was able to gingerly move around, clear up my stuff and drive home. I spent the next day doing nothing but was at least eating and drinking almost normally. It took a few more days to feel fully myself but I'm OK now and with no lasting ill-effects. Except that all my main tools and some rolling stock is at Club where it shouldn't be. I'll make do until I can get back there later this week.
Full Member
Cheers Pete.
Site staff
Full Member
Full Member
This week I managed the afternoon at club without falling ill!!!
One other member suffered stomach pains later last week. However we all now think it’s a bug doing the rounds due to the extremely quick onset. Also the strong feeling that Huey was about to be summoned but never was.
Onwards and upwards.
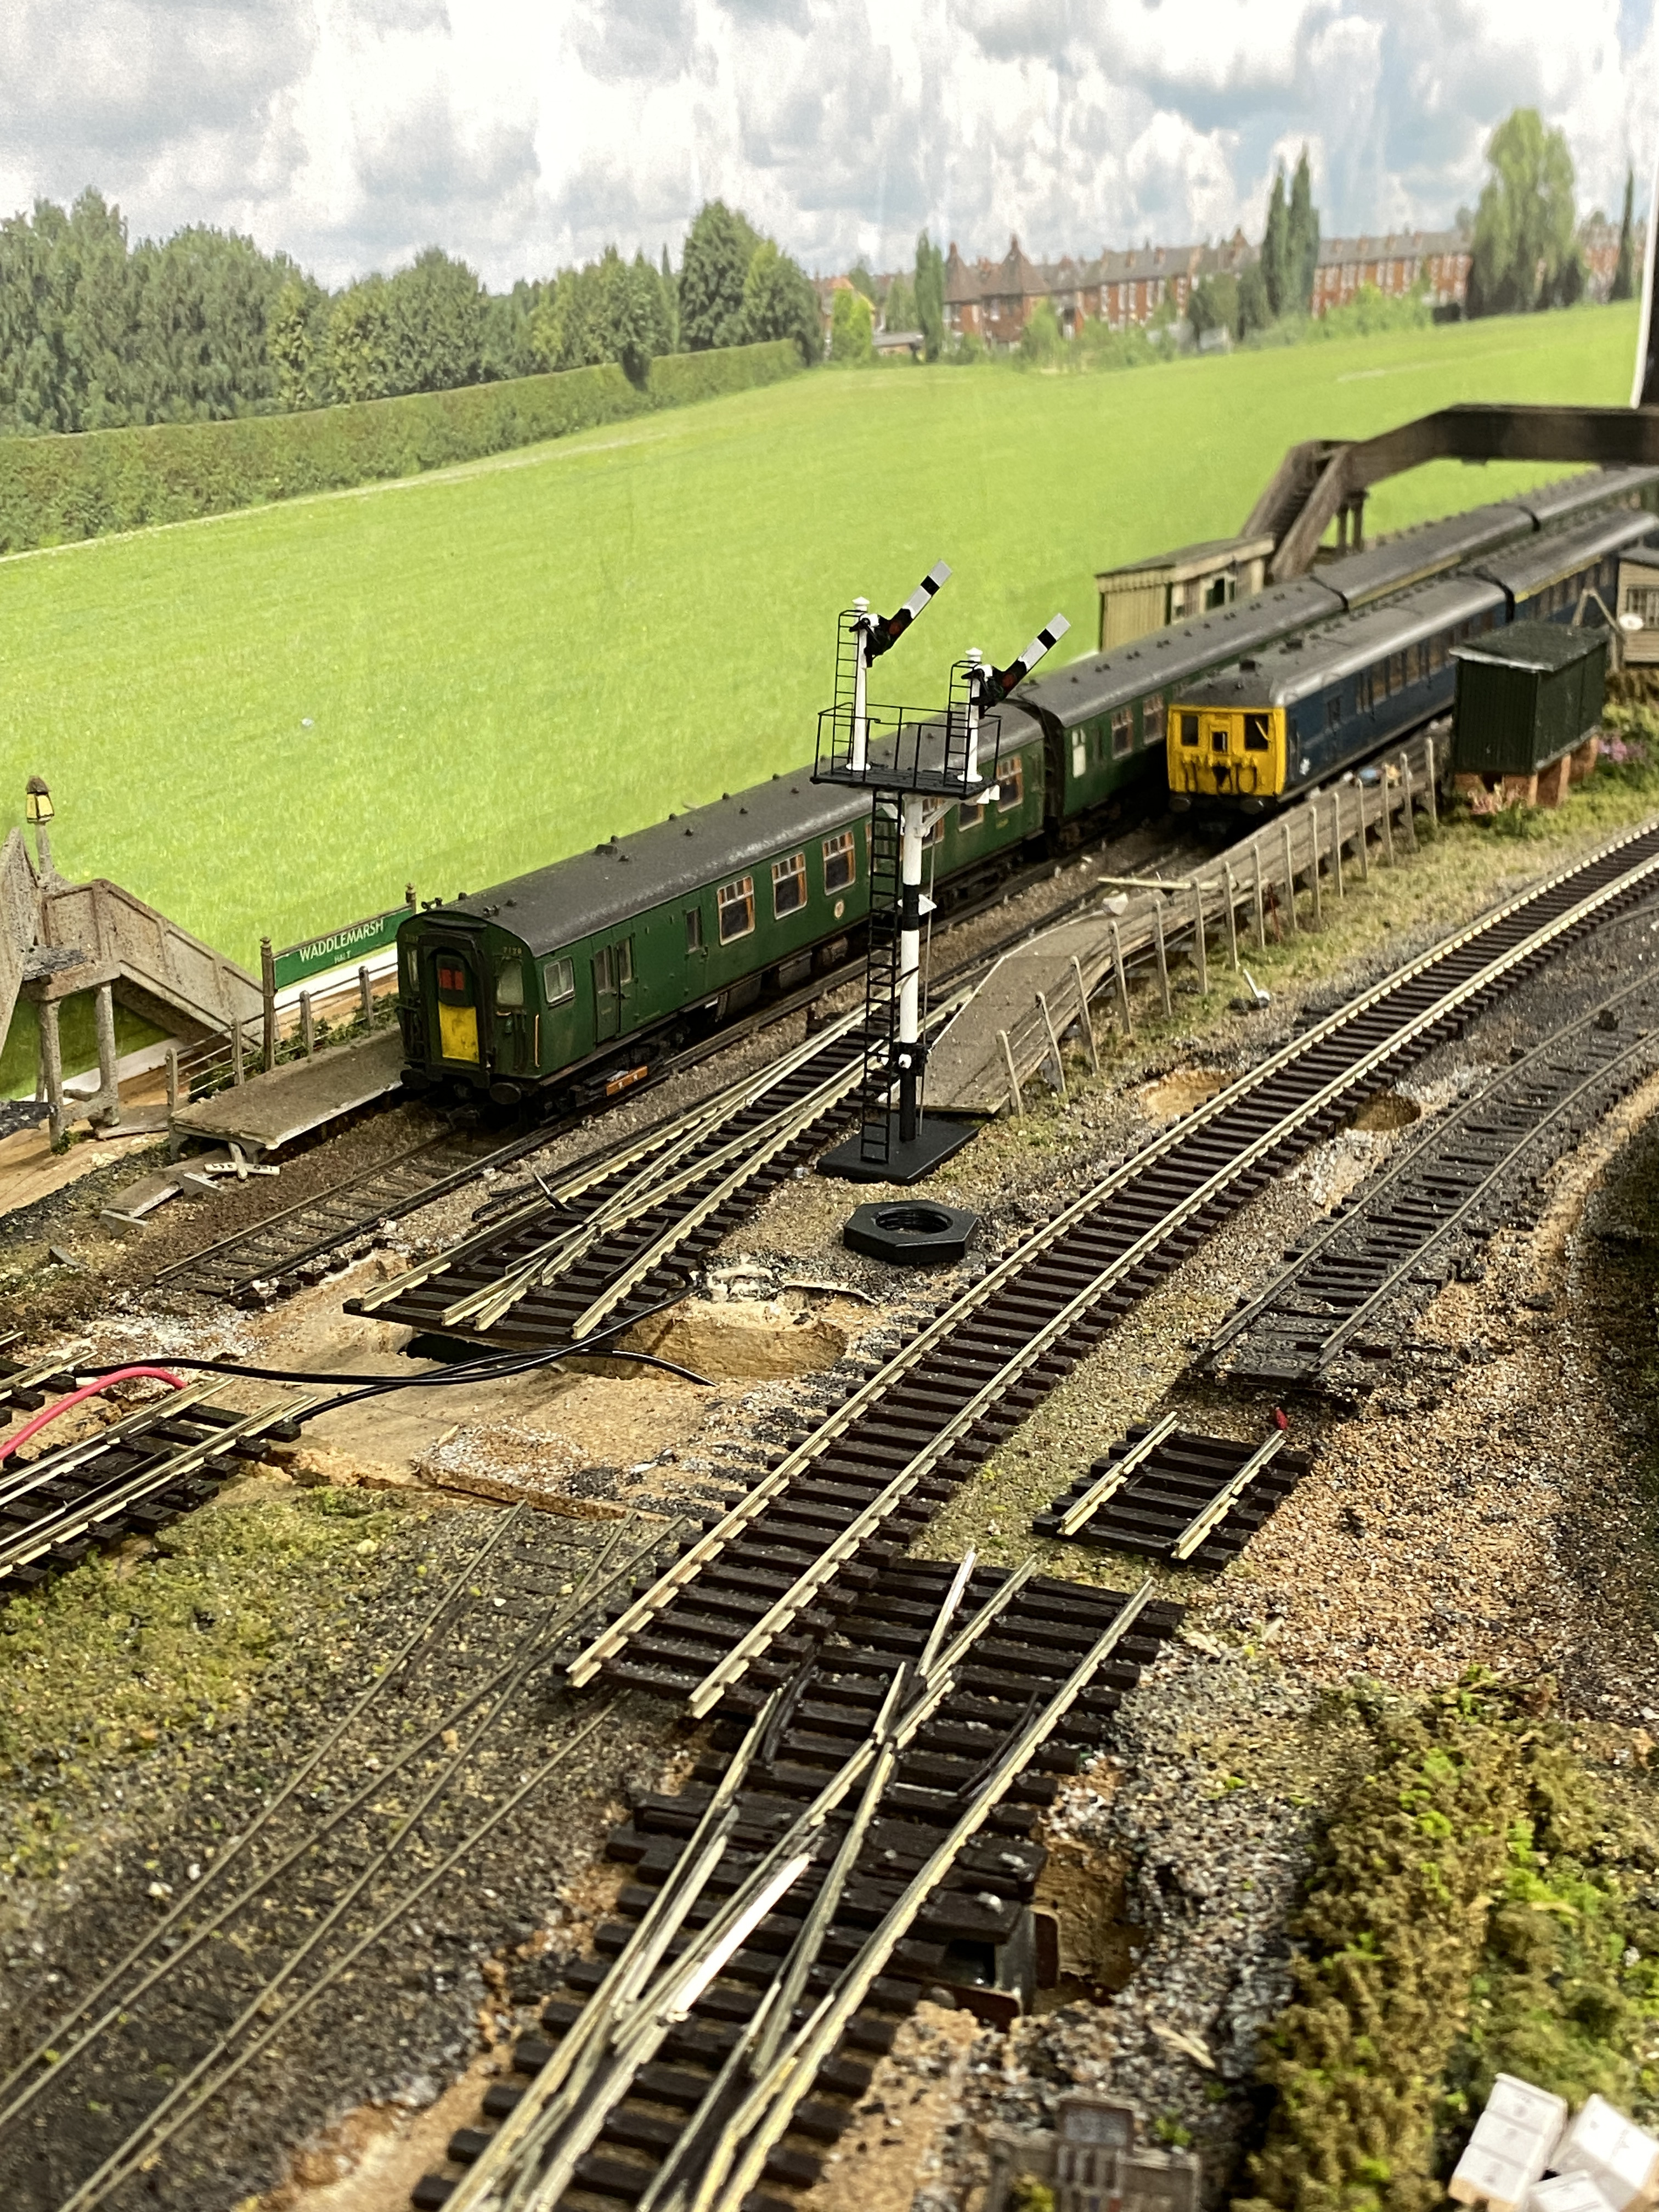
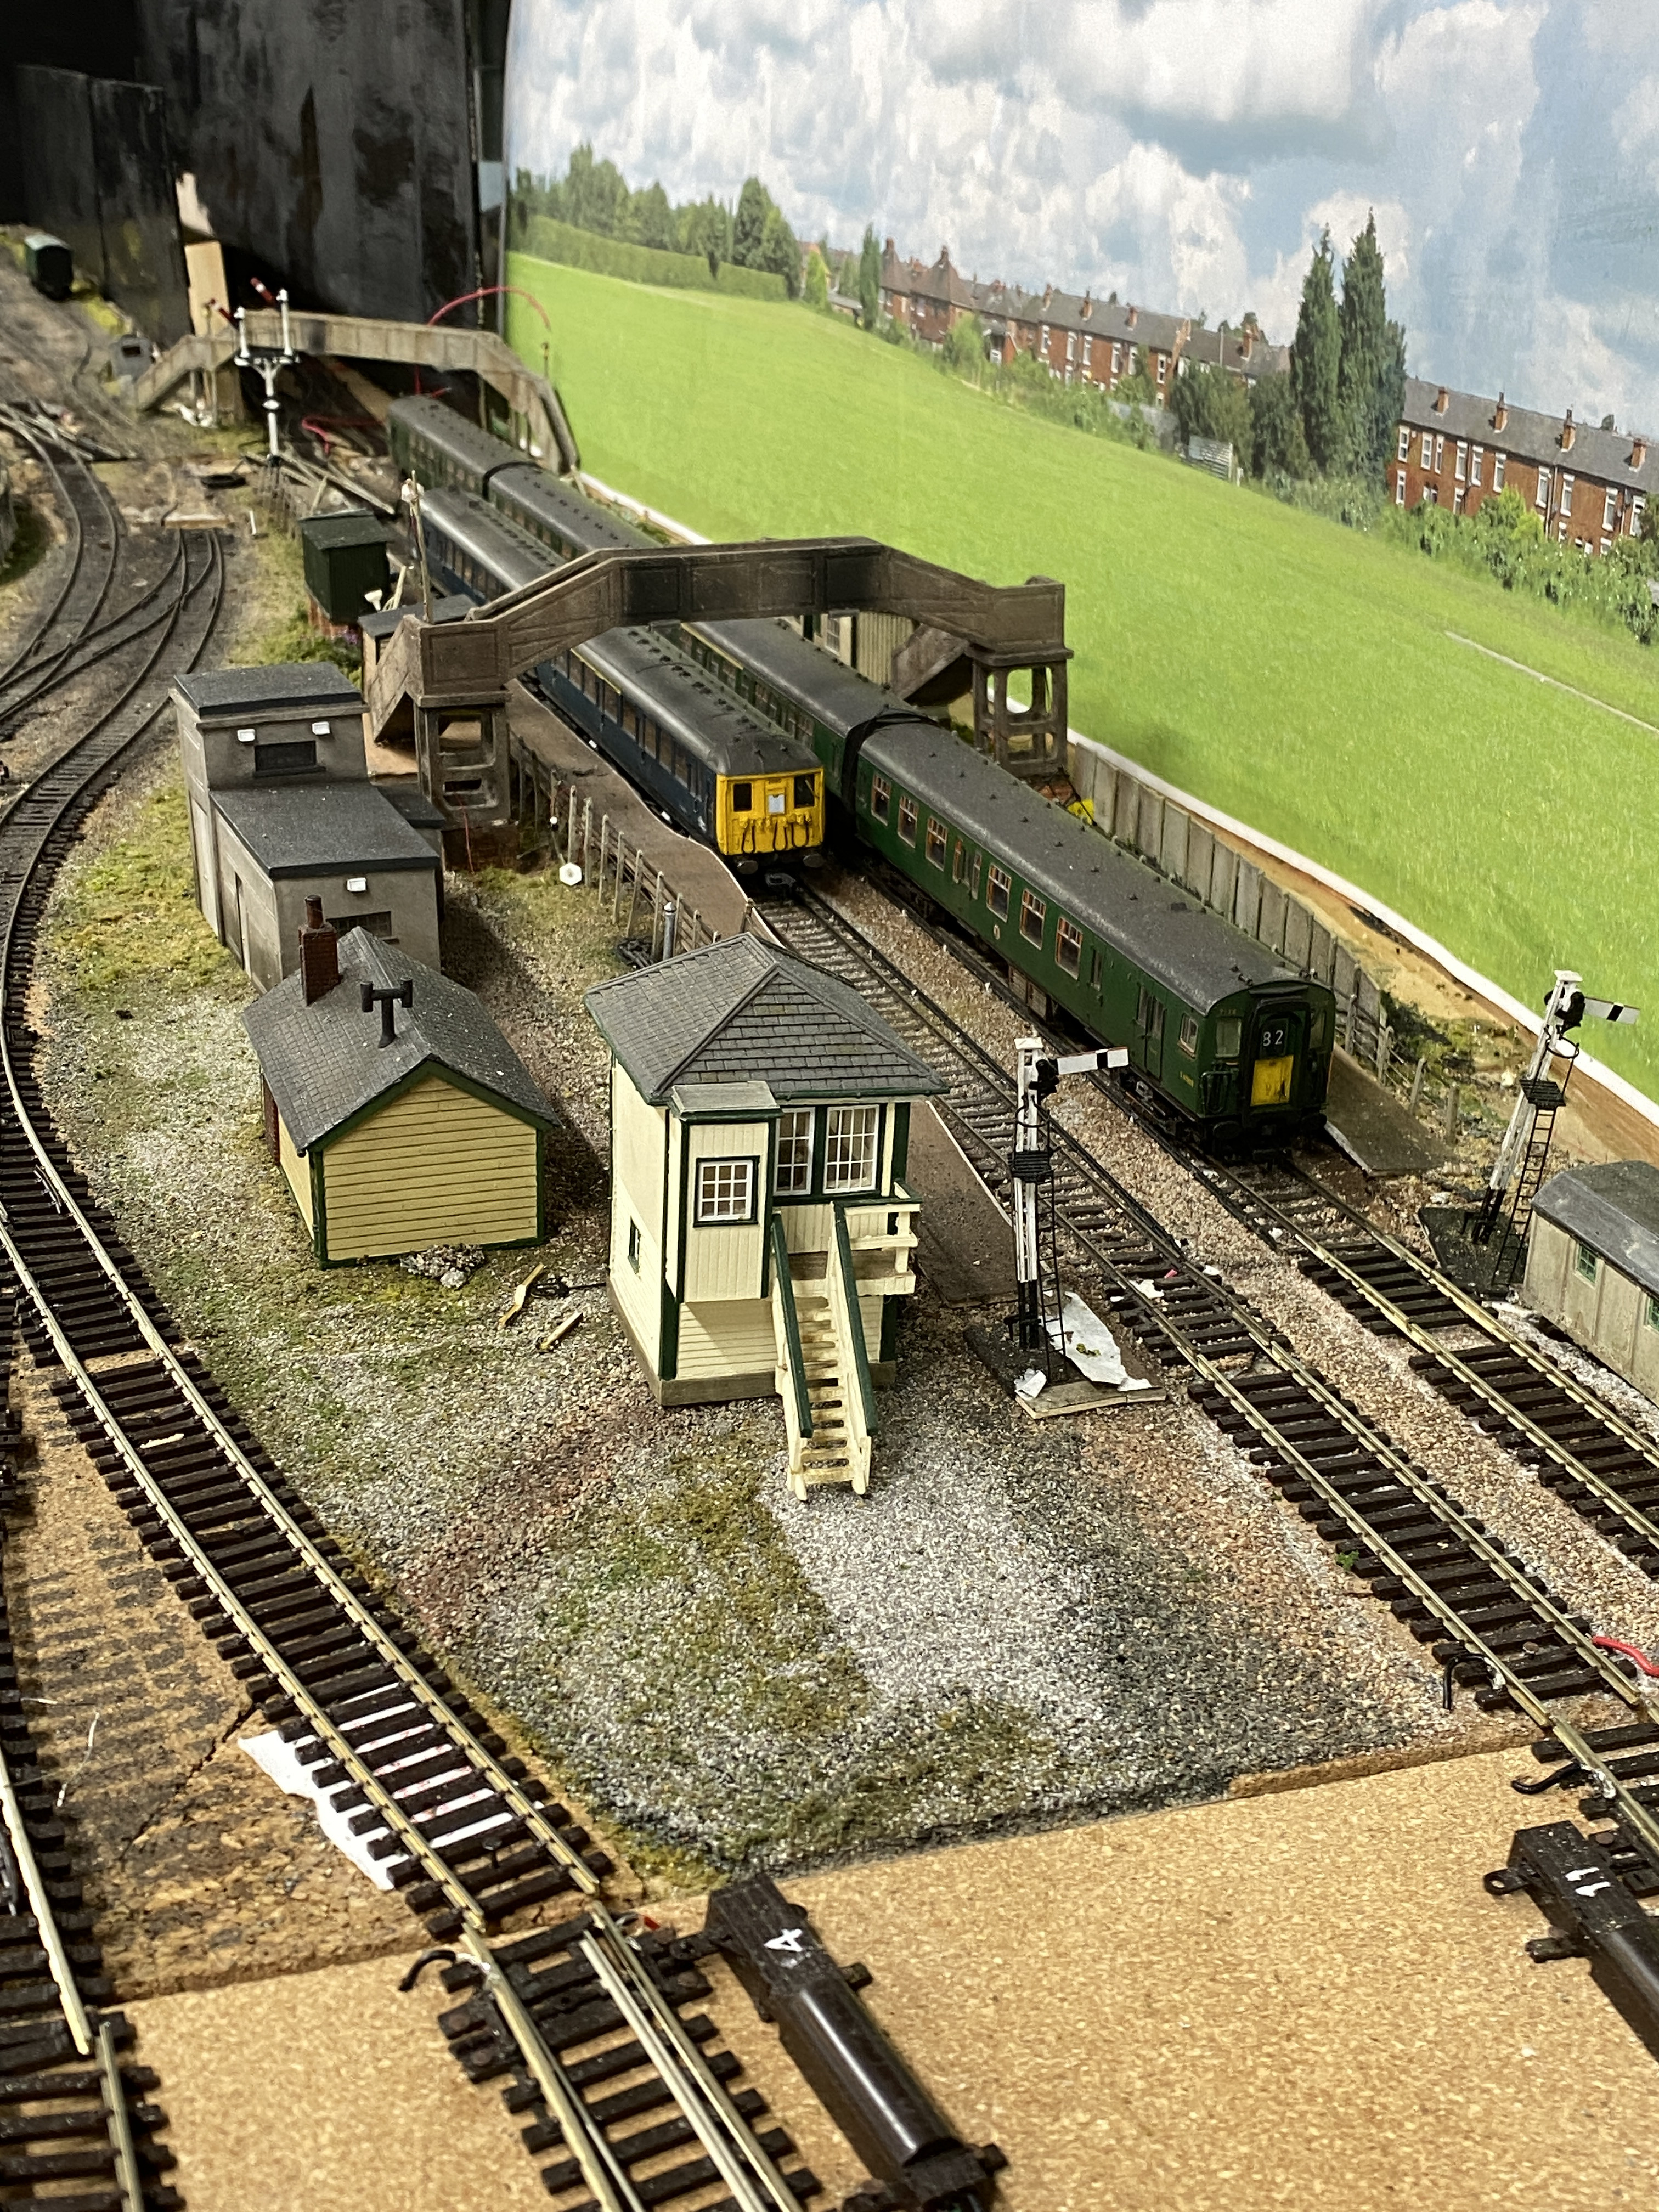
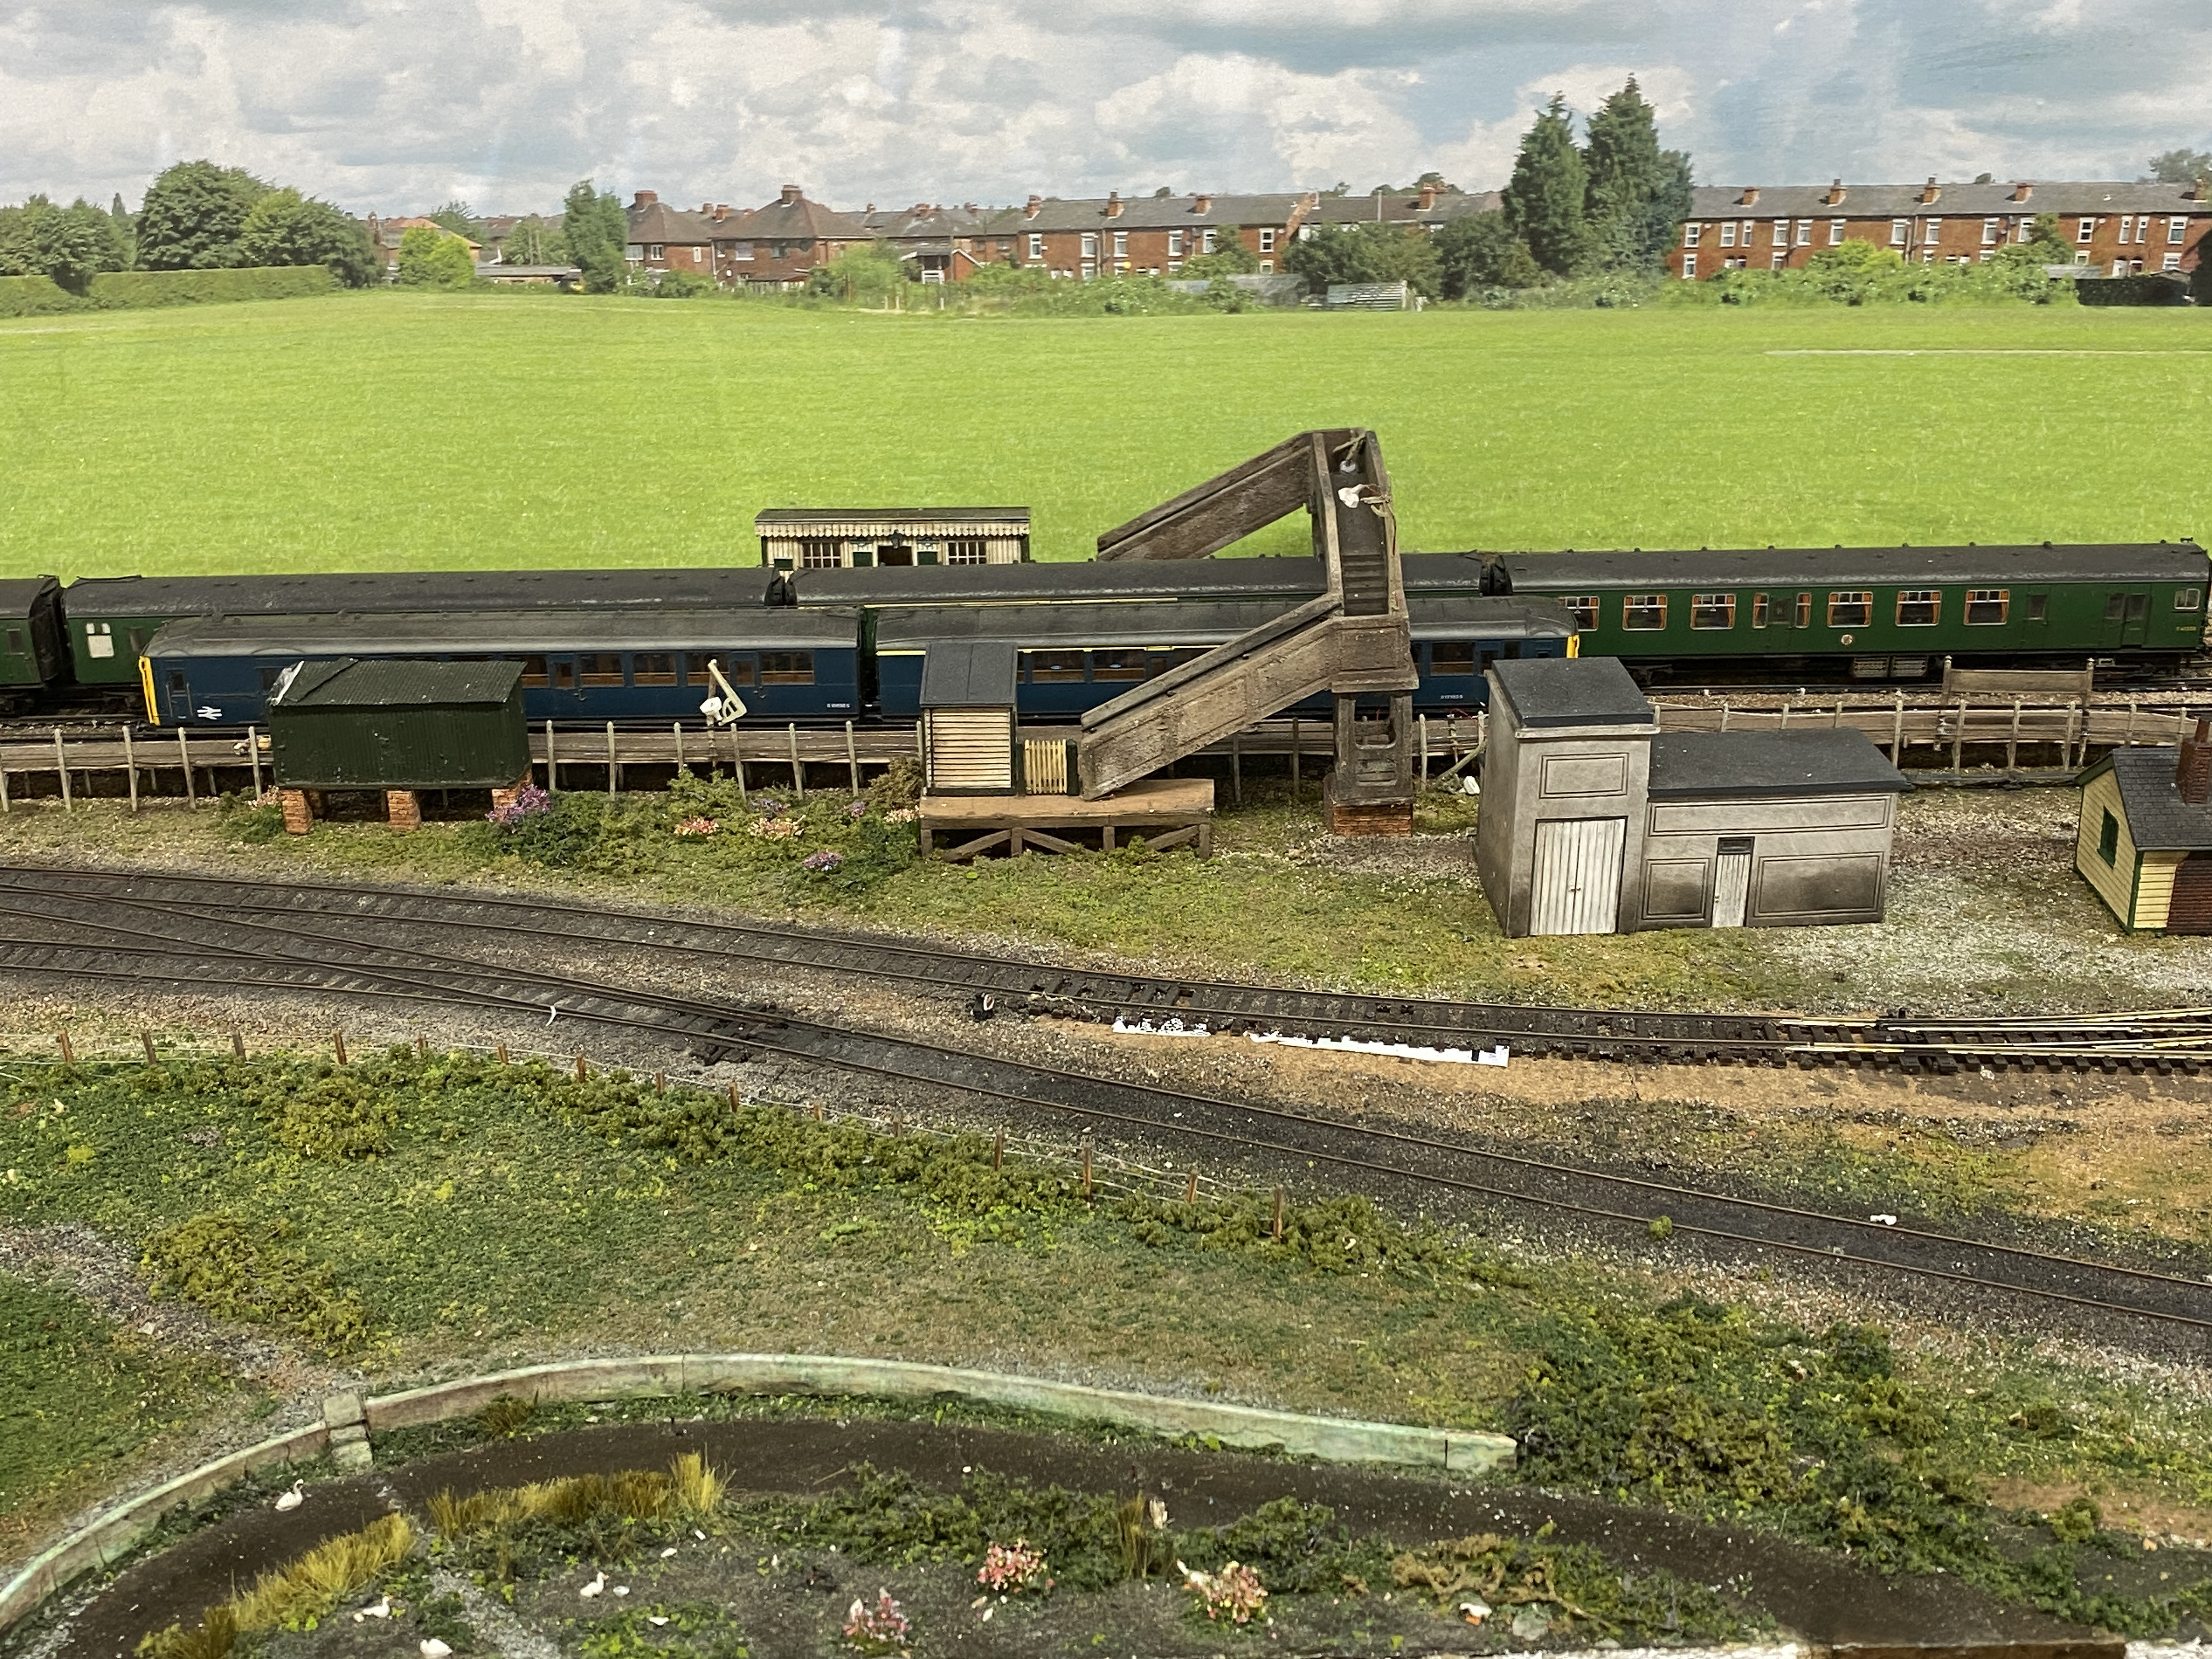
One panel of backscene has been pasted up. It’s not exactly the same as before because I am using the full height of the print. Previously these had been cut down to reduce the amount of grass and bring houses “closer” to the railway.
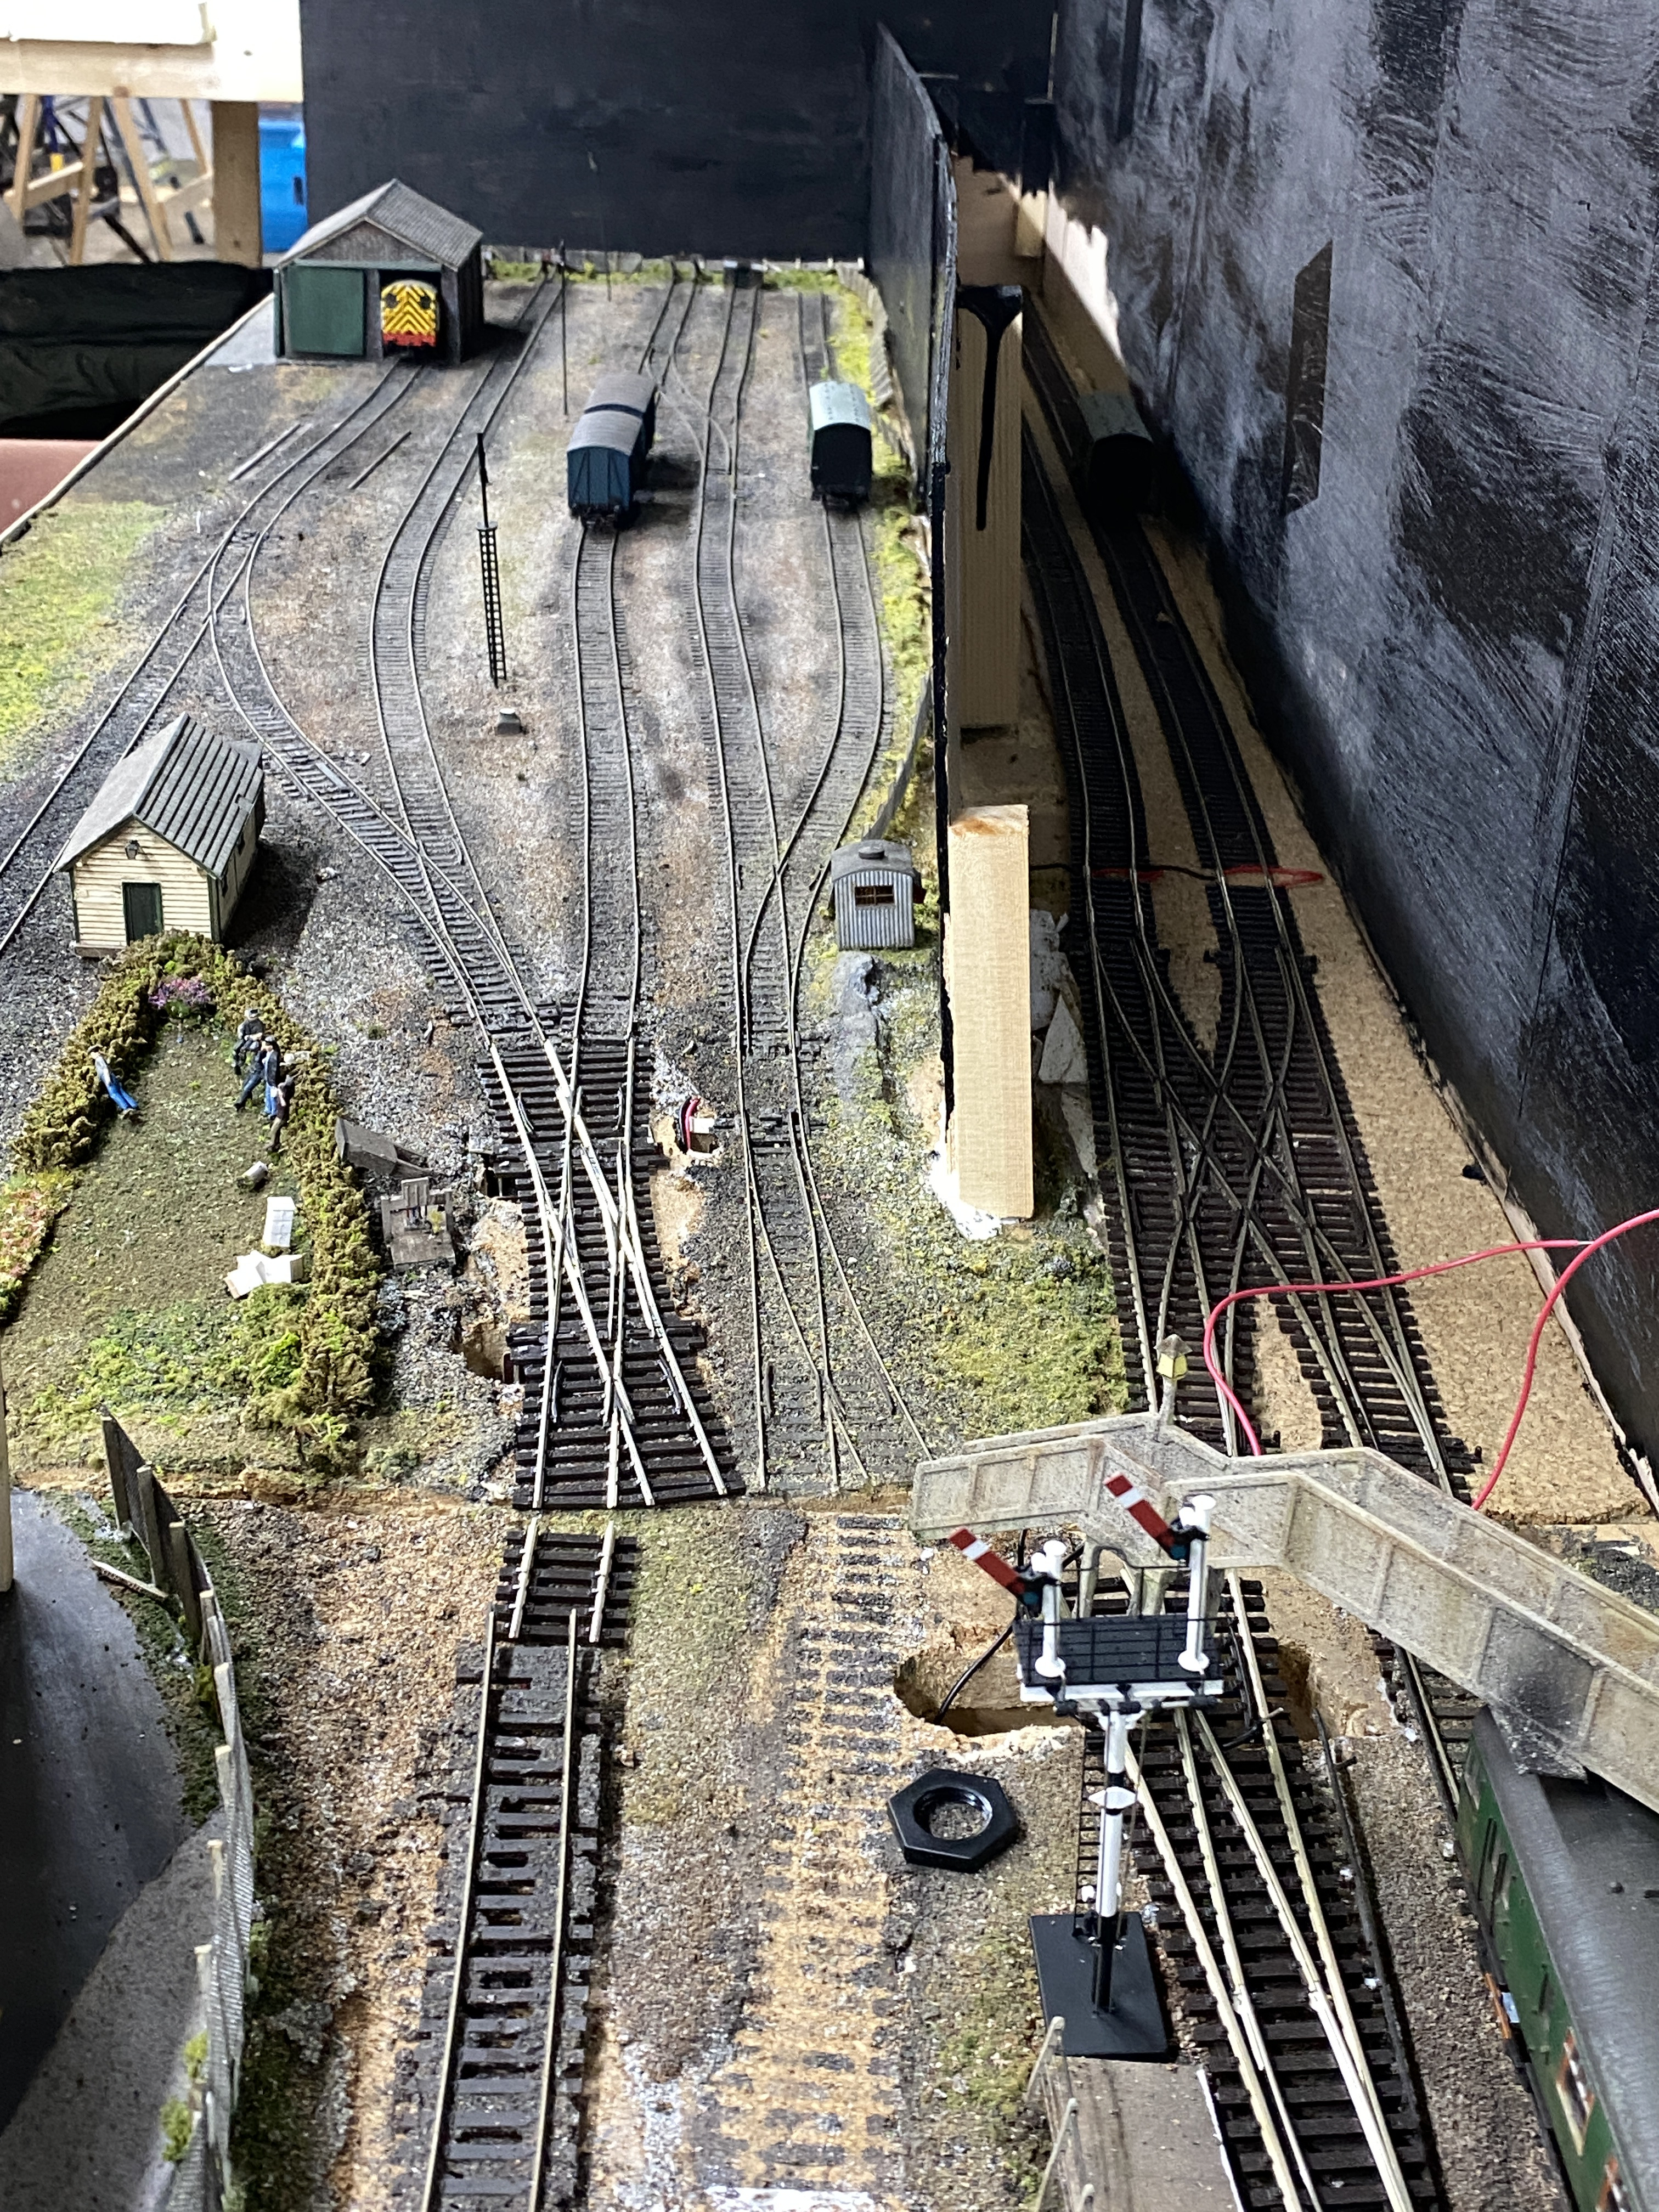
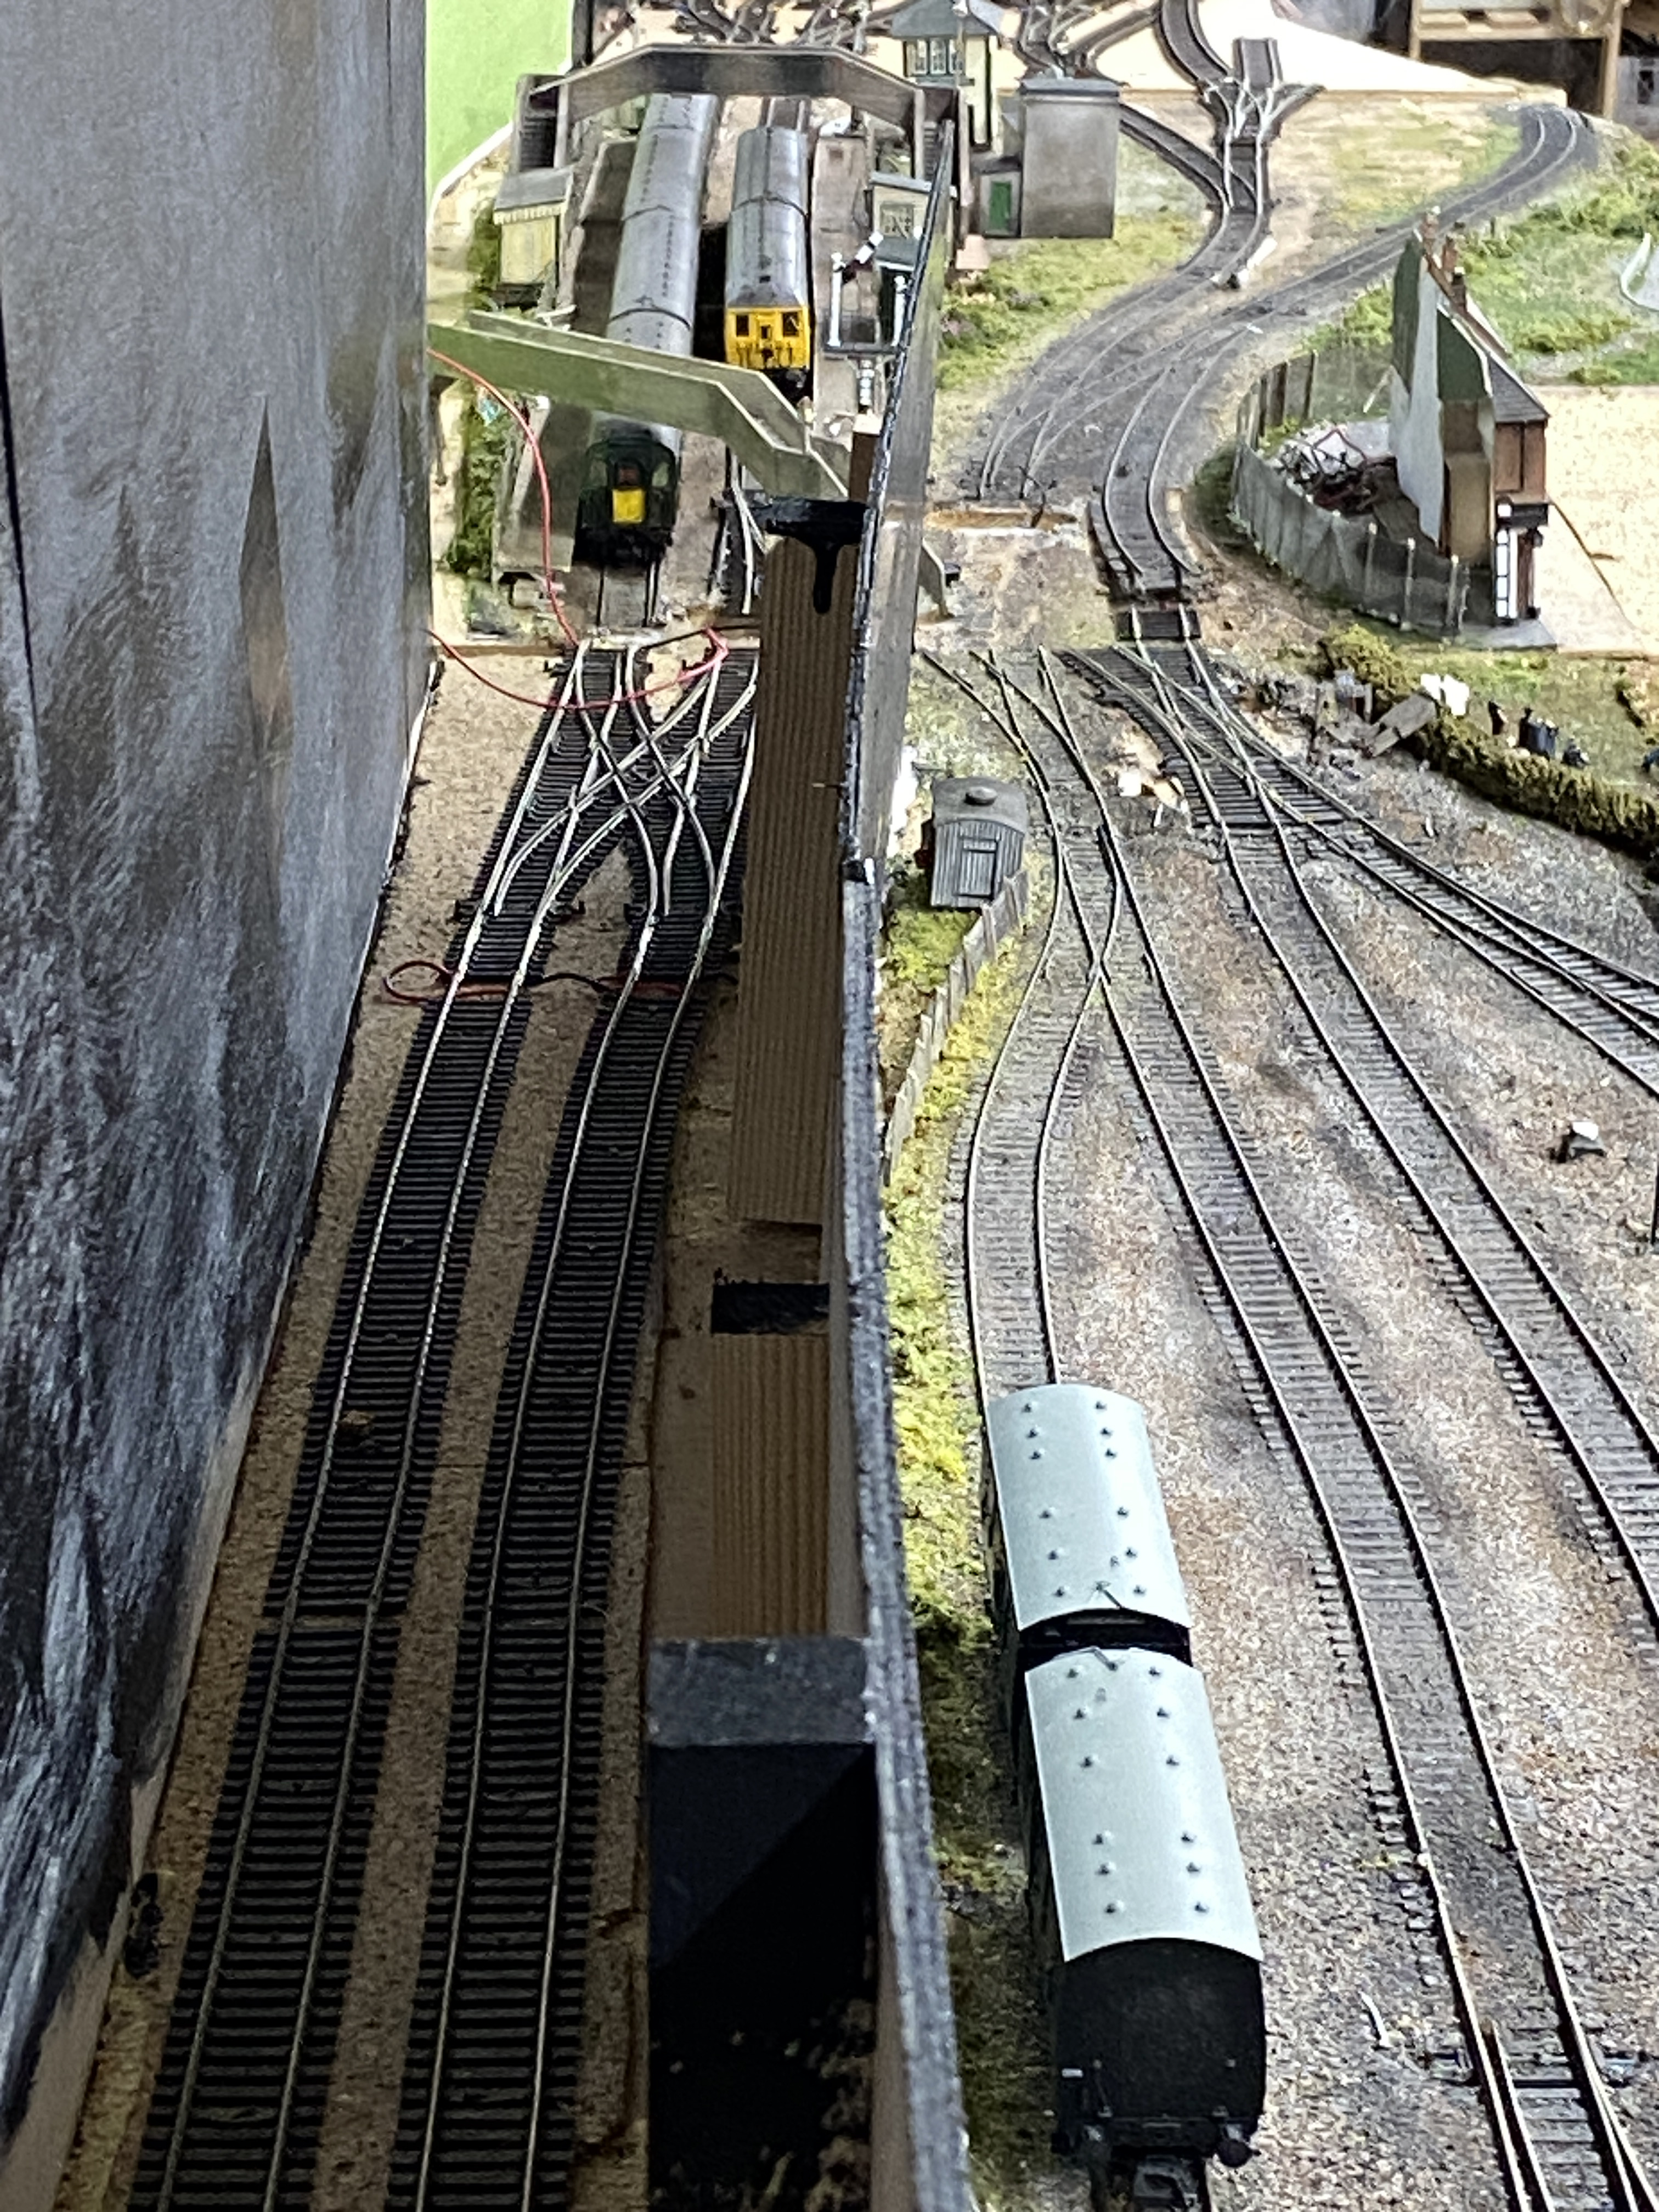
More track adjustments have taken place. The crossover into the two-road sidings has been realigned to remove the S-bend. This has allowed the last of the back-boards to be fitted in front of it.
The double-slip approaching the goods yard has been replaced. This was terminally damaged in the dismantling process. The opportunity has been taken to replace electrofrog with insulfrog for slightly easier wiring / operation.
One issue yet to be resolved is the connection from the passenger line to the yard. There is very little space and few options. I hope a first-radius point will do the trick. The other matter which has been entirely self-inflicted is that the running lines are code 75 but the sidings code 100. The original track would have been all code 75 but when the boards were erected in London for Waddlemarsh v.1 I had plenty of spare code 100 plain track but no code 75. So the fiddle yard was built at minimal cost using what was to hand. There are now several “code-changing” rail sections around the layout. I also have a good supply of code 100 points but no spare code 75 meaning I still need to buy new ones whist perhaps 20 sit unused in the workbench drawer.
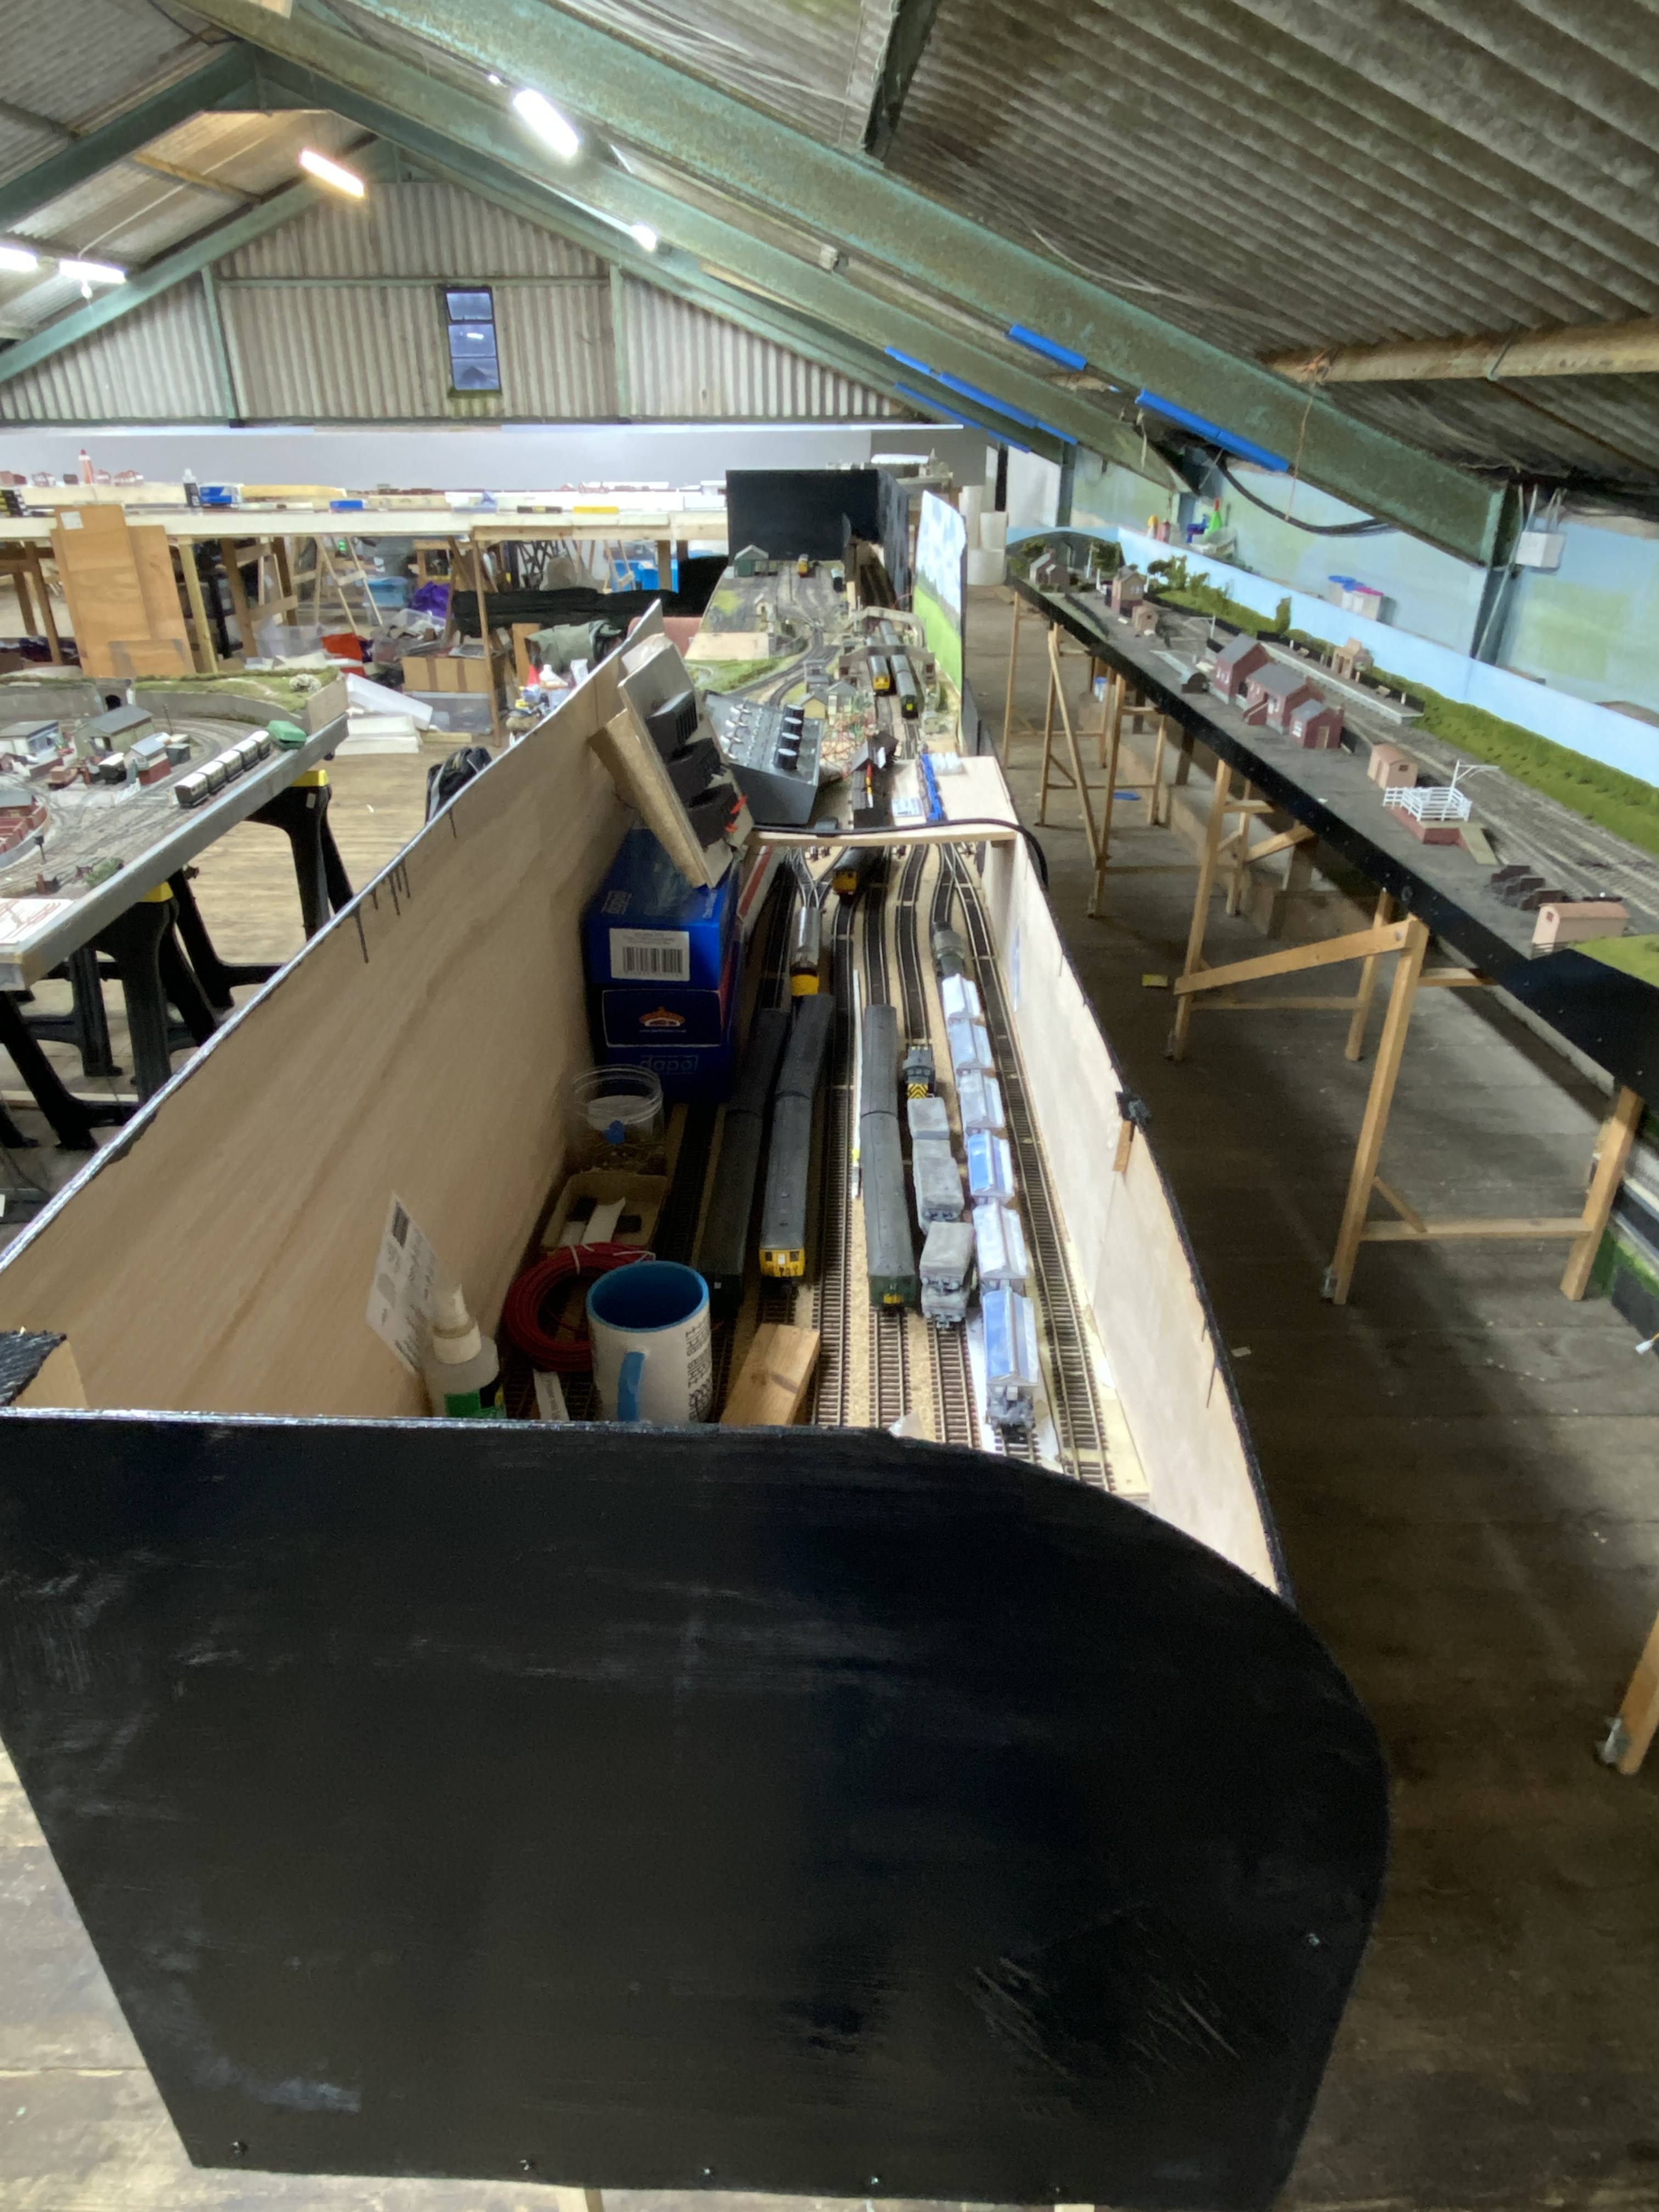
It’s looking a little more like a display layout. The target remains to have it in full working order and hopefully with a show or two during next year. We have entered the cool damp months in the clubhouse when glues and paint don’t dry and paper / card becomes damp and mouldy. I have two dehumidifiers under the dust-sheet covers to address this as far as possible.
Posted
Full Member
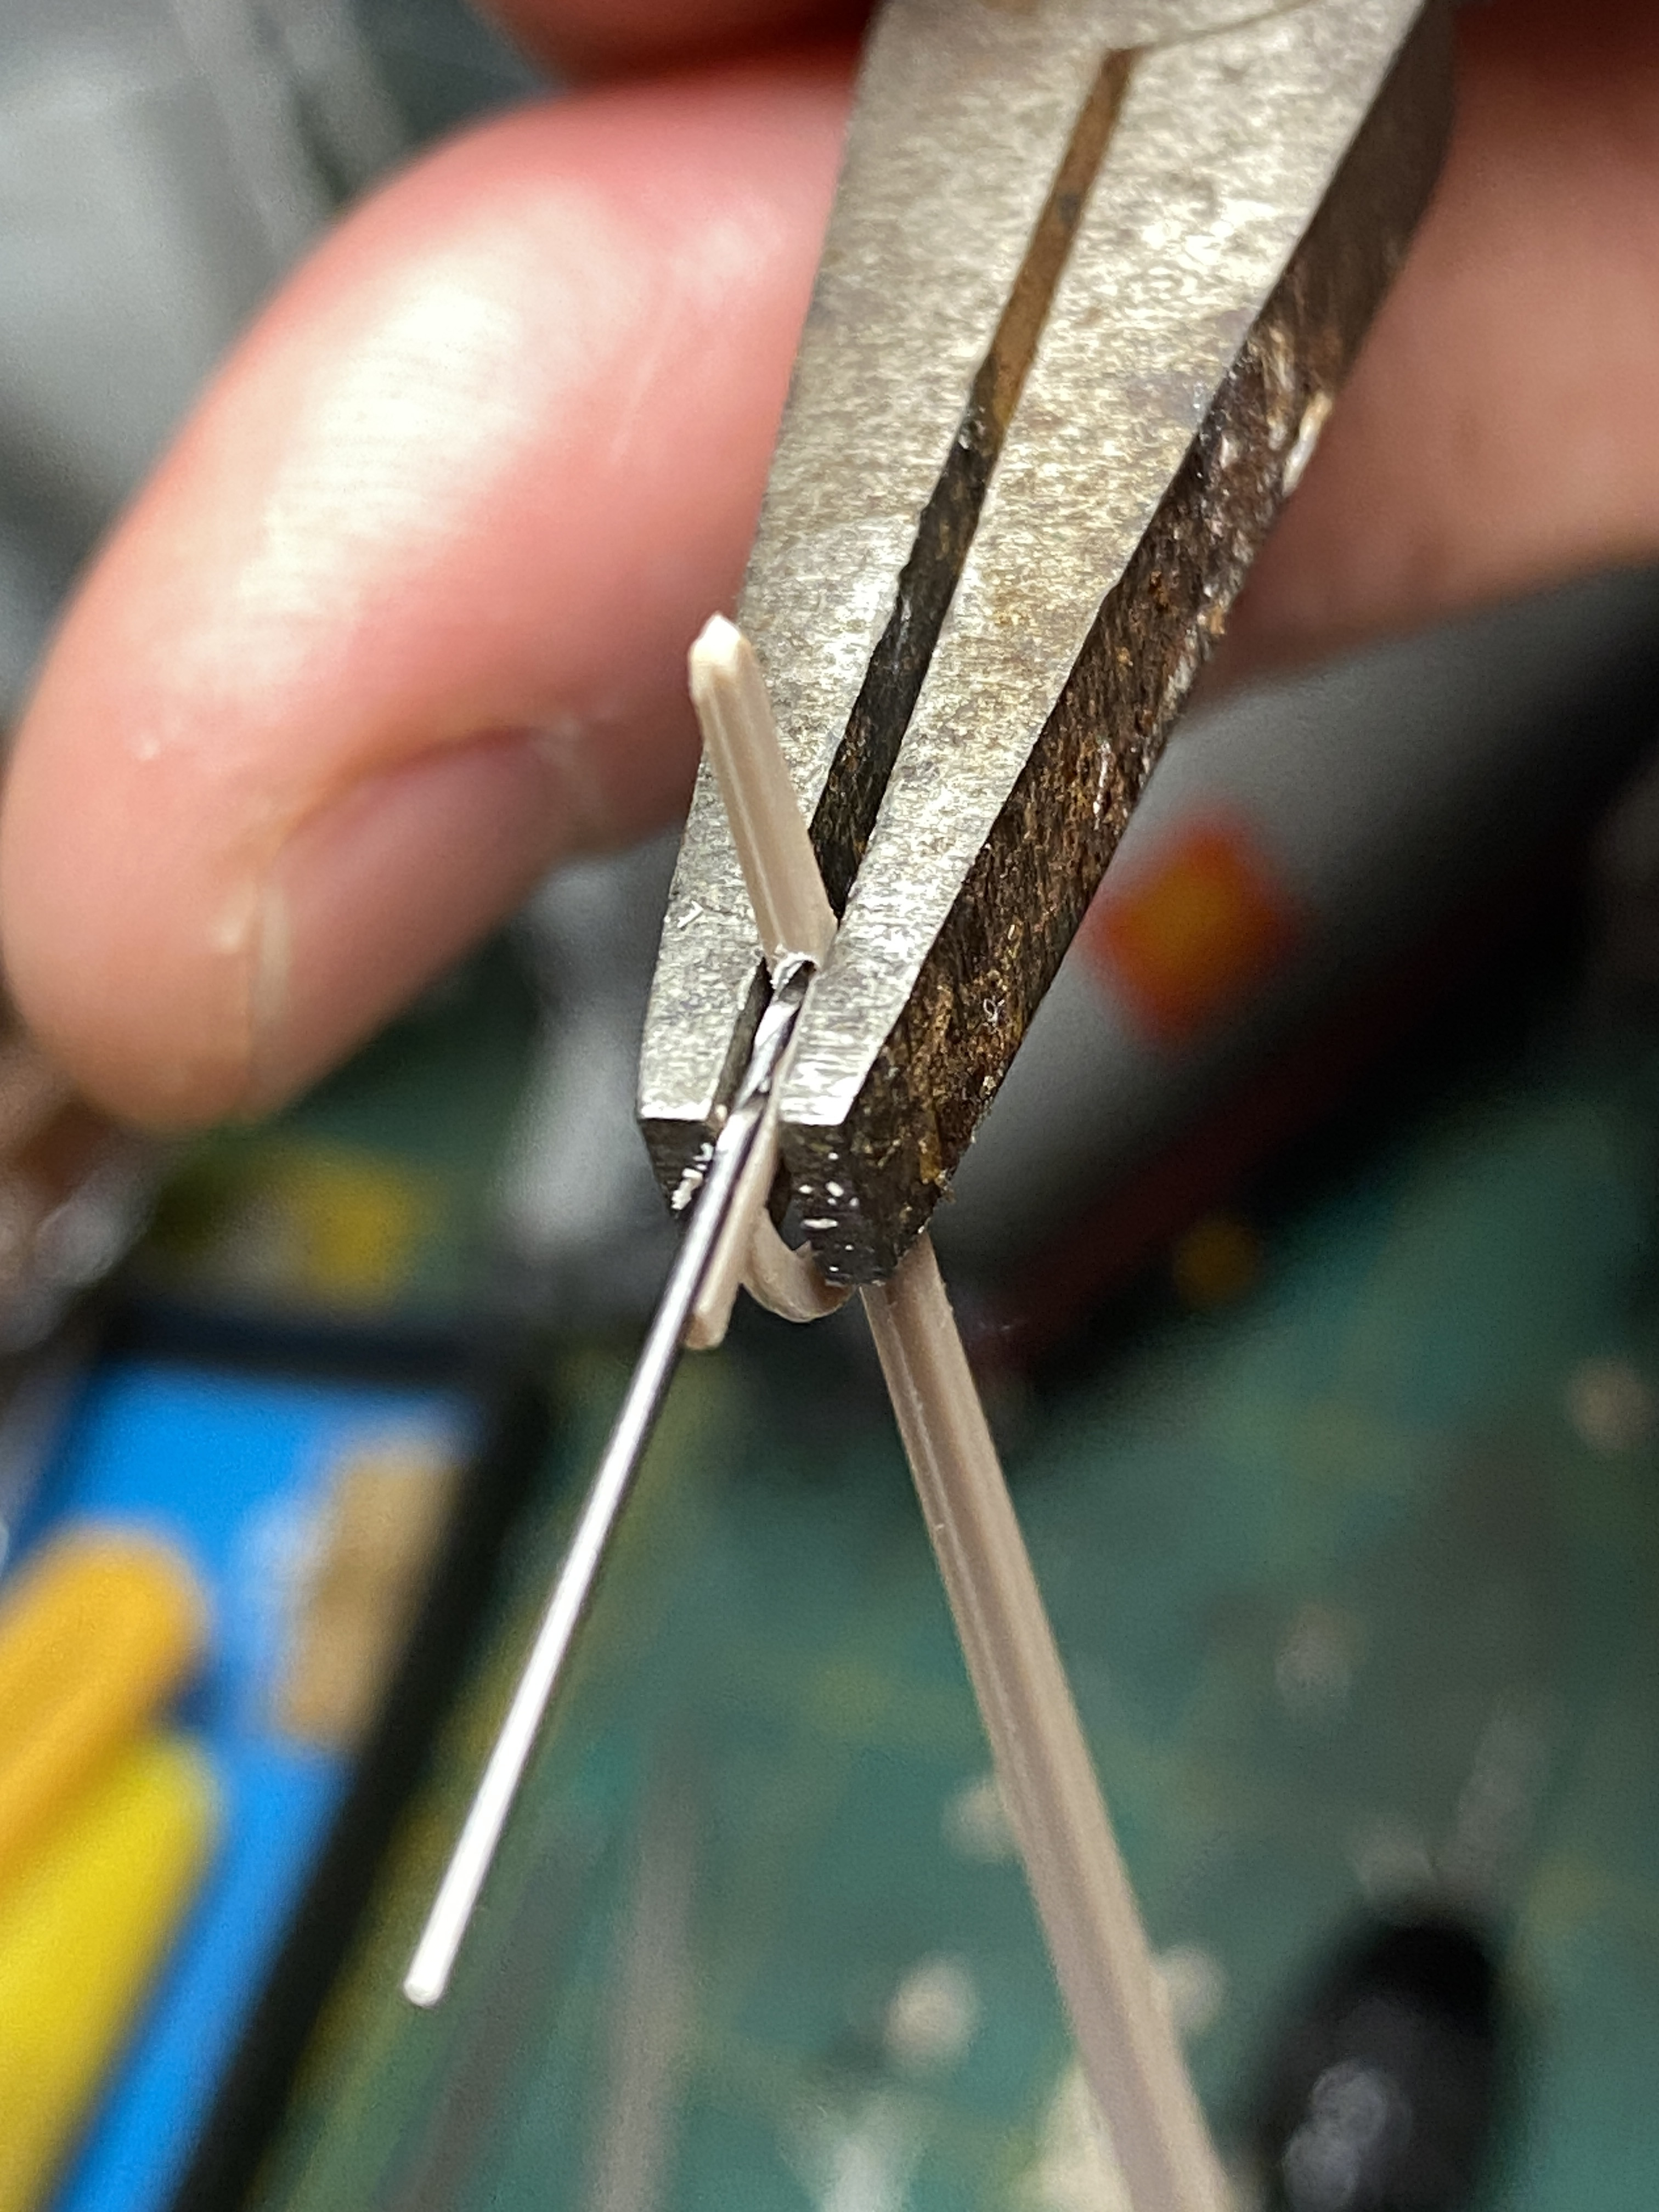
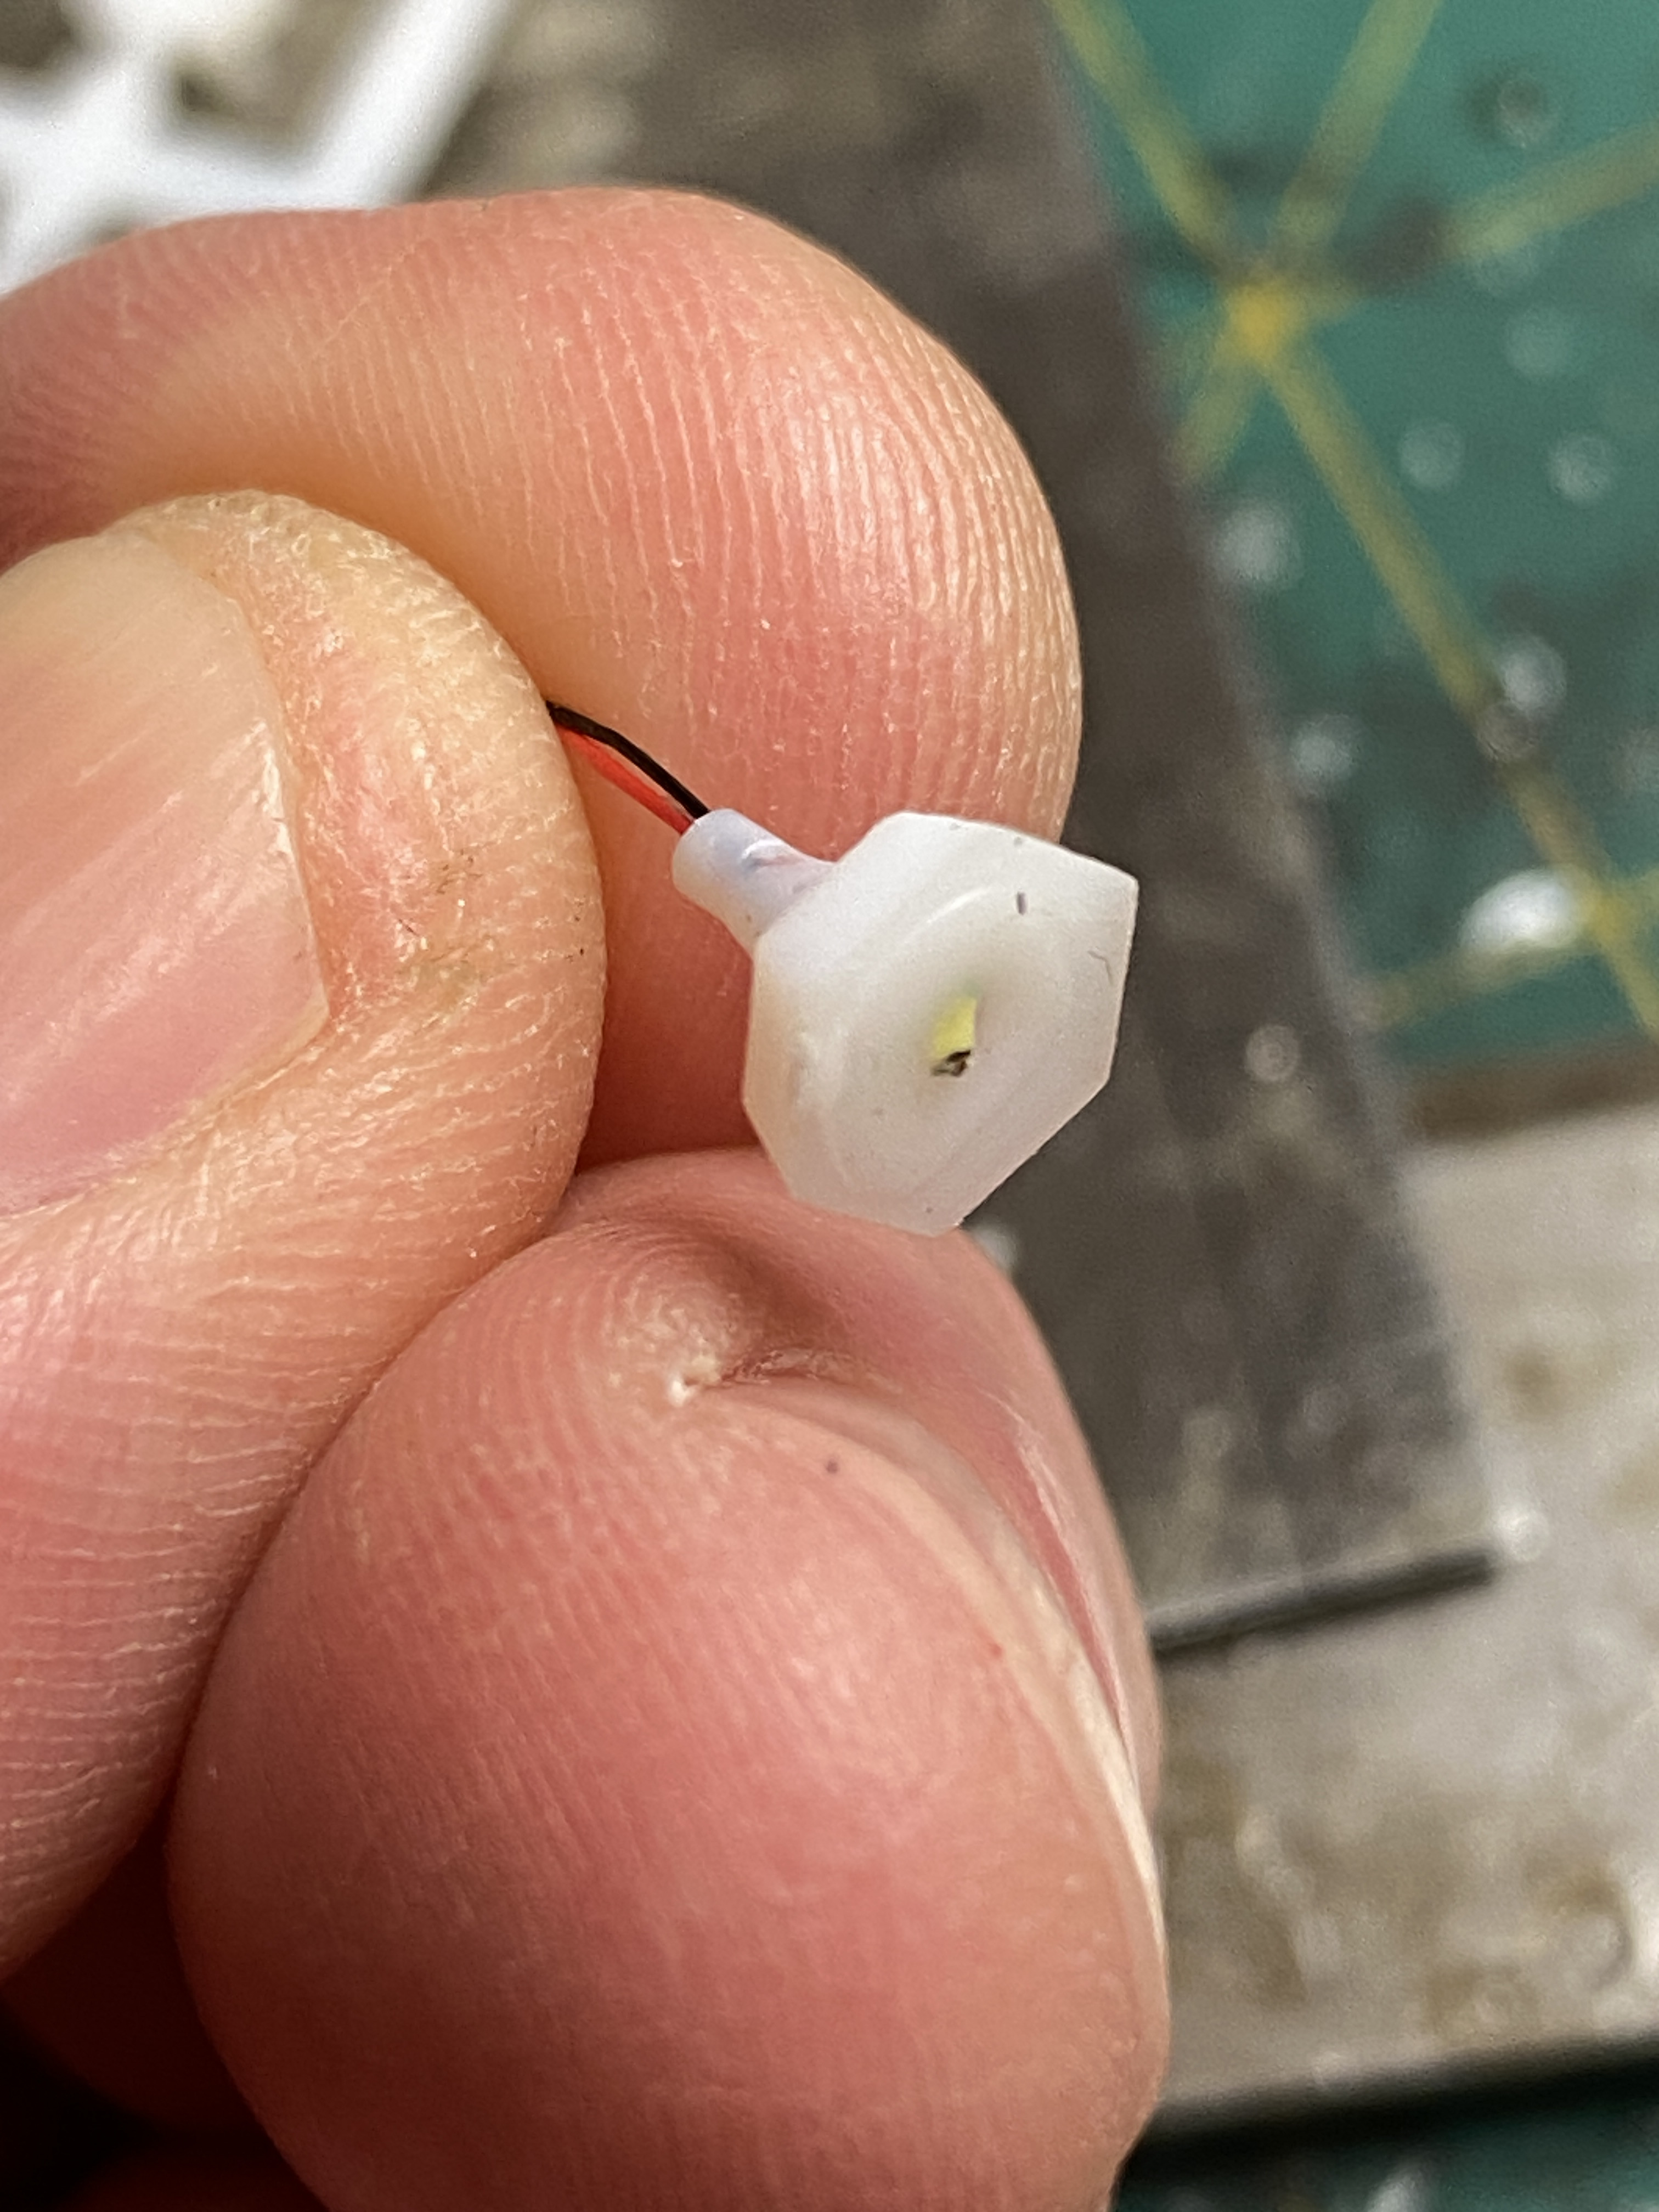
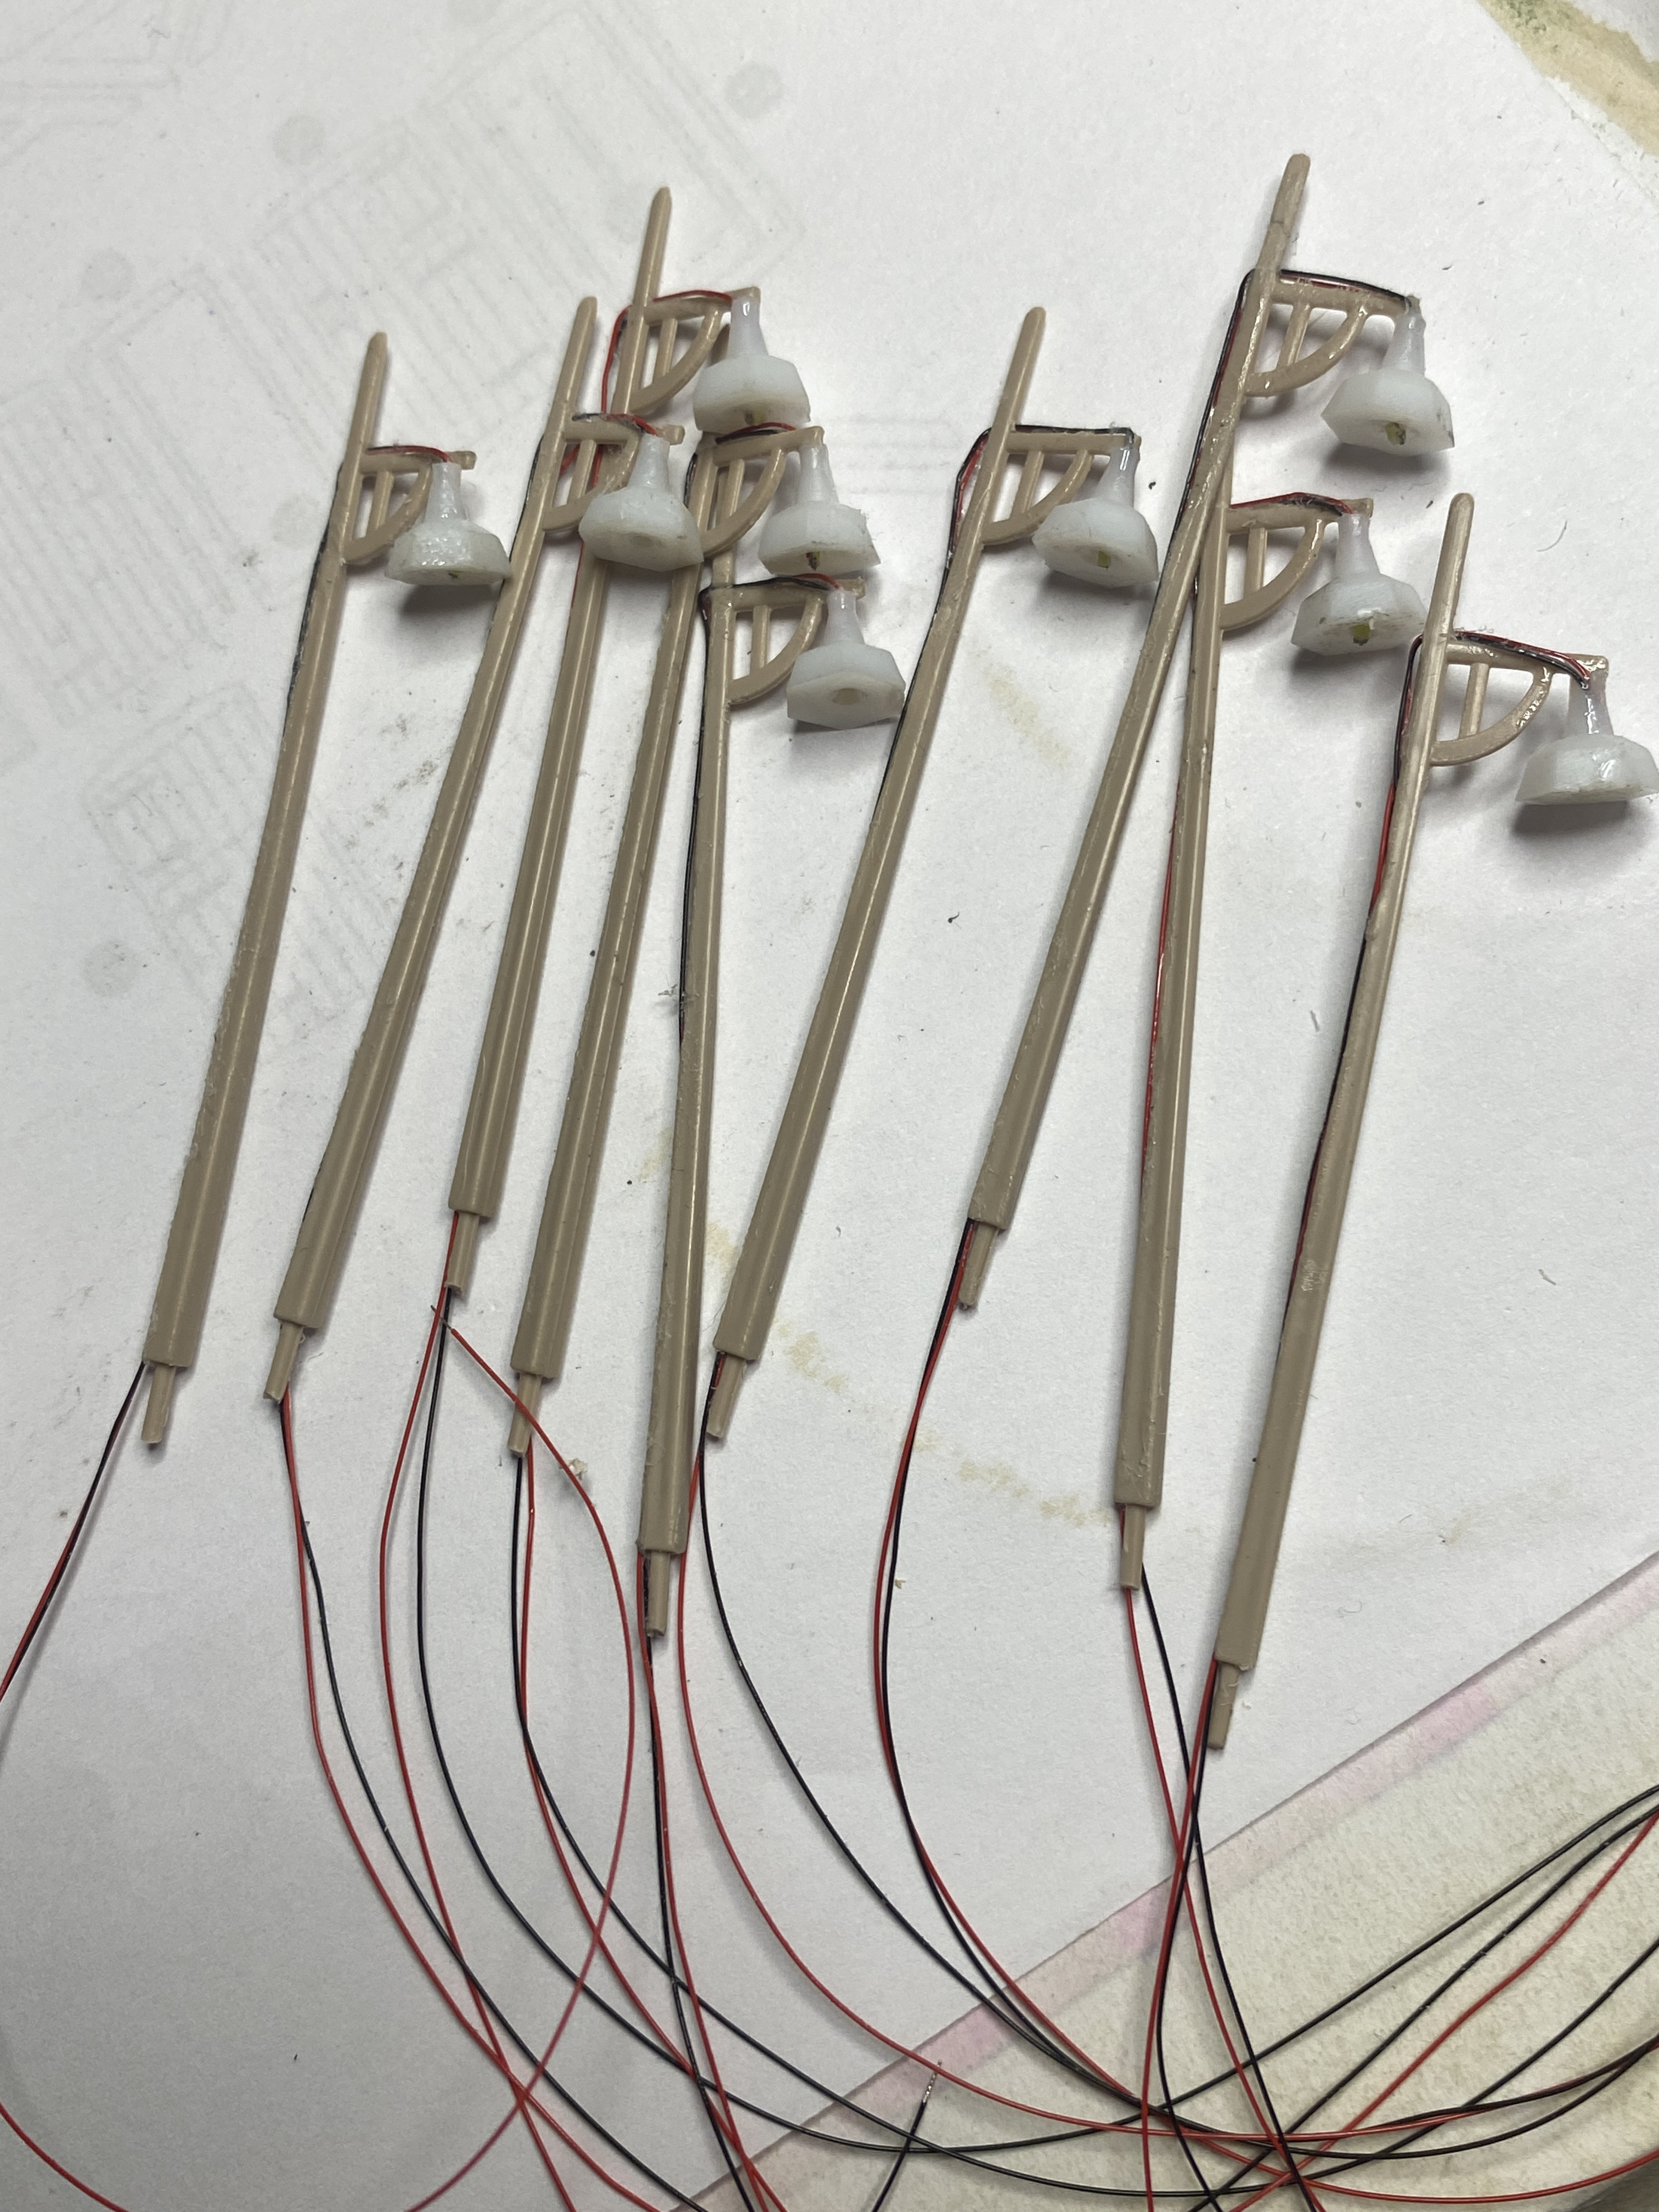
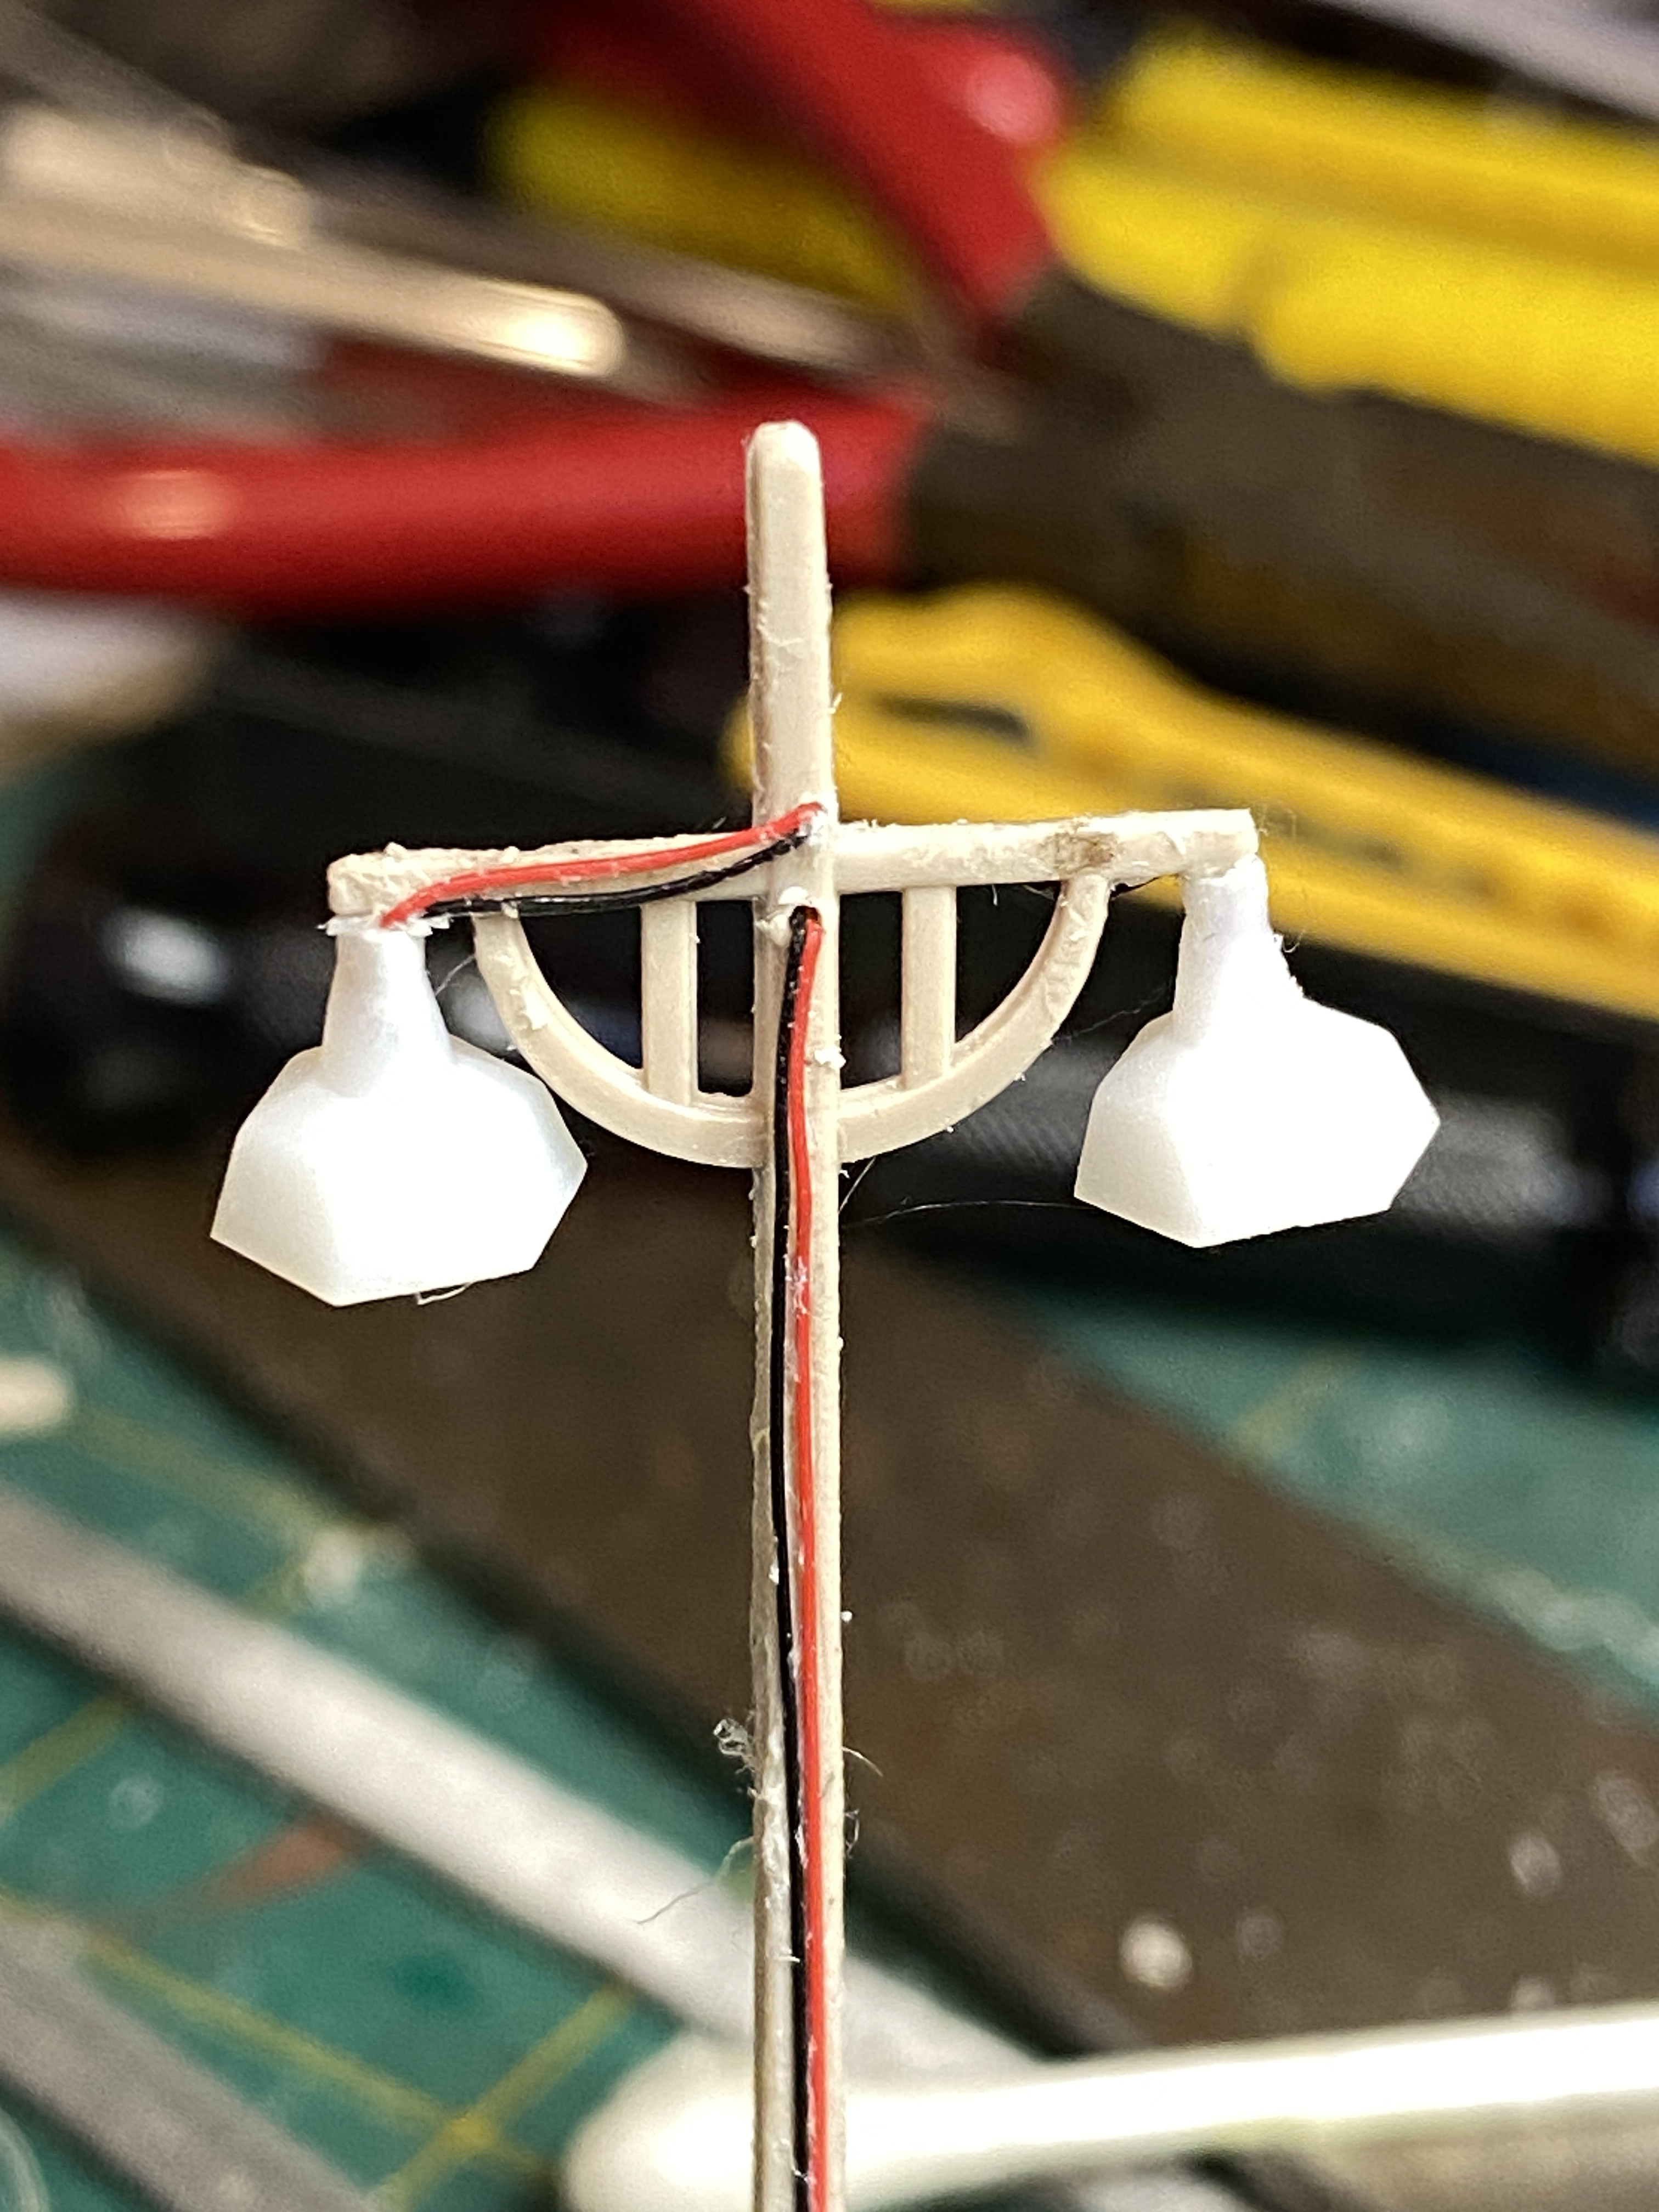
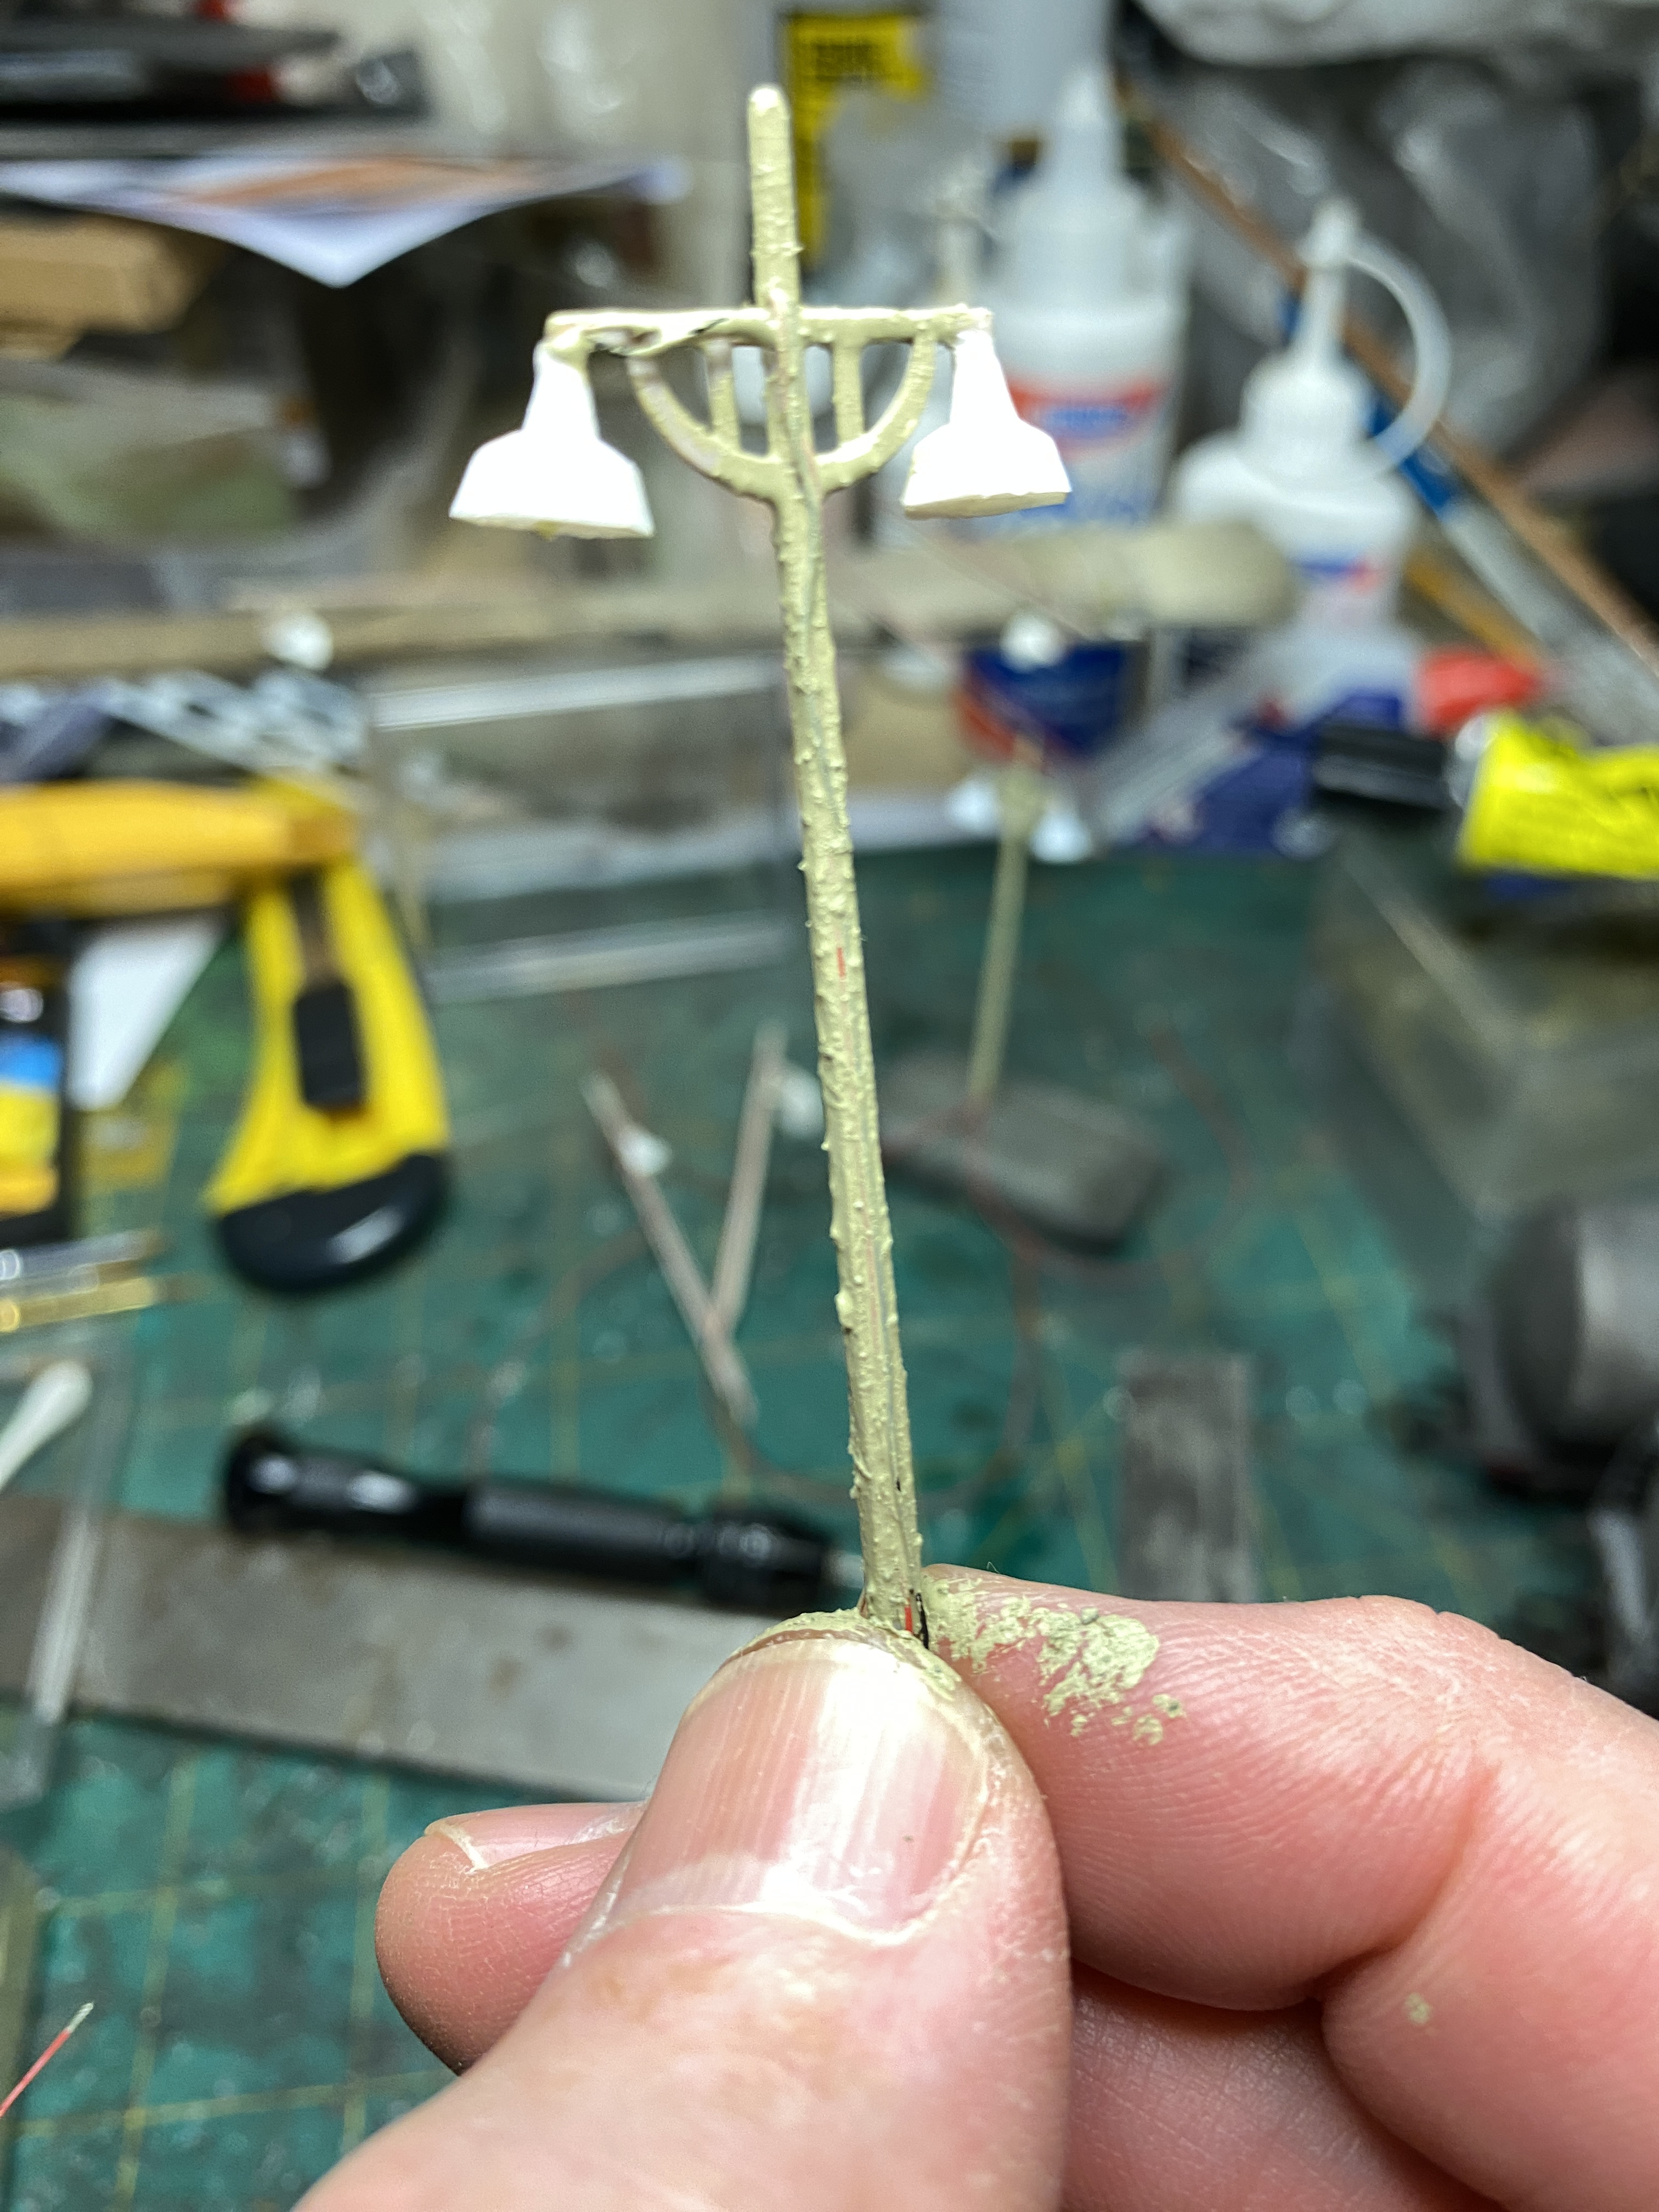
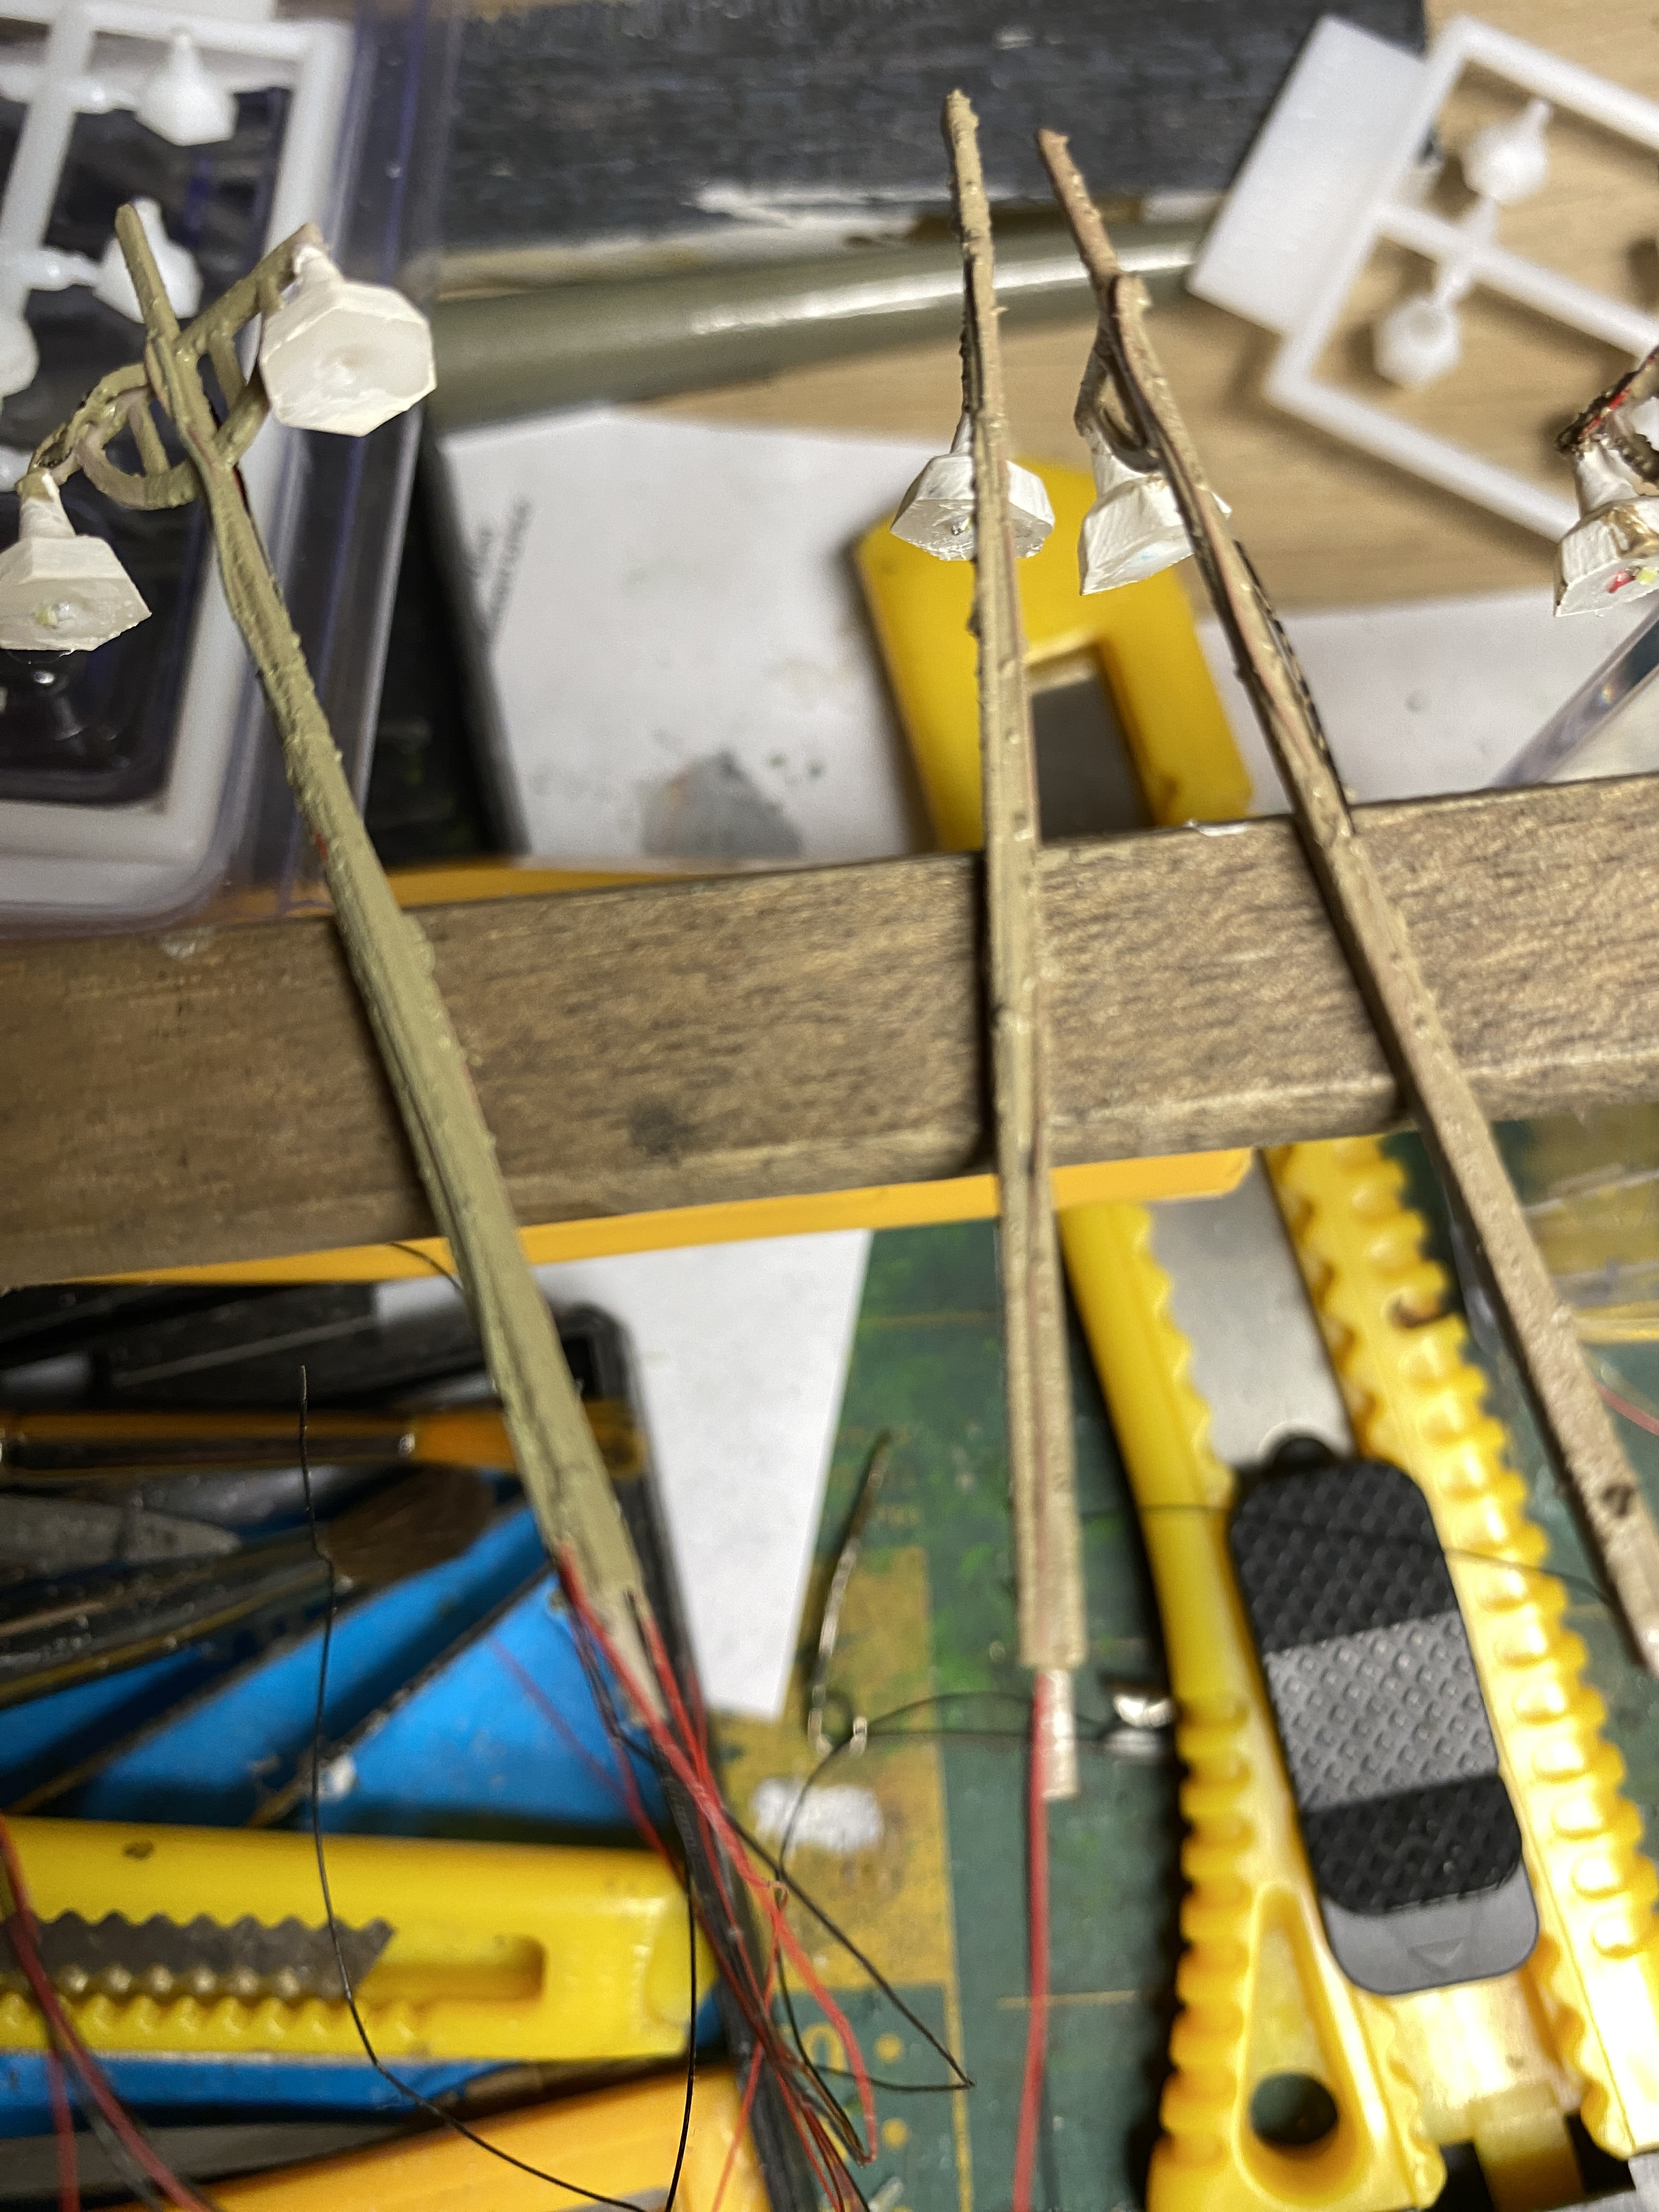
The production line continues for the new concrete platform lamps
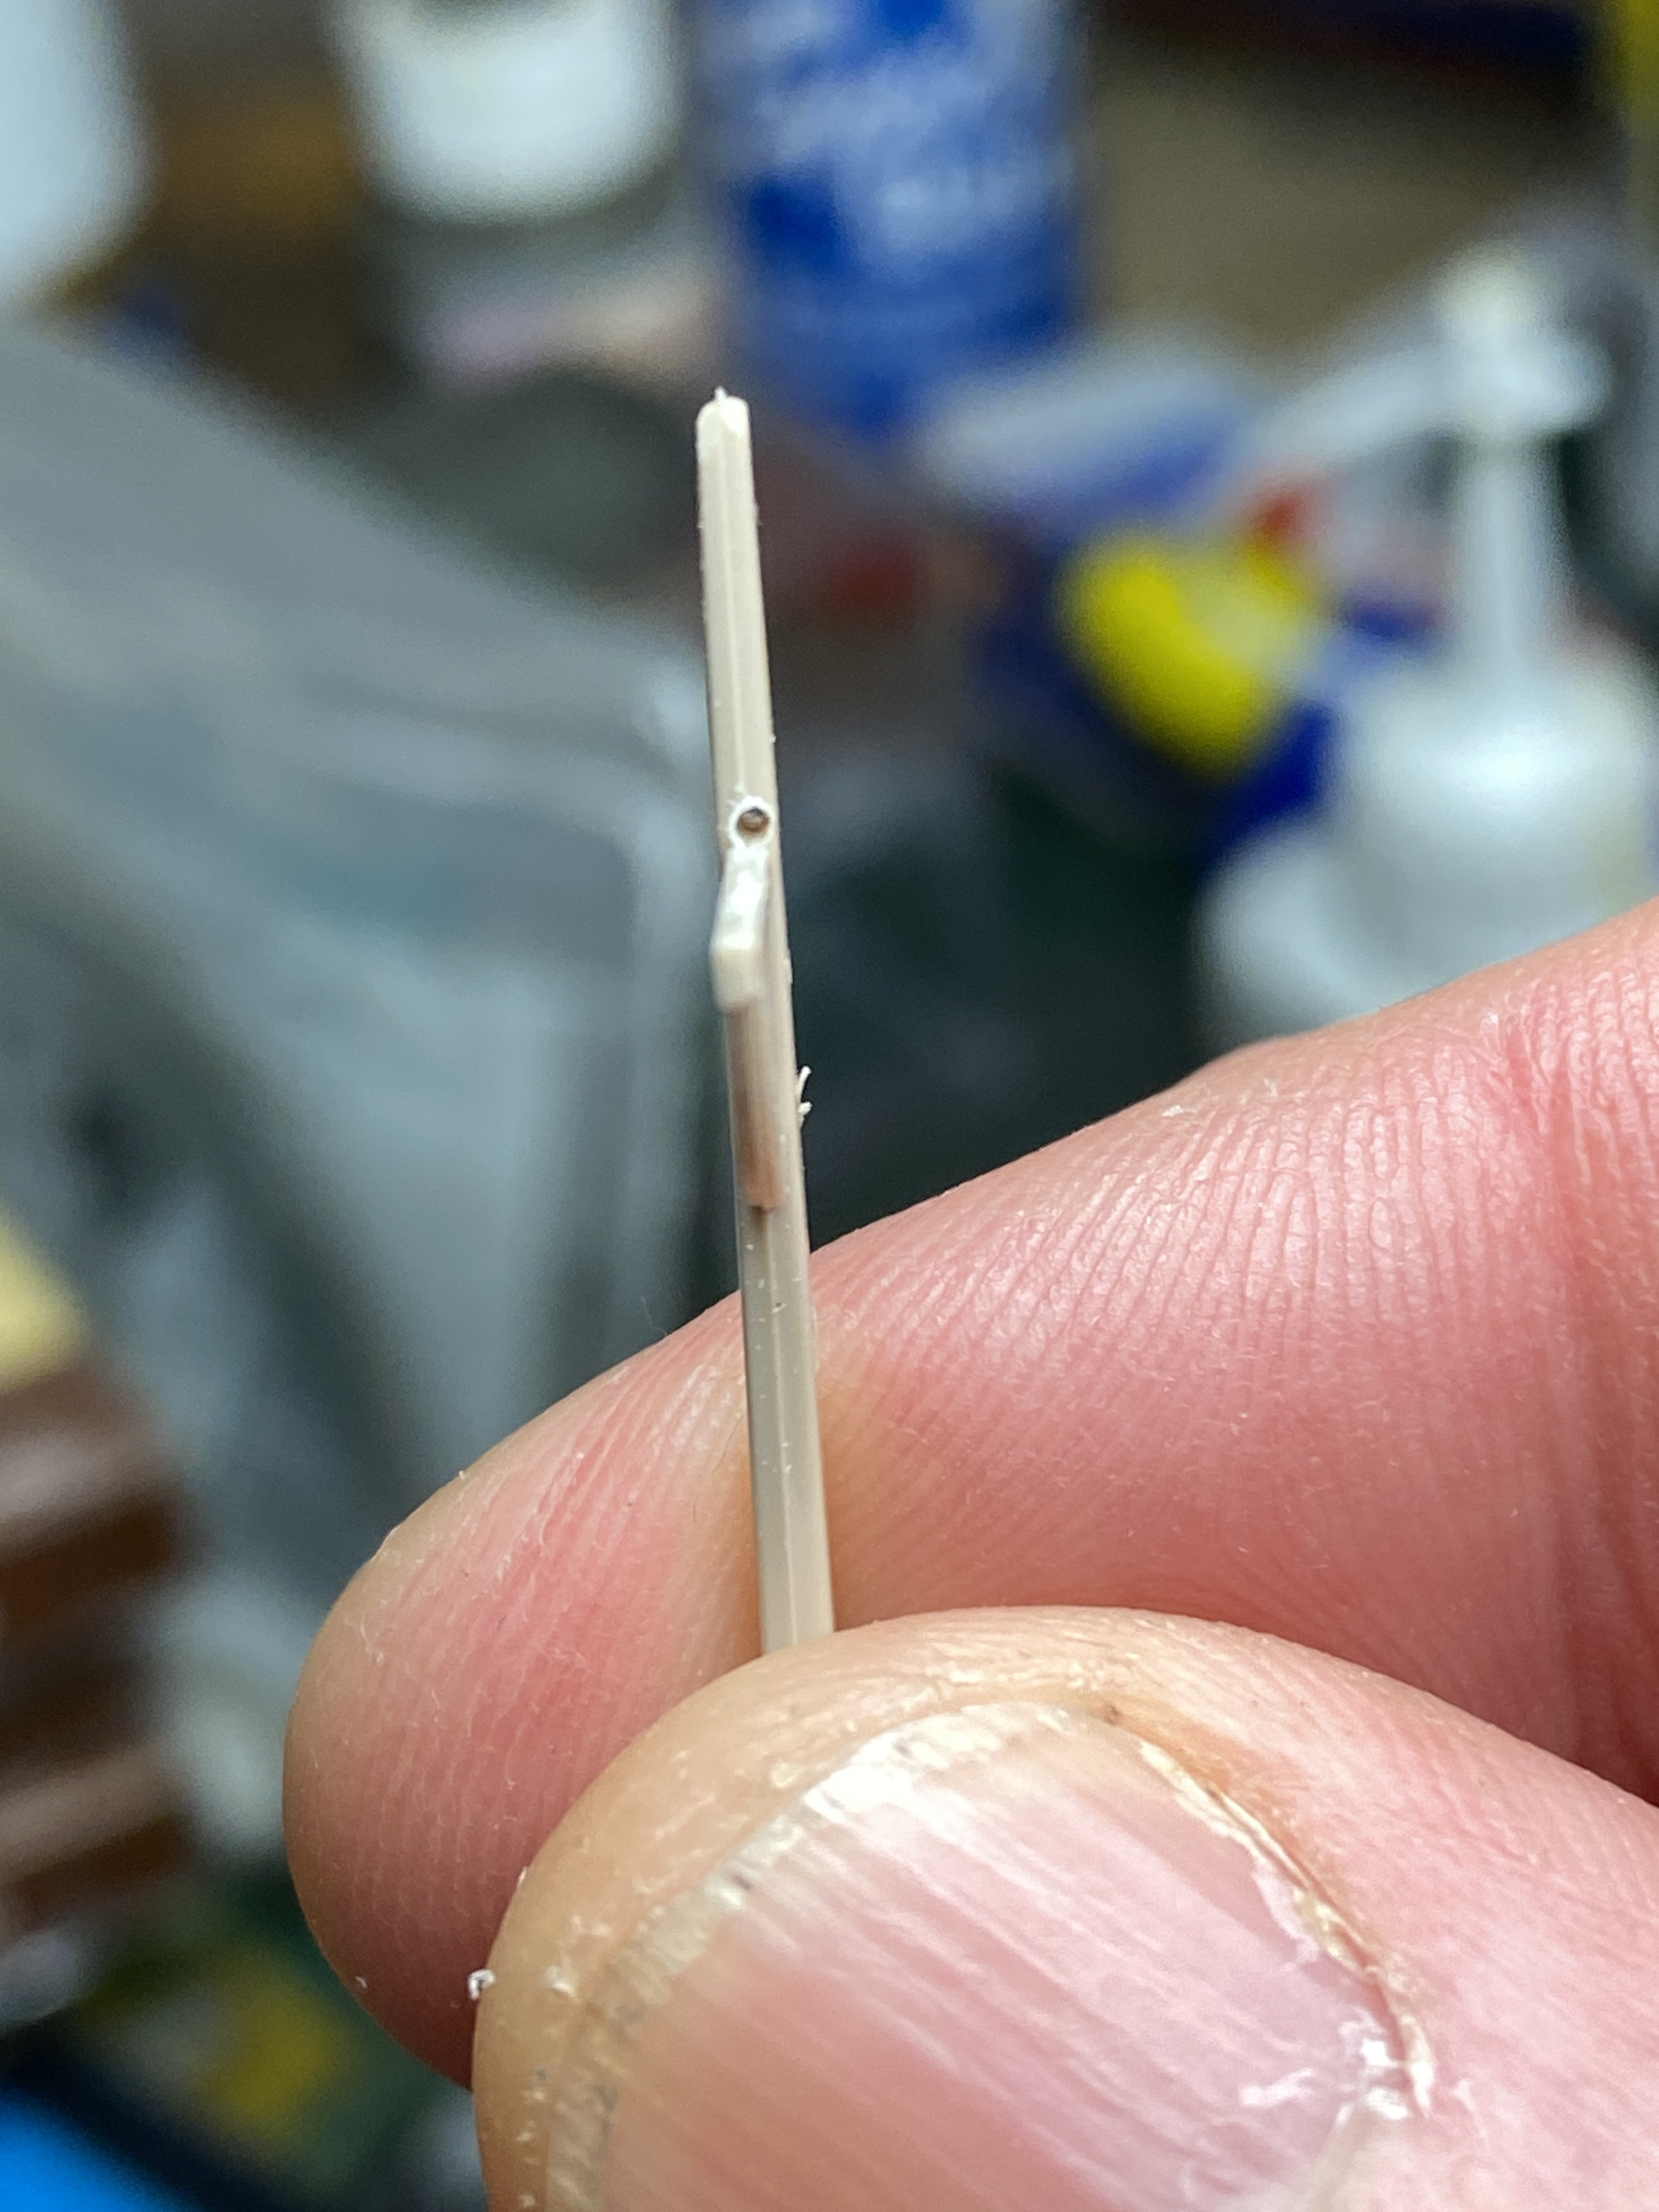
The 0.6mm hole through the shade is bored out to 1mm for just enough depth to accommodate the LED without it standing proud.
Wire the nanoLED through the shade, place a pin-point spot of glue in the bored-out recess. Wiggle the wires to draw some adhesive through the 0.6mm bore and seat the LED in the 1mm area
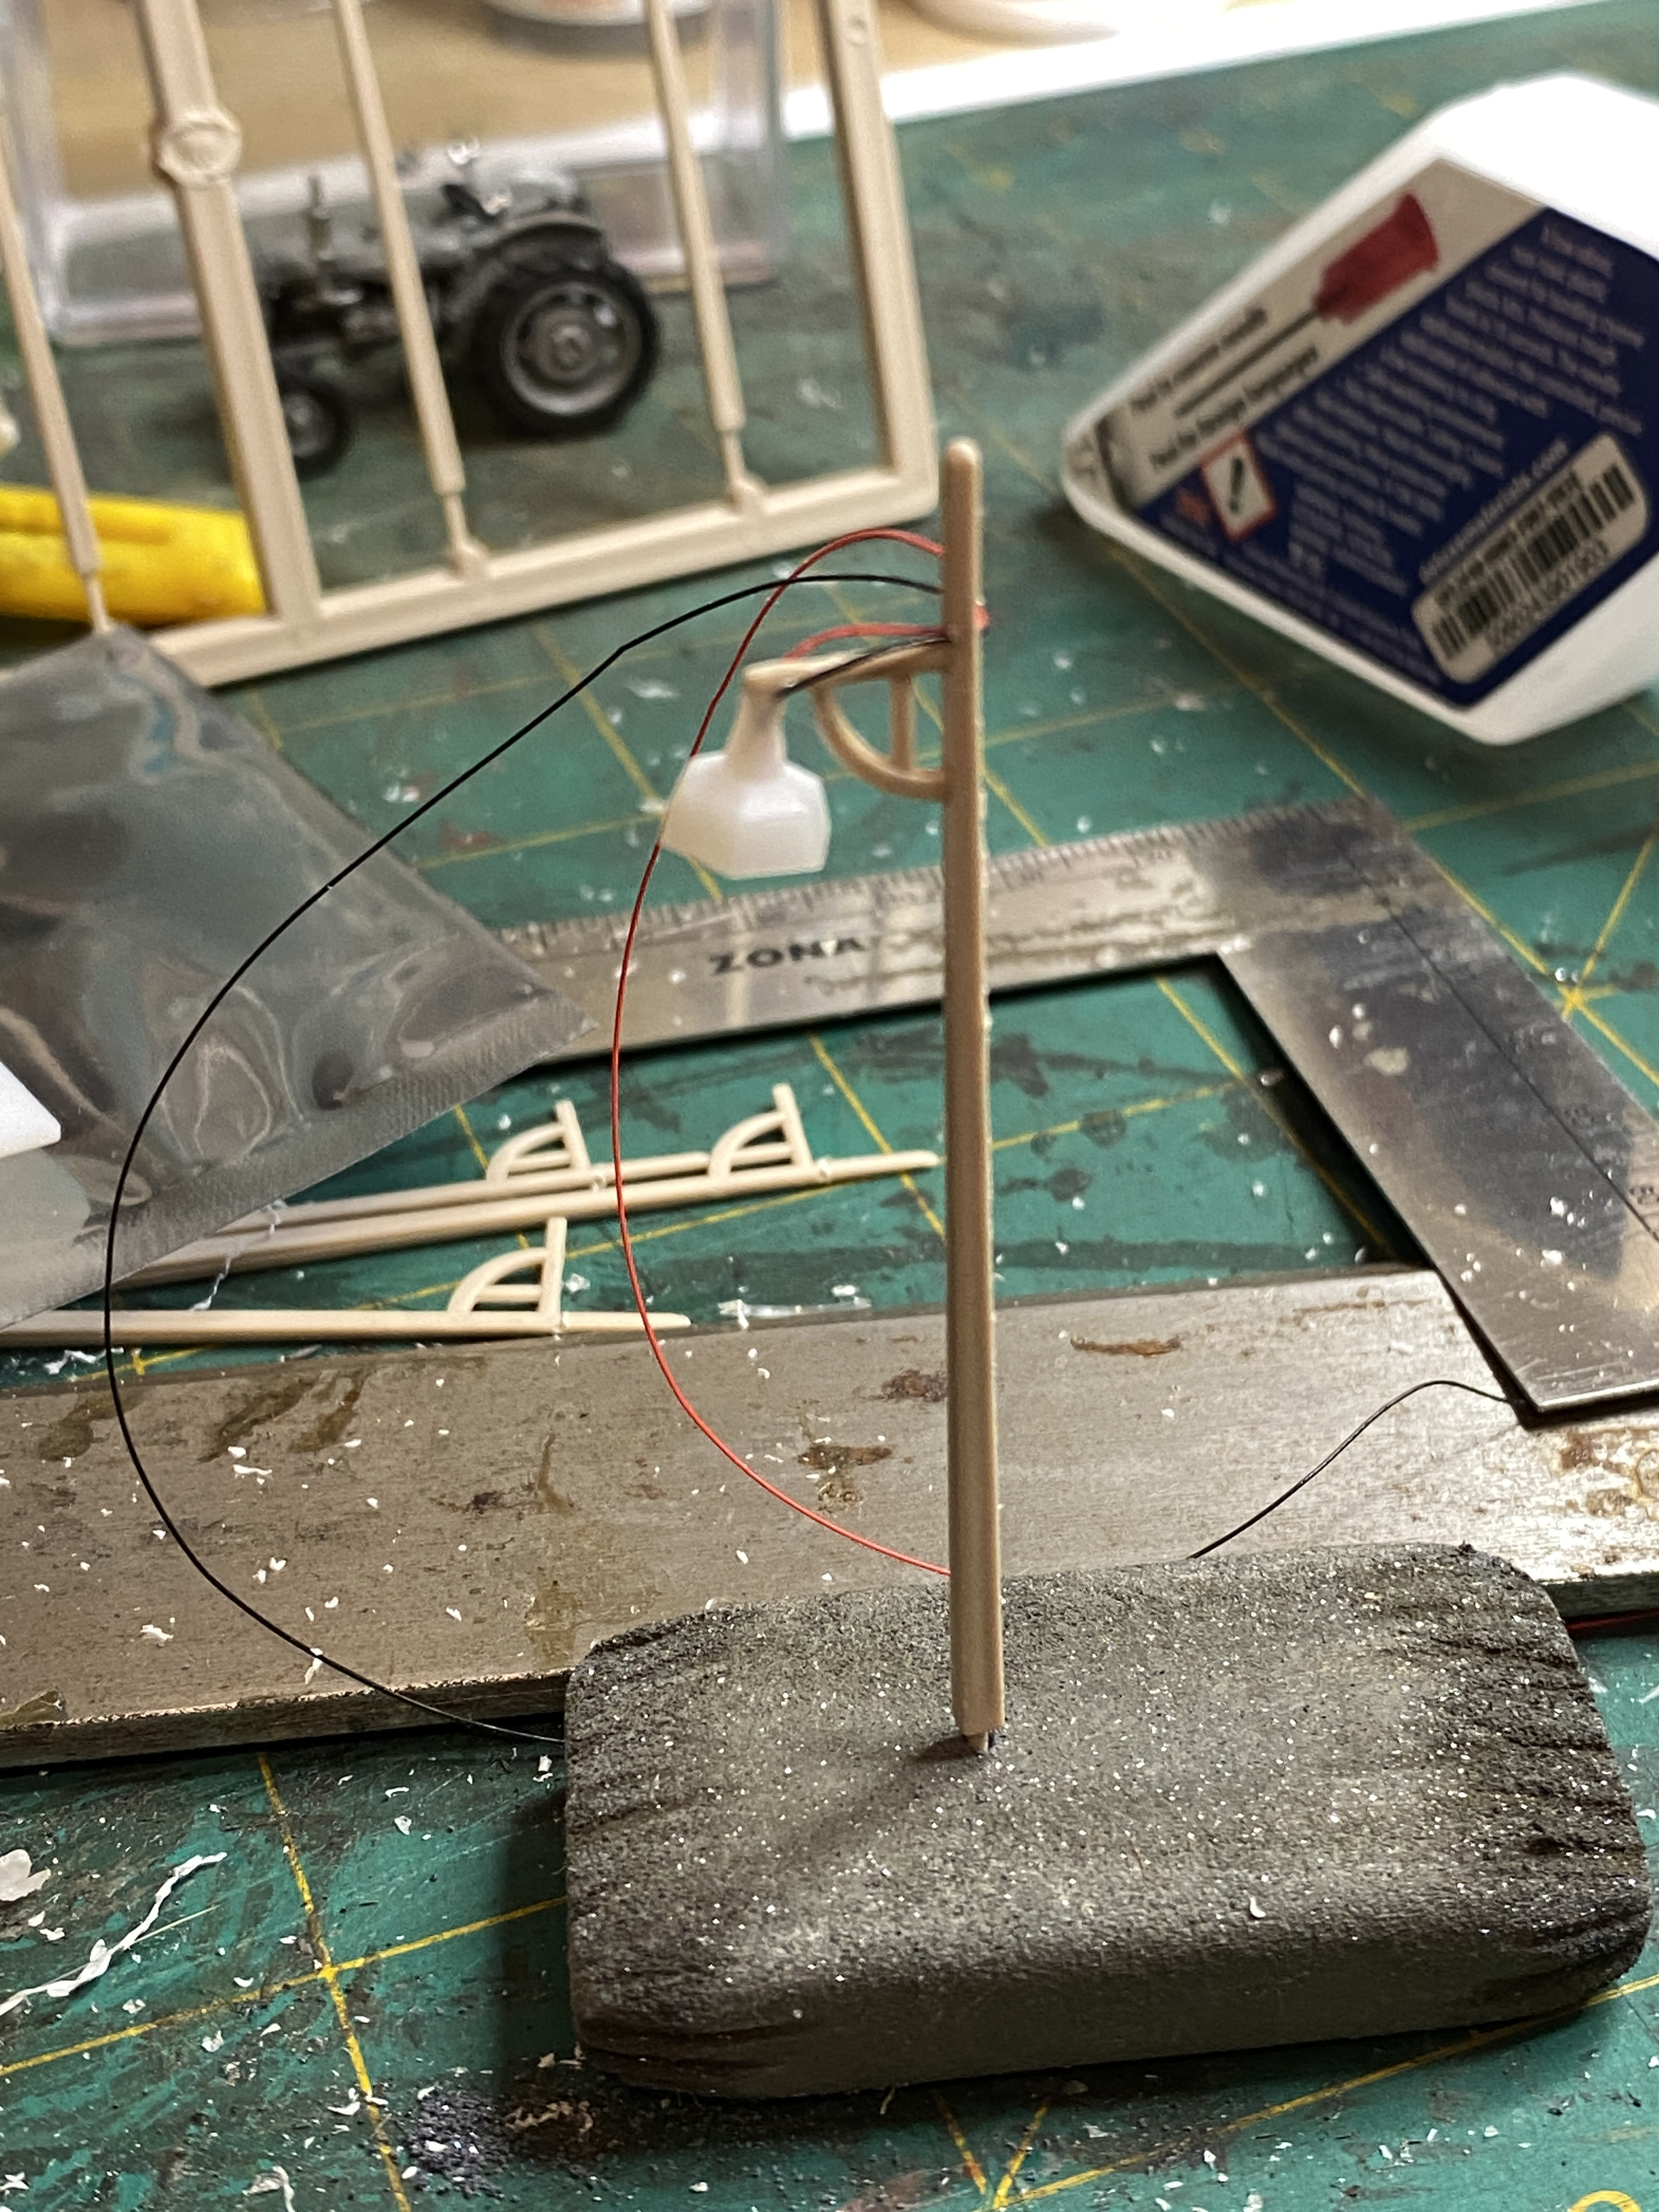
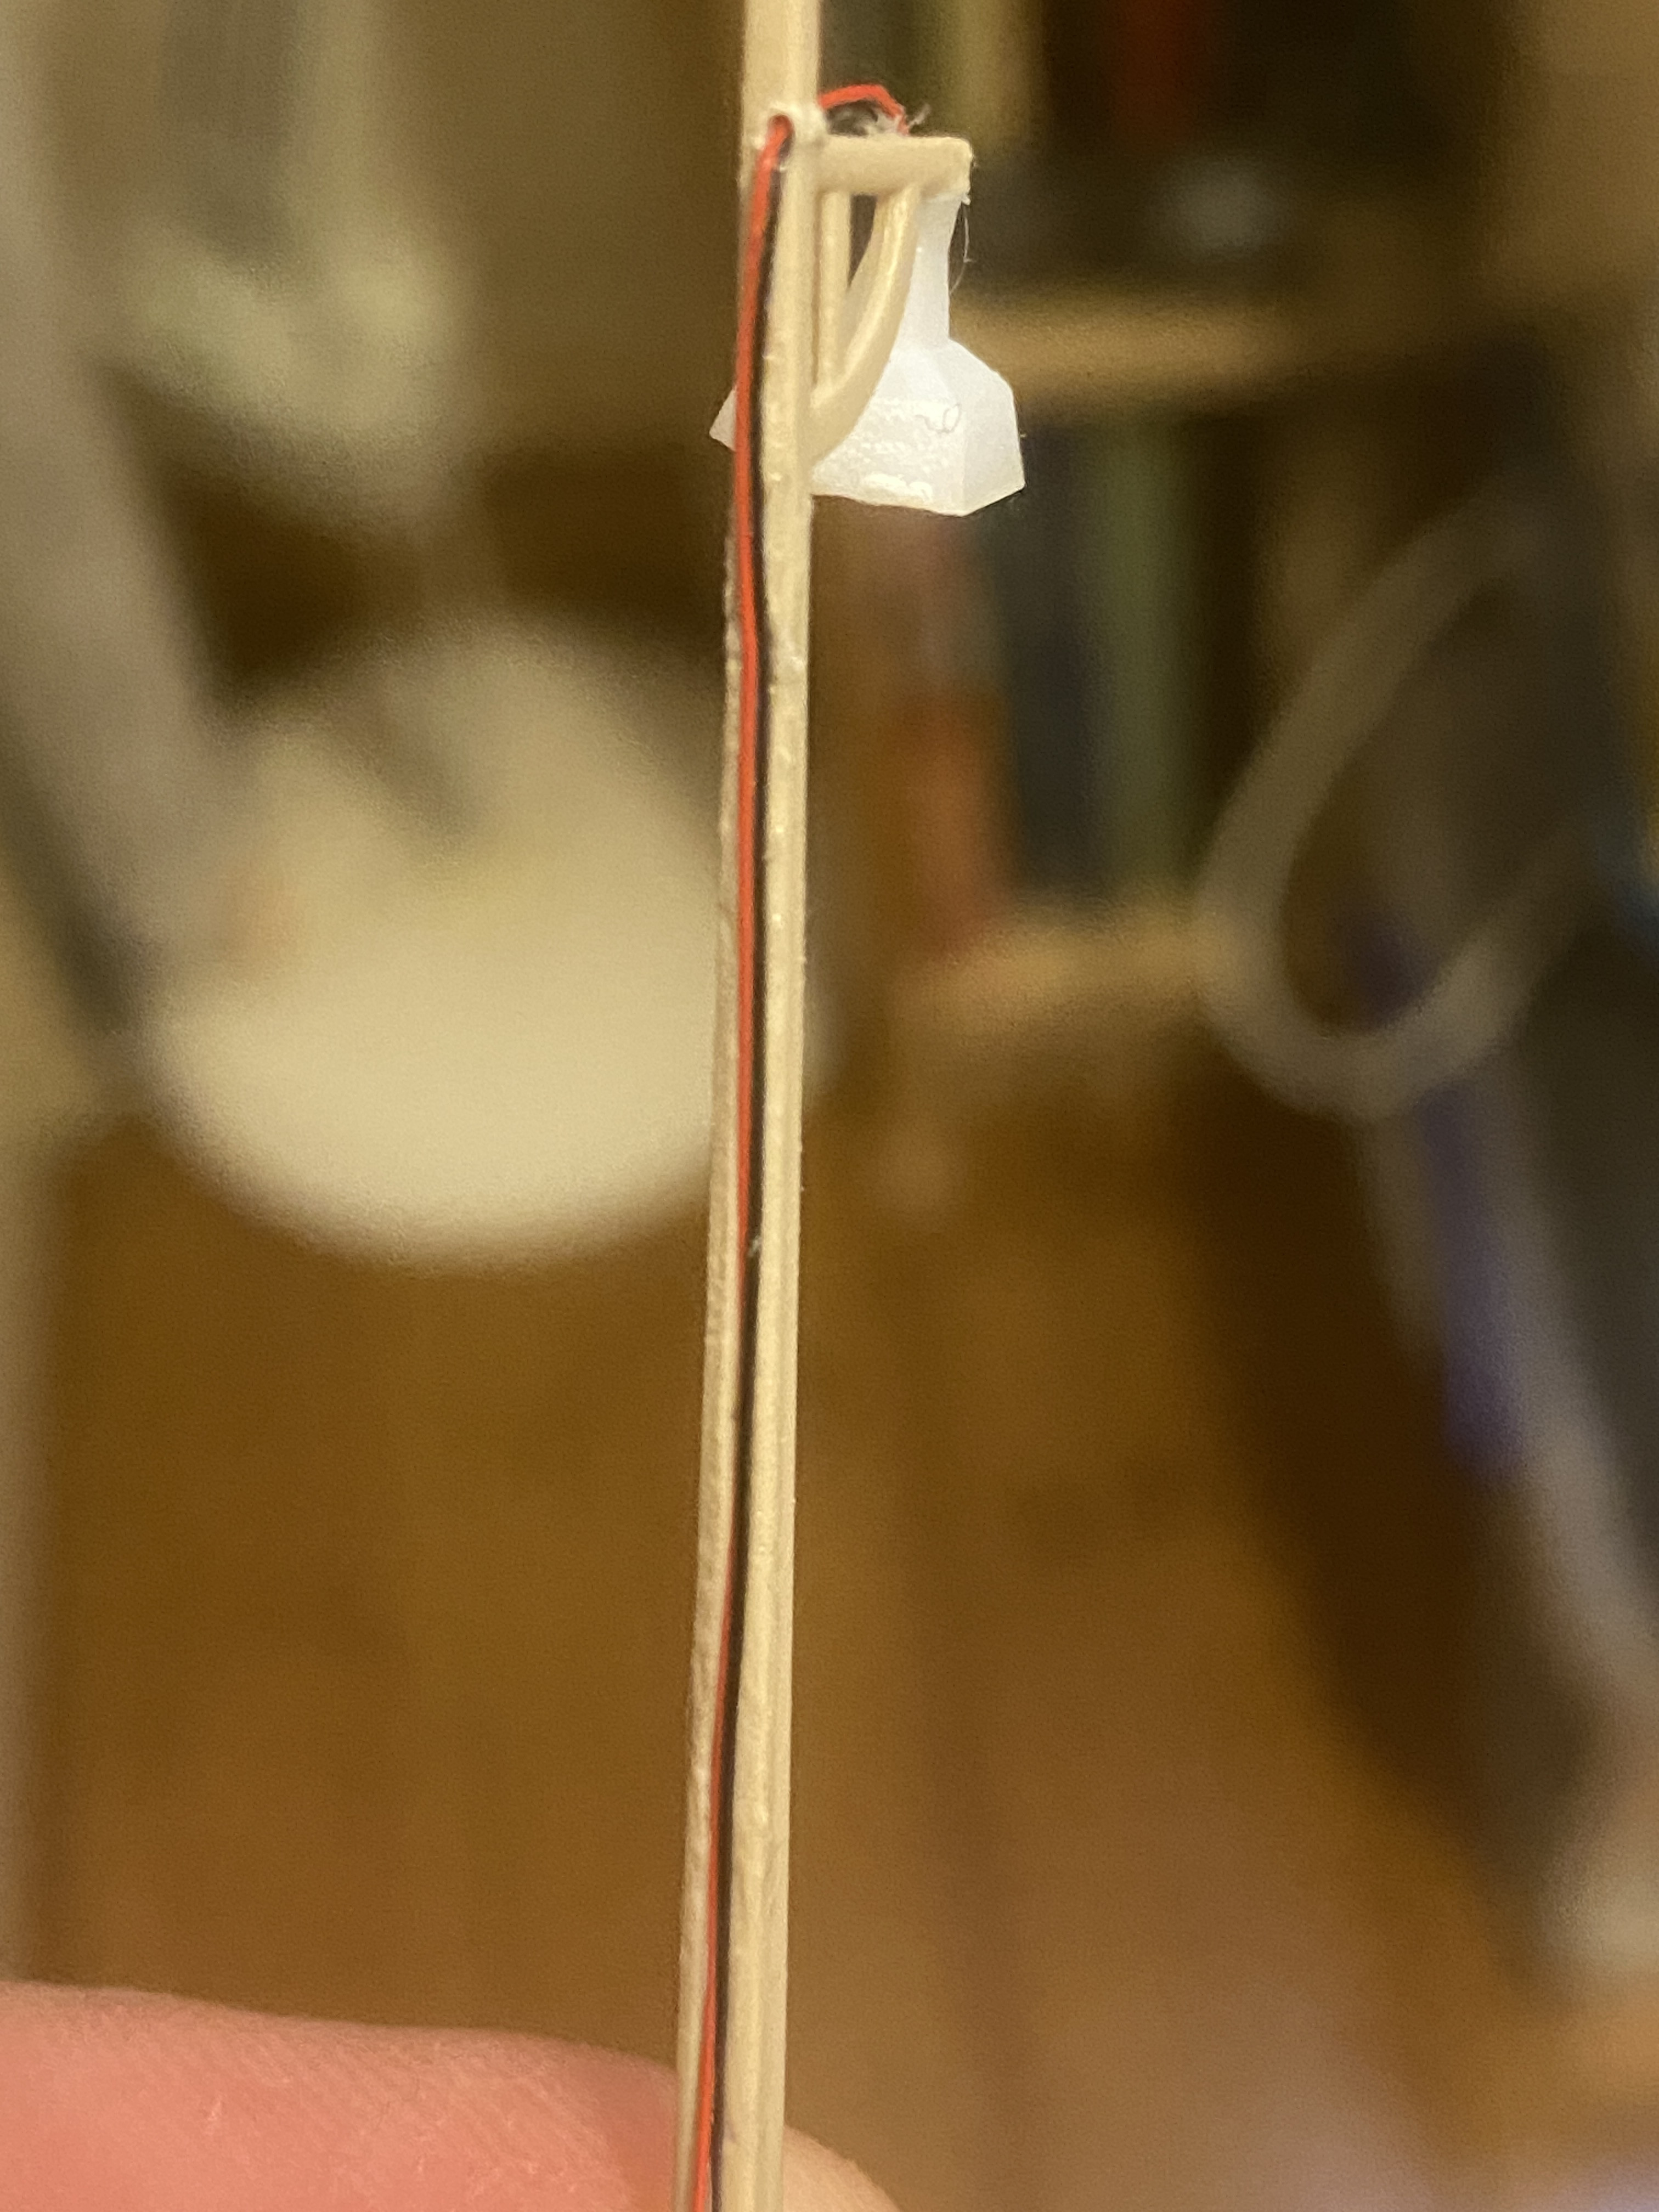
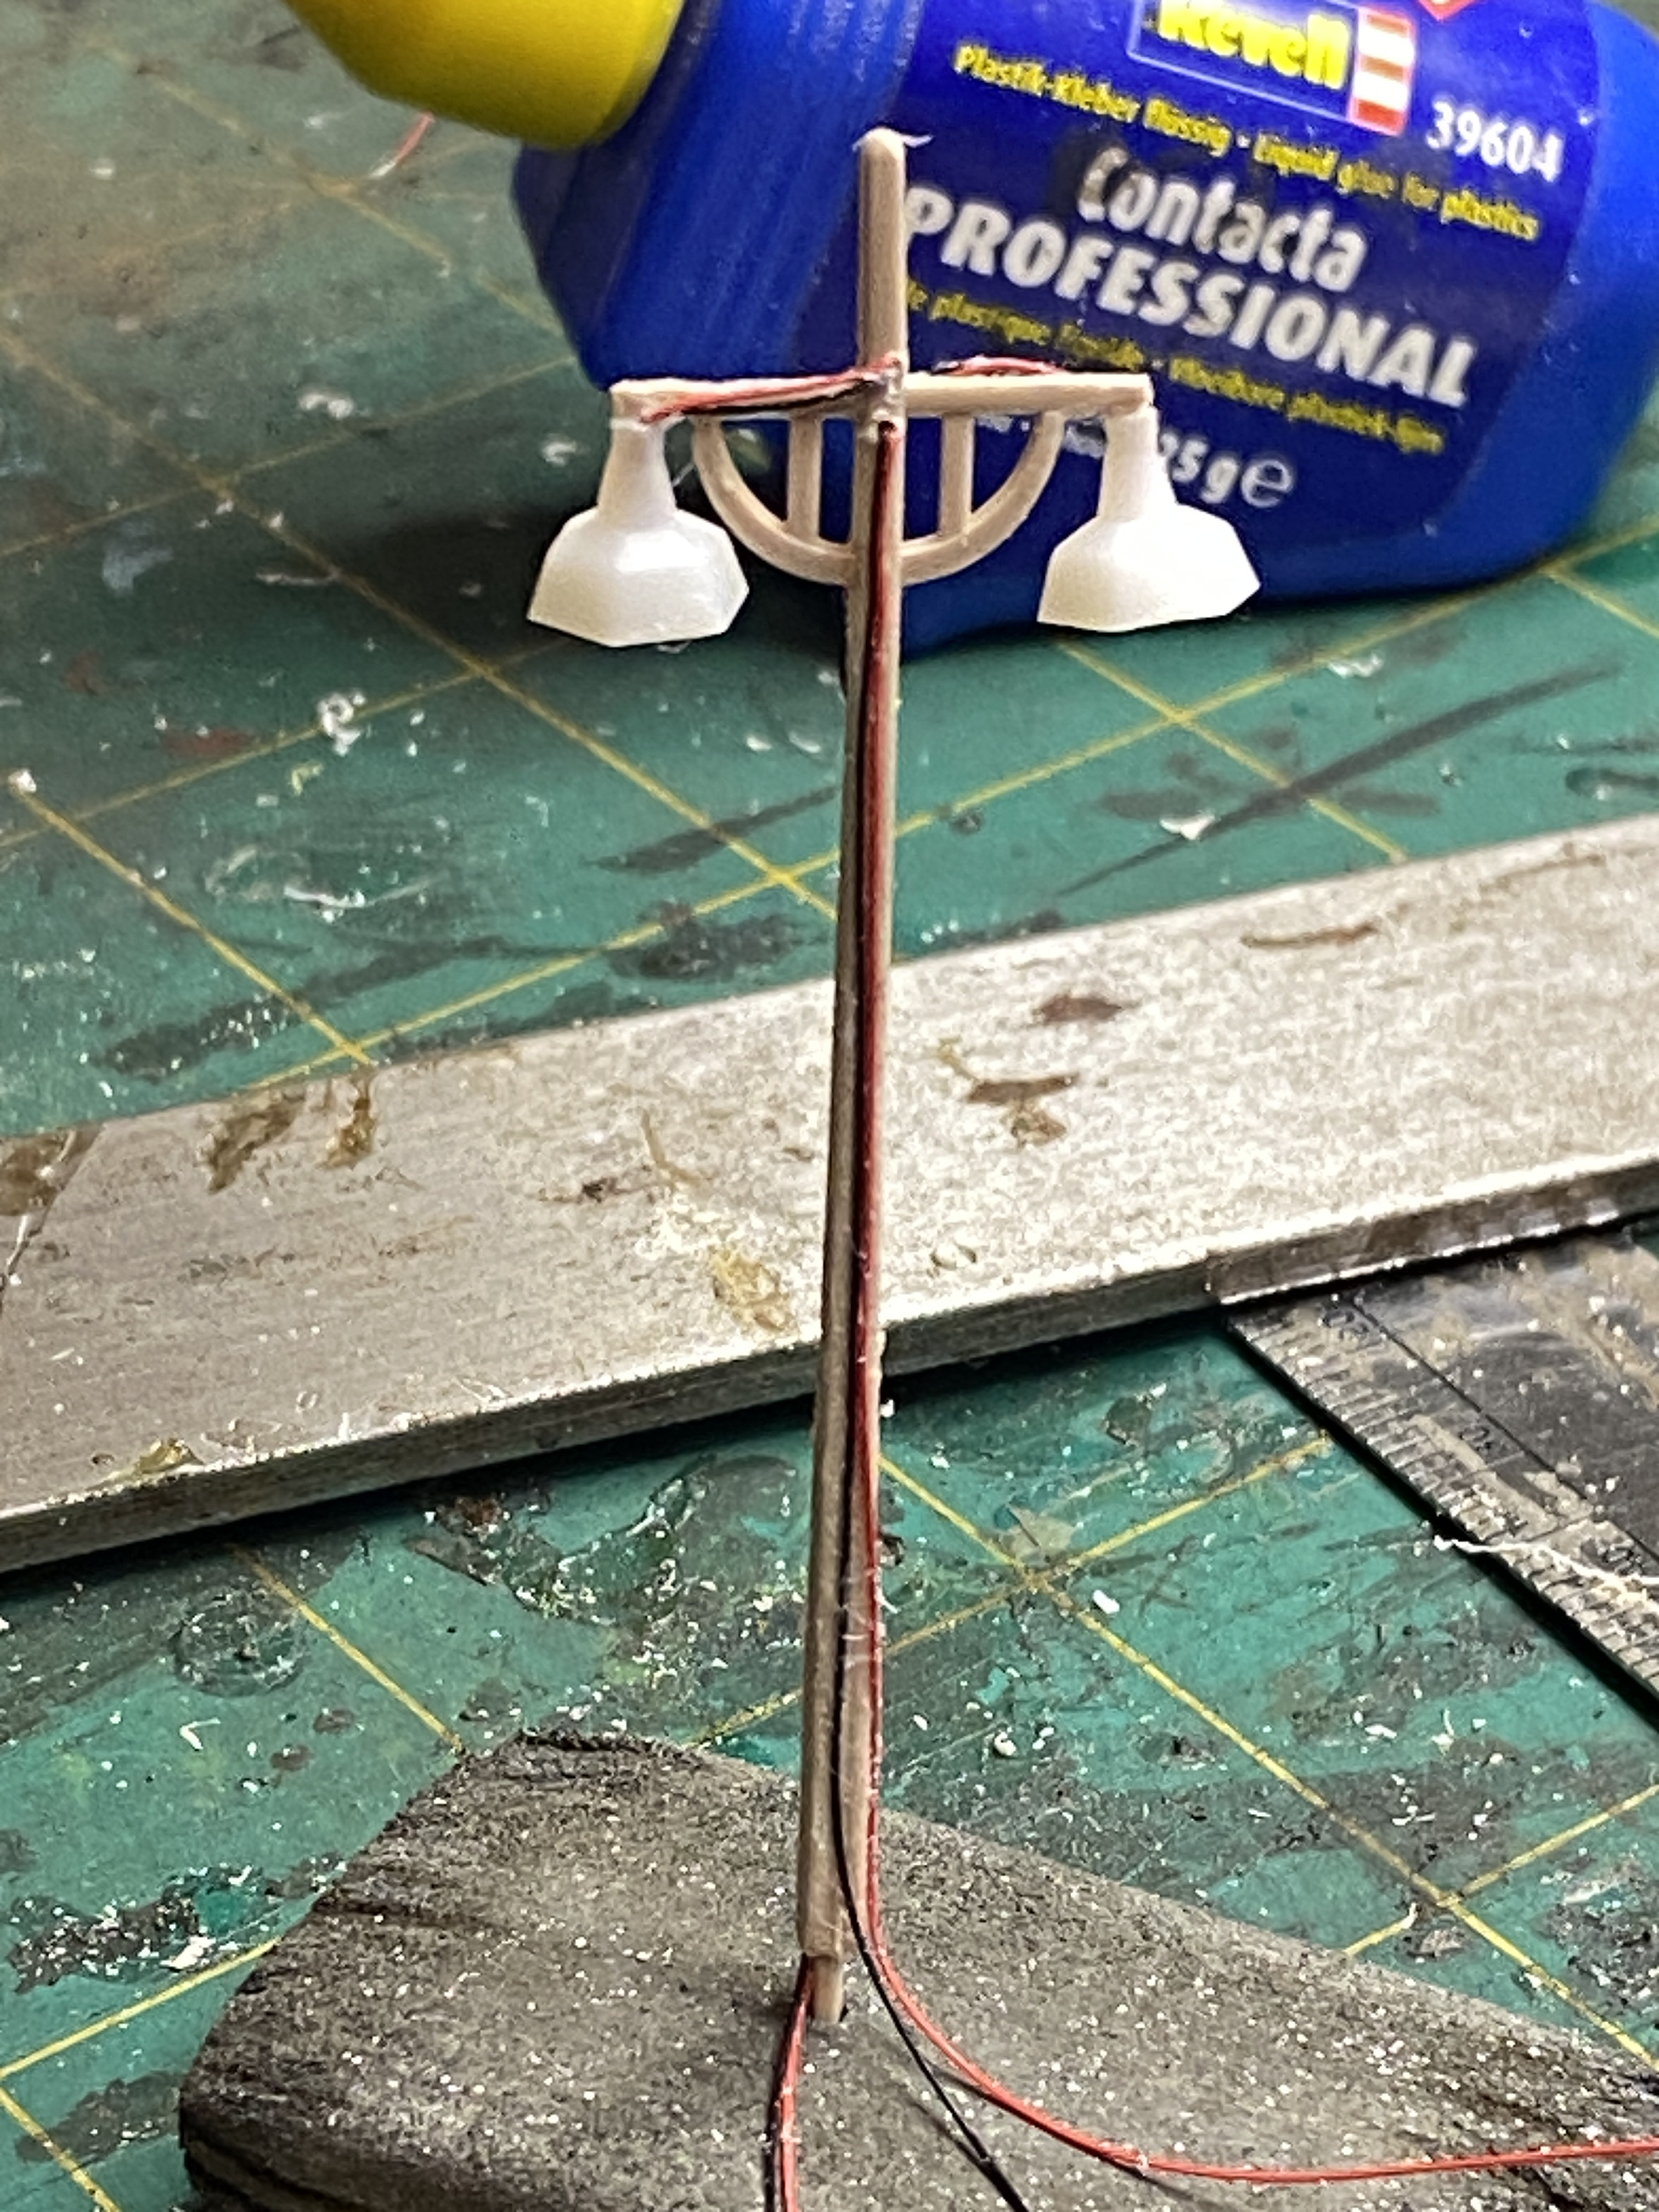
Then feed the wires through the hole at the top of the post, place a spot of adhesive at the end of the bracket and locate the shade on the end of this bracket. Note - the wires are not glued to the post yet; it helps to keep some slack there for working and to allow the shade to hang naturally.
I bored a 1mm hole in a track rubber to allow the job to stand upright while the adhesive cures. During this time if the shade starts to hang significantly out of true it can be teased back.
Posted
Full Member

Full Member
Cheers,
Claus
www.wct.payne-ellef.dk
www.flickr.com/photos/ellef/
Claus
www.wct.payne-ellef.dk
www.flickr.com/photos/ellef/
Site staff
Full Member
Full Member
It gets cold and damp there in winter. Today's weather prodiuced a biting northerly wind with frequent and violent hail downpours. No snow though. It wasn't the best of days to expect fingers to work with tiny bits and pieces but I ended the afternoon's session having reconfigered all the track and re-connected all the ends. The former L-shape has been removed and the layout is now a straight end-to-ender. This has required the relocation of some of the points and that in turn has required the down station platform to be repositioned about 15 scale feet closer to "London". This will give a stagger but allows the old configuration of having a turnout at the platform end leading into the goods yard to be restored.
In turn the "London end" of that platform will be closer to the road bridge (yet to be restored but at home awaiting my attention) and therefore so will the signal box. It all fits in - just.
In conversation with club-mates it has been agreed that the back-scene is too high and dwarfs the railway itself. In due course - possibly in better weather next Spring - I shall therefore cut the full-height boards down to the half-height used to divide the scene from the sidings. I don't want to do it now as cutting a paper print scene if it is even slightly damp will lead to disaster. It's not a priority job for now.
I have one more afternoon in the club this year. December is fully booked for other things so after next week it will be January (at least) before I return and that will be weather-dependant. There is no point driving 40 miles if it's going to be too cold / damp to do anything useful.
Sorry there's no pictures from today. I'll try to grab some next week before the winter shutdown.
Full Member
All are now fitted with LEDs and with wires glued in place.
Tonight they received the first coat of paint.
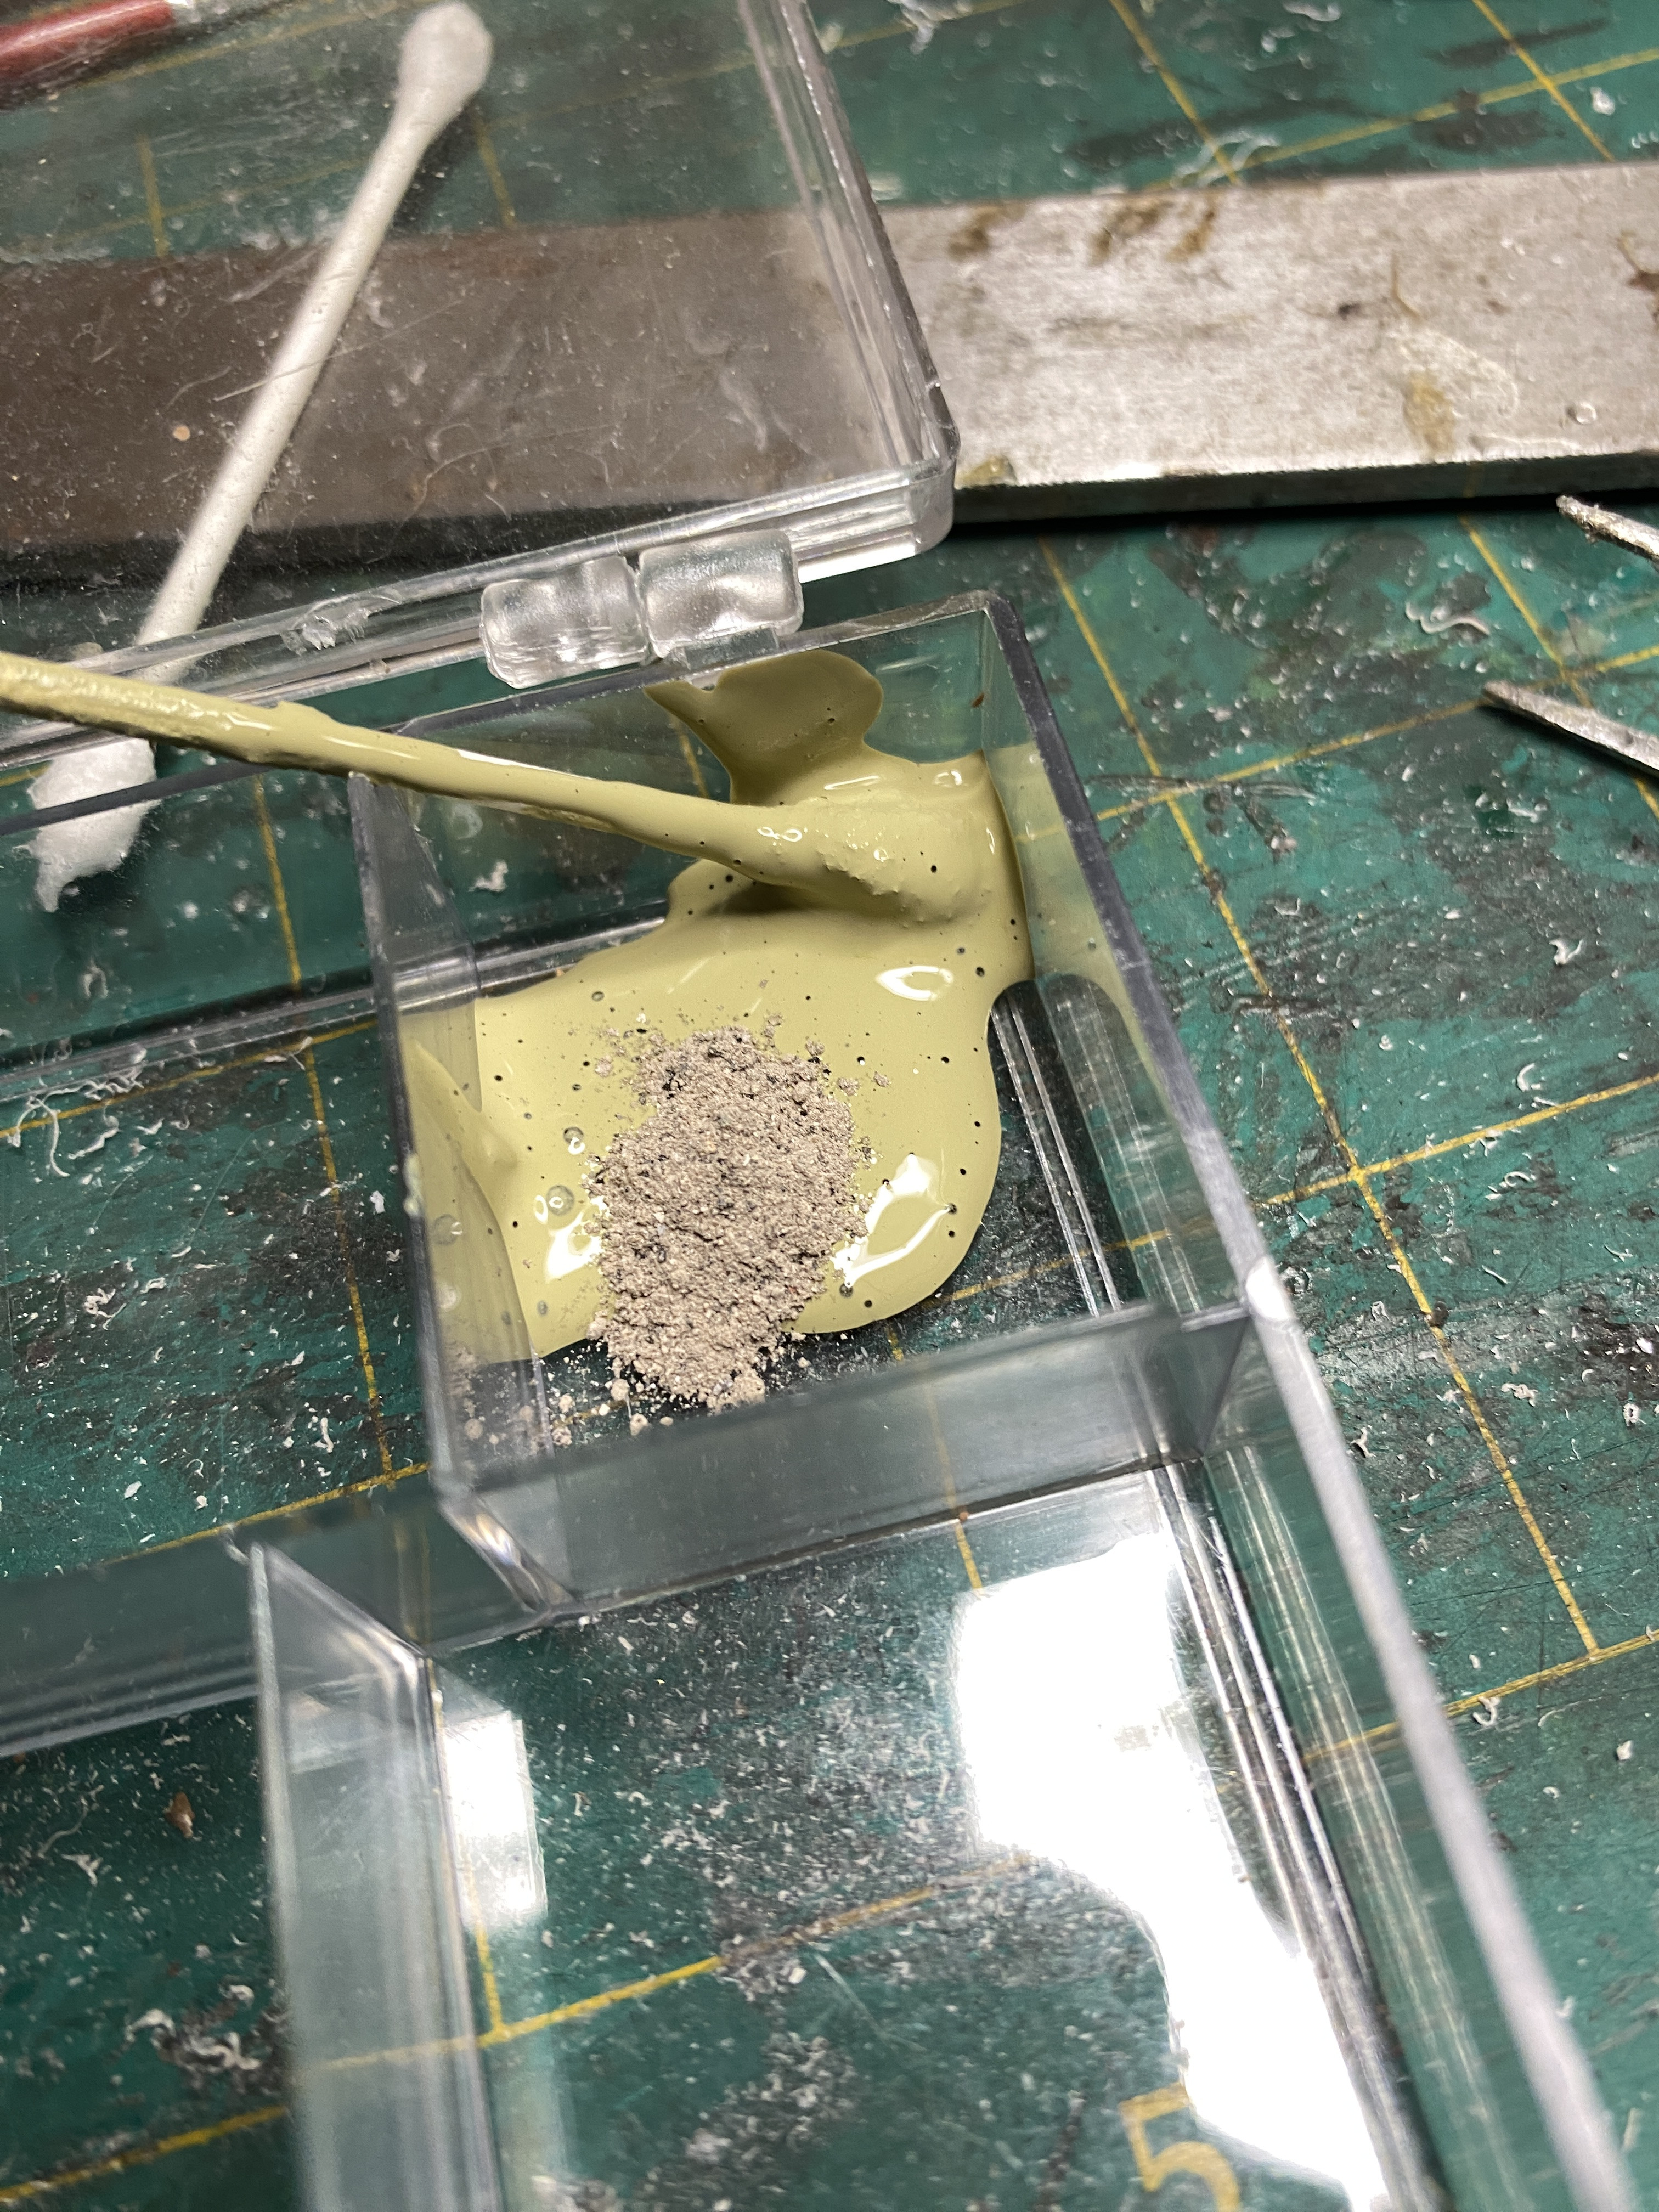
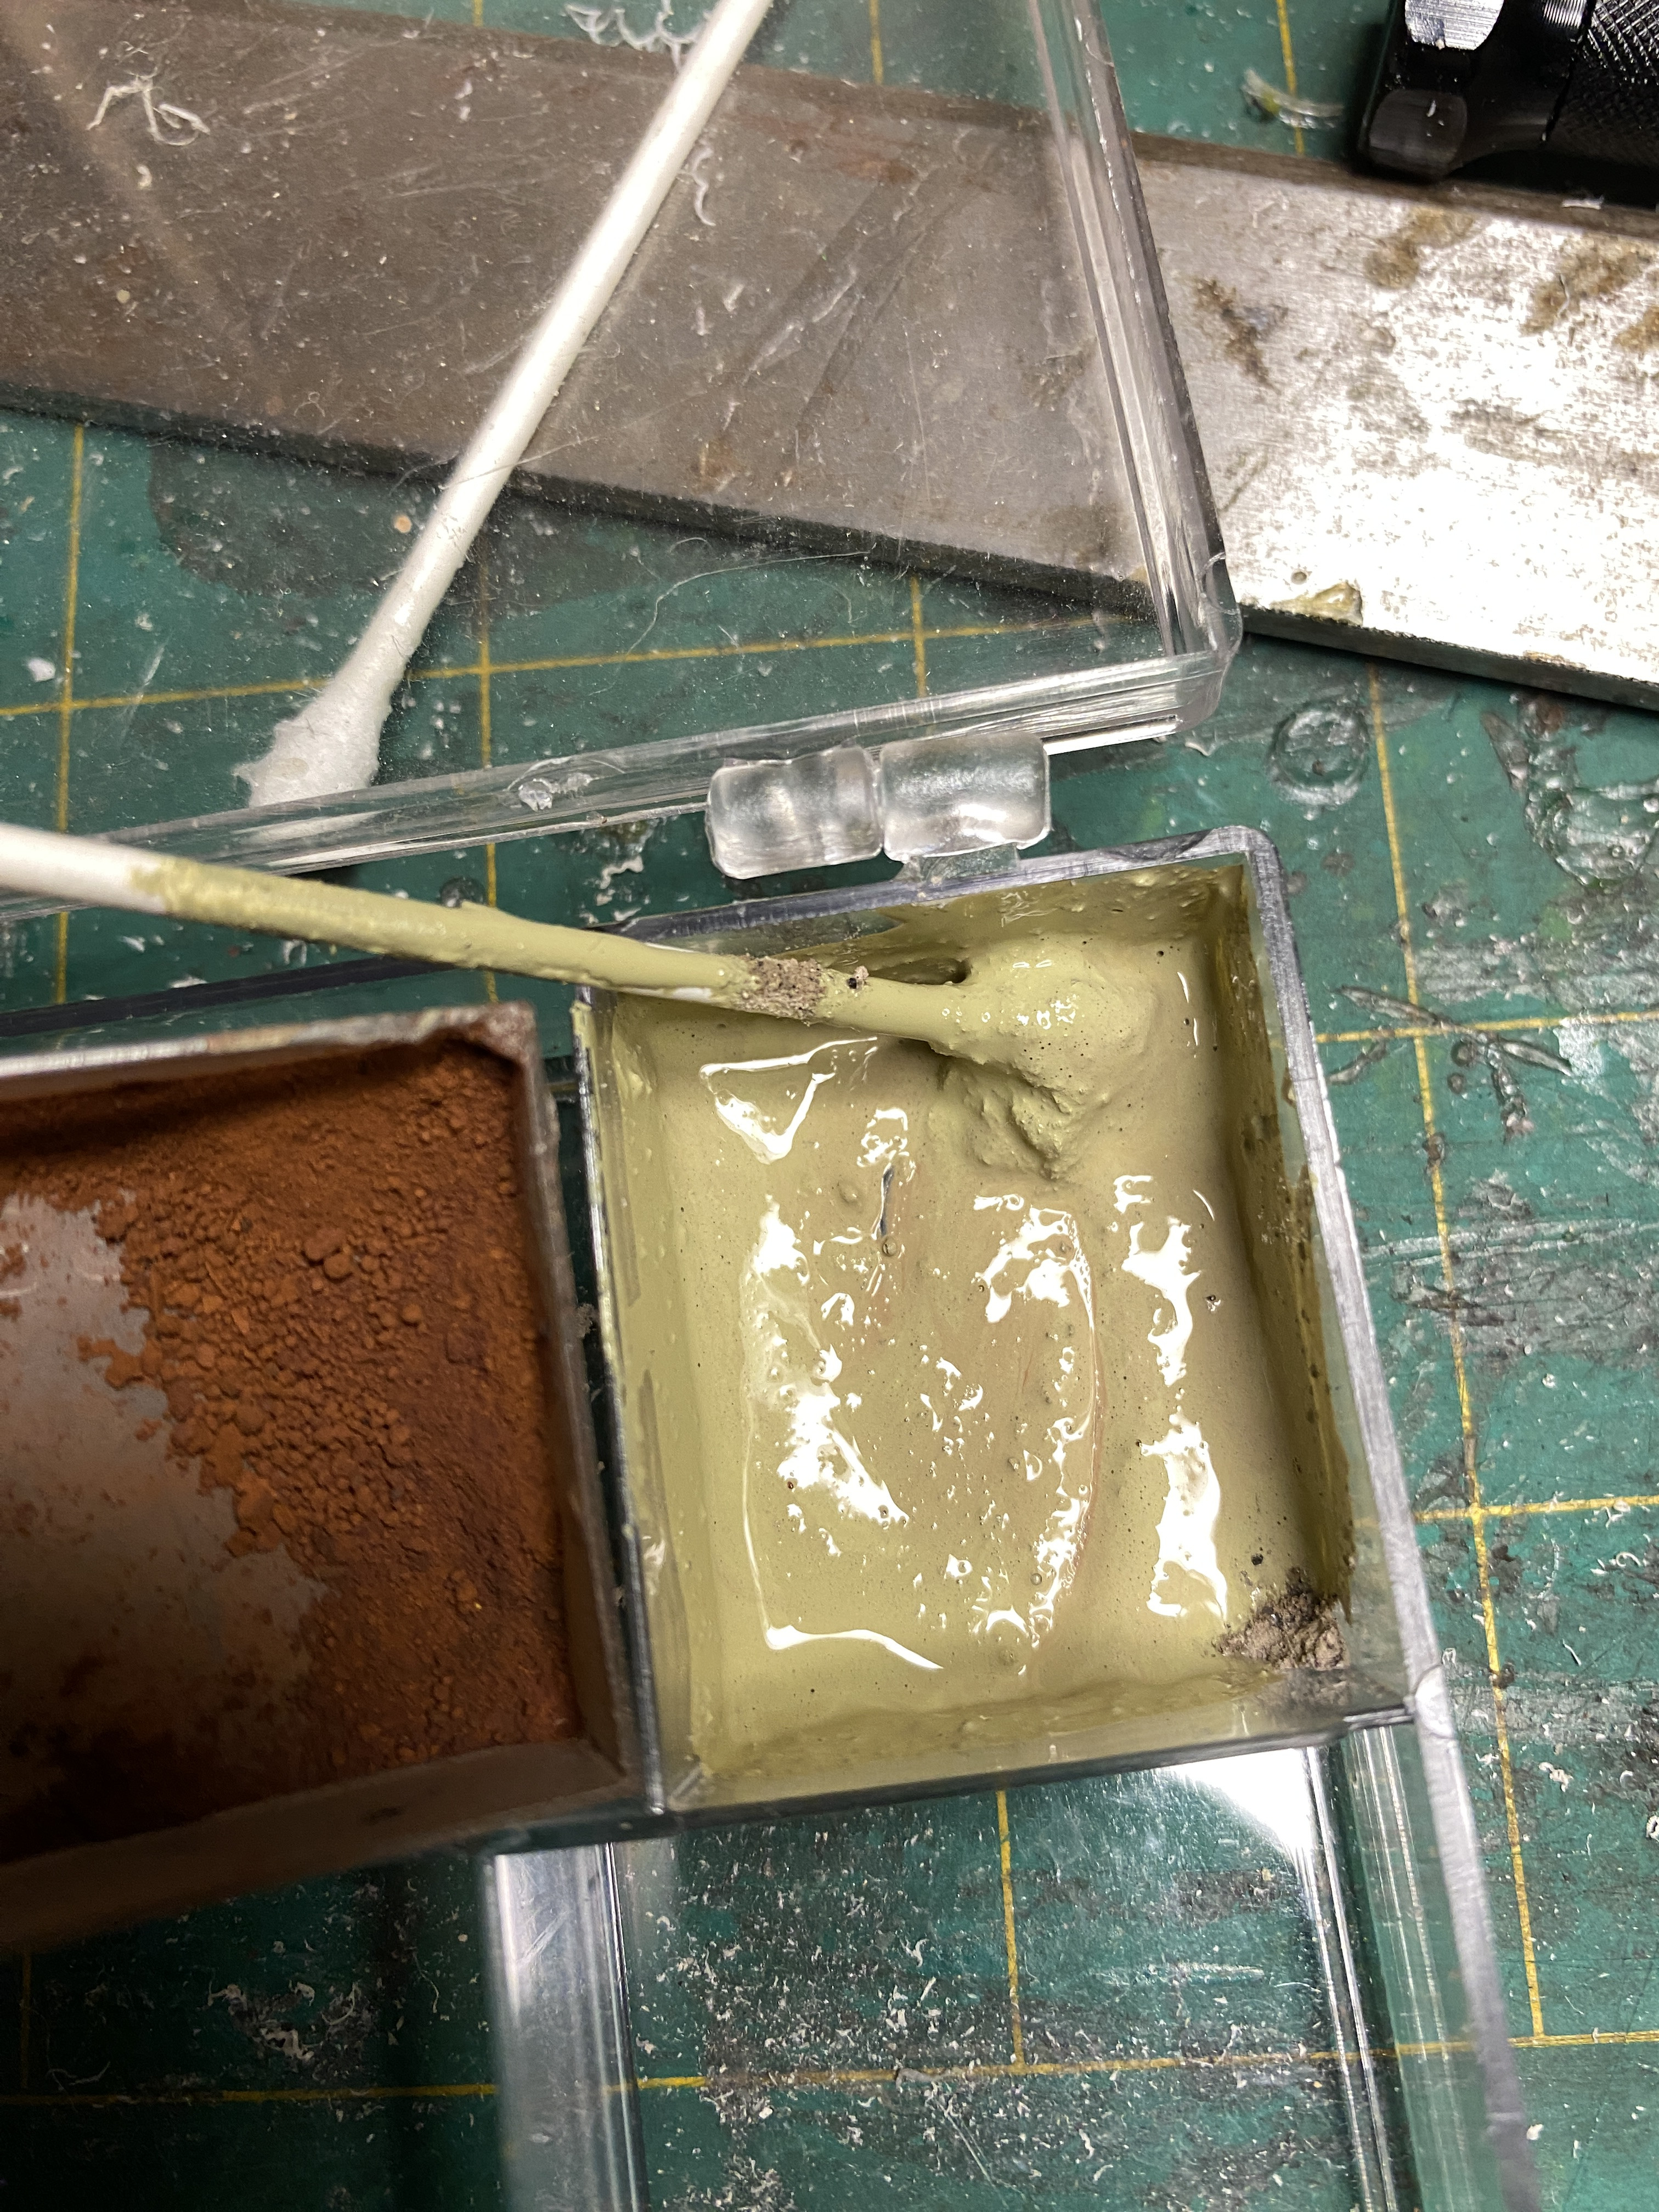
I mixed Railmatch “Concrete” with Peco “Ash” until the combination was almost a sandy paste. Just wet enough to apply but no longer wet enough to run or drip. The twin bracket lamps were then painted.
I then added a small amount of “Rust” weathering powder which is a mix I make of several brands. AIM, DCC Concepts and Carrs are all in there.
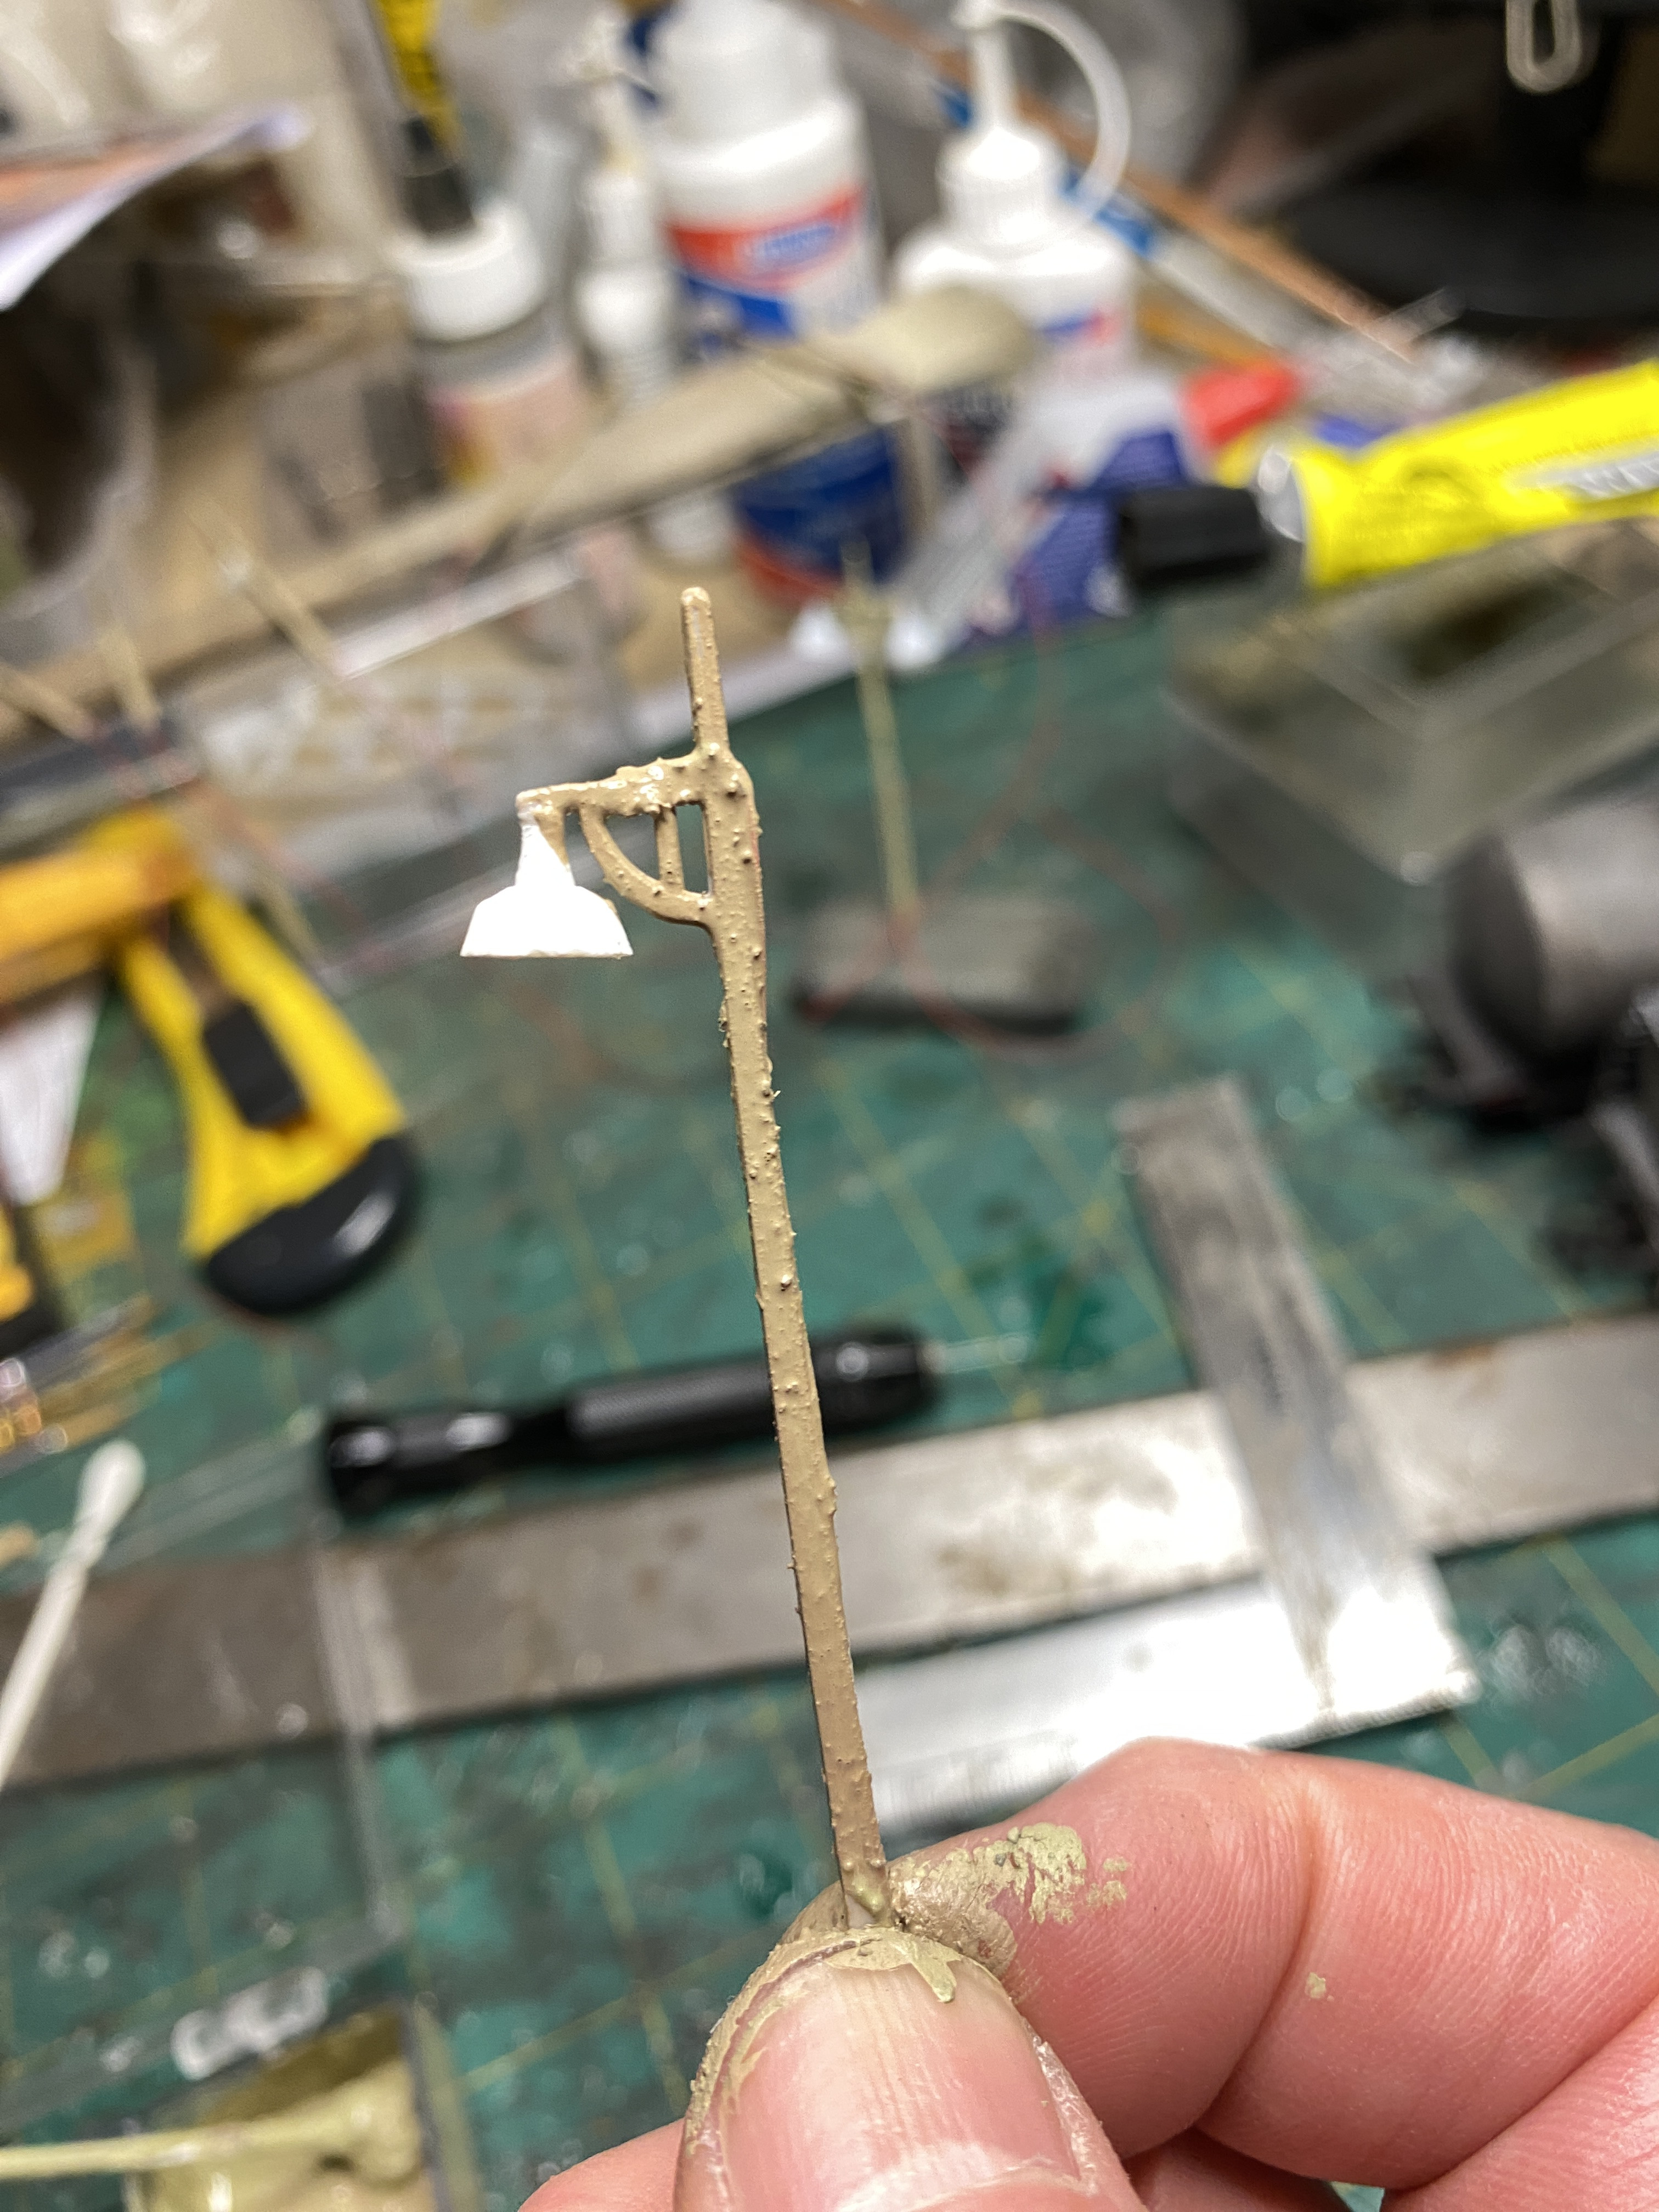
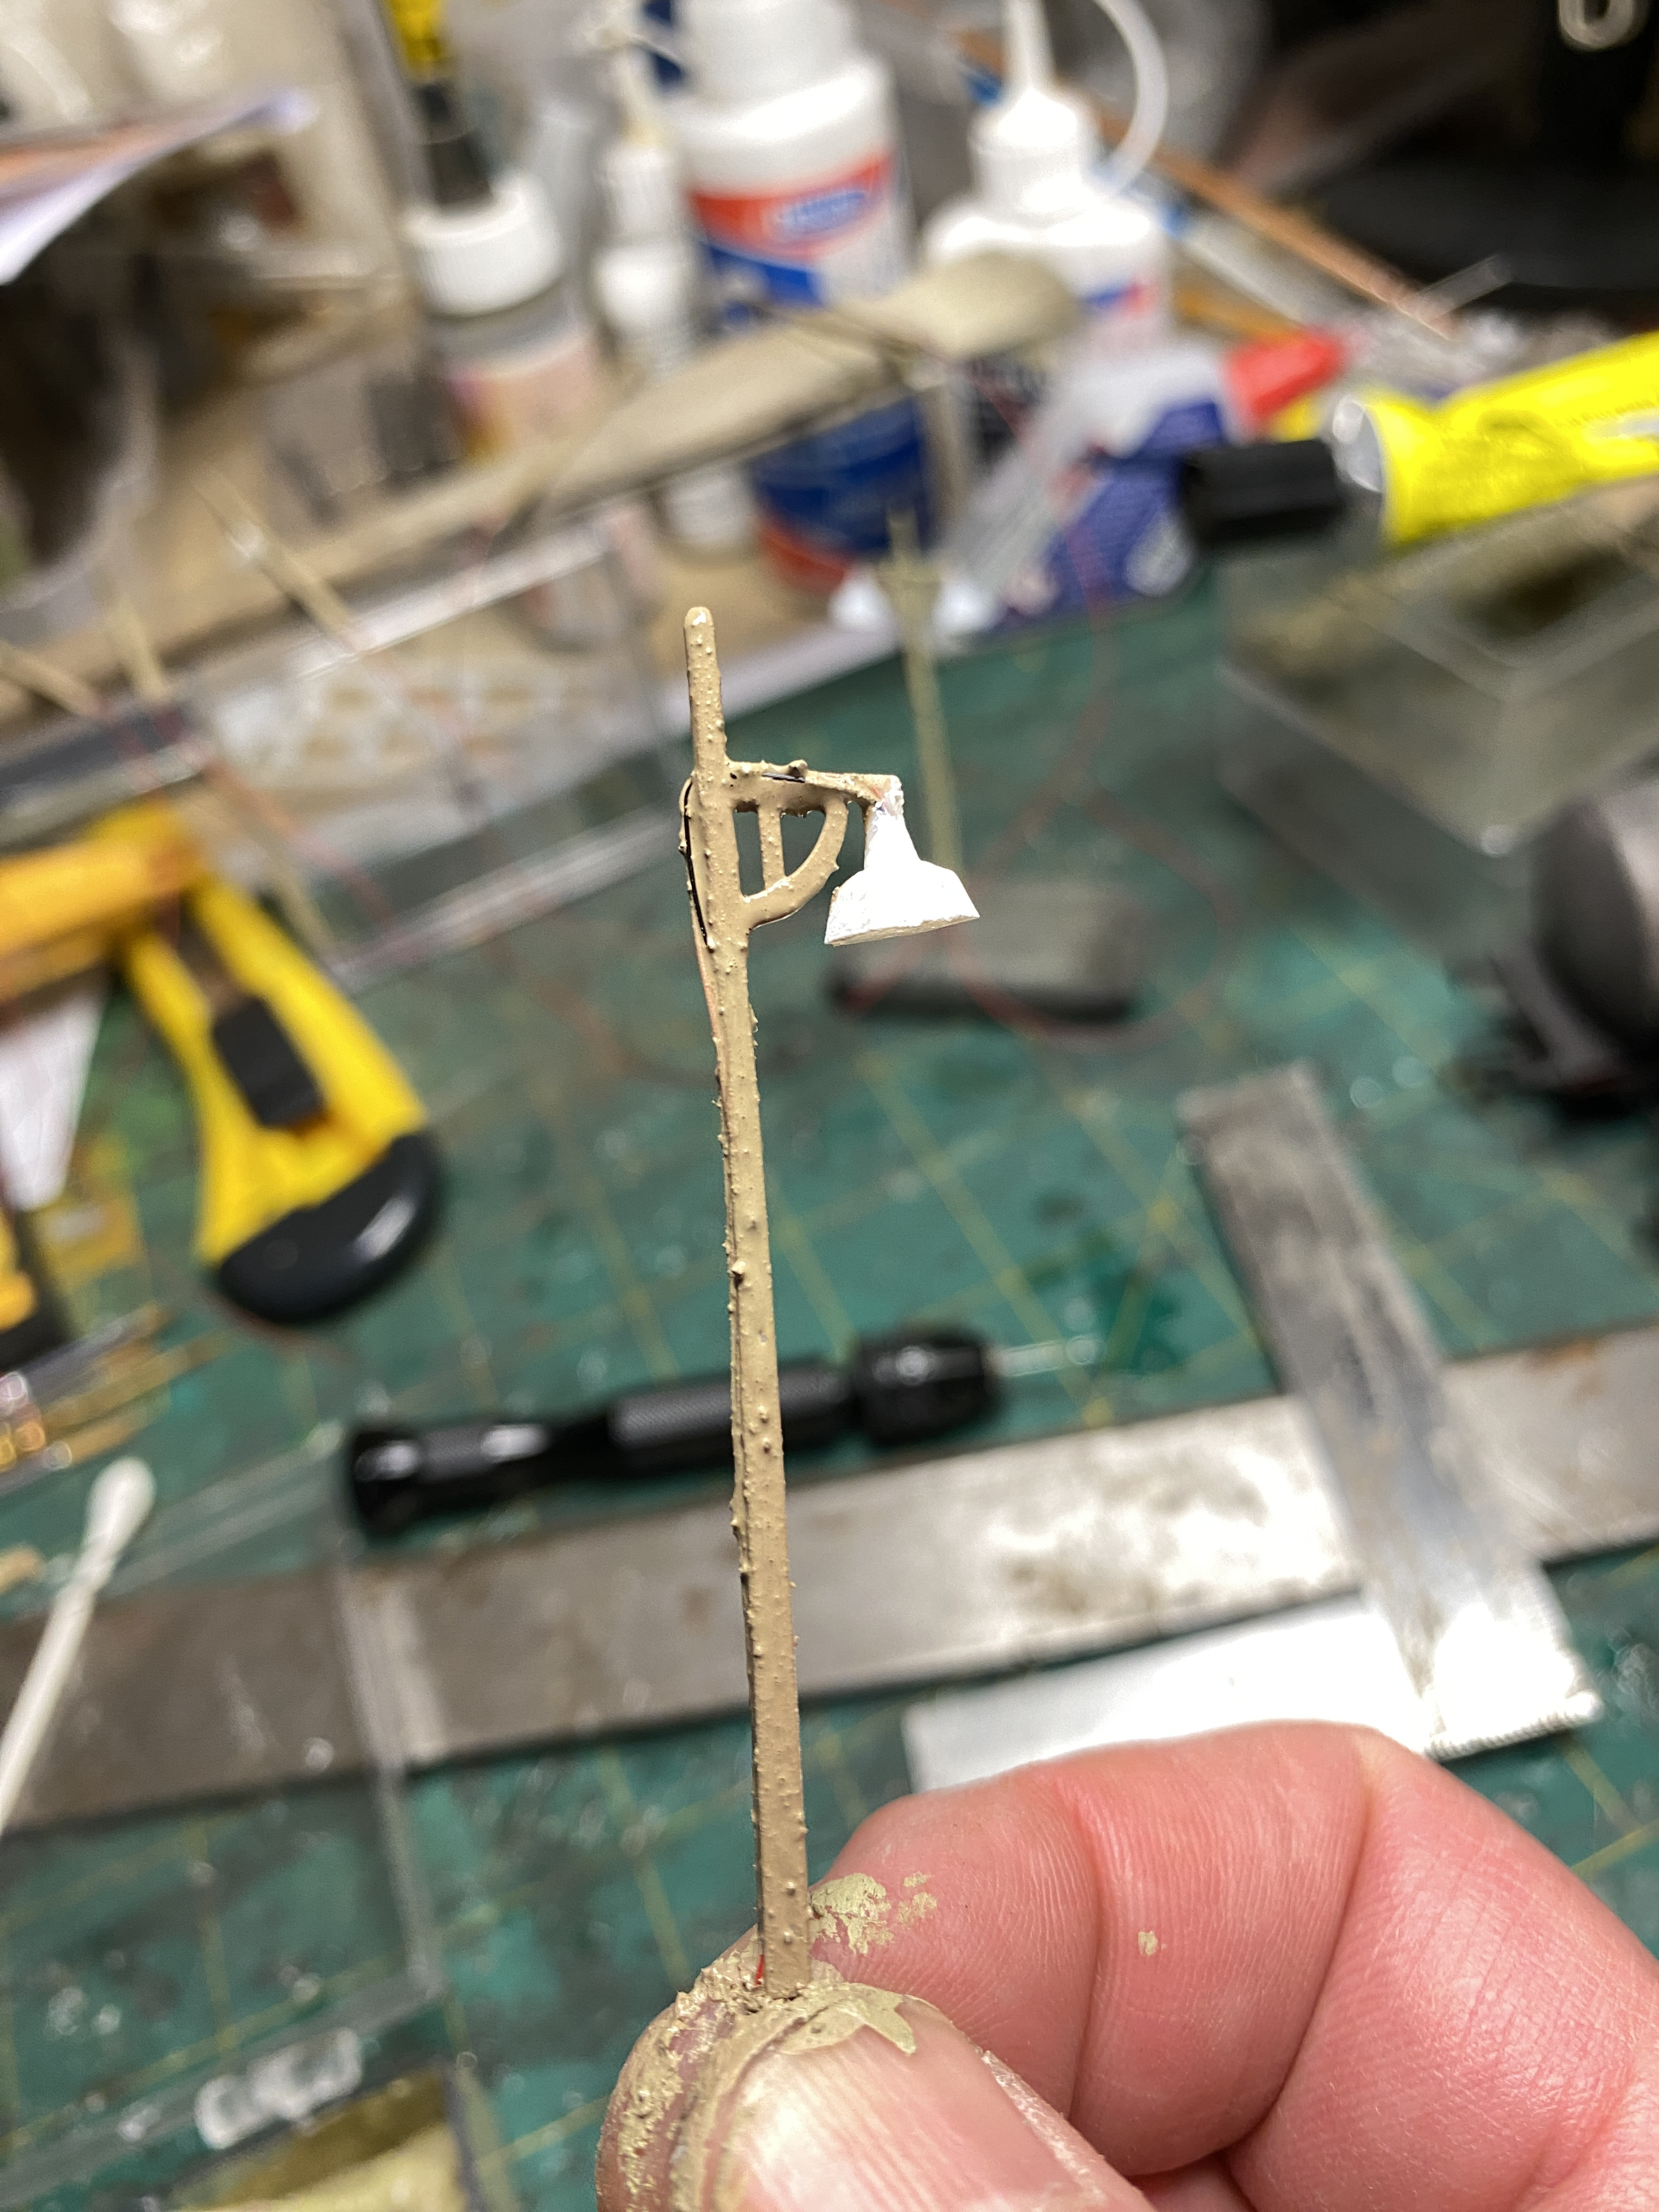
This was then applied to the single-bracket posts. These will be placed along the platform and would have gathered a coating of brake dust in real life. Hence the subtle difference in treatment.
The comparison shows plain concrete to the left and “rusty” to the right. A slight but noticeable difference.
The white shades are painted with an acrylic “warm white”.
Once dry any touching-up or re-sticking of wires can be dealt with.
Posted
Full Member
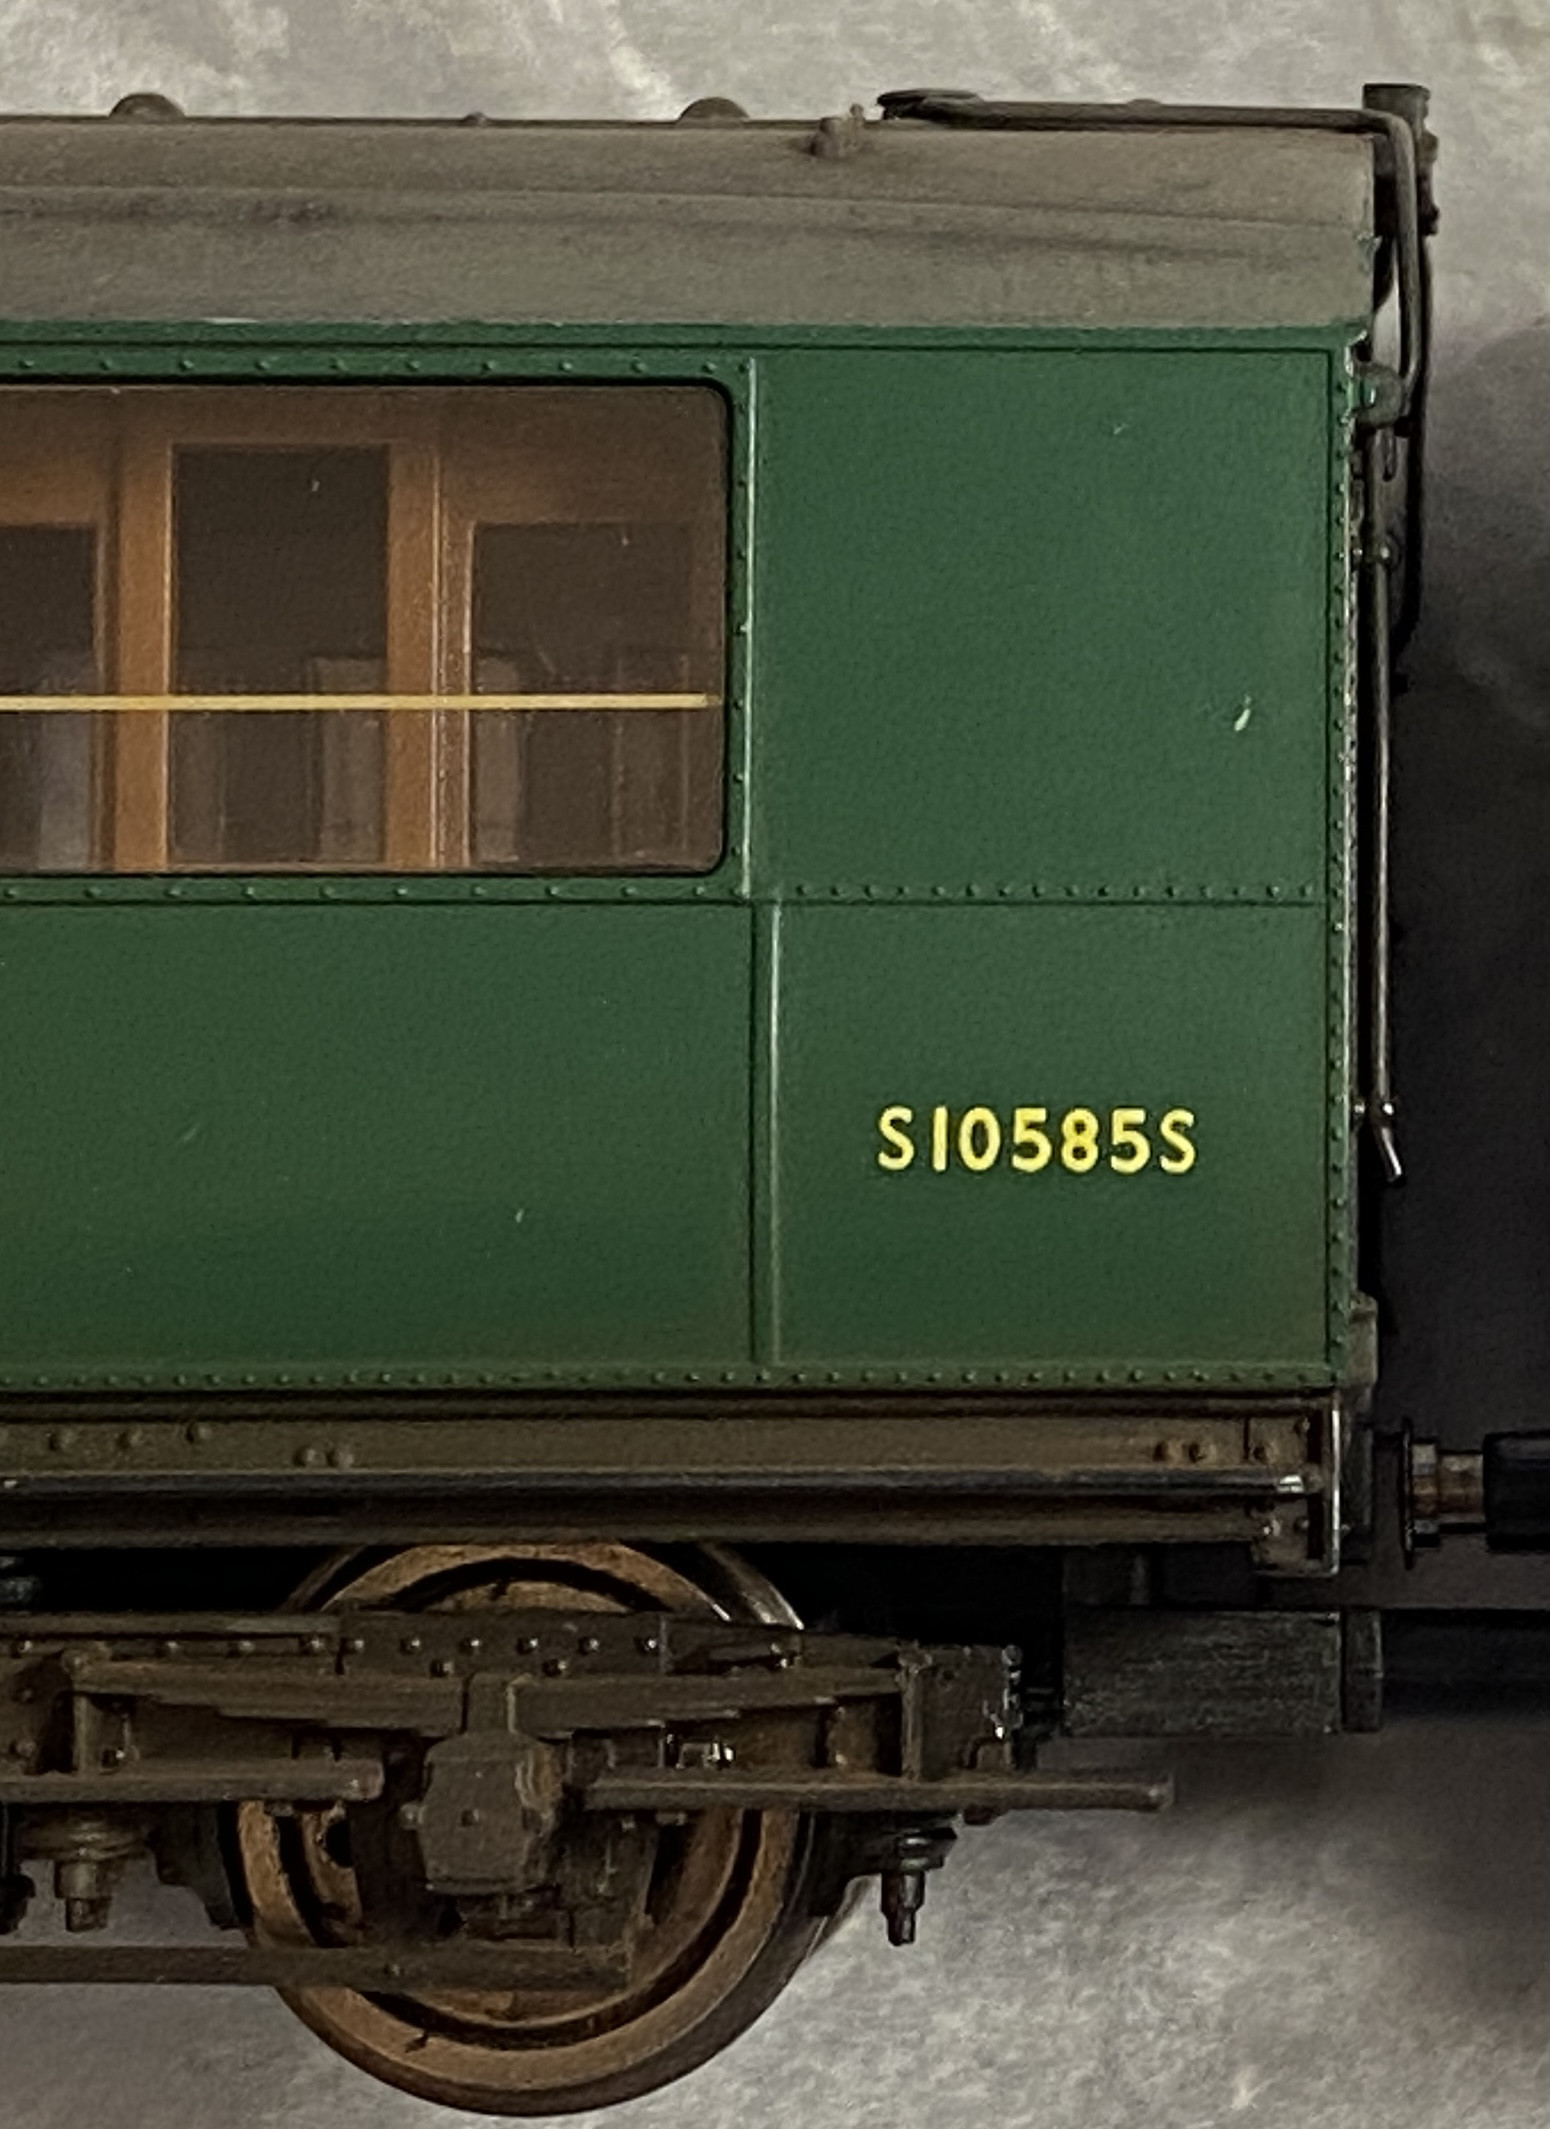
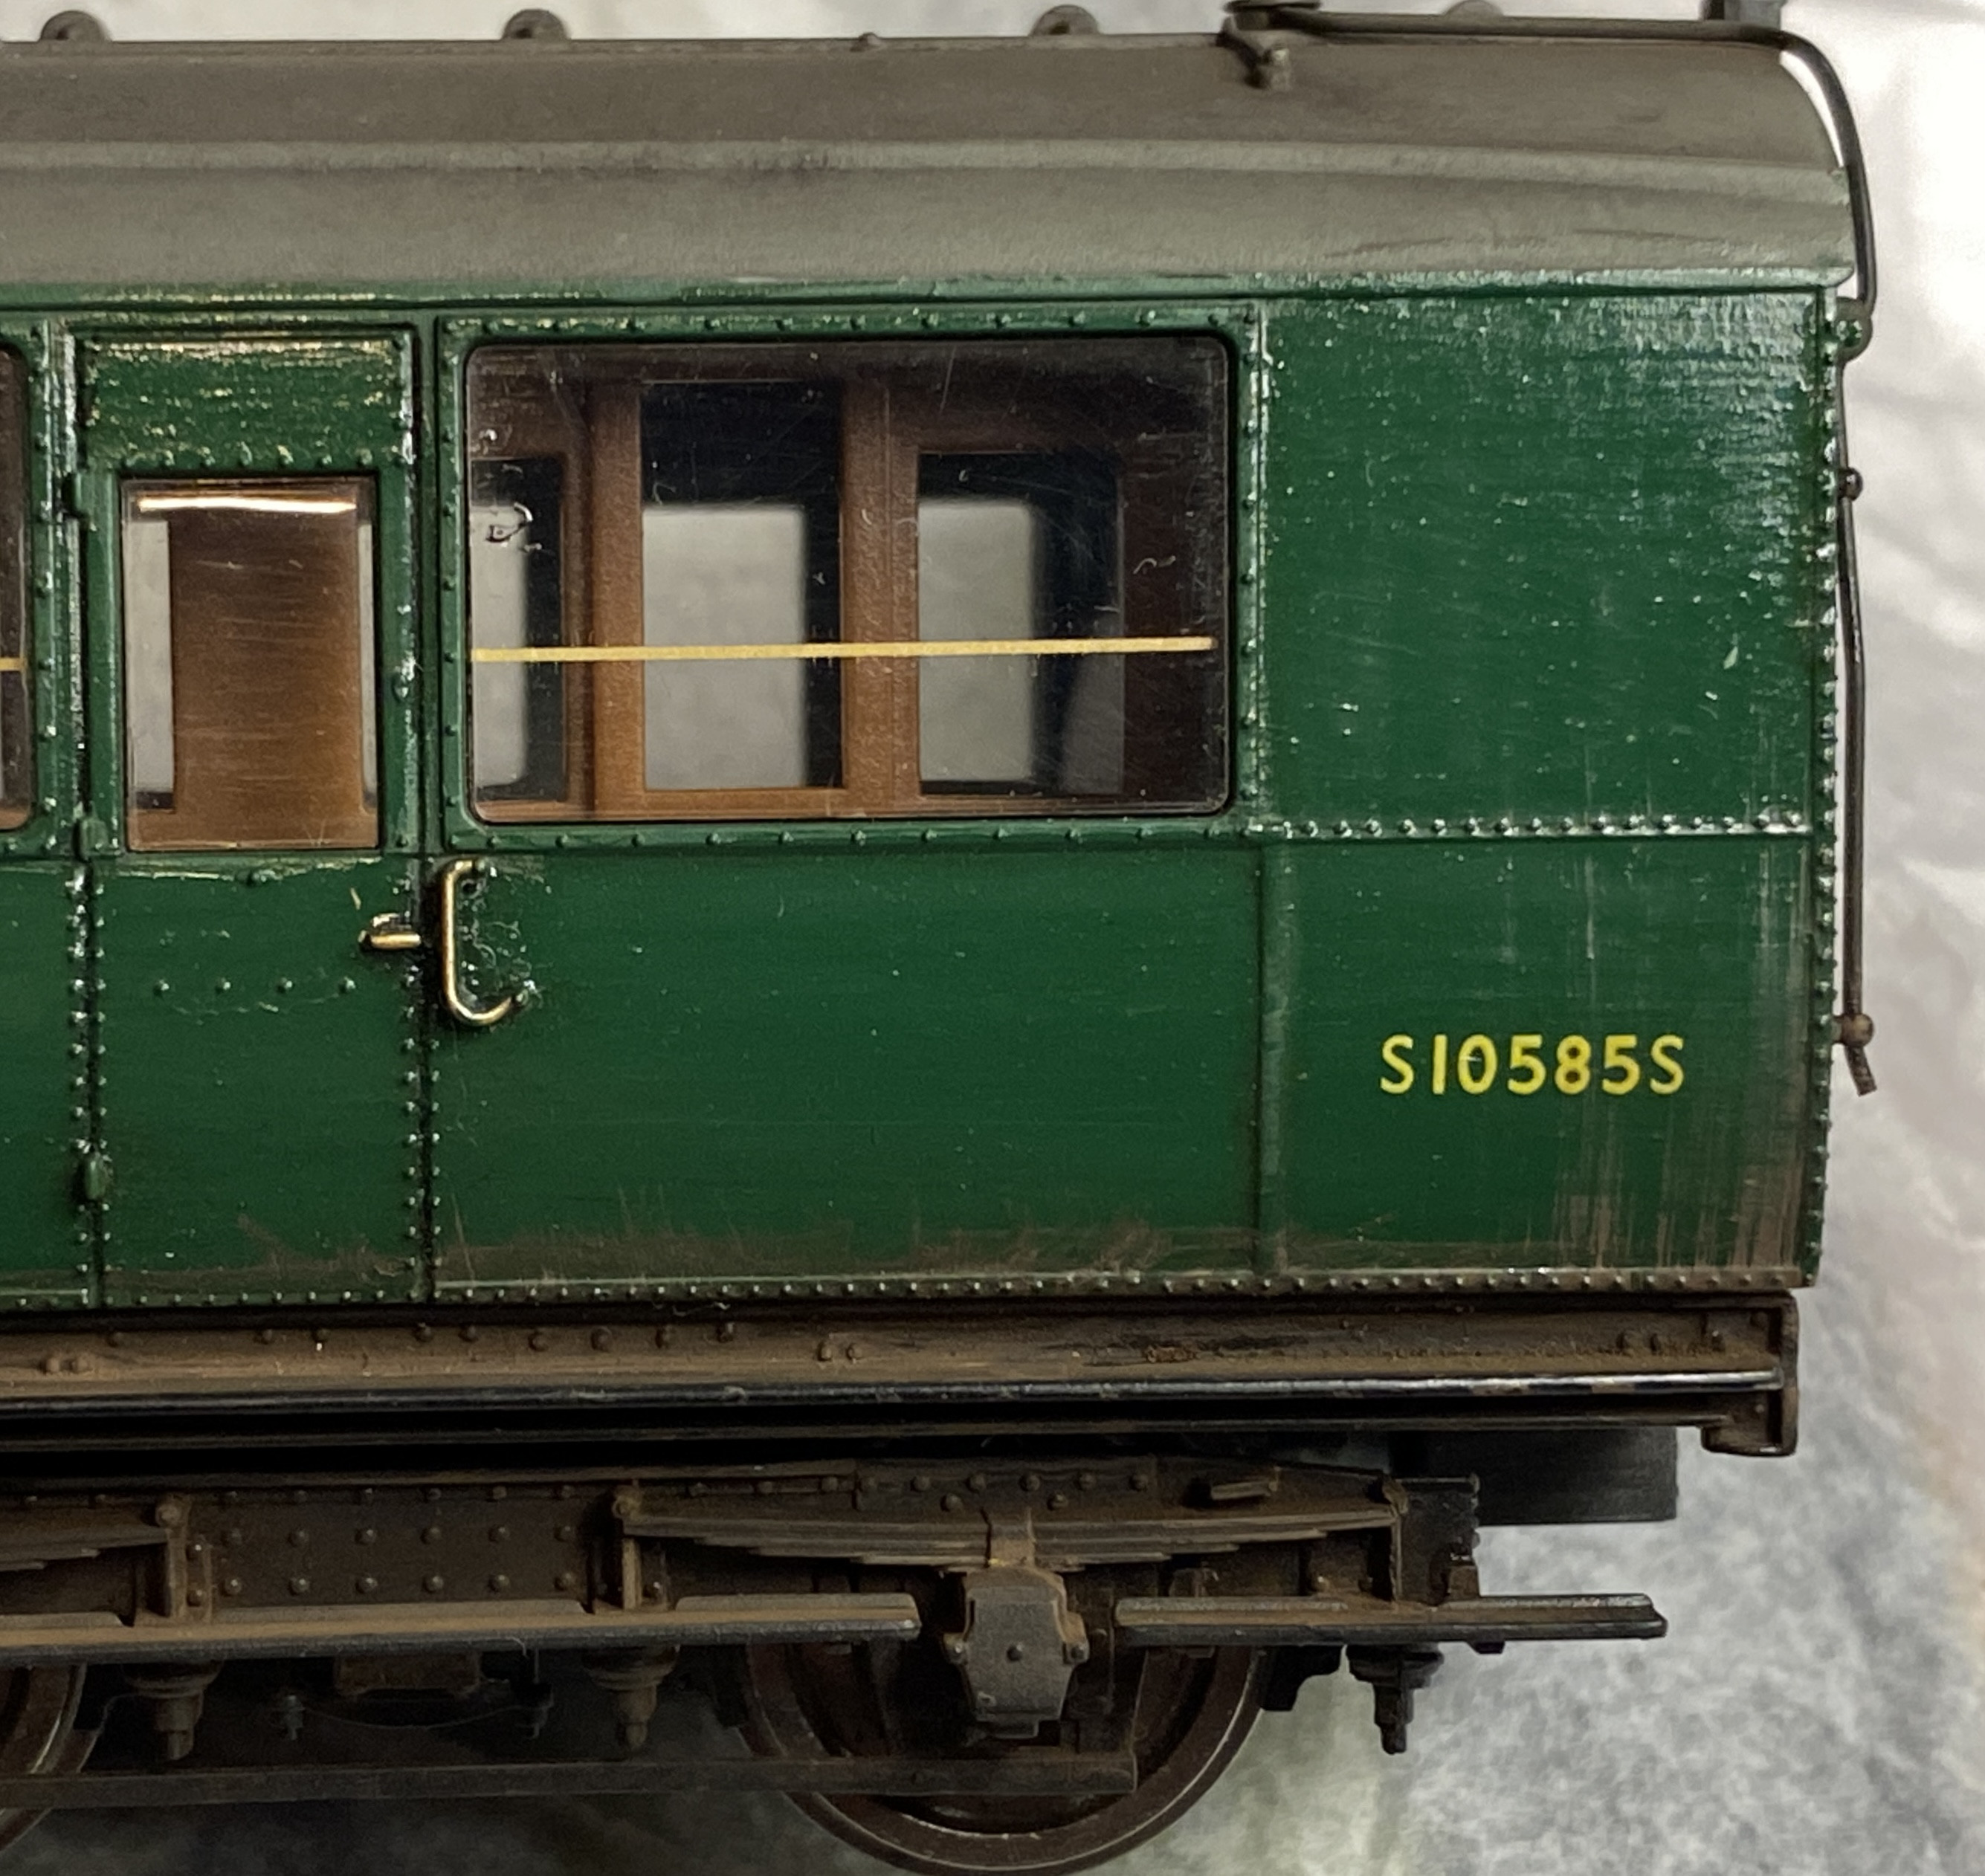
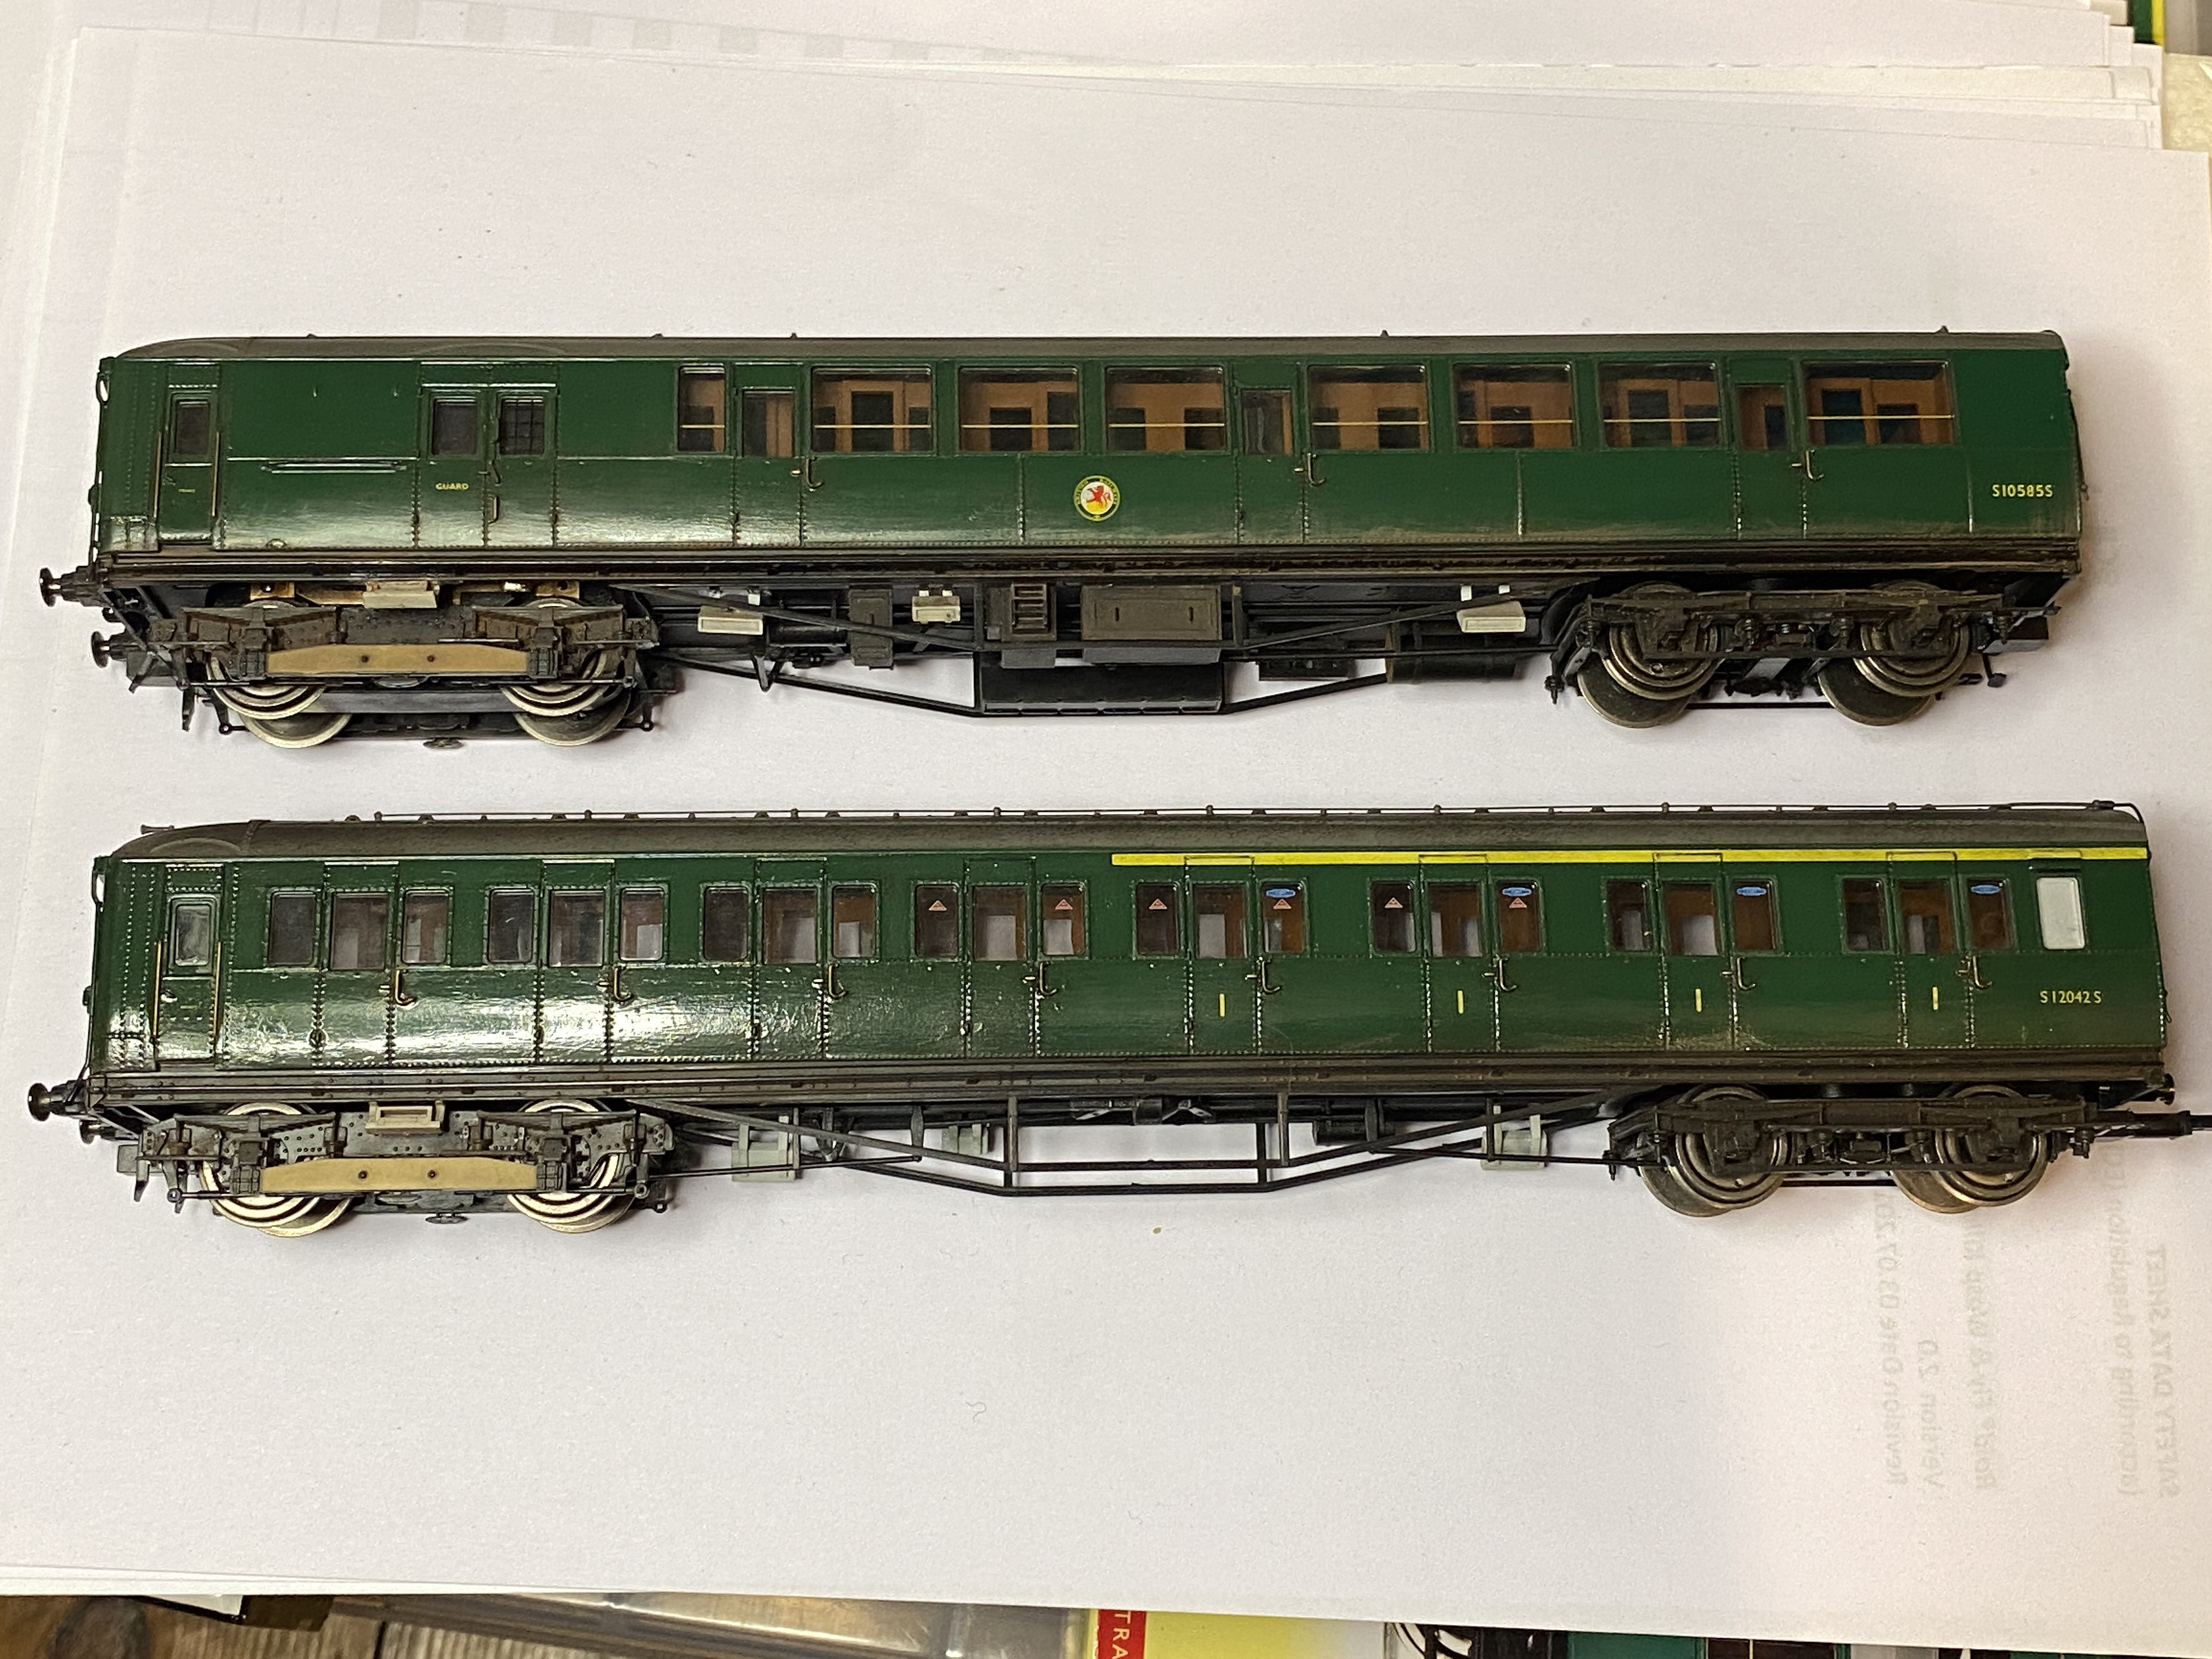
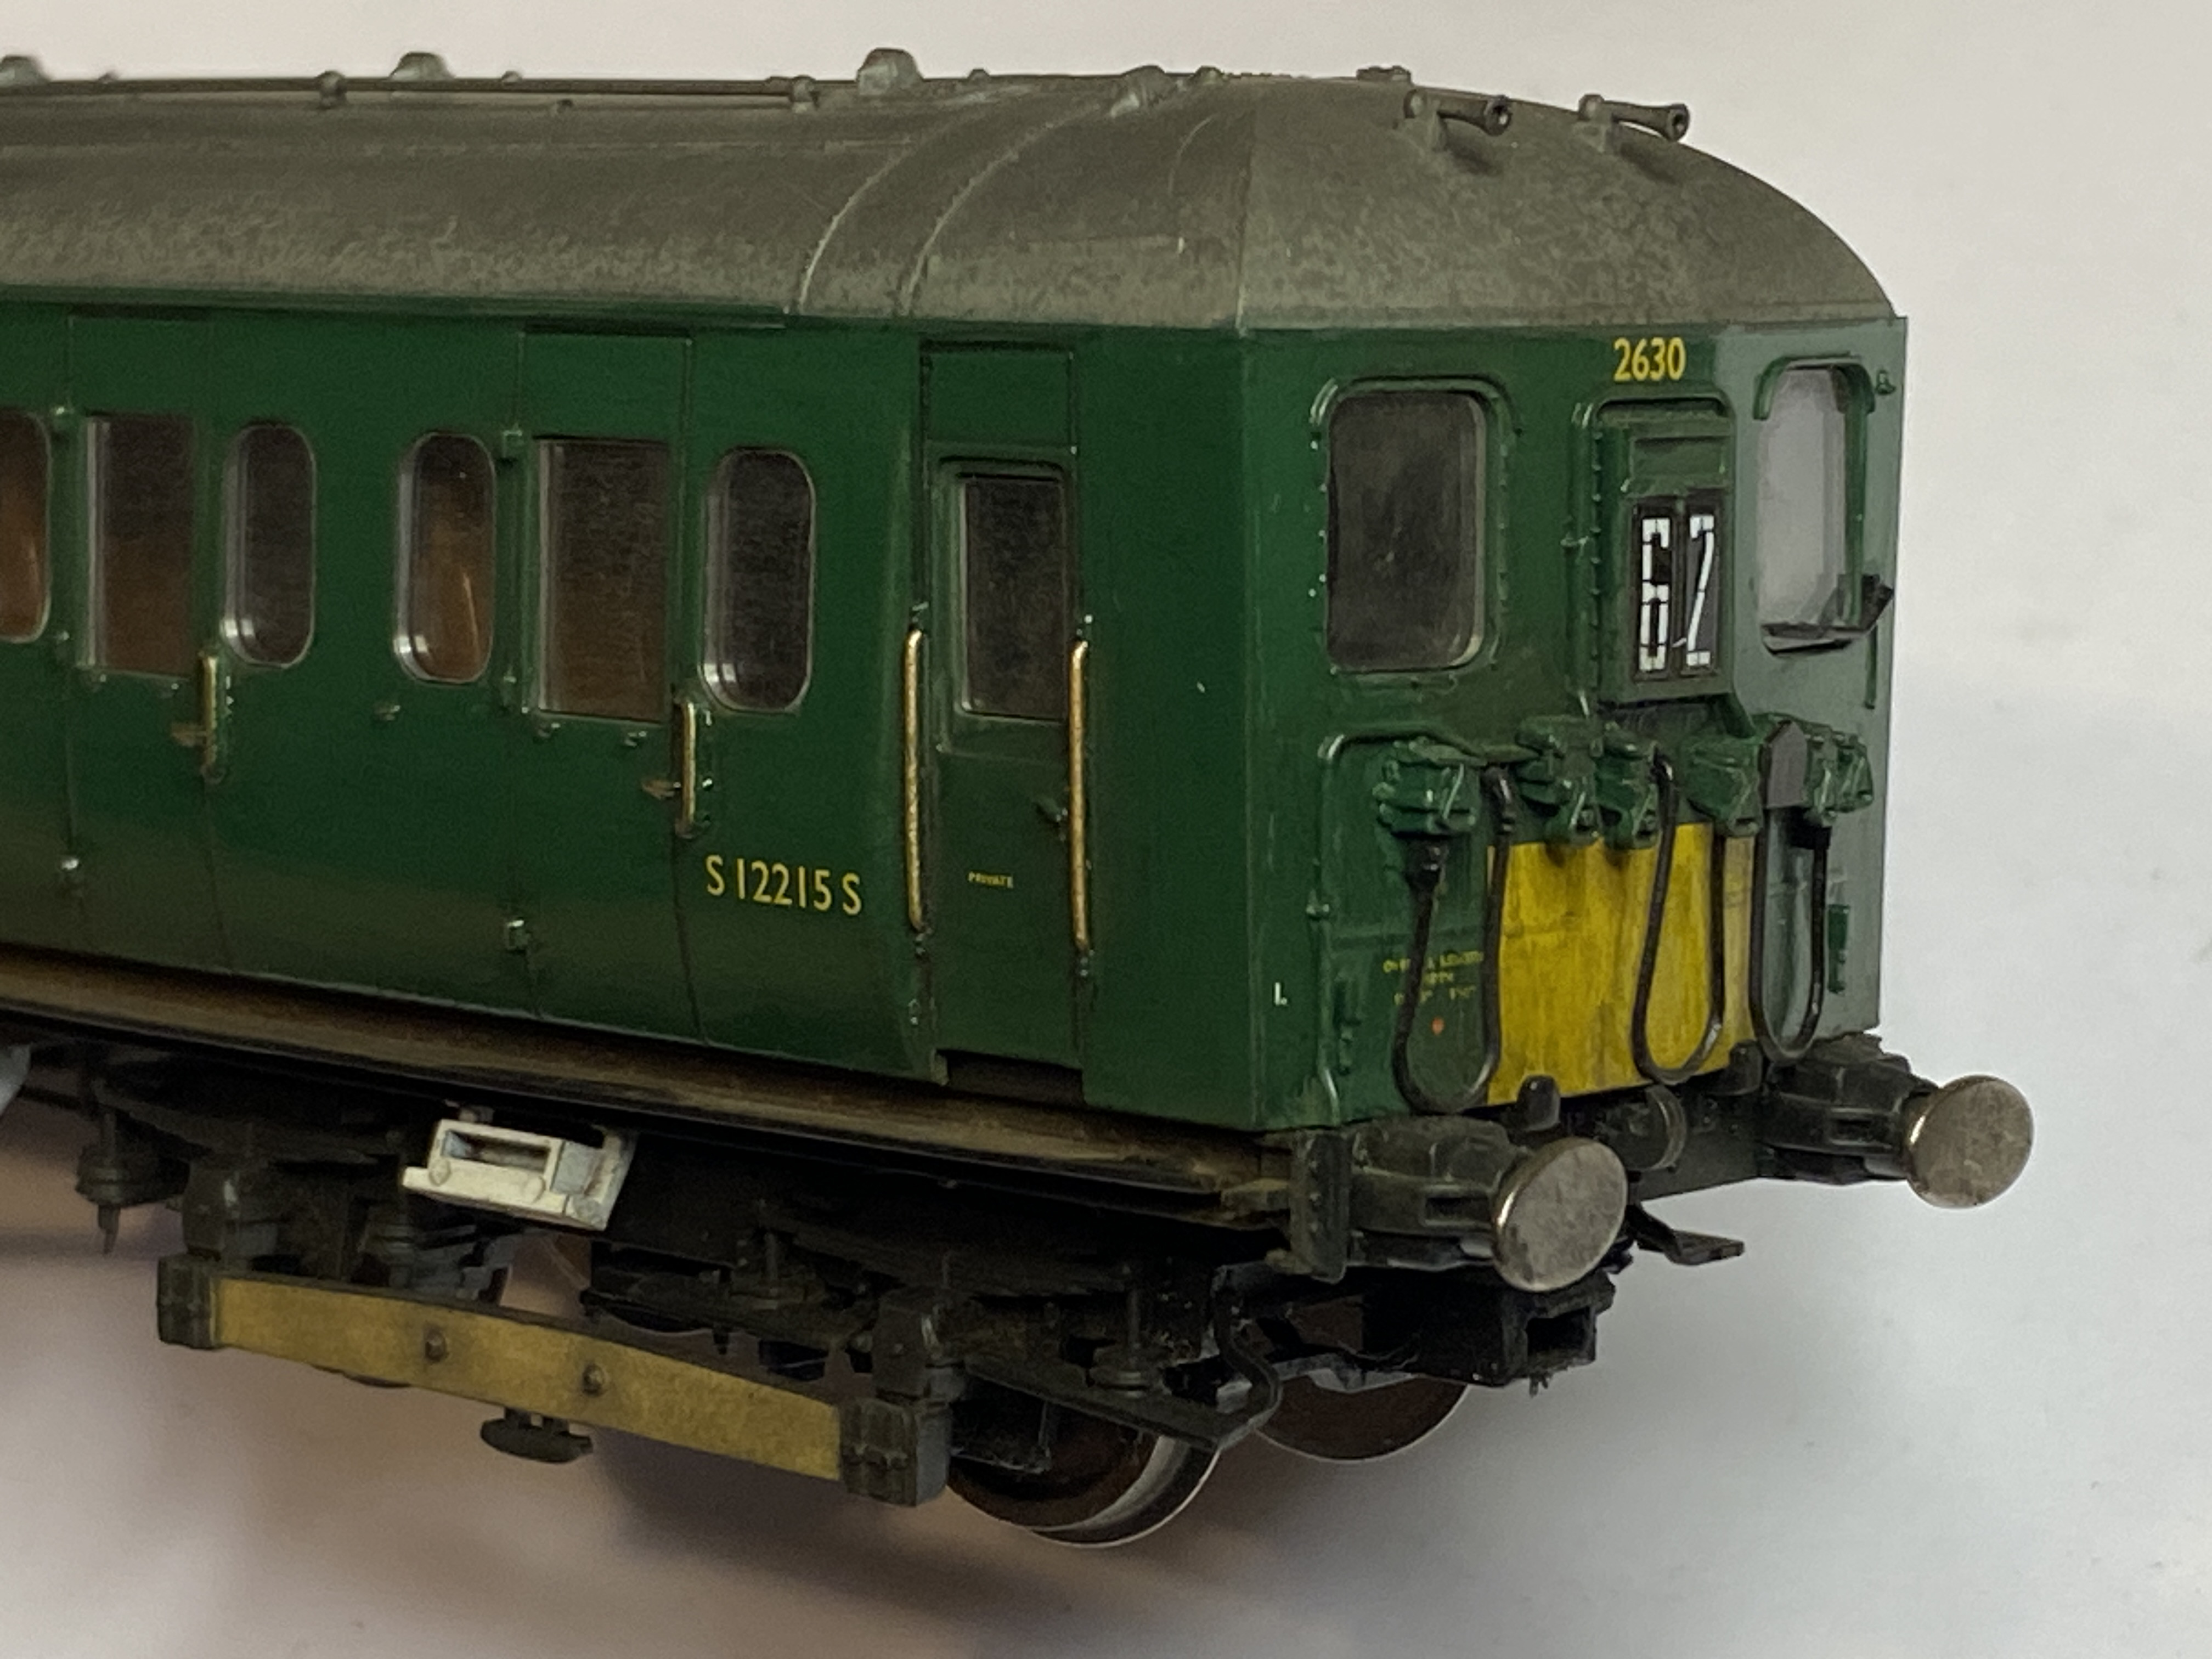
Never having been happy with their appearance but also having no experience of varnishing I took the bold step much as I did when I first weathered my own stock.
Valleja Gloss Varnish is being applied to all five units in my collection. These already had weathering applied. The varnish has subtly enhanced some of that whilst more new powder has been brushed over the dry work.
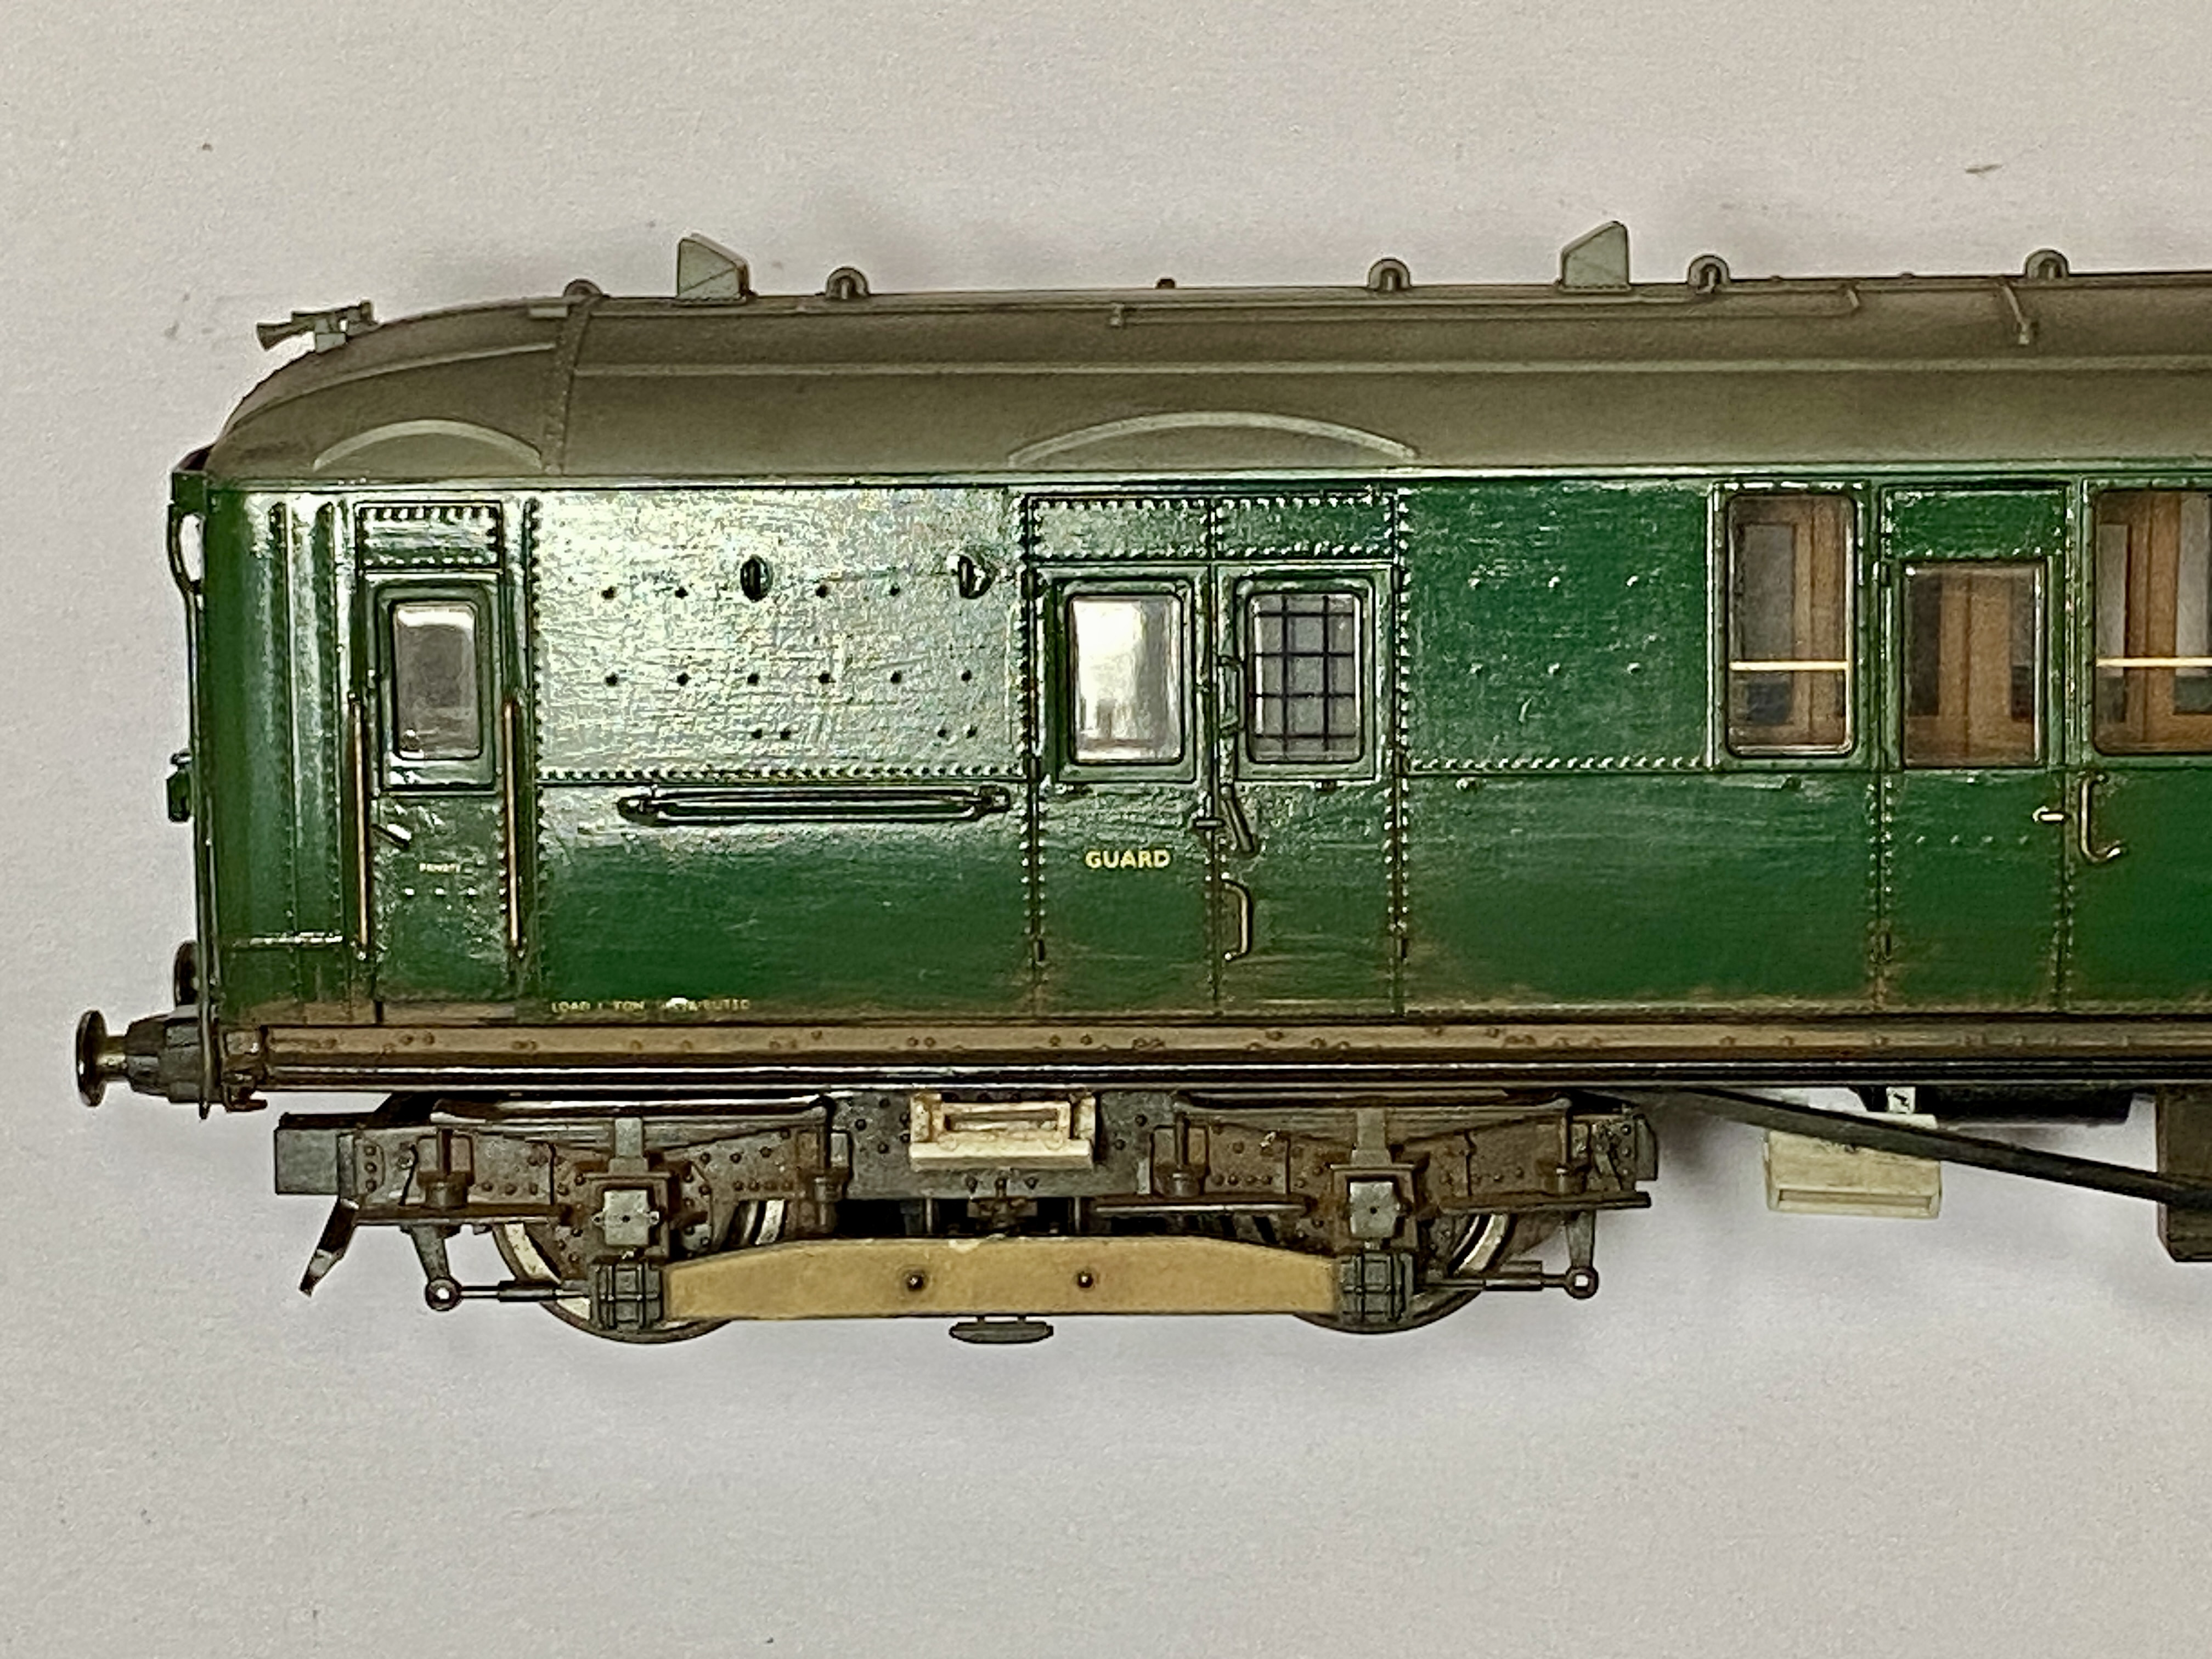
These units were normally seen in traffic with the SR coach-painter’s skills shown in their deep shine even when dirty and, latterly, uncared for.
I aim to replicate that and include some comparison images here. Whilst there are some brush marks these don’t show at viewing distance but the significant improvement in appearance certainly does.
Posted
Full Member
Cheers Pete.
Full Member
peterm said
I might even have a try at that myself… one day. Yours are looking though, Rick.
From “Post #292,853”, 1st December 2025, 11:57 pm
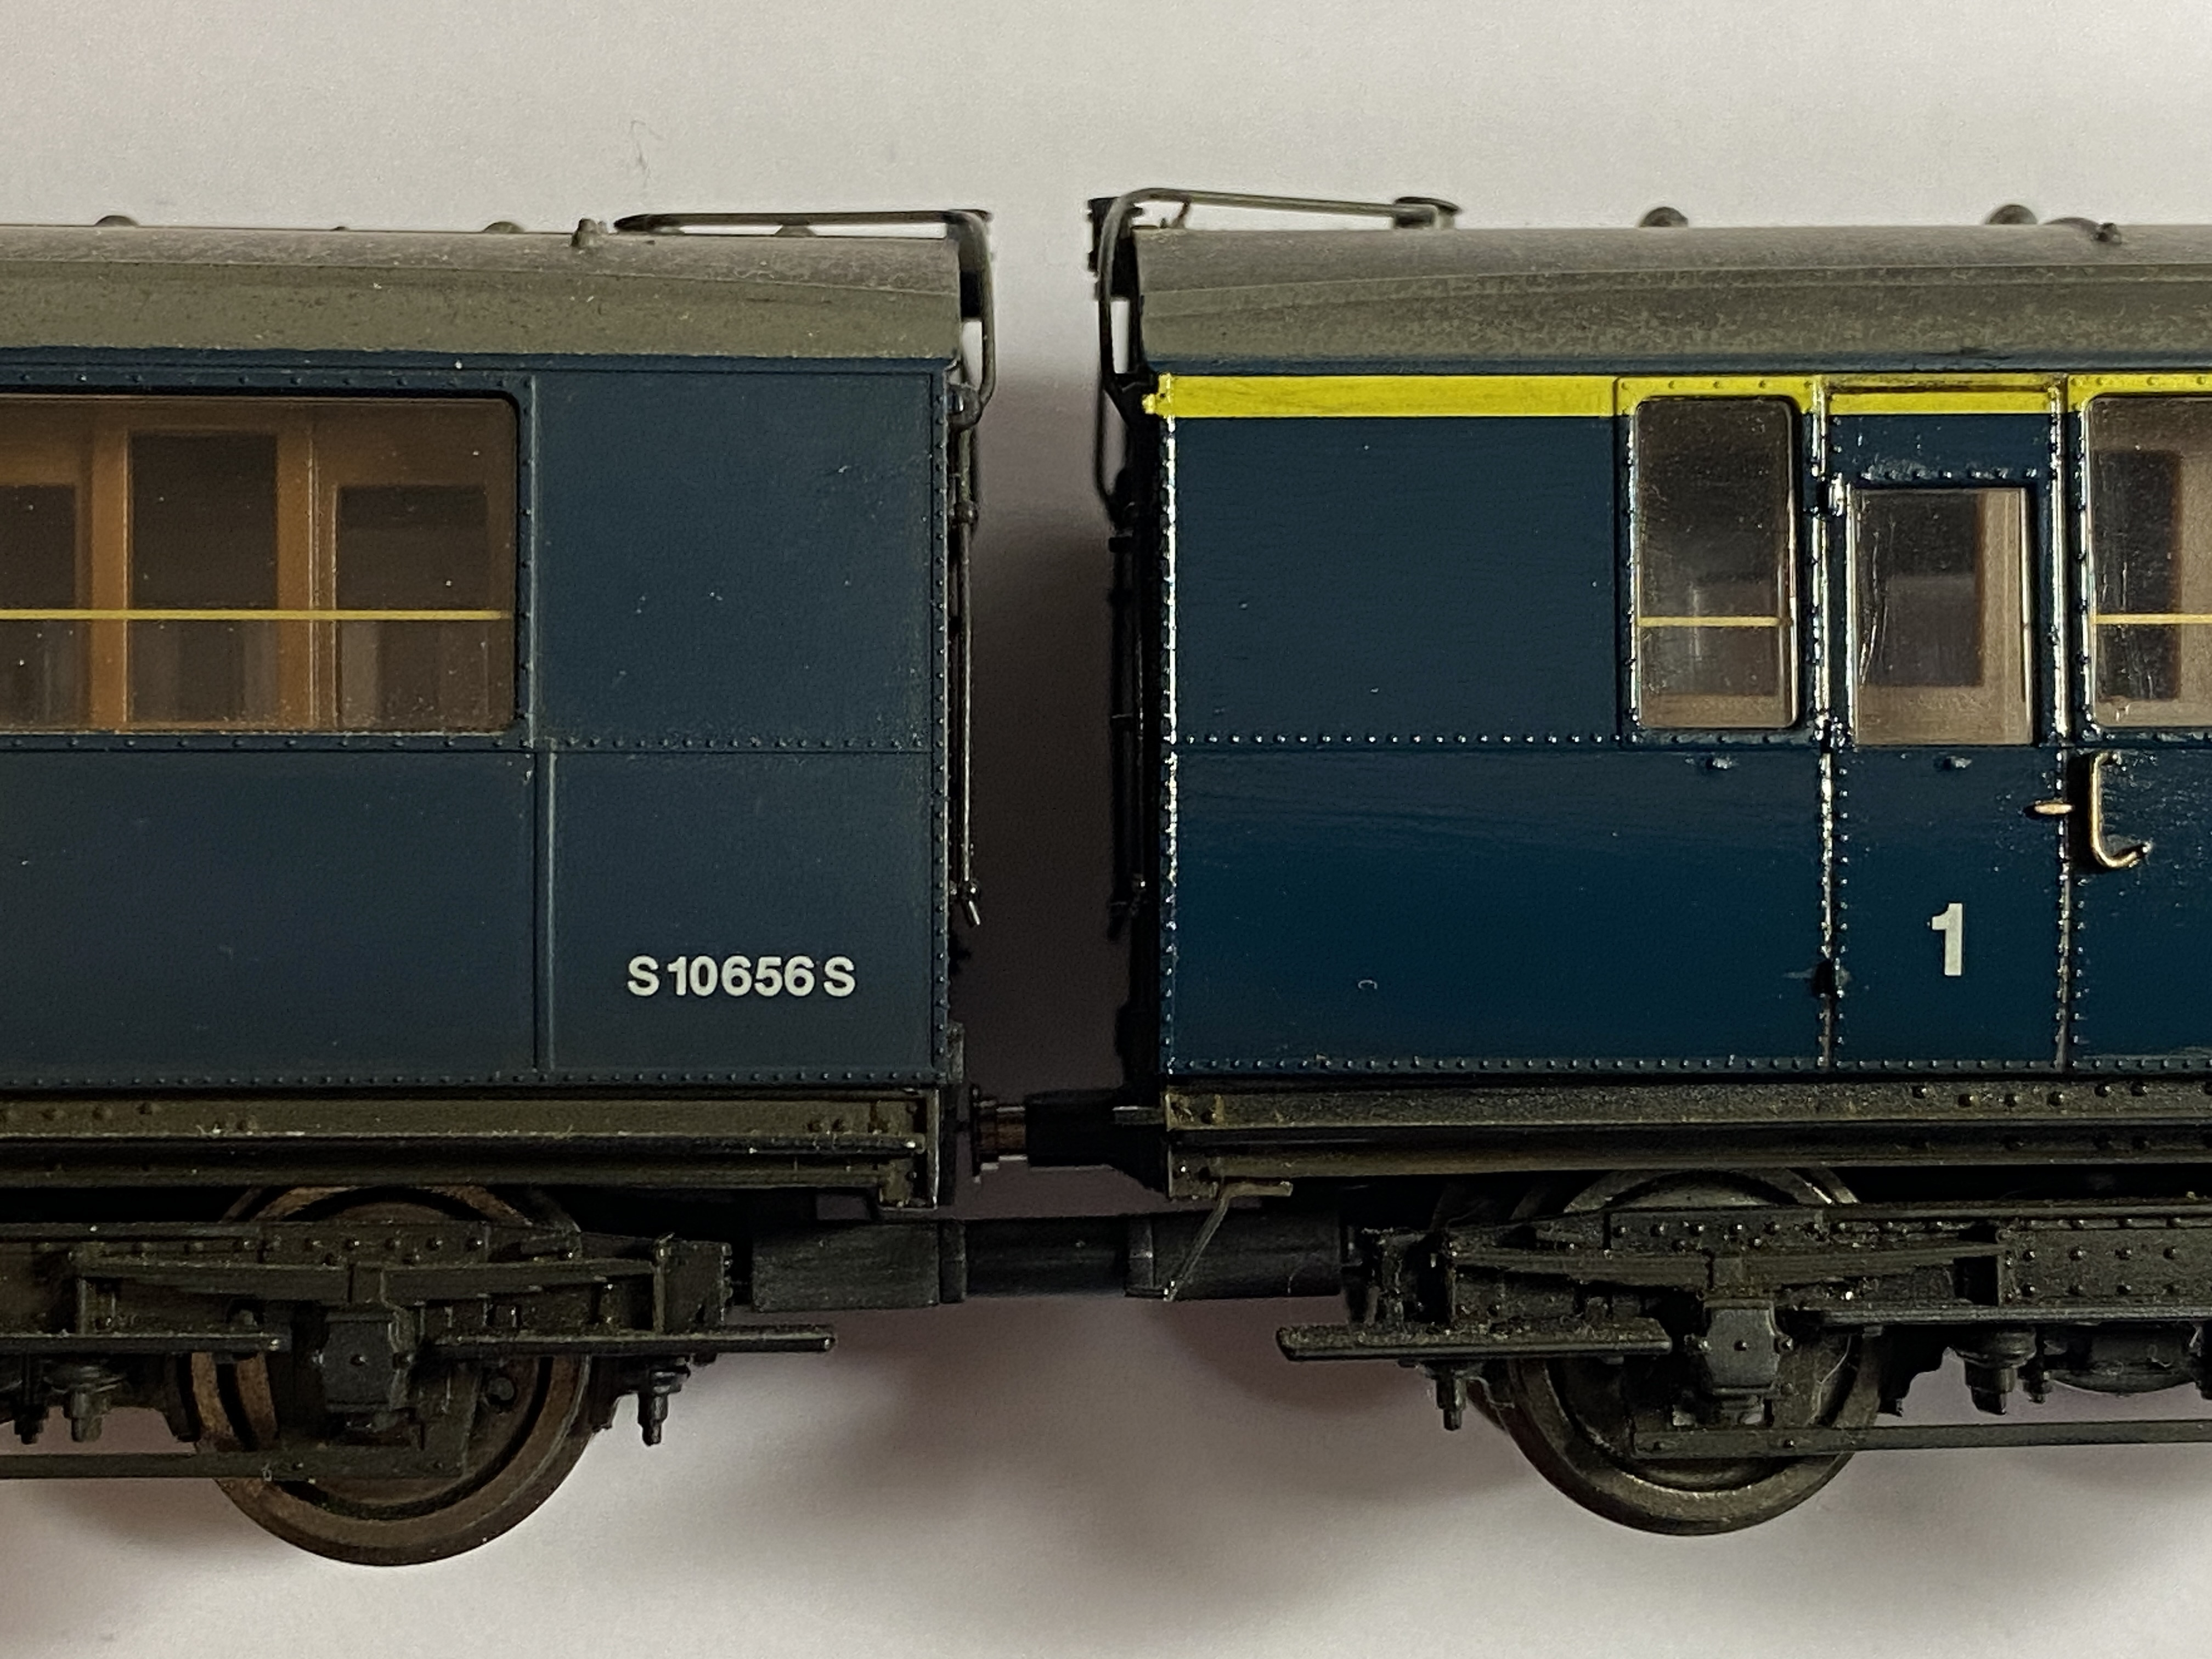
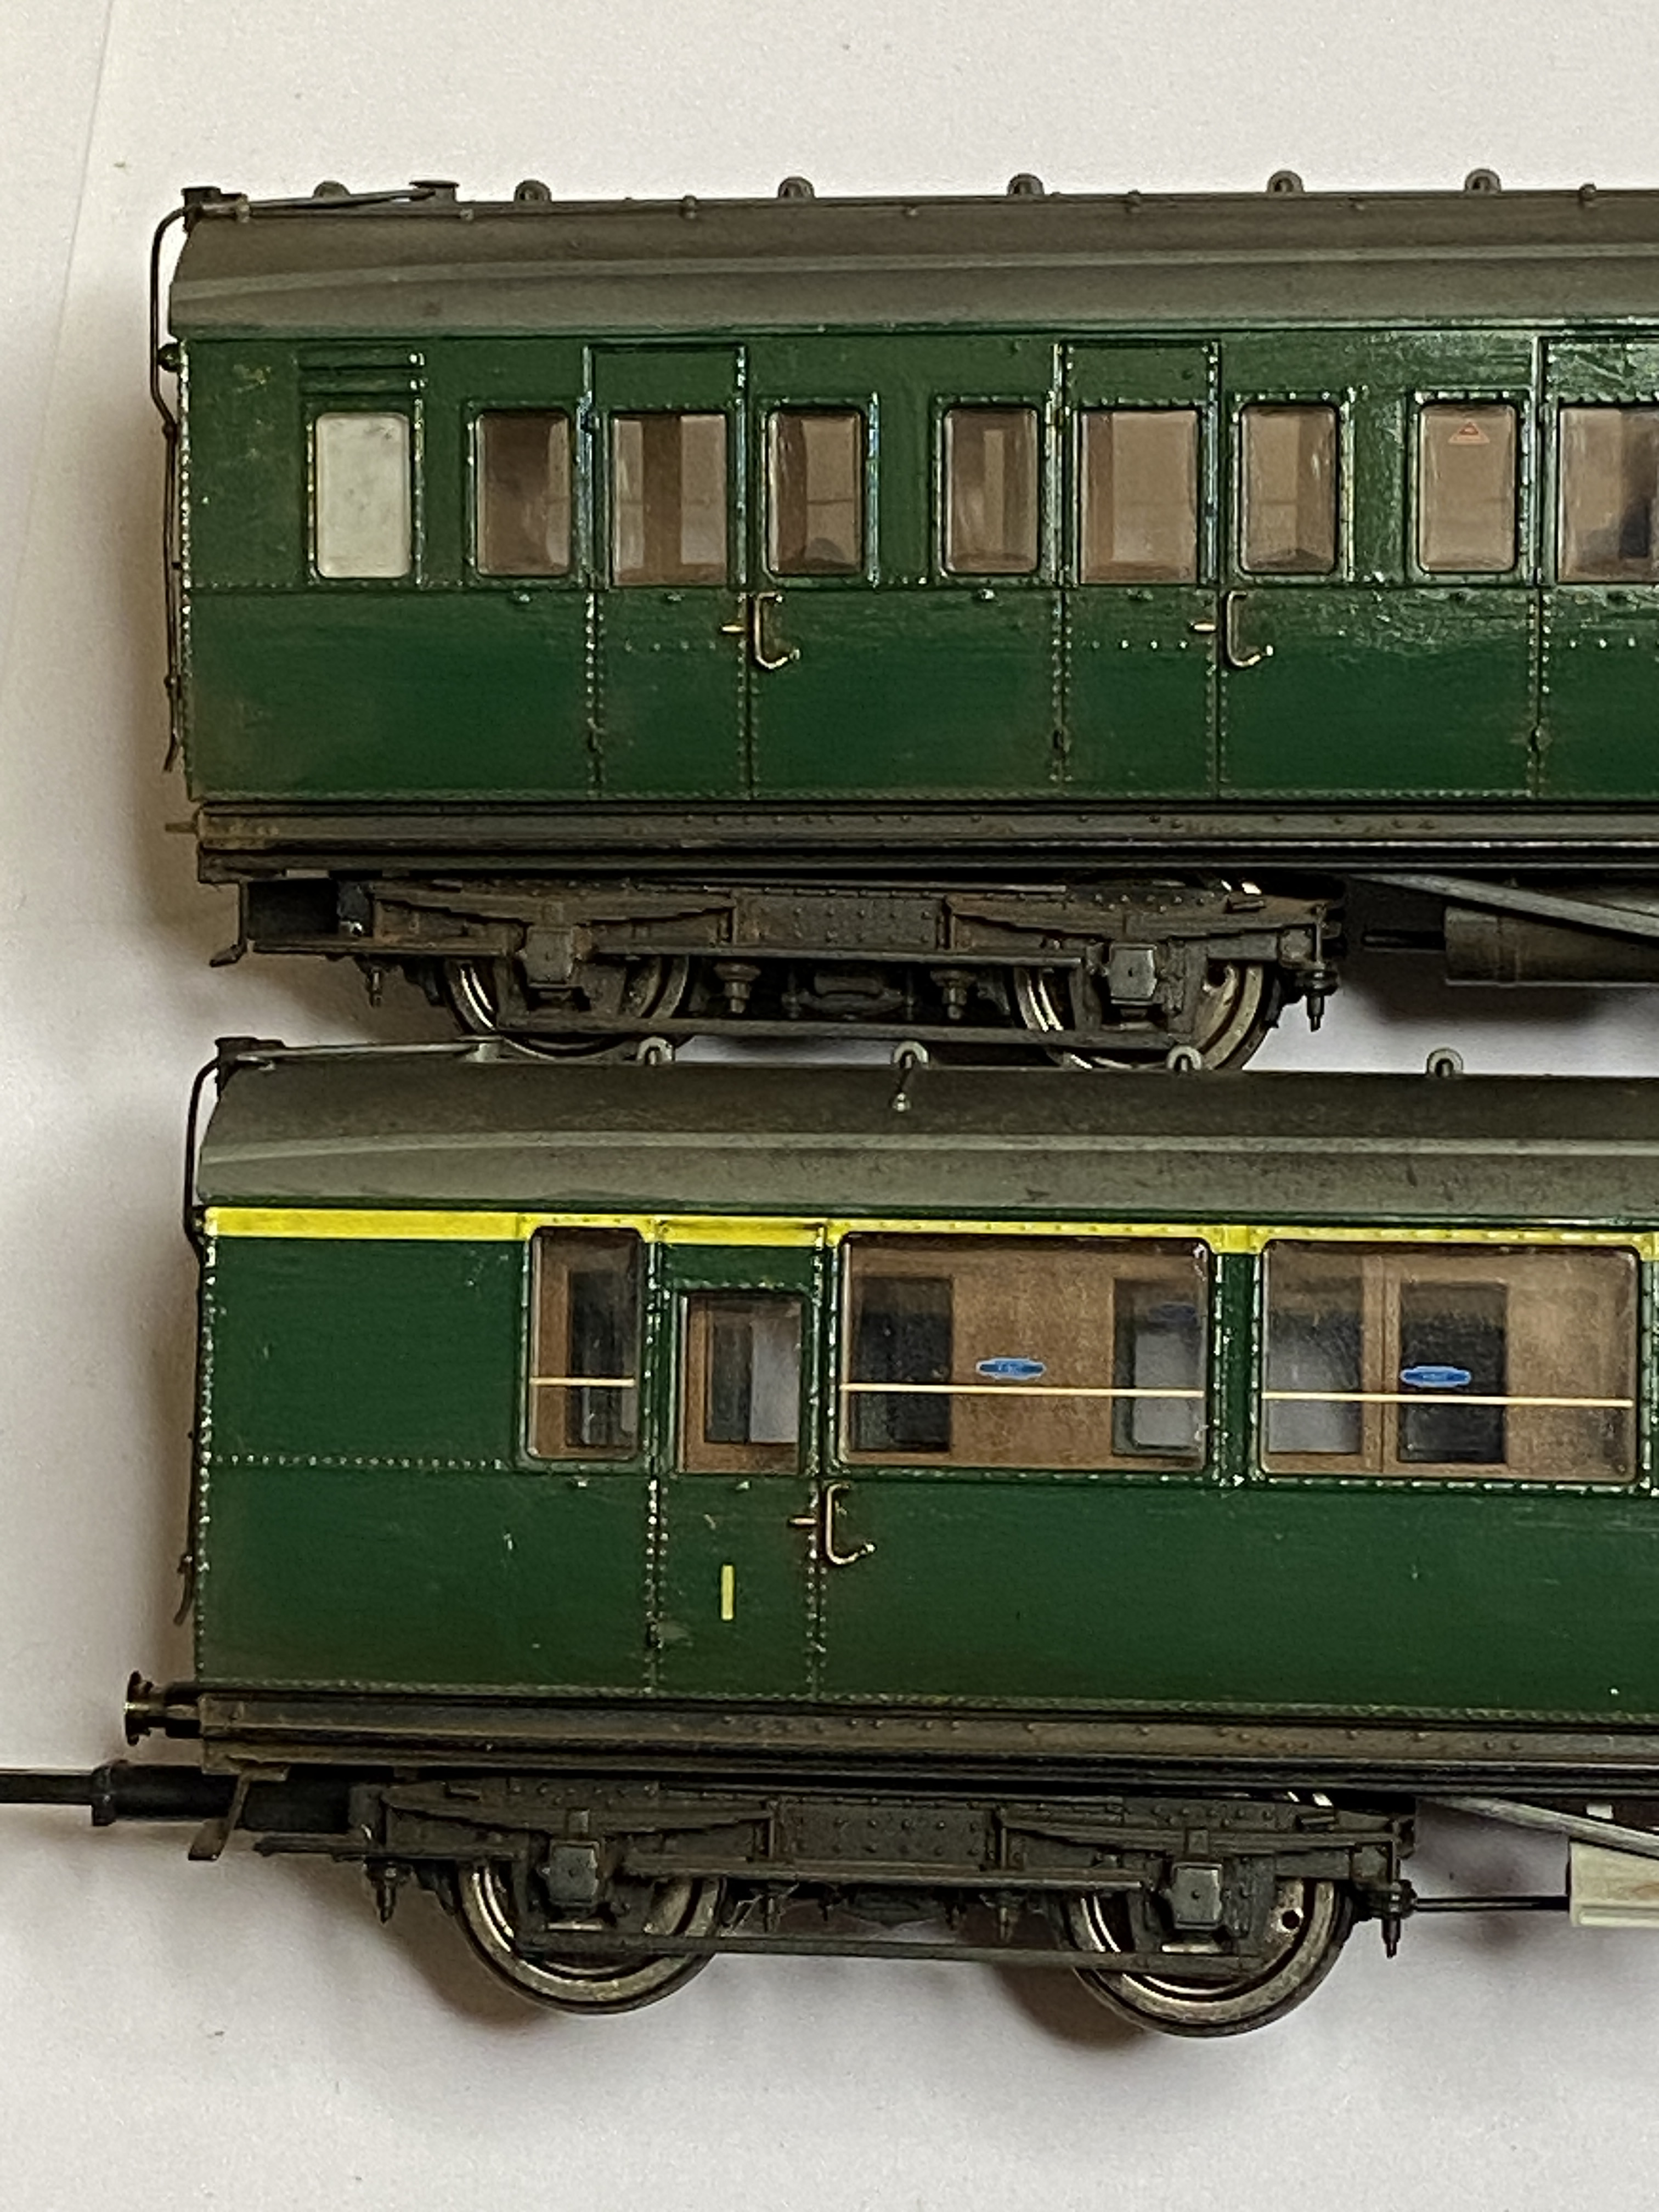
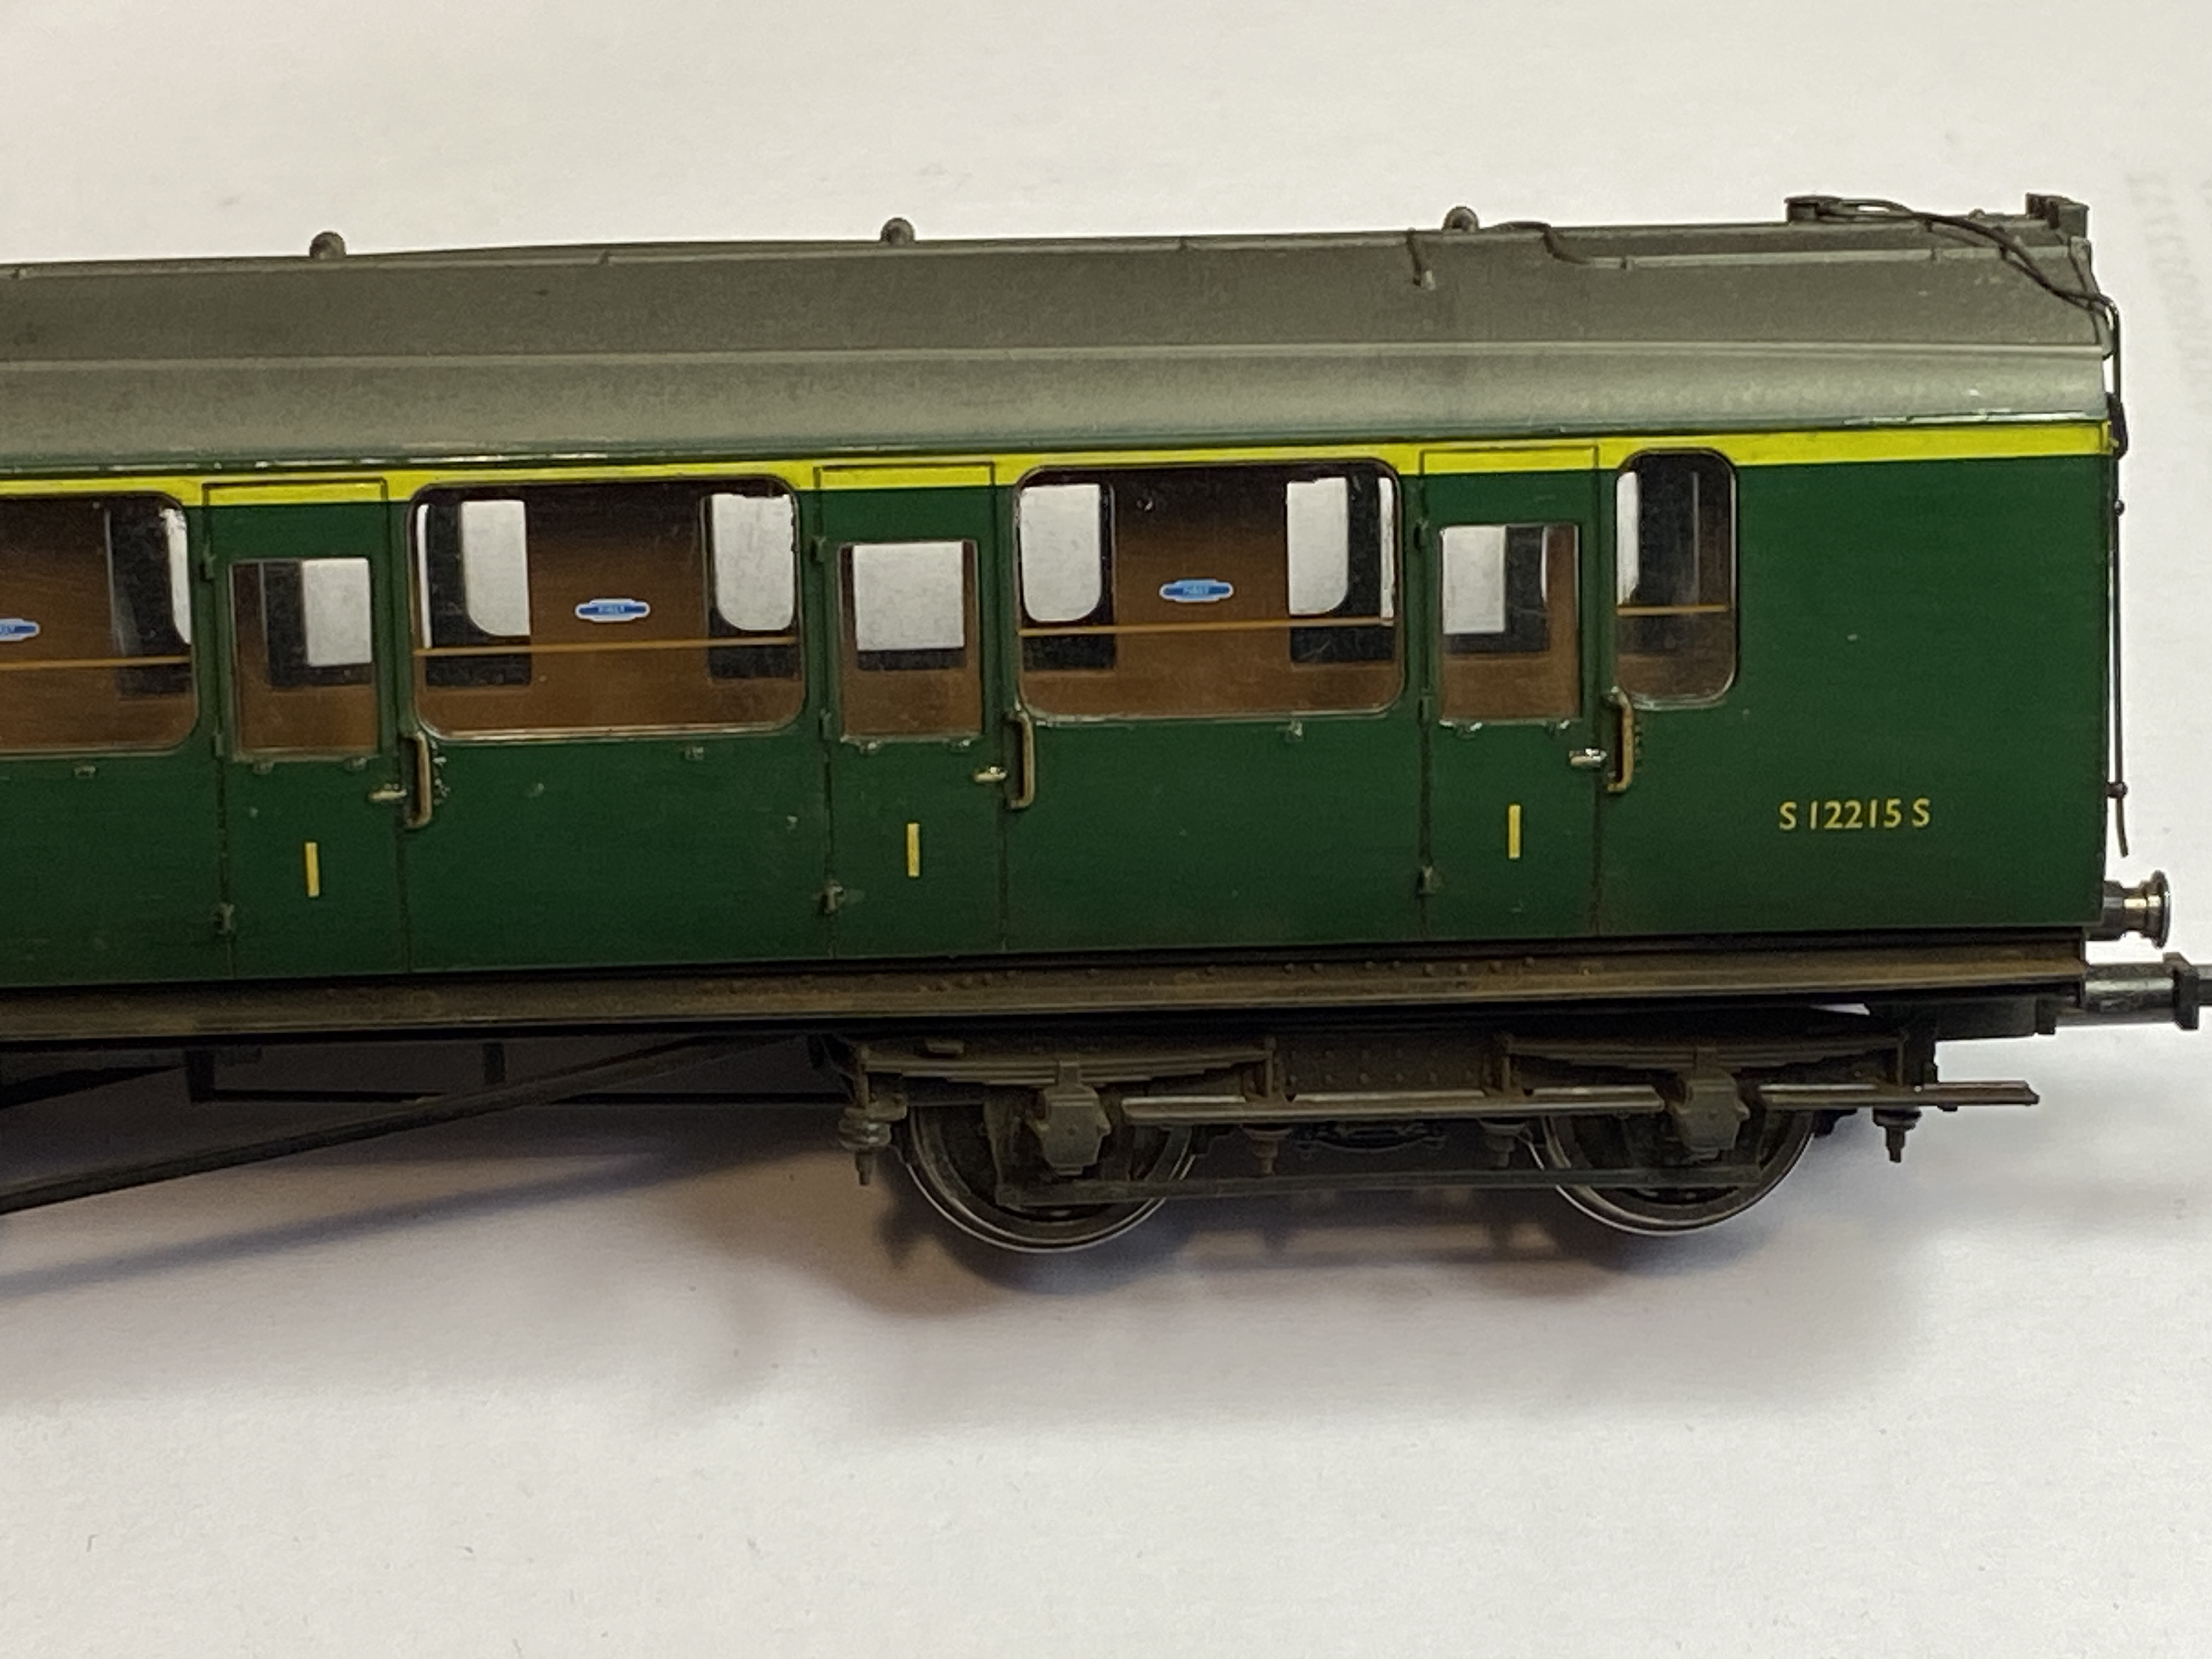
Here’s another unit making three of five now glossy. But with weathering still added.
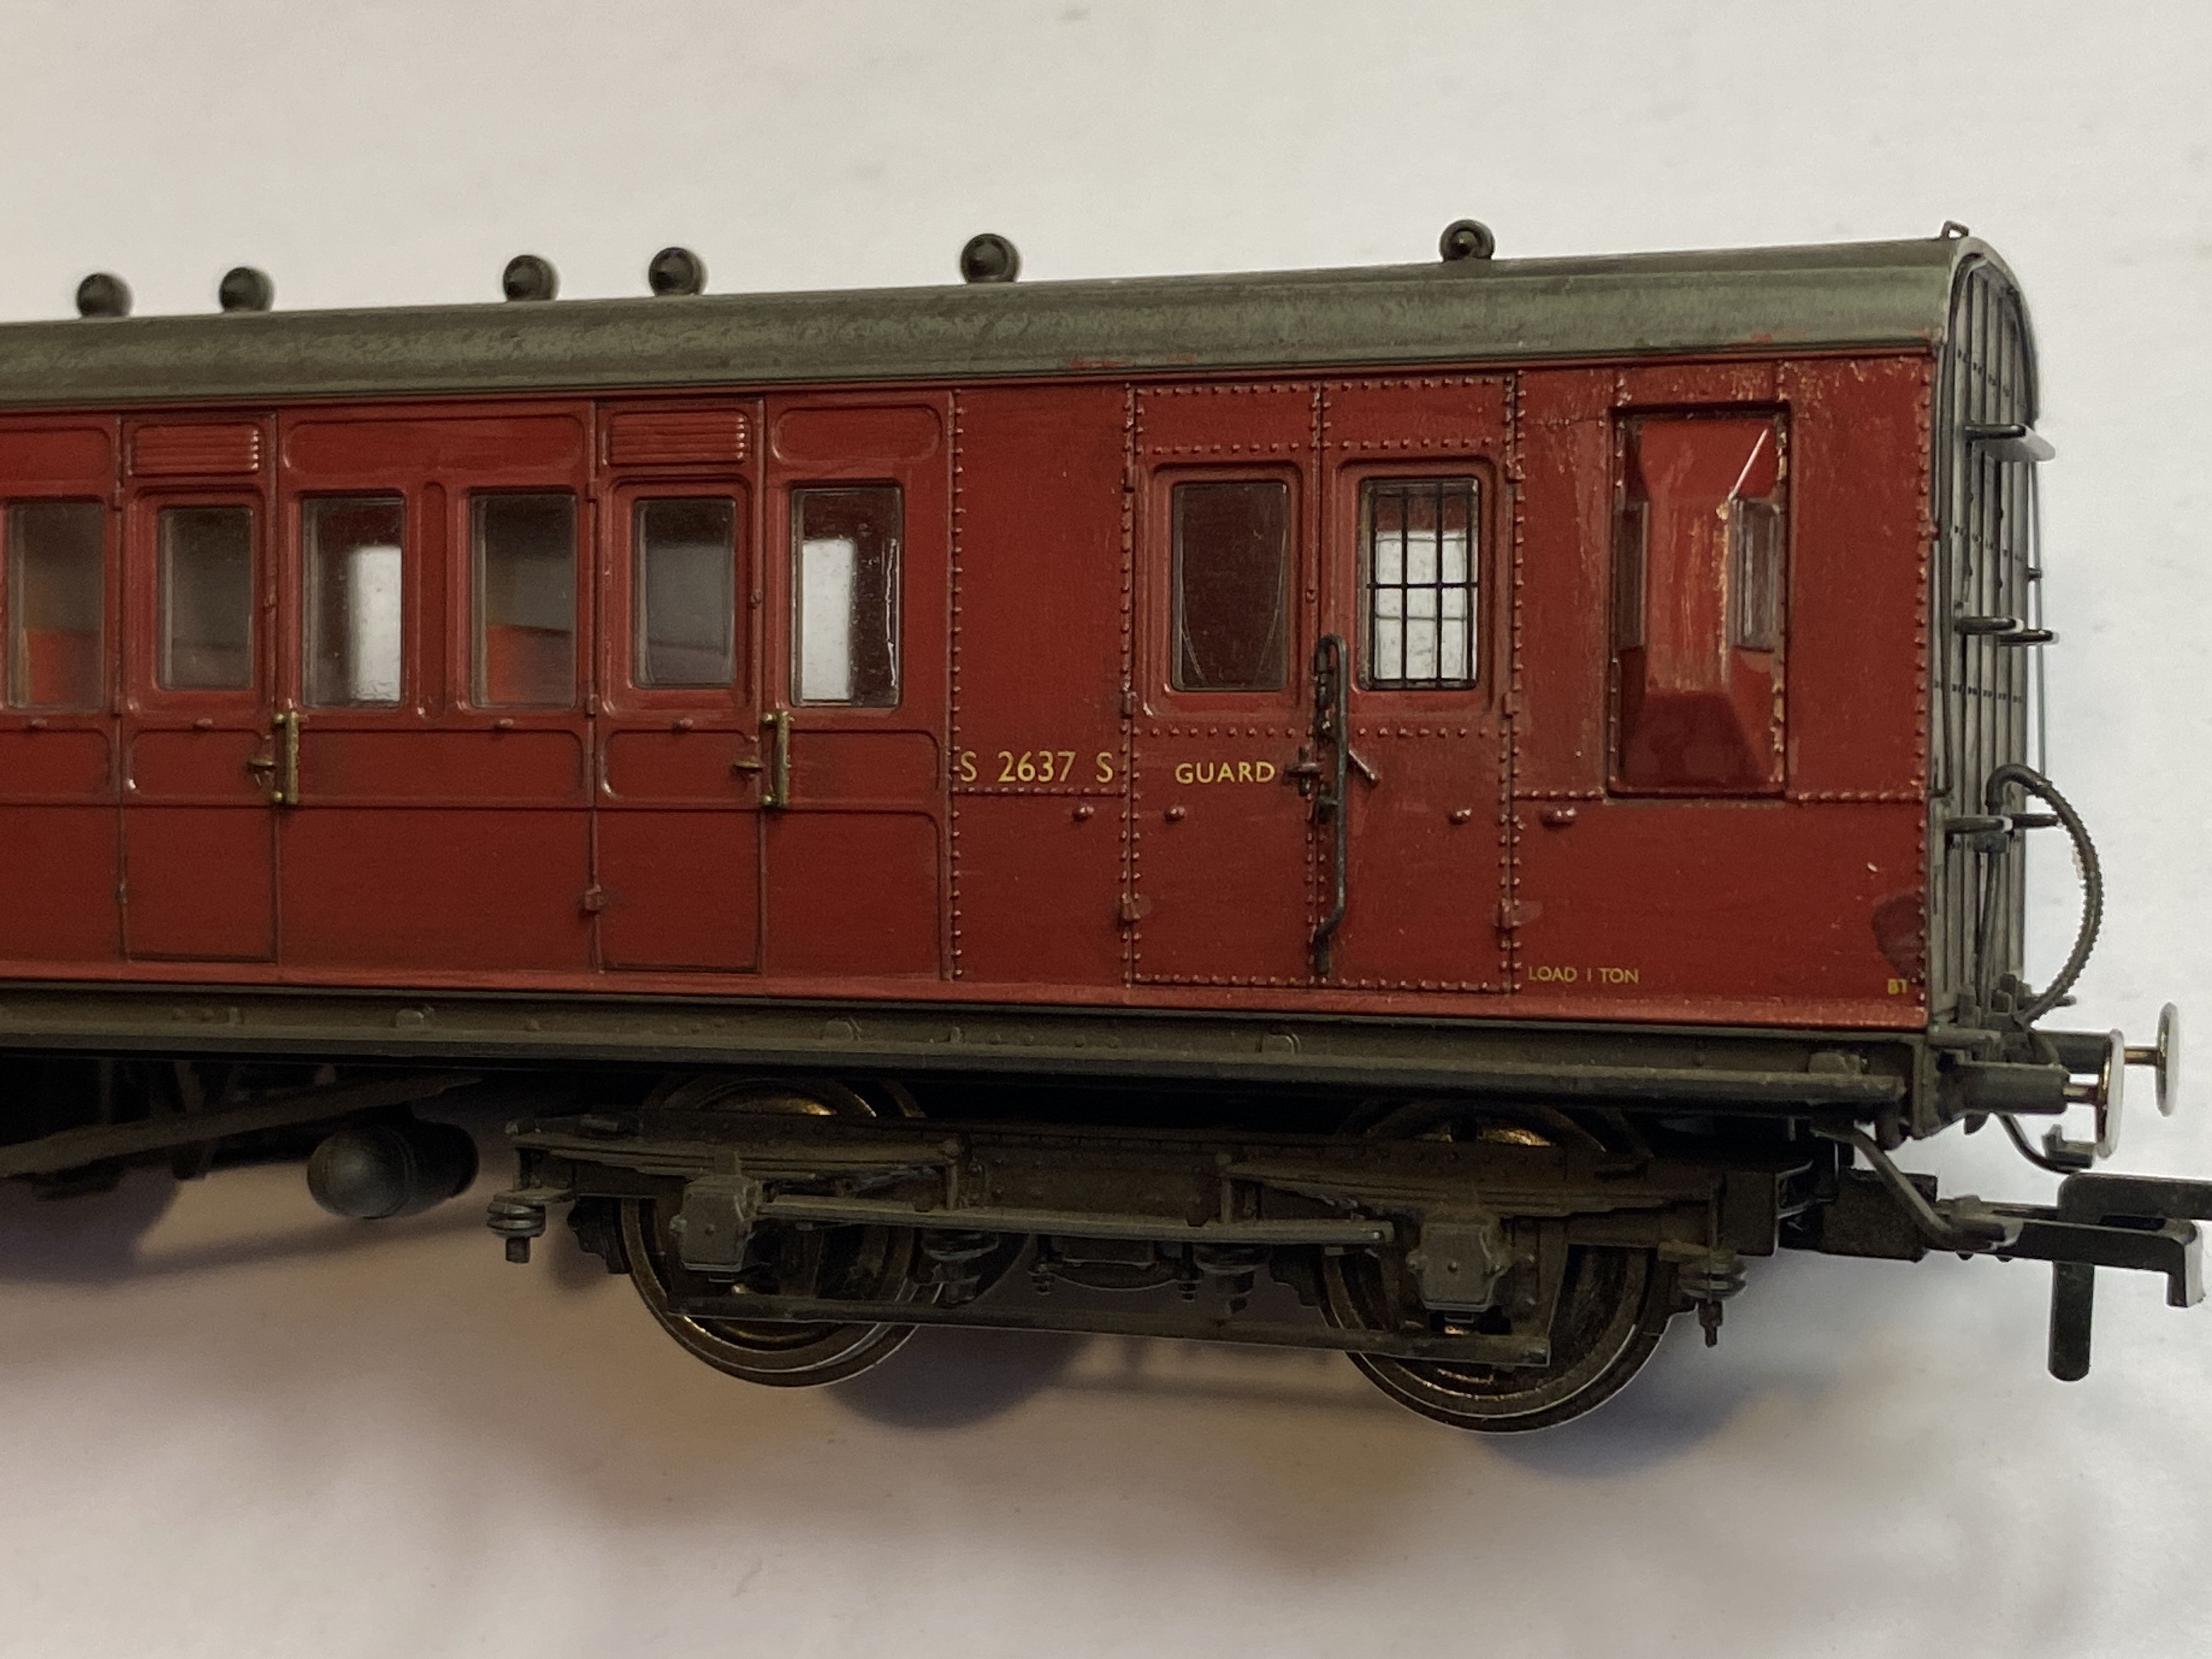
Also a crack at something else with the crimson LSWR suburban coach also looking better in my opinion

Posted

Full Member
On another subject - I don't think your lamp posts look good with the Peco Ash cocktail - great concrete colour but the ash is too course for the scale - rather spoils them, IMHO of course……………

'Petermac
Posted
Full Member
Petermac said
That's an interesting transformation Rick - just brush painted varnish and a splodge of weathering powder ?
On another subject - I don't think your lamp posts look good with the Peco Ash cocktail - great concrete colour but the ash is too course for the scale - rather spoils them, IMHO of course……………
From “Post #292,862”, 3rd December 2025, 9:55 pm
Just brush-painted and a touch of weathering powder as you say, Peter. Both require very light touches. I use a very soft No.5 sable which leaves minimal brush strokes in the varnish. There are some but they're not readily visible at viewing distance.
On the lamp posts I take your point and agree that the chunky bits are over-scale bit again they look better at viewing distance than they do significantly enlarged right up under the camera's lens.
Posted
Site staff
Gwiwer said
Gwiwer said
Petermac said
That's an interesting transformation Rick - just brush painted varnish and a splodge of weathering powder ?
On another subject - I don't think your lamp posts look good with the Peco Ash cocktail - great concrete colour but the ash is too course for the scale - rather spoils them, IMHO of course……………
From “Post #292,862”, 3rd December 2025, 9:55 pm
Just brush-painted and a touch of weathering powder as you say, Peter. Both require very light touches. I use a very soft No.5 sable which leaves minimal brush strokes in the varnish. There are some but they're not readily visible at viewing distance.
On the lamp posts I take your point and agree that the chunky bits are over-scale bit again they look better at viewing distance than they do significantly enlarged right up under the camera's lens.
From “Post #292,863”, 3rd December 2025, 11:17 pm
Might look a bit clunky, but brings back memories of living in South West London
1 guest and 0 members have just viewed this.