Waddlemarsh
Posted

Full Member
Somewhere SW of London. Somewhen before today
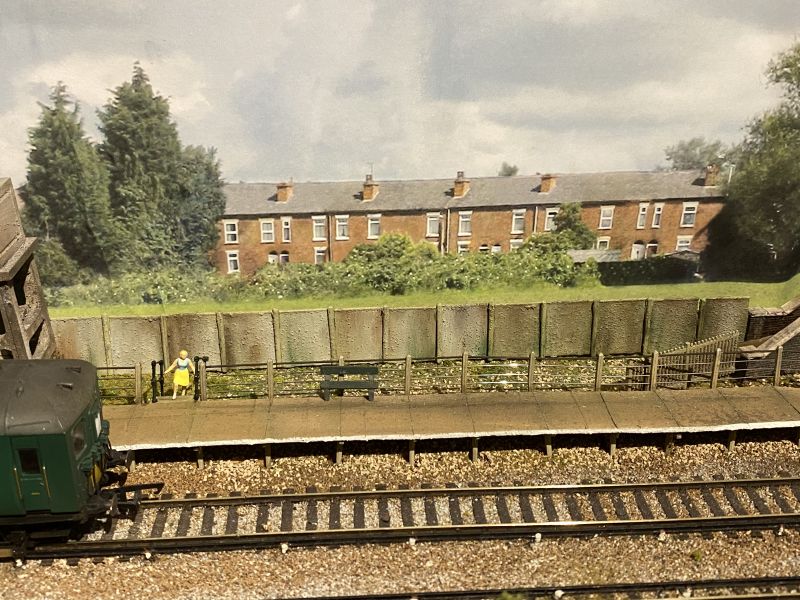
A Merry Christmas season from WaddlemarshI have been doing a few small bits and pieces in between other seasonal essentials. Two sets of platform steps have been created from a Ratio post-and-rail kit and offcuts of steps from the concrete footbridge kit.
These will provide access from footbridge and road bridge to the up platform.
0.7mm holes were bored out of the step sections to locate the posts which are pre-bored to accept the supplied wire. They are not designed to be used at this angle so a measure of gentle persuasion has been used to create handrails for the steps.


Posted

Full Member
Staying on the thread Kevin.
Posted
Full Member

Posted
Full Member
Posted
Full Member
 Last edit: by Passed Driver
Staying on the thread Kevin.
Posted
Full Member
Also shown is the first platform lamp complete with its SR “target†sign.
One hopeful chap seems to have missed his train.

Posted

Full Member
How did you do the concrete panels - they look brilliant. :thumbs also, the steps - or rather, the handrails look excellent - a steady hand required with a strong loupe I think……..
Did the well endowed lady in the yellow dress catch her train ? Did you have to do some surgery to get her to climb the steps ?
'Petermac
Posted
Full Member
1. Thank you kindly.Some remarkable effects you've created there Rick.
How did you do the concrete panels - they look brilliant. :thumbs also, the steps - or rather, the handrails look excellent - a steady hand required with a strong loupe I think……..
Did the well endowed lady in the yellow dress catch her train ? Did you have to do some surgery to get her to climb the steps ?
2. As Kevin (Passed Driver) also asked me the same by PM I shall repeat my answer to him below. The steps require some decent eye-sight, a steady hand and a measure of patience. The holes are 0.7mm all bored by pin-vice and the railings required a little persuasion to adopt the required angle.
3. Yes and no in that order; she is from a pack of "Persons Climbing Steps" which I bought specifically so as to have people posed on the various flights of steps this layout features.
I applied a base coat of Woodland Scenics “Earth Undercoat†then mixed Railmatch “Concrete†paint with a tiny amount of Peco “Ash†from their weathering pack together on the palette first rather than applying direct to the plastic. The paint and ash mix alone didn’t give enough coverage hence the undercoat.
Once dry I then brushed some weathering powders over the paint; grey over almost everywhere to de-gloss the paint and age it. Then rust and green. That was all blended to give a near-finished result completed when I used a dry-brushing technique to highlight some of the texture in black and rust.
Finally the individual components were glued to a card strip for rigidity and then fitted to the layout. Note that the use of a card backing meant I had to cut the square-section posts vertically in half to avoid them standing too proud of the surface. A task which required careful use of the scalpel.
Posted
Full Member
Posted
Full Member
Staying on the thread Kevin.
Posted
Full Member
Posted
Full Member
Staying on the thread Kevin.
Posted
Full Member
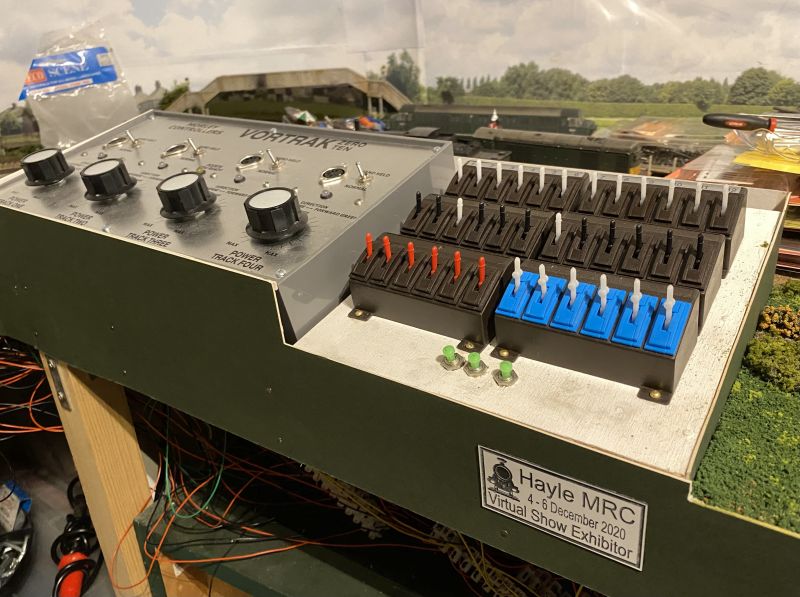
This project is almost functionally complete. There is plenty of detailing to be done but traction power, signals and points all work and if I cleared the decks of modelling ephemera I could have a running session all controlled from the panel.
Keep an eye on future developments.
Posted
Full Member
Looking forward to developments during year.
'Petermac
Posted

Full Member
Cheers,
Claus
www.wct.payne-ellef.dk
www.flickr.com/photos/ellef/
Claus
www.wct.payne-ellef.dk
www.flickr.com/photos/ellef/
Posted
Full Member
Staying on the thread Kevin.
Posted
Full Member
Not many layouts have 2020 exhibition plaques!
 I
I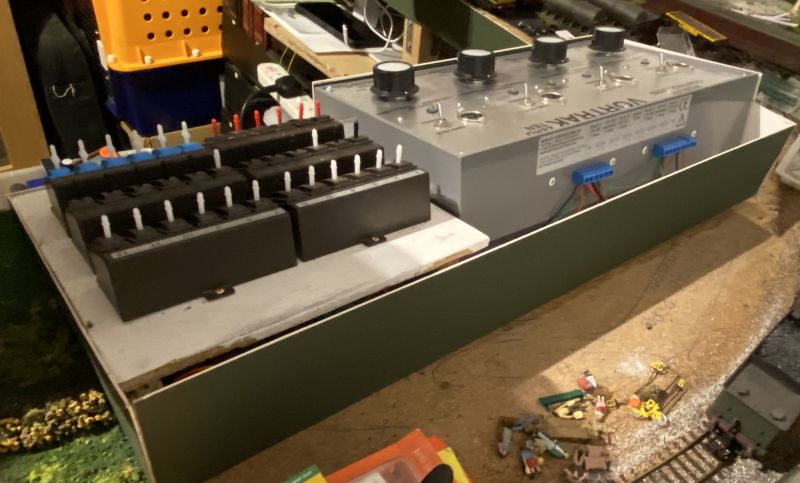
Posted
Full Member
Staying on the thread Kevin.
Posted
Full Member
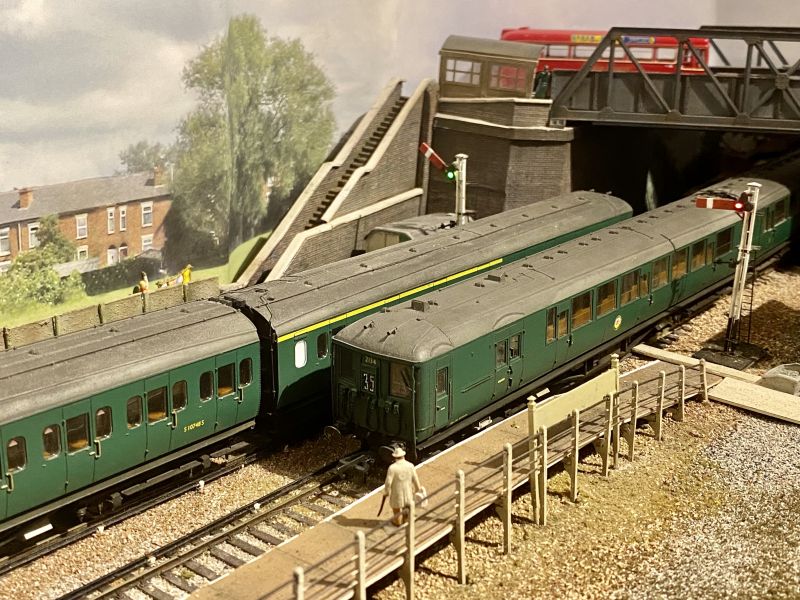
As seen from the viewing / control area

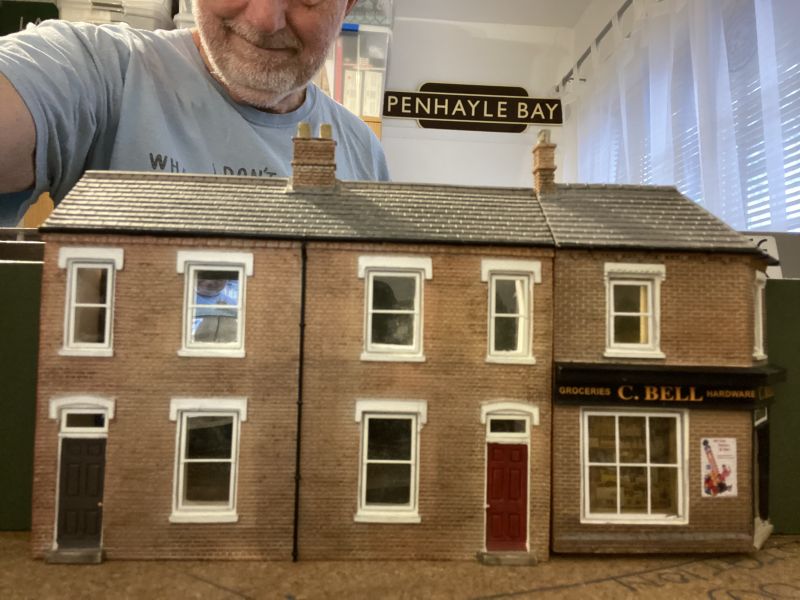
Using the phone’s “selfie†camera here’s the reverse-angle view. Some might recognise the “totem†sign on the wall.
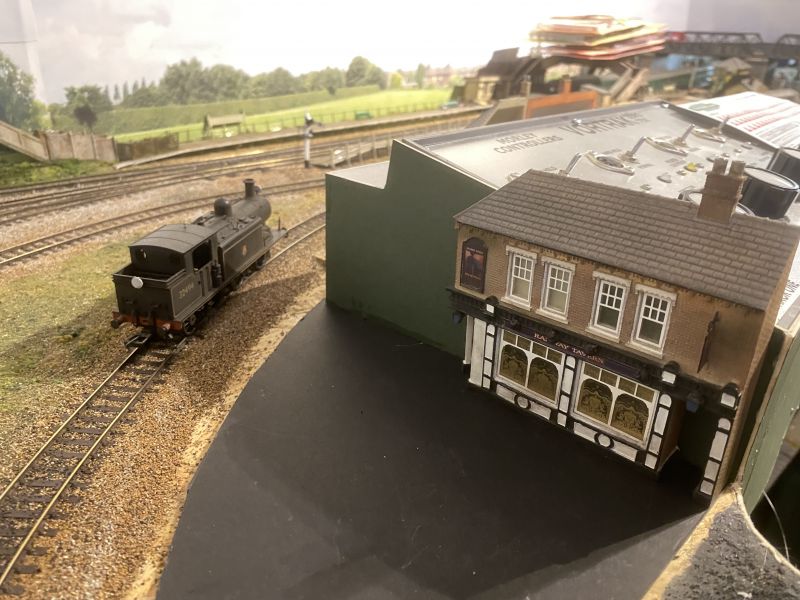
And why not have a pub at the end of the road? In the 1960s this is where you would often find railway staff between tasks!
Posted
Full Member
'Petermac
1 guest and 0 members have just viewed this.